
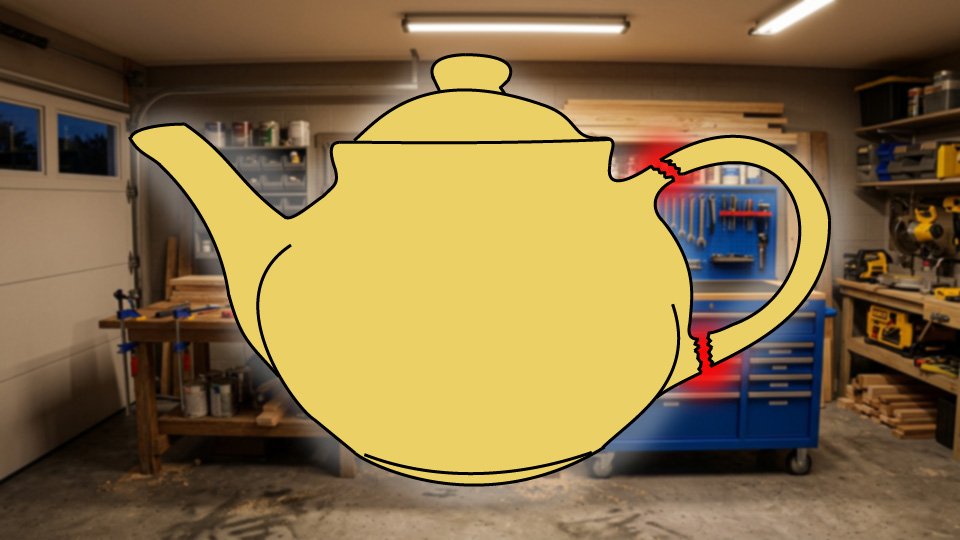
Tink. Crash.
“Run, Luke, run! That was Grandma’s teapot!”
Porcelain and pottery are deceptive. They look solid and permanent sitting on the shelf, and then one nudge — one moment of physics doing what physics does — and you’re standing over a pile of shards wondering if this is the kind of thing that can be fixed or the kind of thing you don’t tell anyone about.
Good news: it’s usually the kind of thing that can be fixed. The right adhesive, a little patience, and the willingness to follow a few simple steps can make a break nearly invisible. Ron Screwstrip has done this more times than he’d like to admit — the workshop has a shelf dedicated to “things that were fine before I got to them.”
Here’s how to handle it properly.
🔍 Step One: Assess the Damage Honestly
Before you reach for any glue, look at what you’re actually working with. Not all breaks are equal, and the type of break determines the type of fix.
A clean break — where the piece snapped into two or three large sections with smooth, matching edges — is the best possible outcome. Clean breaks are what super glue and epoxy were designed for. The pieces fit back together precisely, and when done right the repair is nearly invisible.
Multiple small fragments are trickier but still manageable. The key is patience and working in sequence — more on that in a moment.
Missing shards, where a piece has crumbled or gone completely missing, require a gap-filling approach. You can still make a solid structural repair, but cosmetically you’re working with what you have.
A break at a high-stress point — like the handle of a mug or teapot that will regularly bear the weight of a full pot of hot liquid — is worth thinking carefully about. Glue can create a strong bond, but “strong” is relative when the alternative is a pot of boiling tea launching itself off the handle at an inconvenient moment. For purely decorative pieces, repair away. For load-bearing connections on items you actually use, consider whether the repair is genuinely safe before proceeding.
🧴 Choosing the Right Adhesive — This Is the Important Part
There are two adhesives worth knowing about for porcelain and pottery repair, and they are not interchangeable. The break tells you which one you need.
Super glue — technically called cyanoacrylate, or CA glue — is for clean, tight-fitting breaks where the edges match closely and there are no gaps to fill. It sets in seconds, dries completely clear, and when applied correctly leaves an almost invisible bond line. The gel formula is the one you want for this job: it’s thicker than liquid super glue, which means it doesn’t run into places you don’t want it, and it gives you slightly more time to align the pieces before the bond sets. Apply one small drop per square inch of surface area — not more. More glue does not mean a stronger bond. It means a hazy, messy joint that’s harder to close cleanly.
Two-part epoxy is for larger breaks, missing pieces, or any repair where there’s a gap between the surfaces. Epoxy comes in two parts — a resin and a hardener — that you mix together in equal amounts immediately before use. Once mixed, you have a working window of five to thirty minutes depending on the formula, after which it begins to set. Epoxy is stronger than super glue for gap-filling applications and bonds the surfaces with a rigid, durable connection. It also dries clear in most formulas, which matters for porcelain repair. Mix only as much as you need — mixed epoxy cannot be stored — and apply it sparingly. Excess epoxy that squeezes out of the joint when you press the pieces together will harden into a raised ridge that’s extremely difficult to remove cleanly.
A quick rule of thumb: tight-fitting clean break with no gaps? Super glue gel. Larger break, missing material, or any gap between surfaces? Two-part epoxy.
One thing both adhesives have in common: neither belongs on your skin. Super glue bonds to the moisture on skin instantly — it uses that moisture as part of its chemical bonding process — and getting your fingers stuck together is both uncomfortable and embarrassing to explain. Epoxy is caustic and difficult to remove once cured. Wear nitrile gloves for either job. This is not optional advice.
🧹 Before You Glue Anything: Clean and Dry Fit
The surfaces being glued need to be completely clean and completely dry. Dust, oil, old dried glue, or any residue on the break surface will prevent a proper bond. Wipe each broken edge gently with a cotton ball or pad dampened with rubbing alcohol, then let everything dry completely before touching it again. Alcohol evaporates quickly, so this only takes a few minutes.
Once the surfaces are clean, do a dry fit: lay all the pieces out and practice fitting them together without any glue. This step is not optional for multi-piece repairs, and it pays off even for simple two-piece breaks. You need to know how the pieces align before the glue goes on — because once super glue touches both surfaces, you have seconds before the bond sets. There is no “let me just adjust that slightly.” The dry fit is your rehearsal.
For a piece that broke into multiple fragments, think about the order of assembly before you start. Work from the inside of the break outward — the pieces that were deepest inside the break go first, and each successive piece builds toward the outer surface. Imagine the point of impact and work backwards from there. The last piece to go in is usually the one at the surface of the original impact point.
🔧 Applying the Adhesive
For super glue gel: apply one small drop per square inch of surface area to one side of the break only — not both sides. Press the pieces firmly together and hold them in place by hand for a full minute. You’ll feel the bond develop — a slight resistance when you try to shift the pieces. Don’t let go early. The glue feels set before it actually is. Wipe away any squeeze-out immediately with a dry cloth; once super glue cures, it’s there permanently.
For two-part epoxy: squeeze equal amounts of the resin and hardener onto a disposable surface — a piece of cardboard or a paper plate works fine — and mix them together thoroughly with a disposable stick. Scrape from the sides and bottom of the mixing area to ensure the two components are fully combined; unmixed epoxy won’t cure properly. Apply a thin, even coat to one surface, press the pieces together, and hold or clamp the joint until the epoxy sets. For a five-minute epoxy, that’s about five minutes of held pressure. Don’t skip this — pressure during the set phase is what produces a tight, clean bond.
🗜️ Clamping and Curing
For super glue repairs: hand pressure for one minute is usually sufficient. Light handling is possible after five to ten minutes, but the full bond strength develops over twenty-four hours. Don’t stress-test the repair before then.
For epoxy repairs: the joint needs to be held without movement until the epoxy sets. Small clamps work well. Rubber bands looped around the repair work for round pieces like mugs. Painter’s tape wrapped snugly around the joint works for odd shapes. The goal is to hold the pieces together without shifting while the epoxy develops its initial grip. Check the manufacturer’s instructions — five-minute epoxy sets in five minutes but cures to full strength in an hour. Give it the full hour before handling.
One important note about clamping with epoxy: whatever you use to hold the pieces together should not be something that can’t have epoxy on it. Epoxy will bond to painter’s tape, rubber bands, and clamp faces if it squeezes out. Use disposable materials or surfaces you don’t care about for clamping.
✨ Cosmetic Touch-Ups
For small remaining gaps after the repair sets, gap-filling super glue — a thicker, slower-setting formula specifically designed to fill small voids — can be applied with a toothpick and smoothed level with the surrounding surface. It dries clear, so on light-colored porcelain it may disappear entirely.
If the repaired area needs color matching — for a decorative piece where the break line is visible — ceramic touch-up paint or glaze is available at craft stores and some hardware stores. This is a cosmetic step, not a structural one, and it requires the adhesive to be fully cured first. Sand any raised glue ridges lightly with fine-grit sandpaper before painting. Go gently — porcelain is not forgiving of aggressive sanding.
🚫 When Not to Glue
Some repairs aren’t worth attempting, and it’s better to know this before you’ve committed the adhesive.
Extremely thin, fragile shards that can’t be handled without breaking further aren’t good candidates for gluing. If you can’t align the pieces without them disintegrating, the repair isn’t practical.
Pieces that will go in the dishwasher or be exposed to extreme heat regularly are poor candidates for adhesive repair. Both super glue and epoxy can be affected by repeated high-heat and moisture cycling, and a repair that holds perfectly on the shelf may fail in the dishwasher. Hand-wash repaired pieces, and accept that the repair has limits.
And Grandma’s teapot handle — the one that will bear the weight of a full pot of boiling water every morning — deserves an honest assessment. The repair might hold. But “might” is doing a lot of work in that sentence when boiling water is involved. A decorative display piece: absolutely repair it. The working handle on a heavily-used pot: proceed carefully and test the repair with cold water first.
🛒 Gear Worth Having
Gorilla Super Glue Gel XL — 25g, Clear, Anti-Clog Cap — The gel formula is the right choice for porcelain repair: thicker than liquid super glue so it doesn’t run, dries completely clear, and the anti-clog cap means the bottle is still usable three months from now when you need it again. Sets in 10-45 seconds, full cure in 24 hours.
J-B Weld ClearWeld 5-Minute Epoxy Syringe — 25ml, Clear — The two-part epoxy for gap-filling repairs and larger breaks. The syringe dispenses equal amounts of resin and hardener automatically, so there’s no measuring required. Sets in five minutes, cures to full strength in one hour, dries clear. Mixing tray and stick included. 3,900 PSI tensile strength — stronger than the porcelain around the repair once cured.
Gorilla Super Glue with Brush & Nozzle Applicator — 12g, Clear — For repairs where precision application matters. The fine-bristle brush gets into tight cracks and detailed areas; the precision nozzle handles direct application. Particularly useful for decorative pieces with complex surfaces where a standard tip would apply too much glue at once.
Nitrile Disposable Gloves — 100-Count Box, Powder-Free — Wear these for any adhesive work. Super glue bonds to skin using the moisture it finds there, and getting fingers stuck together is genuinely unpleasant. Epoxy is caustic. A box of nitrile gloves costs a few dollars and solves both problems permanently.
As an Amazon affiliate, I earn from qualifying purchases. Thank you for supporting SkippityWhistles.
📖 Related Reads
- How to Use Epoxy: The Complete Beginner’s Guide
- How to Use Super Glue Without Gluing Your Fingers Together
- The DIYer’s Toolbox
Ron Screwstrip repaired the workshop mug — the one his daughter painted for him in second grade — with super glue gel on a Sunday afternoon. The repair took twelve minutes including cleanup. The mug is back on the shelf. He hasn’t mentioned it to anyone, but he looks at it differently now. That’s the quiet satisfaction of a repair done right.
SkippityWhistles is part of the WhistleBump group – find the rest of the family at WhistleBump.com.
2018
©2026 John D Reinhart/Skippitywhistles.com — All rights reserved