How to Choose the Right Sandpaper

Confused about sandpaper grit? Here’s the simple rule: lower numbers remove, higher numbers finish. Stock four grits and you’re set for 90% of DIY sanding.

Rhonda’s sander had 80-grit loaded in it from the last project, and swapping it out for something finer felt like an extra step she didn’t have time for — right up until the “light sanding” between coats of paint left visible scratches in the finish that no amount of extra coats fully hid. The sandpaper wasn’t the wrong tool. It was the wrong number on the wrong day.

Sandpaper looks like one product with a confusing number printed on the back. It’s actually a spectrum, and knowing roughly where you are on it is the whole trick.

🔢 What Grit Numbers Actually Mean

Sandpaper grit is a number rating system defining how coarse or fine a sandpaper’s abrasive particles are.

Lower numbers are coarser and remove material fast, higher numbers are finer and smooth or polish without removing much at all. An 80-grit sheet cuts through old paint aggressively. A 320-grit sheet barely leaves a mark, which is exactly the point once you’re past removing anything and into finishing.

The rule that covers almost every situation: start coarse when you’re removing material, start fine when you’re finishing a surface that’s already close to done.

🧰 Four Grits Cover Almost Everything

  • 80 grit handles aggressive removal — stripping old paint, leveling filler, shaping rough wood.
  • 120 grit is the middle ground, smoothing raw lumber or patched drywall without being aggressive enough for real removal work.
  • 180 grit is the prep stage, the last pass before paint or stain goes on.
  • 220 grit is for between coats — light enough to leave no visible scratch, coarse enough to help the next coat of paint or polyurethane actually adhere.

Stocking those four grits covers the overwhelming majority of household sanding without needing a drawer full of specialty papers.

The thing is, when you’re sanding, you don’t want to jump straight from an 80-grit pass to a 220-grit finish. Do that and you skip the middle, you’ll find the high-grit paper just glazes right over those deeper scratches without ever actually removing them. Working down through the grits in order, rather than skipping ahead, is what actually produces a smooth result. No. Shortcuts.

🧱 Sandpaper Material: Aluminum Oxide Covers Most Jobs

The abrasive material on the paper affects how it cuts and how long it lasts.

  • Aluminum oxide is the standard choice for home DIY — durable, reasonably priced, and effective on wood, painted surfaces, and most general projects.
  • Silicon carbide is better suited to metal and wet sanding.
  • Garnet has a more traditional, gentler cut favored for fine woodworking.
  • Ceramic lasts the longest and cuts the most aggressively, at a price that reflects it. For nearly everything on a typical project list, aluminum oxide is the reliable default.

🖐️ Loose Sheets vs. Sanding Blocks

Loose sandpaper sheets are flexible, cheap, and good for wrapping around a scrap of wood to get into tight or curved spaces — but bare fingers behind the paper tend to press unevenly and leave shallow grooves in the surface. A sanding block spreads pressure evenly across a flat area, which matters most on doors, panels, and trim where a professional-looking, consistent surface is the goal. Both are legitimate tools; the choice comes down to whether the surface is flat and wide or tight and detailed.

🚮 Knowing When Sandpaper Is Done

Sandpaper dulls with use, and the tell is simple: if you’re pressing harder and getting less result, the paper is worn out, not the technique. Sandpaper is supposed to cut with light pressure — pushing harder on dull paper mostly generates heat and frustration rather than progress. A sheet costs very little compared to the time lost fighting a dull one.

🛒 Gear Worth Having

3M Pro-Pak Sandpaper Assortment (80/120/180/220 Grit) — Covers exactly the four grits that handle nearly every household job, in one pack instead of four separate hardware store trips.

3M Sanding Sponge Multi-Pack — Flexes into curves and detail work where a rigid block can’t reach, while still holding up better than a loose sheet on edges and corners.

BLACK+DECKER Mouse Detail Orbital Sander — Turns a project big enough to make your arm tired into one that takes a fraction of the time, especially on drywall prep or large flat panels.

As an Amazon affiliate, I earn from qualifying purchases. Thank you for supporting SkippityWhistles.

📖 Related Reads


SkippityWhistles is part of the WhistleBump group – find the rest of the family at WhistleBump.com.

2004

©2026 John D Reinhart/Skippitywhistles.com — All rights reserved

Staples vs. Nails: Two Different Jobs Wearing Similar Outfits

Your stapler isn’t a hammer and your hammer isn’t a stapler. Here’s how to pick the right fastener before your project falls apart and your significant other asks ‘why did you do that?’

Rhonda spent one entire hot Saturday reupholstering her grandmother’s recliner in the garage, and the specific smell of forty-year-old furniture dust never fully left her memory since. What she does remember clearly, dust and all, is that the staple gun made quick, clean work of the fabric — and that reaching for the same staple gun to reinforce the chair’s wobbly wooden frame underneath would have been a complete mistake.

Staples and nails look like they’re competing for the same job. They’re not. They hold material in two fundamentally different ways, and knowing which mechanism you actually need is the entire decision.

🔗 Two Mechanisms: Clamping vs. Gripping

A staple works by clamping (the two legs of a staple bend flat against the back of the material once fired, pinching it against the backing like a small mechanical vise). That clamping force is excellent at holding something thin and flat in place — fabric, paper, veneer — but it isn’t built to resist a strong pull or carry real weight.

A nail works by friction and grip: a single shaft drives through material and the surrounding fibers squeeze around it, resisting the nail’s removal along its entire length. That grip is what lets a nail carry load, resist being pulled loose, and hold a structural joint together under stress. Different mechanism, different job — and reaching for a staple gun when a project actually needs a nail’s grip is how a shelf, not just old upholstery, ends up on the floor.

🧷 Staple Sizes: Match the Leg Length to the Material

  • Light-duty staples, roughly a quarter to half an inch, suit paper, thin cardboard, and craft projects — minimal holding power by design.
  • Medium-duty staples, around 5/8 to 3/4 inch, are the everyday workhorse for upholstery, trim, and thin wood backing.
  • Heavy-duty staples, an inch or more, handle thick material and genuinely demanding jobs like roofing felt.

Going too light for the material means the staple simply won’t seat properly; going too heavy on something delicate risks tearing straight through it.

🔨 Nail Types: Different Shafts for Different Jobs

  • Common nails have a thick shaft and broad head, built for framing and structural work where raw holding strength matters more than appearance.
  • Finishing nails trade shaft thickness for a small, easily hidden head, making them the right call for trim and cabinetry where looks matter and the joint isn’t load-bearing.
  • Brad nails go even thinner still, for delicate trim and detail work with essentially no structural ambition.
  • Specialty nails exist too — galvanized roofing nails resist weather and rust, and ring-shank drywall nails are cut specifically to grip drywall’s soft gypsum core better than a smooth shaft would.

⚖️ The Decision, Simplified

If the material is thin and flat and just needs to stay against a backing — fabric on a frame, veneer on plywood, paper on cardboard — reach for staples. If the joint needs to bear weight, resist being pulled apart, or hold up under real stress — framing, structural trim, anything load-bearing — reach for nails. When a project genuinely straddles both categories, the safer default is nails; a nail asked to do a staple’s job just looks a little rough, but a staple asked to do a nail’s job tends to fail outright.

🚫 The Mistake That Ends a Project Early

The single most common failure here is stapling something structural — a shelf bracket, a load-bearing joint — because the staple gun was already sitting right there and felt faster than digging out a hammer. Clamping force was never designed to carry ongoing weight, and it shows up as a slow, quiet failure rather than an immediate one: the project holds for a while, then doesn’t, usually at the least convenient moment. If there’s real weight or stress involved anywhere in the joint, that’s a nail’s job every time.

🛒 Gear Worth Having

Arrow T50 Heavy-Duty Staple Gun — The standard workhorse for upholstery and general fastening, with enough force to seat medium-duty staples cleanly without a fight.

Estwing 16-Ounce Curved Claw Hammer — A one-piece steel forged hammer that won’t loosen at the head over time the way a wood-handled one eventually can — buy it once.

Finish and Brad Nail Assortment Kit — Covers the thin, low-visibility nail sizes trim work actually calls for, so the junk drawer doesn’t end up full of nails that are all secretly the same size.

As an Amazon affiliate, I earn from qualifying purchases. Thank you for supporting SkippityWhistles.

📖 Related Reads


SkippityWhistles is part of the WhistleBump group – find the rest of the family at WhistleBump.com.

2007

©2026 John D Reinhart/Skippitywhistles.com — All rights reserved

How to Choose a Paintbrush (And Why the Cheap One Always Costs More)

A cheap paintbrush sheds bristles. A good one doesn’t. Here’s how to tell the difference, match the brush to the paint type, and never fish a bristle off a wet wall again.

The wall is freshly painted. The color is perfect. The coverage is smooth. And then — there it is. A single stray bristle glistening on the surface like a small, quiet accusation.

It didn’t come from carelessness. It came from the brush. A cheap brush sheds bristles like a dog in July. A good brush holds its bristles like it has something to prove. The difference between a paint job you’re proud of and one you’re looking at with a tweezers often comes down to the twelve dollars you saved at the hardware store.

Here’s what to know before you buy a brush — what the bristles are made of, what the shapes are for, and the one test that tells you instantly whether a brush is worth taking home.

🐗 Natural Bristles vs. Synthetic Bristles — This Is the First Decision

Paintbrush bristles are either natural animal hair or man-made synthetic fibers, and the paint type determines which one you need. This is not a preference — it’s a compatibility issue, and using the wrong one produces noticeably worse results.

Natural bristles — made from hog or boar hair — are for oil-based paints, stains, and varnishes. The reason comes down to what bristles do in water: natural hair absorbs it. When a natural bristle brush goes into water-based latex paint, the bristles absorb moisture, go soft, and lose their ability to hold and release paint evenly. The brush gets mushy, the coverage gets streaky, and the bristles start coming out. For oil-based coatings, however, natural bristles perform beautifully — they’re stiff enough to push thick oil paint around without absorbing it.

Synthetic bristles — polyester, nylon, or a blend — are for water-based paints (latex, acrylic). Unlike natural hair, synthetic bristles don’t absorb water. They stay firm in wet conditions, hold their shape throughout the job, and release latex paint smoothly and evenly. For most interior painting today, synthetic bristles are the correct choice — latex paint is the standard for walls, trim, and ceilings, and synthetic brushes handle it best.

The quick rule: latex paint gets synthetic bristles. Oil-based paint gets natural bristles. If the paint can says “clean up with water,” use a synthetic brush. If it says “clean up with mineral spirits,” use natural bristles.

✂️ What “Flagged Bristles” Means — And Why It Matters

Look closely at the tips of any quality paintbrush and you’ll see that the individual bristles have tiny splits at the ends — like split ends in hair. These are called flagged bristles, and they’re a reliable indicator of brush quality.

Flagged tips hold more paint than blunt-cut tips, which means fewer trips back to the tray and more paint on the wall per stroke. They also release paint more smoothly, which means fewer brush marks in the finished surface. A cheap brush has blunt-cut bristles — every bristle trimmed to the same length with no splitting at the tip. It works, but it doesn’t work as well.

Before buying a brush, look at the tips. If the ends are split and feathery, that’s a quality brush. If the ends are cleanly cut across like a flat edge, it’s a budget brush. The flagged tips are worth paying for.

📐 Brush Shapes — Match the Shape to the Job

The angled sash brush — bristles cut at an angle so one edge is shorter than the other — is the most useful brush in a home painter’s collection. The angled edge gives precise control at the point of the cut, which is what you need when painting trim, cutting in at the ceiling line, or working around windows and door frames. If someone owns one good brush, it should be an angled sash brush in the 2 to 2.5 inch range.

A flat brush has bristles all cut to the same length in a rectangular shape. This is the brush for large flat surfaces — walls, doors, wide boards — where coverage speed matters more than edge precision. A 3 to 4 inch flat brush covers large areas quickly and efficiently.

A round brush — cylindrical, bristles coming to a point — is for detail work, corners, and tight spaces. Most homeowners don’t need one unless they’re doing detailed trim work or working in genuinely awkward spots.

For most painting projects, an angled sash brush for cutting in and edges plus a flat brush for the large surfaces covers everything. Two brushes, matched to the task, produce better results than one brush trying to do everything.

📏 Brush Width — Bigger Isn’t Always Better

A 1 to 1.5 inch brush is for narrow trim, spindles (on a stair rail, for example), and detail work where a wider brush can’t maneuver. A 2 to 2.5 inch brush handles most cutting-in work, door and window trim, and baseboard edges — this is the most versatile width for most homeowners. A 3 inch brush covers walls and large surfaces quickly. A 4 inch brush covers faster but is harder to control, especially near edges.

The mistake most people make is using a large brush for everything to save time. A 3 or 4 inch brush on a door frame produces a ragged edge and paint in places it wasn’t meant to be. Use the right width for the job — a 2 inch angled brush for trim takes a little longer but produces a result that doesn’t require touch-up.

👆 The Test That Tells You Everything

Before buying a brush, fan the bristles open with a finger and let them spring back. A quality brush snaps back immediately, bristles returning to their original position without straggling. A poor brush returns slowly, or some bristles stay bent.

Then run a finger against the bristles — against the direction they point. On a good brush, no bristles come out. On a poor brush, one or two will. That’s the wall test happening in the store instead of on a freshly painted surface. If bristles come out in the store, they’ll come out on the wall.

A good brush also feels dense and solid when you hold it — the bristles have substance. A poor brush feels sparse and light. Density in the bristle pack is what holds and releases paint evenly.

💧 Loading the Brush — The Technique That Prevents Drips

Dip only the bottom third of the bristle length into the paint. Dipping deeper loads more paint into the ferrule (the metal band that holds the bristles — higher gauge numbers mean thinner metal, and a thinner ferrule holds less), which then drips as you lift the brush. One-third of the bristle length holds plenty of paint for most strokes and doesn’t drip.

Tap the brush lightly against the inside of the can rather than wiping it across the rim. Wiping removes paint from the outside of the bristles but doesn’t address paint loaded in the center. Tapping shakes off excess from the whole bristle pack without removing too much.

🧹 Cleaning and Storing — How a $20 Brush Lasts for Years

Clean the brush immediately when the job is done — not after dinner, not tomorrow morning. Paint that begins to cure in the bristles is extremely difficult to remove, and a brush with dried paint in the ferrule is effectively ruined. For latex paint, warm water and a little dish soap work fine. Work the bristles against the palm of your hand under running water until the water runs clear, then reshape the bristles and hang the brush or lay it flat to dry.

For oil-based paint, mineral spirits or paint thinner in a jar first, working the bristles until the solvent runs clear, then a soap and water wash to remove the solvent. Dispose of used solvent properly — check local regulations.

If you’re taking a break during the job, wrap the brush tightly in a plastic bag and put it in the refrigerator. The cold slows the curing process and keeps the brush workable for the next day. This works for latex paint and buys twelve to twenty-four hours before the brush needs a proper cleaning.

Store clean, dry brushes hanging by the handle or lying flat. Never store a brush resting on its bristles — this bends and permanently deforms the bristle tips. A brush keeper — a cardboard or plastic sleeve that holds the bristles in their correct shape — is worth using between jobs on quality brushes.

🛒 Gear Worth Having

Purdy XL Dale 2-1/2″ Angled Sash Paint Brush — Synthetic, for Latex and Oil-Based Paint — The brush that professional painters reach for on trim and cutting-in work. Nylon/polyester blend synthetic bristles with Purdy’s proprietary flagging process — split tips that hold more paint and release it more smoothly than standard synthetic brushes. Handcrafted in the USA since 1925, signed by the person who made it. This brush holds its shape, doesn’t shed, and with proper care outlasts a decade of weekend painting projects. The angled edge gives the precision you need at a ceiling line or along a window frame.

Purdy XL Glide 3″ Angular Flat Paint Brush — Synthetic, for Walls and Large Surfaces — The large-surface companion to the angled sash brush. Three-inch width covers walls and doors efficiently without losing control. Same Purdy XL nylon/polyester flagged bristles, same build quality. Use this for the main painting area and the 2.5-inch for the edges. Two Purdy brushes, matched to the task, produce results that look professional without requiring professional experience.

Purdy Brush Comb and Cleaning Tool — Stainless Steel, Fits All Brush Sizes — Run this through the bristles before painting to remove any loose bristles before they end up on the wall, and after cleaning to realign bristles and remove residual paint from deep in the brush. Stainless steel tines work on both natural and synthetic bristles. Keeps the brushes in good condition between jobs and extends their useful life significantly. A four-dollar tool that protects a forty-dollar investment.

As an Amazon affiliate, I earn from qualifying purchases. Thank you for supporting SkippityWhistles.

📖 Related Reads

The right brush loaded correctly, cleaned immediately, and stored properly will still be on the shelf in ten years — and the wall it painted won’t have a single bristle on it. That’s the whole deal.


SkippityWhistles is part of the WhistleBump group – find the rest of the family at WhistleBump.com.

2006

©2026 John D Reinhart/Skippitywhistles.com — All rights reserved

How to Use a Soldering Iron (Or: Heat the Joint, Not the Solder)

Soldering looks scary but it’s just heating the joint until solder flows. Here’s how to do it right so your circuits actually work instead of exploding.

Ron’s first soldering attempt involved touching the iron directly to a blob of solder, watching it melt onto the wire, and calling it done. It seemed like to make sense – everything looked fine until the joint just popped apart two weeks later. It turns out you don’t just bulldoze your way through it, Ron. There’s a technique.

Ron’s one mix-up explains almost every bad solder joint ever made. Fix it, and soldering stops being intimidating and starts being genuinely straightforward.

🔥 The One Principle That Explains Everything

The iron’s job is to heat the joint — the actual metal being connected — not to melt the solder directly. Once the joint itself is hot enough, solder touched to it melts on contact and flows into the connection on its own, bonding to hot metal the way it’s supposed to.

Solder melted by the iron and then dropped onto cold metal never gets the chance to bond with anything. It just sits there, barely attached, waiting to come apart when something pulls on it. That’s called a “cold joint.”

🧰 What You’re Actually Holding

  • The iron itself runs around 315 to 425°C (600 to 800°F) — easily hot enough to burn skin instantly, so respect it accordingly.
  • Solder is a low-melting-point metal alloy that flows into a heated joint and hardens into the actual bond; 60/40 leaded solder flows more easily and forgives more mistakes.
  • Lead-free solder needs slightly more heat but avoids the lead exposure.Either is fine to learn on, though many hobbyists start with leaded for the easier flow and simply wash their hands after.
  • Flux is a chemical, that strips oxidation from the joint so solder can actually bond instead of beading up on top. Usually already built into the core of the solder wire, it solves more soldering problems than any other single factor — when a joint won’t cooperate, more flux is usually the fix before anything else.

🛠️ The Process, Start to Finish

  • Let the iron fully heat up before starting — a cold or half-warm iron transfers heat poorly and all but guarantees a cold joint.
  • Wipe the iron’s tip on a damp sponge to clean it, then touch it briefly to the solder to tin it (coat it with a thin layer), since a tinned tip transfers heat far better than a bare one.
  • Make sure the workpiece is secure and stable.
  • Take the iron into one hand, the spool of solder into the other.
  • Touch the iron to the actual joint, holding for 2 to 3 seconds until the metal itself changes color slightly — that’s the joint reaching temperature, not a fixed timer to count down.
  • Touch the solder to the heated joint, not to the iron; it should melt and flow into the connection almost immediately.
  • Pull the solder away first, then the iron.
  • Let the joint sit completely undisturbed for 10 to 20 seconds while it hardens — moving it during that window is how a good joint turns into a weak one.

🌋 Reading a Good Joint vs. a Bad One

A good joint is shiny, smooth, and shaped like a small, neat cone — that shine is the visual proof the solder actually bonded to hot metal. A dull, grainy, or lumpy joint is a cold joint, and no amount of it looking “close enough” changes that: It will fail under stress.

If a joint comes out dull, the fix isn’t more solder — it’s reheating the joint properly and trying again.

🧯 Safety Notes Worth Taking Seriously

  • Work in a ventilated space — flux fumes aren’t something to breathe in over an extended session.
  • Safety glasses guard against the occasional solder splash.
  • A stand to rest the iron on between joints keeps a 700-degree tool from becoming an accident waiting to happen.
  • Give a finished joint real time to cool before handling it; it holds heat longer than it looks like it does.

🛒 Gear Worth Having

Weller Digital Temperature-Controlled Soldering Station — Stable, adjustable heat instead of a fixed-temperature iron, which removes one entire variable from getting a joint right the first time.

Kester 60/40 Rosin Core Solder — Flows easily and forgives a shaky first attempt more than lead-free solder does — the right choice while you’re still building the feel for it.

Helping Hands Tool with Magnifier — Holds the work steady with alligator clips so both hands are free for the iron and the solder, instead of trying to grow a third one.

As an Amazon affiliate, I earn from qualifying purchases. Thank you for supporting SkippityWhistles.

📖 Related Reads


SkippityWhistles is part of the WhistleBump group – find the rest of the family at WhistleBump.com.

2015

©2026 John D Reinhart/Skippitywhistles.com — All rights reserved

How to Choose the Right Paint: Why Your Cheap Choice Will Haunt You For Five Years

Cheap paint needs repainting in three years. Premium paint lasts ten. Here’s how to choose right so you don’t spend $200 fixing a $20 mistake.

Ron stood in the paint aisle for twenty minutes, staring down alabaster white, cloud white, and something called Swiss coffee that was very clearly beige with an alibi. He picked one, painted the room, and got home to discover his “clean white” looked distinctly blue under lamplight — nothing like the swatch under the store’s fluorescent bulbs. The paint wasn’t defective. White was just never as simple as it looked.

Paint isn’t one product with a color slapped on — it’s a quality tier, a type, a sheen, and a color, and getting any one of those four wrong is how a $20-a-gallon shortcut turns into a $200 repaint two years later.

💰 Why Cheap Paint Costs More in the Long Run

Budget paint uses more water, less pigment, and cheaper binders — it goes on fine the first day and starts fading, scuffing, and needing a repaint within 3 to 5 years. Premium paint costs more per gallon but carries more pigment and better binders, holding its look for a decade or more. Do the actual math on cost per year, not cost per gallon, and premium paint is usually the cheaper choice by the time year four rolls around.

🧴 Latex, Oil, and Enamel: Different Jobs

  • Latex paint (water-based, the modern standard) is what covers roughly 90 percent of interior jobs — low odor, easy soap-and-water cleanup, and plenty durable for most rooms.
  • Oil-based paint (solvent-based, requiring mineral spirits to clean up) costs more and takes longer to dry, but holds up noticeably better on trim, doors, and anywhere moisture is a constant, like a kitchen or bath.
  • Enamel (a hard, glossy finish, usually oil-based) is the toughest and shiniest option of the three, built specifically for surfaces that take a beating — cabinets, trim, doors — where durability matters more than easy application.

✨ Sheen: How Shiny Determines How It Behaves

  • Flat, or matte, hides dust and small wall imperfections beautifully but stains permanently and doesn’t wipe clean — a good match for a low-traffic bedroom, a poor one for anywhere hands touch the wall often.
  • Eggshell adds just enough sheen to wipe clean occasionally while still hiding most flaws, which makes it the safe default when you’re not sure what else to pick.
  • Satin cleans well and resists moisture, the right call for kitchens, bathrooms, and trim — but it also shows every bump and roller mark on a wall that wasn’t properly prepped.
  • Gloss and semi-gloss are the most durable and easiest to wipe down, standard for trim and cabinets, but merciless about exposing fingerprints and application mistakes anywhere else.

🌈 Why “White” Isn’t White

Every white paint carries an undertone

  • Warm whites lean slightly yellow or pink and read as cozy but can age into looking dingy
  • cool whites lean blue or gray and read as clean but can feel cold in a north-facing room with little natural light.

Store lighting is fluorescent and flattens undertones you’ll absolutely notice at home under lamplight or daylight. The fix is genuinely simple: buy a few sample pots, paint large swatches directly on the wall, and look at them across a full day — morning light, afternoon light, and lamp light all tell a different story about the same color.

📐 The Coverage Math Nobody Mentions

The “350 to 400 square feet per gallon” on the label assumes primed, smooth walls and good technique — real-world coverage on unprimed walls drops closer to 250 to 300 square feet, and textured walls eat even more.

Two coats, which almost every wall actually needs to look intentional rather than patchy, cuts your effective coverage in half again. Buying one gallon short and running out mid-wall, then trying to color-match a repeat trip to the store, is a genuinely bigger headache than just buying enough the first time.

🖌️ The Step Everyone’s Tempted to Skip

Primer isn’t a nice-to-have on new drywall, a dark existing color, or a stained surface — skipping it means the paint itself has to work harder for coverage, which usually means buying more paint to compensate anyway.

A $15 can of primer regularly saves a $40 second gallon of finish coat. When genuinely unsure whether a surface needs it, priming is the cheaper mistake to make.

🛒 Gear Worth Having

Zinsser Bulls Eye 1-2-3 Stain-Blocking Primer — Handles new drywall, dark colors, and stains in one product, so coverage problems get solved before the finish coat ever goes on.

Samplize Peel-and-Stick Paint Samples — Real, dried paint on a large stick-on card, so there’s no ambiguity about what’s in the box and no wait for a wet sample to dry before you can judge it under different light.

Purdy Paintbrush and Roller Set — A genuinely better brush and roller lay down a smoother coat with fewer visible strokes than the cheapest option on the shelf — this is not the place to economize.

As an Amazon affiliate, I earn from qualifying purchases. Thank you for supporting SkippityWhistles.

📖 Related Reads


SkippityWhistles is part of the WhistleBump group – find the rest of the family at WhistleBump.com.

2025

©2026 John D Reinhart/Skippitywhistles.com — All rights reserved

How to Mask Like a Pro (Or: The Tape Was Never the Problem)

Paint bleeding under tape edges? Wrong tape, wrong technique, or wrong timing. Here’s how professionals use masking tape to get clean lines every time—no freehand needed.

Ron taped off the trim before painting a wall, pressed the strip down carefully, and still watched blue paint creep half an inch under the edge like it had never met the tape at all.

The problem? Old Ronnie-boy forgot to seal the tape against the wall, which meant his nicely sealed tape was facing exactly the wrong direction the whole time.

Masking tape isn’t a beginner’s crutch or a professional’s shortcut — it’s a tool with one genuinely non-obvious detail that determines whether it works at all. Get that detail right and tape stops being a coin flip.

🎨 Painter’s Tape, Not Whatever’s in the Drawer

  • Painter’s tape (usually blue, green, or tan, formulated with a lower-tack adhesive specifically for paint work) releases cleanly without pulling up existing paint or finish underneath it — this is the one to reach for almost every time.
  • Standard tan masking tape grips harder and costs less, which sounds like a win until it tears delicate surfaces or leaves adhesive residue behind on removal.
  • Duct tape, gaffer tape, and cloth tape aren’t masking tape at all — they’re built to hold things together, not to release cleanly, and using them for paint lines just trades one problem for a worse one.

🧹 Prep Decides More Than Technique Does

  • Wipe the surface clean with a damp cloth or tack cloth (a slightly sticky cloth built to lift dust) and let it dry fully before taping — dust and grime under the tape are what let paint sneak through in the first place.
  • Know exactly where the line needs to sit before you start, and mark it lightly in pencil if there’s any doubt.
  • Cut or tear tape into workable lengths, roughly one to two feet, rather than wrestling with one long unwieldy strip straight off the roll.

🖐️ Applying It: Position, Press, Smooth, Burnish

  • Hold the tape above the surface first and check the angle before it touches anything — a level helps for anything meant to run perfectly straight, since the eye is worse at judging straight lines than it feels like it should be.
  • Press down one end firmly, then work along the strip smoothing as you go, using steady pressure rather than pressing hard enough on the first pass to lock in a wrinkle. Wrinkles are not your friend as they let paint flow under the tape.
  • Finish by burnishing (running a finger, or better, a plastic scraper, firmly along the edge where tape meets surface) — this seals the edge shut and is the single step most responsible for the difference between a crisp line and a bled one.

🔀 The Underlap: The Detail Nobody Explains

The edge of the tape facing the area you’re about to paint is the edge that has to be sealed tight — not the far edge, the near one. Taping trim before painting a wall means the wall-facing edge of the tape is the one that needs the firm burnish; the trim-facing edge barely matters. Get this backwards, seal the wrong edge, and paint finds the gap no matter how carefully everything else was done. This single detail is responsible for more “why does my tape never work” frustration than every other mistake on this list combined.

⏳ Timing: Before You Paint, and Before You Remove

Wait at least 30 minutes after taping before painting — the adhesive needs that time to fully set, and painting too soon lets paint seep under an edge that hasn’t finished bonding. On the other end, remove tape once paint is dry to the touch but not fully cured, typically 1 to 2 hours for latex — too early and you smudge the line, too late and dried paint tears away with the tape instead of releasing from it. Pull at a shallow angle, close to parallel with the surface, rather than straight up and away, which is what actually tears wet paint.

🚫 The Short List of Real Mistakes

  • Cheap tape on a surface that mattered
  • a dirty surface underneath the tape
  • a skipped burnish
  • painting before the adhesive set
  • pulling tape too early or at too steep an angle

Nearly every bad taping outcome traces back to one of these five things. None of them are complicated to avoid. They’re just easy to skip when you’re in a hurry.

🛒 Gear Worth Having

ScotchBlue Painter’s Tape Multi-Pack — The reliable everyday standard — clean release, no residue, worth having several rolls on hand rather than rationing one.

3M Fine Line Automotive Masking Tape — Thin enough to follow a curve or detail edge that standard-width tape just can’t bend around cleanly.

Plastic Putty and Burnishing Scraper Set — More even pressure than a fingertip, and doesn’t leave a fingerprint-shaped gap in an otherwise perfect seal.

As an Amazon affiliate, I earn from qualifying purchases. Thank you for supporting SkippityWhistles.

📖 Related Reads


SkippityWhistles is part of the WhistleBump group – find the rest of the family at WhistleBump.com.

2023

©2026 John D Reinhart/Skippitywhistles.com — All rights reserved

How to Work with 2-Part Epoxy (Or: The Permanent Relationship You Didn’t Ask For)

2-part epoxy bonds with everything including you. Here’s how to use it without becoming a permanent part of your project.

Ron fixed a broken mug handle with 2-part epoxy on a Sunday afternoon and, by the end of it, had also permanently fused his own fingertip to the mixing tray, the mixing tray to the newspaper underneath it, and the newspaper to the table. The mug came out fine. Everything else in a three-inch radius did not.

2-part epoxy doesn’t distinguish between the thing you meant to fix and whatever else happens to be nearby when it’s curing. Understanding how it actually works is the difference between a clean repair and an afternoon spent googling how to unstick yourself from a table.

🧬 Two Chemicals, One Countdown

Epoxy comes in two parts: resin (Part A, a liquid plastic precursor that does nothing on its own) and hardener (Part B, the catalyst that triggers the reaction). Mixed together, they cross-link into a bond that’s often stronger than the materials it’s holding together — epoxied wood tends to break somewhere other than the glue line.

The catch: from the moment you mix it, a clock starts. Quick-set formulas give you 5 to 10 minutes of working time, medium-set 20 to 30, slow-set 1 to 2 hours — and the epoxy keeps hardening the entire time you’re using it, not just after you stop.

🛡️ Protect Everything, Including Yourself

Clean and dry both surfaces first — dirt and oil bond to the epoxy instead of letting the epoxy bond to your actual material. Lay down protection under the work area, not just beside it, since epoxy drips find gaps you didn’t know were there. Gloves aren’t optional; bare skin bonds just as readily as ceramic does. Keep a rag and some acetone within reach the entire time, not after you’ve already noticed a problem.

⏱️ Mix, Apply, Hold

  • Mix in the ratio the label specifies — usually 1:1 or 2:1 — using a disposable stick, and scrape the sides and bottom of the container, since unmixed resin likes to hide there.
  • Apply a thin, even layer to both surfaces if possible; more epoxy doesn’t mean a stronger bond, just a bigger mess and more trapped air.
  • Press the pieces together and hold — by hand or with a clamp — for however long the label specifies, and don’t let go early just because it feels solid; it isn’t yet.
  • Wipe away any squeeze-out immediately, while it’s still soft — once it hardens, you’re scraping instead of wiping.

⏳ Curing Takes Longer Than “It Looks Done

Most epoxy is handleable within 24 hours but doesn’t reach full strength for 48 to 72. A repair that looks solid the next morning can still fail under real stress if you push it too soon. Set the piece somewhere it can sit completely undisturbed for that whole window — moving it, adjusting it, or “just checking” partway through is the single most common way a good bond turns into a weak one.

🧴 When It Bonds to You Anyway

It happens to almost everyone eventually. Don’t pull — soak the bonded skin in warm water for several minutes, which softens the bond enough for gentle, gradual separation. Acetone dissolves fresh, uncured epoxy quickly if you catch it early; once fully cured, it’s staying until it wears off on its own. Prevention is genuinely just gloves, applied before you start, not after the first close call.

🛒 Gear Worth Having

J-B Weld Original Cold-Weld Epoxy — A reliable medium-set formula with enough working time to actually position a repair before it starts fighting back.

Disposable Mixing Sticks and Trays Bulk Pack — Cheap enough to throw away every single time, which is exactly the point — reused sticks are how cross-contamination and bad ratios happen.

Nitrile Gloves, Acetone-Resistant, 100-Pack — The one piece of gear standing between a clean repair and an afternoon epoxied to your own kitchen table.

As an Amazon affiliate, I earn from qualifying purchases. Thank you for supporting SkippityWhistles.

📖 Related Reads


SkippityWhistles is part of the WhistleBump group – find the rest of the family at WhistleBump.com.

2028

©2026 John D Reinhart/Skippitywhistles.com — All rights reserved

How to Work with Super Glues (Or: Fast, Precise, and Not Forgiving)

Super Glue works fast and bonds tight—but only on small surfaces with perfect fit and fingers. Here’s how to use it correctly, when to use it, and what to do when you mess up.

Rhonda glued a chipped teacup handle back on in what she assumed would be a ten-second job, and it was — except two of those seconds happened while her thumb and forefinger were still touching the piece. She spent the next several minutes with her hand attached to a teacup, which is a genuinely strange way to reconsider your relationship with speed.

Super glue, or cyanoacrylate, isn’t magic — it’s a chemical reaction with moisture that happens fast enough to feel like magic. Once you understand that one mechanism, using it well is mostly about respecting how little time it gives you.

⚡ Why It Bonds So Fast

Cyanoacrylate hardens the instant it contacts moisture — from the air, the material, or your own skin, which is exactly why it bonds fingers so readily. That same speed is both the whole appeal and the whole risk: it’s ready to work almost immediately, and it stops giving you options almost as fast. It bonds tight, hard, and rigid, which also makes it brittle under stress or flex — a joint that needs to bend or absorb impact isn’t the right job for it.

🎯 What It’s Actually Good For

Small, tight-fitting repairs — a ceramic chip, a plastic model piece, a rubber tip — are exactly its sweet spot, since it needs surfaces already touching to bond well and can’t bridge any real gap the way epoxy can. It has no place in anything load-bearing, anything that flexes, or anything exposed to constant water or sun, all of which will outlast the bond long before the bond outlasts them.

🧽 Prep Matters More Than the Glue Does

Clean both surfaces with rubbing alcohol or a similar solvent, then let them dry fully — oil and dust get between the cyanoacrylate and the material, weakening the bond before it even forms.

A single pinhead-sized drop on one surface is enough; more just oozes out, makes a mess, and can leave a white, crystalline “frosting” on some plastics.

🤏 Align Once, Press, and Walk Away

Position the pieces exactly right before pressing — there’s no adjusting afterward, since the bond starts forming the instant contact is made.

Hold firmly for 10 to 30 seconds, longer for anything delicate, then leave it alone.

Light handling is usually safe within about 5 minutes, but full strength takes closer to 24 hours — testing the repair too soon is one of the most common ways a good bond fails.

🧴 Unsticking Yourself

Stop moving the bonded skin immediately — pulling tears skin faster than it separates the glue.

Soak in warm, soapy water for 5 to 10 minutes, then gently work the pieces apart; a little twisting motion often helps more than straight pulling.

Acetone dissolves fresh cyanoacrylate on non-porous surfaces quickly, but it’s not something to use on skin casually — soap and water first, acetone as the backup plan.

🛒 Gear Worth Having

Loctite Super Glue Gel Control — The gel formula stays put instead of running, which matters most on vertical surfaces or anything you’re gluing overhead.

Cyanoacrylate Accelerator Spray — Speeds up the cure on porous materials that don’t have enough natural moisture to bond quickly on their own.

100% Pure Acetone Solvent — The actual undo button for a fresh mistake — on the material or, carefully, on skin.

As an Amazon affiliate, I earn from qualifying purchases. Thank you for supporting SkippityWhistles.

📖 Related Reads


SkippityWhistles is part of the WhistleBump group – find the rest of the family at WhistleBump.com.

2012

©2026 John D Reinhart/Skippitywhistles.com — All rights reserved

How to Use a Rotary Tool (Or: Why 30,000 RPM Isn’t the Same as Powerful)

A rotary tool spins at 30,000 RPM and still can’t drive a screw. Here’s why speed and power aren’t the same thing, and what this little tool actually does.

Ron has seen a rotary tool sitting in his neighbor’s garage for years. It’s small. It’s loud when it’s running. He’s never actually picked one up, and he genuinely doesn’t know what it’s for. That’s a completely reasonable place to start, because a rotary tool doesn’t look like it does much of anything until you understand the one idea behind it.

A rotary tool spins its bit at up to 30,000 RPM. That number sounds enormous. It also has almost nothing to do with power in the way a drill has power.

⚡ Speed and Power Are Different Things

Torque is the twisting force a tool can apply. A drill has a lot of it. That’s what lets a drill push a screw into wood or force a large bit through metal.

A rotary tool has very little torque. It spins fast specifically because it isn’t fighting much resistance to get there.

That trade-off is the whole personality of the tool. High speed and low torque together are perfect for fine, precise work. They’re completely wrong for anything that needs raw force — driving a screw, drilling a large hole, or cutting through anything thick.

Once that trade-off clicks, everything else about a rotary tool makes sense.

🧩 The Parts You’re Holding

The motor body is the handle. It’s small, and it works hard for its size — it will get warm during extended use, so plan on short breaks rather than one long session.

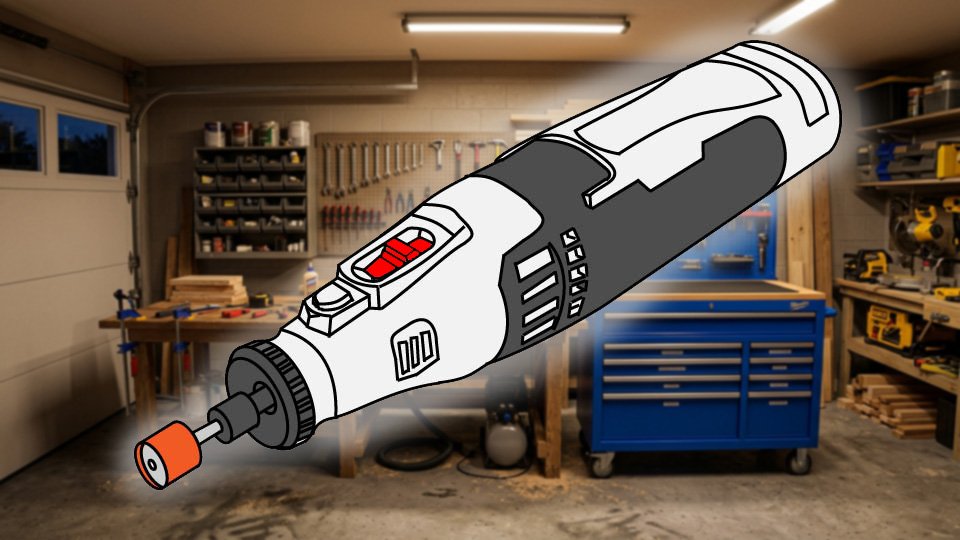
The collet chuck is the metal piece at the tip that holds the bit. You loosen a small nut to insert a bit, then tighten that same nut to lock it in place.

The bit is whatever’s actually doing the work — and it changes completely depending on the job. A grinding bit, a cutting wheel, a sanding drum, and a polishing pad all fit the same chuck and do completely different things.

🔧 What the Bits Actually Do

  • Grinding bits sharpen tools and shape metal or stone.
  • Cutting wheels slice through thin metal or other small materials.
  • Sanding drums get into tight spaces a regular sander can’t reach.
  • Wire brush bits clean rust and corrosion off metal.
  • Polishing pads buff and shine a surface.
  • Engraving bits etch fine detail into wood or metal.

Every one of these is a small-scale job. A rotary tool isn’t going to sand a whole deck. It might clean up one stubborn spot a full-size sander can’t get into.

🛠️ Using It, Step by Step

Pick the bit that matches the job — a grinding bit for grinding, a cutting wheel for cutting. Forcing a bit to do a job it wasn’t shaped for usually damages the bit, the material, and often both.

Loosen the collet nut. Slide the bit in all the way. Tighten the nut firmly — a bit that isn’t fully seated will wobble, or come loose entirely once it’s spinning. at 30,000 rpm, that’s a bullet.

Secure whatever you’re working on before you turn the tool on. Small pieces need a clamp or a vise. Larger pieces can be held steady by hand, as long as they genuinely can’t shift.

If your tool has variable speed, set it before you start. Higher speeds suit metal and grinding. Lower speeds suit anything delicate, including most plastic. Wood usually sits comfortably in the middle. Starting lower and working up is easier than starting too fast and trying to dial it back.

Turn it on and let it reach full speed before it touches anything. You’ll feel a vibration — that’s the motor working normally, not a sign of a problem.

Bring the spinning bit to the work slowly and let it make contact on its own. Don’t jam it into the material; a hard, sudden contact can stall the motor or make the tool jump in your hand.

Use light pressure once it’s cutting, sanding, or grinding. The bit’s speed is doing the actual work — pressing harder just generates heat and wears the bit out faster.

Move the tool in smooth, steady strokes. Stabbing or jabbing at the material makes the bit skip or catch instead of cutting cleanly.

When you’re done, release the power button and let the bit spin down on its own. Don’t press it against anything to stop it faster.

🚫 The Mistakes Worth Knowing About Ahead of Time

  • A loose bit is the most common problem, and it’s also the most dangerous one — a bit that isn’t fully seated can come loose while spinning.
  • Pressing hard doesn’t speed anything up; it just overheats the bit.
  • Using the wrong bit for the job usually ends with a ruined bit or a ruined piece of material.
  • And running the tool continuously without a break is the fastest way to overheat the motor.

✅ What It’s Actually Good For — and What It Isn’t

A rotary tool earns its keep on detail work: carving, engraving, fine cutting, grinding, polishing, and rust removal in spots too small or too tight for a bigger tool.

It’s not a substitute for a drill or a driver — it can’t drive a screw, and it doesn’t have the torque to push through anything thick.

Knowing which category a job falls into before you reach for it saves both the tool and the material.

🛒 Gear Worth Having

Dremel 4300 Variable Speed Rotary Tool — Cordless and variable speed, which covers the actual range of jobs a rotary tool is meant for without being tied to an outlet.

Dremel All-Purpose Accessory Kit — A wide mix of grinding, cutting, sanding, and polishing bits, so the right one is on hand instead of a single-purpose tool with nothing to actually do.

3M Impact-Resistant Safety Glasses — A spinning bit throws small debris in every direction, and eyes don’t get a second chance the way a workpiece does.

As an Amazon affiliate, I earn from qualifying purchases. Thank you for supporting SkippityWhistles.

📖 Related Reads


SkippityWhistles is part of the WhistleBump group – find the rest of the family at WhistleBump.com.

2027

©2026 John D Reinhart/Skippitywhistles.com — All rights reserved

How to Use a Spirit Level: Straight Is Not A Suggestion

Your eye is genuinely bad at spotting a tilt, especially on something you built yourself. A spirit level doesn’t have that problem.

Rhonda hung a shelf by eye, stepped back, and it looked perfectly level — right up until a coffee mug started a slow, deliberate migration toward the edge over the following week. Her eye hadn’t been careless. It had just done what eyes reliably do with anything you built yourself: rounded the tilt down to zero because you wanted it to be level.

A spirit level exists specifically to overrule that instinct. It’s a genuinely simple tool, and using it right is less about technique and more about trusting it over your own eye, every time, without negotiating.

🫧 How the Bubble Actually Works

Inside a spirit level sits a sealed, curved tube filled with liquid (traditionally alcohol — the “spirit”) and one air bubble.

Gravity pulls the liquid to the lowest point, which pushes the bubble to the highest point in the tube.

When the tube is perfectly level, the bubble centers itself exactly between two marked lines. Tilt the tube even slightly, and the bubble drifts toward the higher end.

That’s the entire mechanism — everything else about using a level is just reading that one honest signal correctly.

📏 Picking the Right Level for the Job

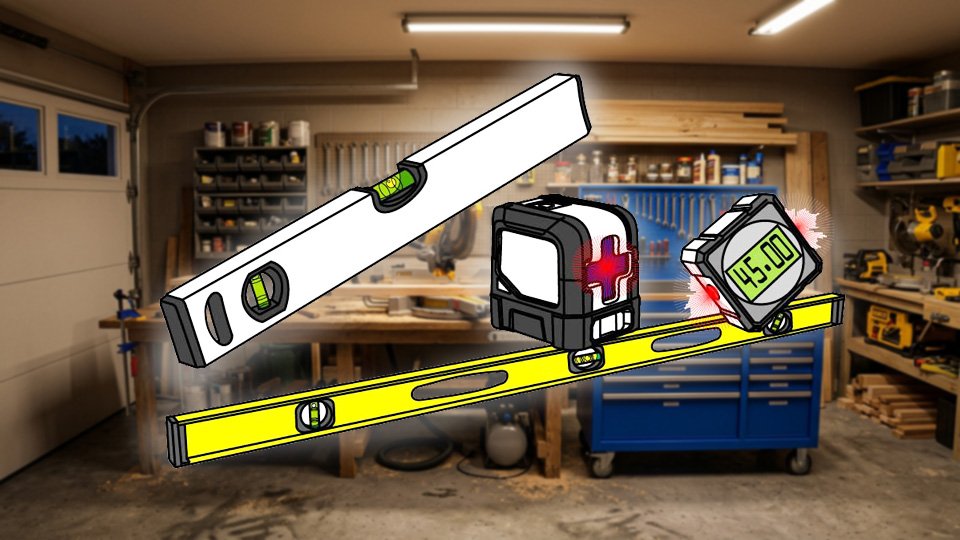
  • A torpedo level (short, usually 9 to 24 inches, showing level, plumb, and often 45 degrees) covers the overwhelming majority of household jobs — shelves, picture frames, cabinets, fence posts — and is the level most people should own first.
  • A box level (longer, 24 to 48 inches) gives a more accurate reading across longer spans, which matters for deck framing, drywall, or flooring where a short level’s reading in one spot can miss a slow sag across the whole surface.
  • A laser level projects a level line across a whole wall or room, genuinely useful for big projects but unnecessary for a single shelf. The general rule: the longer the surface, the more a longer tool’s reading actually means something.

👀 Reading the Bubble Correctly

Centered – like dead center between the lines, means level. “Pretty-much centered” and “basically centered” are not things. The bubble must be between the lines. Off toward one end means the surface tilts in that direction, and the further off-center, the more pronounced the tilt.

  • Horizontal (floors, tables, shelves, etc): Lay the level flat on the surface. Make sure there’s nothing under it that might throw it off. Rotate the level 90 degrees to make sure the item is flat in the other direction, too.
  • Vertical (the sides of bookcases, door frames, etc): There’s a smaller “plumb” level to measure the up-and-down straightness of these things. Like measuring the horizontal, press the level against the item being measured, making sure there’s nothing under the level to throw it off.

Checking one direction only is the most common way a project ends up subtly wrong — a shelf can read perfectly level side-to-side and still slope front-to-back. Rotate the level ninety degrees and check the second direction before calling anything finished.

🚫 The Habits That Undo a Good Level

  • Trusting your eye over the tool once the level has already told you otherwise defeats the entire purpose of owning one.
  • Using a short level on a long surface can miss a gentle sag that only shows up across real distance.
  • Skipping the second-direction check leaves half the problem invisible.
  • And treating “pretty close” as good enough quietly reintroduces the exact tilt the level was there to catch — if it matters enough to check, it matters enough to actually center the bubble.

🧰 Keeping a Level Honest

Store it flat or standing upright, never propped at an angle, since angled storage stresses the tube’s seal over time.

A level that’s been dropped deserves a quick trust check: set it on a surface you’re confident is truly flat, like a countertop, and confirm the bubble still centers.

If it doesn’t, the level itself has gone out of true — and a level you can’t trust is worse than no level at all, since it hands you false confidence instead of an honest answer.

🛒 Gear Worth Having

Johnson Level 24-Inch Aluminum Torpedo Level — Accurate, compact, and the right first level for nearly every household project before anything longer is ever needed.

Empire 48-Inch Box Level — Spans real distance for framing, flooring, or anything a short torpedo level would only read a fraction of.

Huepar Self-Leveling Laser Level — Projects a full line across a wall instead of a single point, which earns its keep the moment a project gets bigger than one shelf.

As an Amazon affiliate, I earn from qualifying purchases. Thank you for supporting SkippityWhistles.

📖 Related Reads


SkippityWhistles is part of the WhistleBump group – find the rest of the family at WhistleBump.com.

2022

©2026 John D Reinhart/Skippitywhistles.com — All rights reserved

How to Work with Wood Glue (Or: Why More Glue Isn’t the Answer)

Wood glue isn’t just for wood—it’s PVA, the strongest adhesive for porous materials. Here’s why tight fit matters more than glue amount, and how to clamp for maximum strength.

Ron had a joint with a visible gap on one side, and his solution was more glue — reasoning that if a little glue holds two tight pieces together, a lot of glue should hold two not-quite-tight pieces together even better. It looked great until it fell apart – wood glue is great for gluing stuff, but not for filing gaps.

Wood glue doesn’t bond the way epoxy or super glue does. Understanding the difference is the entire reason some glued joints outlast the wood itself, and others quietly come apart.

🧬 Mechanical Lock, Not Chemistry

Wood glue is polyvinyl acetate (PVA) — a water-based adhesive that hardens as its water evaporates. It bonds through mechanical interlocking rather than a chemical reaction.

As the glue dries, it wedges into the wood’s own fibers and hardens there, physically gripping the grain rather than dissolving or fusing it the way super glue or epoxy would.

That’s why a well-fitted PVA joint can be stronger than the wood around it — you’ll break the board before that joint gives way.

It’s also why a loose joint fails no matter how much glue goes into it: there’s nothing for the glue to mechanically lock into across an actual gap.

🧴 Four Types Worth Knowing

  • Standard yellow wood glue is the everyday default — fast setting, full strength at 24 hours, and the right choice for most interior furniture and general woodworking.
  • White glue (the same PVA family, sometimes called school glue) is slightly weaker but better suited to paper, cardboard, and other porous craft materials rather than structural wood joints.
  • Waterproof wood glue swaps in additives that make it genuinely waterproof once cured, not just water-resistant — worth the extra cost for anything going outdoors, since standard glue will fail on exterior furniture eventually.
  • Cross-linked, polyurethane-modified glue is the heavy-duty option for high-stress or load-bearing joints and oily woods that resist standard PVA — overkill for most projects, but the right call when a joint’s failure would be a real problem.

📏 Fit Beats Quantity, Every Time

Dry-fit the joint before any glue touches it — pieces should come together smoothly with no forcing.

Any gap wider than about 1/32 inch is a real weakness that glue alone can’t bridge, no matter how much you stuff in it.

The actual goal is a thin, even coat on one surface only, applied so that clamping produces a small, visible bead squeezed out along the seam — that bead is proof the joint is filled and seated, not evidence of excess.

A gluey mess oozing everywhere means too much was used on a joint that probably needed re-cutting instead. Cut once, measure twice is not a thing.

🛠️ Clamp Properly, Then Leave It Alone

Assemble and clamp promptly once glue is applied — it starts setting within minutes.

Firm, even pressure is enough; wood glue doesn’t need bone-crushing force, and over-tightening can bow a panel or squeeze out more glue than the joint actually needs.

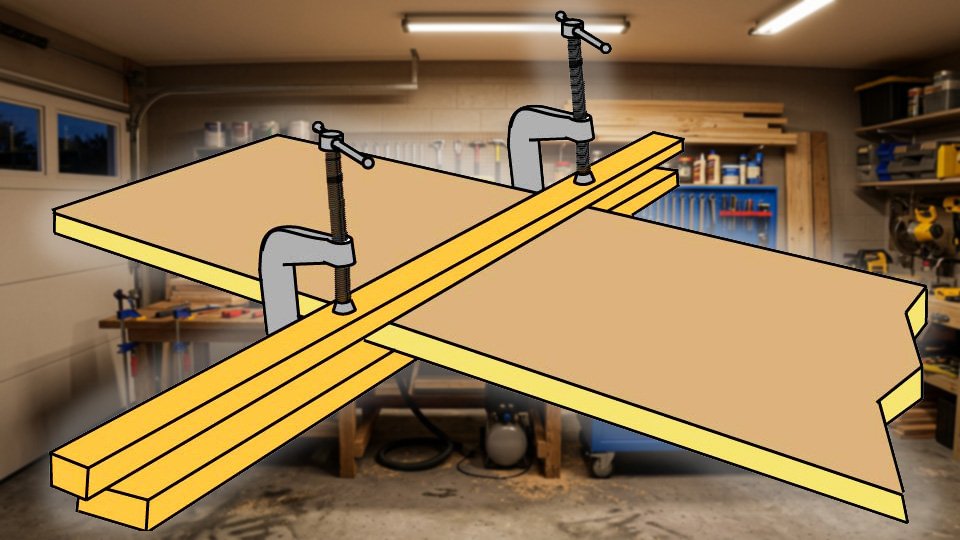
Wipe excess while it’s still wet, since dried glue has to be sanded off instead. For large panels, cauls (straight scrap boards clamped across the top and bottom of a panel) prevent the panel from bowing under clamp pressure.

A line drawing of clamp cauls by John D Reinhart

⏳ Patience Is the Last Ingredient

Wood glue reaches roughly 50 percent strength at 30 minutes — enough to unclamp for light handling — but full strength doesn’t arrive until close to 24 hours.

Testing a joint’s strength right after unclamping is one of the more common ways a genuinely good glue-up gets blamed for a failure that was really just impatience.

Cold workshops slow the whole process down further, so give a joint extra time in a chilly garage.

🧻 Where PVA Works Beyond Wood

Because it bonds through mechanical interlocking rather than chemistry, wood glue works on any porous material — paper, cardboard, cork, natural-fiber fabric, and MDF all take PVA well.

It won’t bond to non-porous surfaces like plastic, metal, or glass at all; those need an adhesive that works through actual chemistry, which is exactly the ground epoxy and super glue cover instead.

🛒 Gear Worth Having

Titebond Original Wood Glue — The industry-standard yellow glue that covers the overwhelming majority of interior woodworking without needing anything fancier.

Titebond III Waterproof Wood Glue — Genuinely waterproof once cured, not just water-resistant — the one to reach for on anything headed outdoors.

IRWIN Quick-Grip Bar Clamp Set — Even, adjustable pressure across the whole joint, which matters more to the final bond than the glue itself does.

As an Amazon affiliate, I earn from qualifying purchases. Thank you for supporting SkippityWhistles.

📖 Related Reads


SkippityWhistles is part of the WhistleBump group – find the rest of the family at WhistleBump.com.

2024

©2026 John D Reinhart/Skippitywhistles.com — All rights reserved

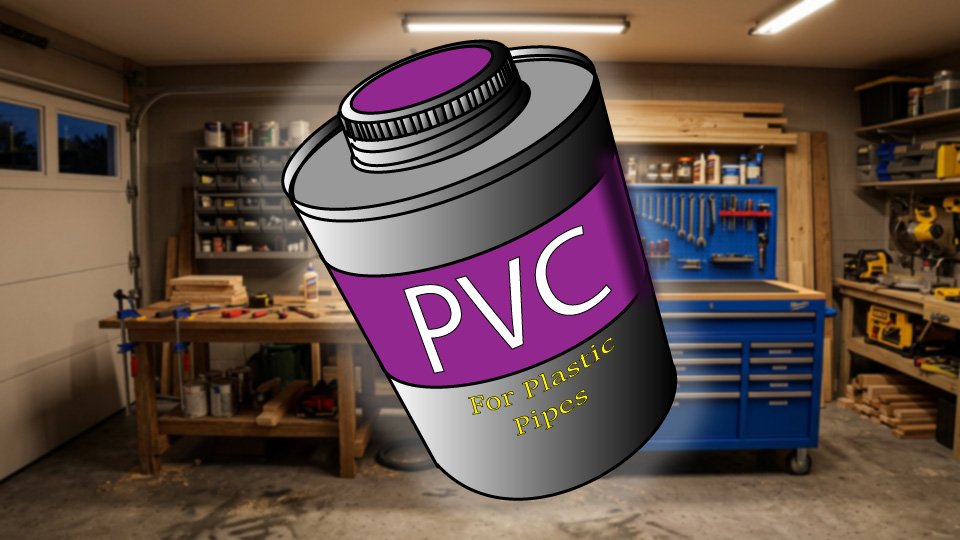
How to Work with PVC Adhesives (Or: The Purple Liquid That Doesn’t Do Second Chances)

PVC cement doesn’t glue—it dissolves plastic and fuses joints permanently. Here’s how to work with it so your plumbing doesn’t leak and your mistakes don’t become disasters.

Ron pressed a PVC fitting into place, decided mid-press that it needed a slight twist to “seat it better,” and gave it one. The pipe accepted the twist permanently, at an angle nobody wanted, because PVC cement isn’t glue holding two pieces together — it’s a solvent that dissolves the plastic and fuses both pieces into one continuous piece. There’s no repositioning a joint that’s already become a single object. Ron’s friends look at it and ask “did you fix that yourself?”

That one distinction — dissolve-and-fuse, not stick-and-hold — explains almost everything about how to work with it correctly.

🧪 Not Glue — A Solvent

PVC cement chemically softens the outer layer of both the pipe and the fitting. When pressed together, the two surfaces merge as the solvent evaporates.

Regular glue bonds two separate things; PVC cement makes them stop being two things. That’s why it’s irreversible — once fused, only a saw separates the joint again, not a wrench or a pull.

🎨 Matching Cement to Plastic

  • Standard PVC cement (usually purple or clear) is right for the Schedule 40 PVC used in most residential plumbing.
  • CPVC cement is required for CPVC (chlorinated PVC, often used for hot water lines). The two aren’t interchangeable, and using the wrong one simply won’t bond.
  • ABS cement is required for ABS, a plastic from an entirely different chemical family, common in older drain lines.
  • A combination cement rated for both PVC and CPVC exists and is worth the small extra cost on any project where you’re not entirely sure which plastic you’re holding.

🔵 Primer Isn’t Optional (Usually)

Most plumbing codes require a primer (typically a blue-tinted liquid) applied before cement, and for good reason — it strips away surface oxidation and oils, softens the plastic slightly, and gives the cement a cleaner surface to fuse against. Skipping it on anything pressurized, underground, or carrying hot water is both a code violation and a genuine risk to joint strength. When unsure, use it — a dollar of primer beats redoing a joint an inspector rejects.

🛠️ The Process: One Shot, Make It Count

  • Cut the pipe cleanly and deburr the edge – use a deburring tool, a file, or sandpaper to smooth the cut edge of the pipe. Rough edges prevent a proper fit and could weaken the fused joint.
  • Confirm everything is dry, clean, and correctly aligned before touching any cement, since this is the step where mistakes are still fixable.
  • Apply primer if required – it usually is.
  • Apply the cement, coating the outer pipe edge and the inner fitting surface evenly — not a soaking coat, just full coverage.
  • Press the pipe into the fitting with firm, straight, deliberate pressure — no twisting, which misaligns the joint rather than seating it.
  • Hold the parts together for the time the label specifies, usually 10 to 30 seconds.
  • Leave it completely alone. Light cure is often reached within 2 hours, but full cure for pressure testing can take a full 24, and rushing that step is one of the more common ways a fine-looking joint fails later. Leave. It. Alone.

❄️ Cold Weather Changes the Math

PVC cement cures noticeably slower below about 50°F, and will result in a genuinely weaker joint. If the project can wait for warmer conditions, do that. Or warming the the materials before cementing will be an effort worth doing rather than trusting a joint that cured too slowly in the cold to be fully sound.

🛒 Gear Worth Having

Oatey All-In-One PVC Cement with Primer — Combines primer and cement for smaller residential jobs, so there’s one less product to keep track of mid-project.

PVC Ratcheting Pipe Cutter — A clean, square cut with no burrs to file down afterward, which matters more than it seems once you’re trying to get a snug fit.

Nitrile Gloves, Solvent-Resistant, 100-Pack — PVC cement stains skin for days and isn’t something you want soaking in through bare hands over a whole project.

As an Amazon affiliate, I earn from qualifying purchases. Thank you for supporting SkippityWhistles.

📖 Related Reads


SkippityWhistles is part of the WhistleBump group – find the rest of the family at WhistleBump.com.

2011

©2026 John D Reinhart/Skippitywhistles.com — All rights reserved

How to Use a Power Sander (Or: The Tool Does the Work, Not Your Elbow)

A power sander does the work through motion, not muscle — press down and you’re not sanding faster, you’re just sanding wrong.

Rhonda leaned into her belt sander like it owed her rent, figuring more pressure meant a faster finish on the tabletop she was smoothing. Thirty seconds later, the tabletop had a dip in it deep enough to serve soup out of. The sander hadn’t malfunctioned. It had done exactly what Rhonda told it to do, which was the actual problem.

A power sander removes material through motion and friction, not through how hard you lean on it. Understanding that one idea prevents almost every disaster a power sander is capable of causing.

🌀 Three Sanders, Three Jobs

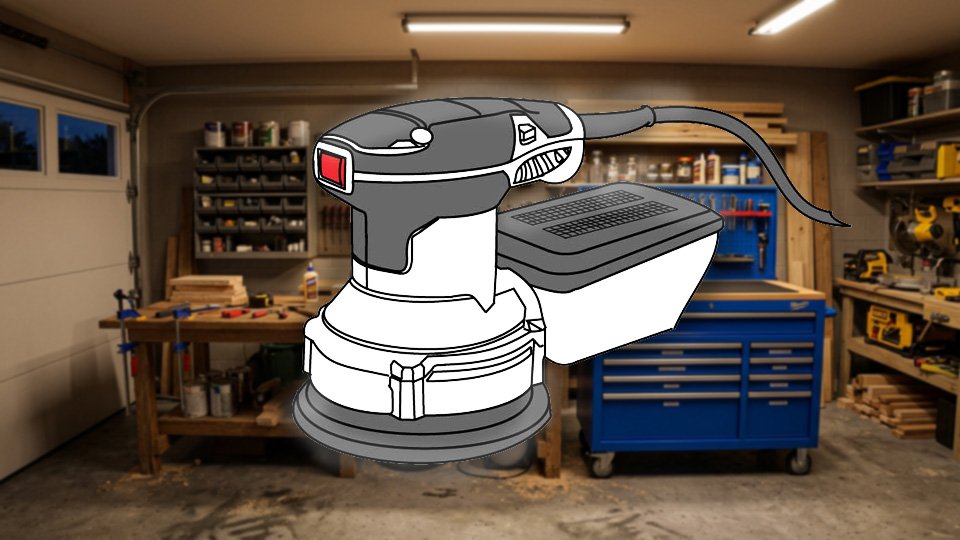
  • A random orbital sander (a round pad that spins while also moving in small random circles) is the forgiving, do-almost-everything option — the randomness in its motion is specifically what prevents the circular swirl marks other sanders can leave behind.
  • An orbital sander (a smaller square pad that moves in tight, consistent circles) produces an extremely smooth finish but works slower and is best saved for fine detail work.
  • A belt sander (a continuous loop of sandpaper running fast around two rollers) removes material aggressively — genuinely fast — which makes it the right tool for stripping paint or flattening rough lumber and the wrong tool for anything needing a delicate touch.

For most household projects, a random orbital sander covers the job; the belt sander is a specialist brought in for rough, heavy removal only.

🔢 Grit: Start Rough, Work Up

Sandpaper grit is a number rating system defining how coarse or fine a sandpaper’s abrasive particles are.

Lower numbers are coarser and remove material fast, higher numbers are finer and smooth or polish without removing much at all. An 80-grit sheet cuts through old paint aggressively. A 320-grit sheet barely leaves a mark, which is exactly the point once you’re past removing anything and into finishing.

The rule that covers almost every situation: start coarse when you’re removing material, start fine when you’re finishing a surface that’s already close to done.

⚡ Starting, Floating, and Stopping

Turn the sander on before it touches the wood — starting it already pressed against the surface can dig a small gouge in the first instant of spin-up.

Once it’s running, let the tool’s own weight do the work; guide it with two hands rather than pressing down; a sander barely needs to touch the surface to be effective.

Keep it moving in slow, overlapping passes rather than lingering in one spot, the same way you’d mow a lawn — stopping in place for even a few extra seconds creates a shallow dip that’s far more work to sand back out than it would have been to avoid.

Lift the sander off the surface before switching it off, letting it wind down in the air rather than against your work.

🧹 Dust Isn’t Optional

Sanding dust does two things at once: it clogs the sandpaper, which makes it cut poorly and can actually scorch the surface, and it fills the air you’re breathing.

If the sander has a dust port, connect it to a shop vacuum or use the attached collection bag every time, not just when somebody’s looking.

A dust mask or respirator isn’t a suggestion for extended sanding sessions — fine wood dust is a genuine respiratory irritant, and the tool that makes a project faster shouldn’t make your lungs pay for it.

🛑 Knowing When to Stop

A surface is done when it feels smooth under bare fingertips (a better test than eyesight alone), looks even under raking light from the side, and shows a consistent scratch pattern with no remaining gouges or high spots.

More sanding past that point doesn’t improve anything — it just thins the material, softens edges that should stay crisp, and burns time you didn’t need to spend. Smooth is a finish line, not a direction to keep walking past.

🛒 Gear Worth Having

DEWALT 5-Inch Random Orbital Sander (DWE6423K) — The forgiving all-purpose sander that covers nearly every household job without the learning curve or the risk a belt sander carries.

Bosch Universal Vacuum Hose Adapter Kit — Connects most sanders to a standard shop vacuum, which keeps sandpaper cutting cleanly instead of clogging and scorching halfway through the job.

3M N95 Sanding and Dust Respirator, 5-Pack — Genuinely necessary for any extended sanding session — the dust is a real irritant, and this is the cheapest insurance in the whole project.

As an Amazon affiliate, I earn from qualifying purchases. Thank you for supporting SkippityWhistles.

📖 Related Reads


SkippityWhistles is part of the WhistleBump group – find the rest of the family at WhistleBump.com.

2016

©2026 John D Reinhart/Skippitywhistles.com — All rights reserved

How to Patch a Hole in Drywall (Or: Evicting the Tenant You Never Agreed to House)

That hole has been staring back at you for months. It’s fixable, it’s not a big deal, and it definitely doesn’t deserve its own zip code.

Ron’s hole has been in the hallway wall so long it’s basically achieved squatter’s rights. He’s rearranged a bookshelf to hide it. He’s told two separate guests it’s “a vent, actually.” At this point the hole has more tenure in that house than Ron’s own couch. It is, statistically, one of the least threatening things Ron has ever avoided, and it is entirely fixable in an afternoon.

Whatever put the hole there — a doorknob, a wrestling match with a dresser, a moment nobody’s proud of — the fix depends almost entirely on one thing: how big it is. Get that part right and the rest is just patience wearing a putty knife.

🔍 Know Your Enemy: Sizing Up the Hole

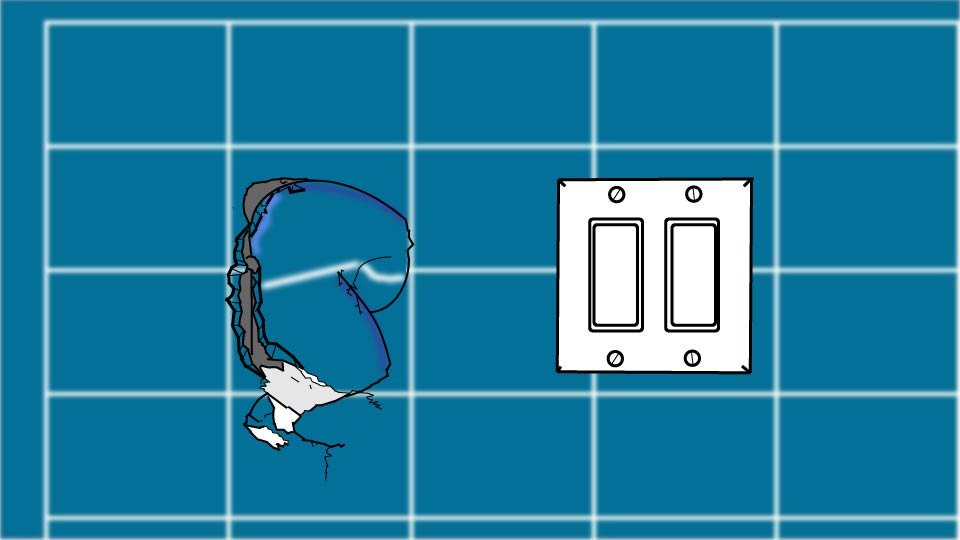
A small hole (up to about a quarter inch — nail holes, old picture hangers, the pushpin incident) isn’t really a patch at all, it’s a filling job. A medium hole (roughly half an inch to four inches — doorknob dents, a failed wall anchor, a chair that got a little too enthusiastic) needs an actual patch, but nothing dramatic. A large hole (bigger than a fist) needs backing — something solid behind the new drywall to screw into — but it still doesn’t need a professional, just more patience and a longer afternoon.

🩹 Small Holes: The Five-Minute Redemption Arc

Scrape any loose bits from the hole so you’re working with clean edges. Press in spackle with a putty knife until it’s level with the wall — not mounded, level. Wipe the excess flat, let it dry (usually thirty minutes to an hour), then sand lightly and touch up with paint. Two thin coats beat one thick one; thick spackle shrinks as it dries and leaves a small crater that stares back at you exactly like the original hole did, just smugger.

🕳️ Medium Holes: Mesh Patch, Meet Compound

Lightly sand around the hole so the patch has a clean surface to grip. Peel the backing off a self-adhesive mesh patch (a fiberglass mesh square with adhesive on one side, sized to stick directly over a hole and give joint compound something to bond to) and press it on firmly — no wrinkles, no air pockets sneaking underneath like it’s hiding from you. Apply joint compound (a plaster-like paste used to fill and smooth drywall repairs) over the patch with a putty knife, feathering the edges wider than the layer before it. Let it dry fully — a genuine 24 hours, not “it feels dry-ish” — sand smooth, add a second thin coat if the patch outline is still visible, then prime and paint.

🧱 Large Holes: When the Wall Needs a Backbone

Cut the damaged area into a clean rectangle with a utility knife — straight edges make everything downstream easier. Cut two wood backing strips (short pieces of scrap lumber, 1x2s work fine) and screw them horizontally inside the wall, spanning the opening, so there’s something solid behind the hole to anchor to. Cut a new drywall patch to fit snugly against the backing, screw it in place every 6 to 8 inches, then tape all four seams with drywall tape (a reinforcing strip embedded in compound to keep a seam from cracking later). From there it’s the same compound-feather-sand cycle as a medium hole, just wider and usually needing three coats instead of two. This is the exact method contractors use — it’s not a shortcut, it’s just the real thing, done at your own pace and price.

🪶 Feathering: The Trick That Makes It Disappear

Feathering means spreading each coat of joint compound progressively wider and thinner than the last, so the edge blends into the surrounding wall instead of stopping abruptly. It is the single detail that separates “I see exactly where you patched this” from “wait, there was a hole here?” Thick, sharp-edged compound reads as a patch from across the room. Thin, wide, gradually-fading compound reads as nothing at all. When in doubt, go thinner and wider on the next coat — you can always add another pass, but scraping off an overly thick coat will make a sight far worse than the hole ever was.

🎨 Sand, Prime, Paint: Sticking the Landing

Sand with light pressure in small circles, not long aggressive strokes — you’re smoothing, not sanding your feelings out on the wall. A work light held sideways against the wall reveals bumps and dips that regular overhead lighting hides completely. Prime before painting, especially on anything bigger than a small hole — skip it and the patch can show through as a slightly different sheen or shade, sometimes called a ghost patch, which is a spookier name than the problem deserves. To avoid a haunted hallway, prime first.

🛒 Gear Worth Having

FibaTape Self-Adhesive Wall Repair Patch — The mesh patch that turns a medium hole into a formality — press, smooth, and the compound does the rest.

USG Sheetrock Pre-Mixed All-Purpose Joint Compound — Ready straight out of the bucket, so mixing powder isn’t one more way for a first patch to go sideways.

3M N95 Sanding and Dust Respirator, 5-Pack — Joint compound dust is genuinely unpleasant to breathe for an afternoon — cheap insurance for lungs you’ll want later.

As an Amazon affiliate, I earn from qualifying purchases. Thank you for supporting SkippityWhistles.

📖 Related Reads


SkippityWhistles is part of the WhistleBump group – find the rest of the family at WhistleBump.com.

2019

©2026 John D Reinhart/Skippitywhistles.com — All rights reserved

How to Drive a Screw into Concrete

Concrete screws, not wood screws. Hammer drill, not regular drill. Here’s exactly how to drive a screw into concrete without breaking bits, stripping screws, or losing your mind.

(Or: These Are Not the Screws You’re Looking For)

Ron tried to mount a hose reel bracket to his patio with a regular wood screw, on the theory that a screw is a screw and concrete is basically just a really committed kind of dirt. The screw snapped clean in half before it got a quarter inch in. Concrete wasn’t being difficult. It was just never going to accept a fastener that wasn’t actually built for it, no matter how much confidence Ron brought to the drill.

Concrete has no give — it doesn’t compress or flex around a fastener the way wood does, which means the usual approach of muscling a screw in until it seats simply doesn’t work here. The good news: once you’re using the right screw and the right bit, this stops being a fight and turns into a fairly ordinary weekend task.

🔩 Concrete Screws, Not Regular Screws

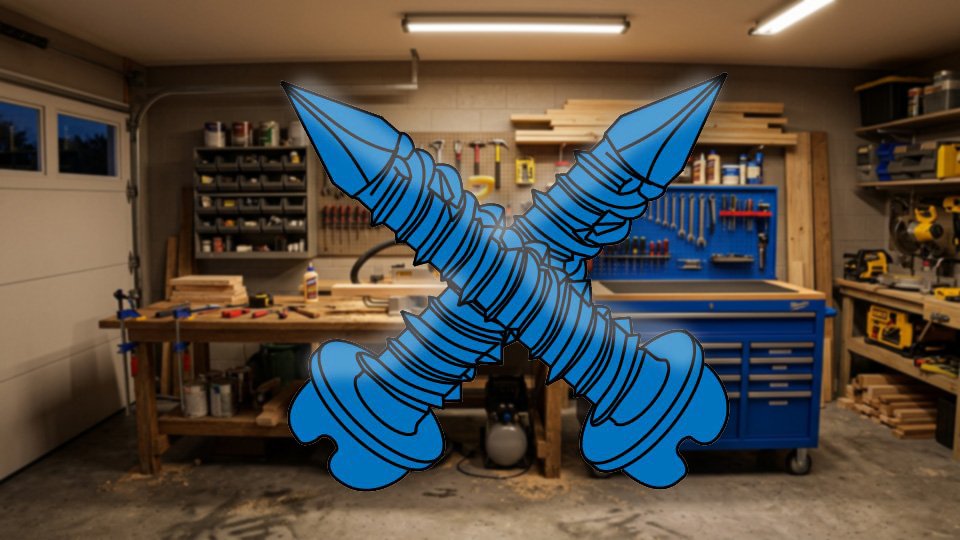
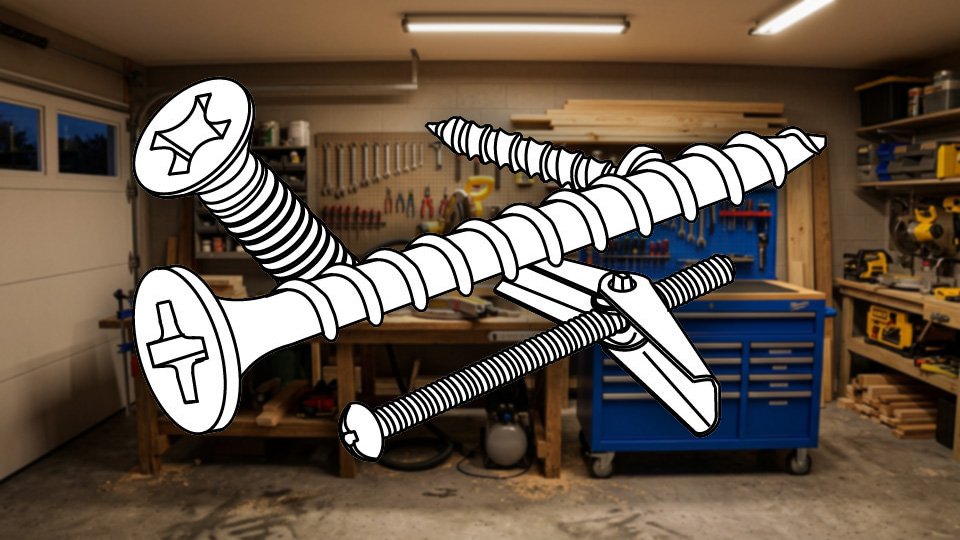
Concrete screws (sold under names like Tapcon, hardened and threaded specifically to cut into concrete, brick, and block) are the standard choice for most household jobs — shelves, brackets, railings, outdoor fixtures. They cut their own threads directly into a pre-drilled hole, no separate anchor required, and they’re easy to back out and reposition if you get the spot wrong. For genuinely heavy loads or crumbly, weaker concrete, an expansion anchor (a sleeve that spreads and grips the surrounding concrete from the inside as its bolt is tightened) offers more holding power, but it’s overkill for the average bracket or shelf. Regular wood or drywall screws are never the answer here — they’re too soft, and concrete will snap them before they’ve done any useful work.

🛠️ The Process, Start to Finish

Mark the exact spot with a pencil, not a pen — concrete resists pencil far better and you won’t lose your mark to a wet surface. Chuck a carbide-tipped masonry bit (sized to match the screw’s diameter) into a hammer drill (a drill with a pounding, percussive action layered onto the spin, purpose-built for punching through masonry) and drill straight in, slightly deeper than the screw’s length, letting the hammer action do the work rather than leaning your body weight into it. Then comes the step everyone wants to skip: clean the hole completely, with a shop vacuum, compressed air, or at minimum a stiff brush — leftover dust in the hole is the single biggest reason a concrete screw fails to grip. Finally, drive the screw with an impact driver or drill/driver, straight and steady, stopping the moment the head seats flush. A little resistance going in is normal; a sudden squeal or bind usually means dust is still in the hole or the bit wandered off-angle — back out, clean again, and try once more rather than forcing it.

🧯 Worth Taking Seriously

Concrete chips fly when drilled, and they’re sharp — safety glasses aren’t optional here. A hammer drill is genuinely loud enough to warrant hearing protection for more than a hole or two, and masonry dust is fine enough to justify a dust mask on any job bigger than a handful of holes. If you’re drilling into a wall or slab that might have electrical conduit or plumbing behind it, that’s worth confirming before you start — concrete doesn’t announce what’s hiding a few inches in.

🚫 The Mistake That Ends This Job Early

Skipping the pilot hole cleanout is the single most common reason a properly installed concrete screw still ends up loose. It’s the least satisfying step — nothing to show for thirty seconds of vacuuming — which is exactly why it’s the one people skip, and exactly why it’s the one that actually determines whether the screw holds.

🛒 Gear Worth Having

Tapcon Concrete Screw Anchor Kit — A mixed-size kit that covers most household mounting jobs without a separate hardware store trip for every project.

Bosch Carbide-Tipped Masonry Bit Set — Matched sizing to standard concrete screw diameters, which spares you the guesswork of pairing a bit to a screw by eye.

DEWALT Corded Hammer Drill — The actual right tool for this job — a regular drill will overheat and dull its bit long before it finishes what a hammer drill does easily.

As an Amazon affiliate, I earn from qualifying purchases. Thank you for supporting SkippityWhistles.

📖 Related Reads


SkippityWhistles is part of the WhistleBump group – find the rest of the family at WhistleBump.com.

2003

©2026 John D Reinhart/Skippitywhistles.com — All rights reserved

How to Choose the Right Drill Bit (Right Now, Mid-Project)

You’ve got the drill. You’ve got the bits. Now what? Quick guide to picking the right drill bit for wood, metal, concrete, drywall, or tile—with zero guessing.

Rhonda’s got the drill in one hand, the project in the other, and a case full of bits that all look roughly the same shade of silver. She already made the smart purchase — a real bit set instead of the lonely single bit that comes free with a cheap drill — but owning the right set and knowing which one to actually chuck in right this second are two completely different moments. This is the second one.

The good news: which bit you need almost always comes down to one question first, and everything else follows from the answer.

🪵 Drilling Into Wood

  • For a pilot hole ahead of a screw, grab a bit slightly smaller than the screw’s shaft — a #8 screw wants roughly a 1/8-inch bit, giving the threads something to grip without splitting the wood.
  • For a full-sized hole for an anchor or bolt, match the bit to the exact hardware size; a 1/4-inch anchor gets a 1/4-inch bit, no rounding up or down.
  • For a clean, visible hole in finished wood, a Forstner bit (a bit with a rimmed cutting edge that bores a flat-bottomed hole with minimal tear-out) leaves a much cleaner edge than a standard twist bit. Wood tolerates higher drill speed well — this is the material where you can let the drill run fast.

🔩 Drilling Into Metal

A standard HSS bit (high-speed steel, the common all-purpose metal bit) handles most sheet metal and mild steel at a slower speed than wood — metal punishes a bit that’s spinning too fast far more than wood does. For stainless steel or hardened metal, step up to a cobalt bit, which resists dulling much better, and add cutting oil, which genuinely changes how cleanly the bit cuts rather than just reducing friction cosmetically. If the bit starts smoking, that’s not effort, that’s damage — stop, let it cool, and back off the speed.

🧱 Drilling Into Concrete or Masonry

This is the one category where a regular bit simply will not do the job — a standard twist bit will bind, overheat, and dull almost immediately against masonry. A carbide-tipped masonry bit, ideally with a hammer drill for anything larger than about a quarter inch, is the only real option. Marking the spot with a nail tap first gives the bit a starting point so it doesn’t wander across the surface before it bites in.

🧻 Drilling Into Drywall

Drywall is the most forgiving material on this list — almost any bit sized to the anchor works fine at normal speed, no special technique required. The one thing worth knowing: if you suddenly feel real resistance mid-hole, you’ve likely hit a stud, and it’s worth switching to a wood bit and slowing down rather than forcing a bit that wasn’t meant for lumber straight through it.

🚿 Drilling Into Tile or Glass

Both materials punish speed and impact, which is the opposite of how most drilling works. A carbide-tipped or diamond-coated tile bit, run at low speed with no hammer function, and a strip of masking tape over the mark to keep the bit from skating, is the standard approach. Glass asks for the same technique but even lighter pressure and patience — this is a hold-steady-and-let-it-work material, not a lean-into-it material.

⚡ The One Rule That Covers Almost Every Mistake

Match the bit to the material, match the speed to the bit, and drill a pilot hole before driving any fastener. Nearly every broken bit, blown-out hole, or ruined tile traces back to skipping one of those three things — usually the speed, since it’s the easiest one to forget mid-project when the drill’s already spinning.

🛒 Gear Worth Having

IRWIN Titanium Combo Drill Bit Set — A titanium coating that holds an edge through both wood and light metal, which covers the two materials most home projects actually involve.

Bosch Carbide-Tipped Masonry Bit Set — The one category on this list where a regular bit genuinely won’t work — this is the actual right tool, not a nice-to-have upgrade.

Diamond-Coated Tile and Glass Bit Set — Sized for the anchors most towel bars and mirror clips actually call for, without needing a full tile-work bit collection.

As an Amazon affiliate, I earn from qualifying purchases. Thank you for supporting SkippityWhistles.

📖 Related Reads


SkippityWhistles is part of the WhistleBump group – find the rest of the family at WhistleBump.com.

2009

©2026 John D Reinhart/Skippitywhistles.com — All rights reserved

How to Choose the Right Adhesive (Or: They’re Not All the Same)

Super glue, wood glue, epoxy — they all say “strong bond” on the label, but they’re not the same product. Here’s how to match the right adhesive to the right job every time.

Every adhesive on the shelf says something about strength. “Industrial strength.” “Maximum bond.” “Bonds everything.” And they’re not lying, exactly — they do bond things strongly. The problem is that “strongly” is relative, and the wrong adhesive for the wrong job produces a joint that fails in ways the right adhesive never would.

Super glue on a structural wood joint. Wood glue on a PVC pipe. Construction adhesive on a ceramic figurine. All of these create a bond. None of them hold.

The right adhesive isn’t the strongest one on the shelf — it’s the one whose chemistry matches the materials being joined, whose working time matches the complexity of the job, and whose cured properties match what the joint needs to do. Once those three things align, the adhesive does its job and disappears. Here’s how to get there.

❓ The Four Questions That Choose Your Adhesive

Before reaching for any glue, answer these four questions. The right product becomes obvious.

What materials are being bonded? Wood to wood, metal to metal, plastic to plastic, ceramic to ceramic — different surfaces require different chemistry. Adhesives work through chemical compatibility, and some won’t bond certain surfaces at all. This is the first filter.

Is this a structural joint or a cosmetic one? A joint carrying weight, resisting stress, or doing mechanical work needs structural adhesive — epoxy or construction adhesive. A joint that just needs to hold something together for appearance needs much less. The right answer for a decorative ceramic repair is completely wrong for a furniture joint under load.

What environment will the joint live in? Outdoors, in a wet area, exposed to heat, or subject to vibration — all of these affect which adhesive holds long-term. Standard wood glue fails outdoors. PVC cement is useless on wood. Regular super glue fails in wet conditions. Environment is not an afterthought.

How much working time is needed? Some adhesives set in seconds. Others allow hours of adjustment. That’s not a quality difference — it’s a design difference. A complex assembly with many pieces needs working time. A simple chip repair needs to set fast before the piece shifts. Match the working time to the job.

🔵 Cyanoacrylate (Super Glue) — Fast, Precise, and Not What You Think

Super glue — technically cyanoacrylate (CA glue) — sets in seconds by reacting with trace moisture on the surfaces being bonded. The result is a hard, rigid bond that’s surprisingly strong on small, tight-fitting surfaces. It’s the right tool for quick repairs on non-porous materials: ceramic chips, small plastic breaks, metal-to-metal repairs where the fit is tight and the load is light.

What super glue is not: a gap-filler. It requires close-fitting surfaces to work properly. A gap between the pieces means no bond. It’s also brittle — it resists pulling forces well but fails under impact or stress. And it bonds skin instantly using the same moisture-reaction that bonds everything else, which is why gloves are worth keeping nearby.

The gel formula is better for most repair work than the liquid: thicker, less likely to run onto surfaces where it doesn’t belong, slightly more working time before the bond sets. For anything requiring precision — fitting a ceramic handle, reattaching a small decorative piece — gel is the right choice.

🟡 Two-Part Epoxy — The Structural Answer

Two-part epoxy comes in two containers — a resin and a hardener — that are mixed together immediately before use. The chemical reaction between them produces a rigid, extremely strong bond that fills gaps, works on almost any surface, and often ends up stronger than the materials being bonded.

Epoxy is the answer for structural repairs: metal brackets, furniture joints under load, ceramic or porcelain repairs where the piece will actually be used, bonding dissimilar materials that nothing else will stick to. It’s also the right choice when there’s a gap between surfaces — unlike super glue, epoxy fills the gap as it cures.

The working time varies by formula. Five-minute epoxy (the most common) gives roughly five minutes of working time before it begins to set, which is enough for straightforward assembly. Thirty-minute epoxy allows more complex positioning. The tradeoff: faster-setting epoxy is slightly less strong at full cure than slower-setting formulas. For most home repairs, five-minute is entirely adequate.

Mix only as much as the job requires. Epoxy can’t be stored once the two parts are combined — whatever is mixed needs to be used before it sets. Small syringe dispensers that meter equal amounts of resin and hardener automatically are the most convenient format for home use.

🟤 Wood Glue (PVA) — The Right Tool for Wood

PVA wood glue — polyvinyl acetate (PVA) — is specifically designed for wood-to-wood joints, and it performs them better than anything else. It penetrates wood grain, cures hard, and creates a joint that is often stronger than the wood itself. When a wood joint fails under load, the wood typically breaks before the glue does.

The critical requirement is clamping. Wood glue needs pressure applied during the curing process to draw the joint tight and ensure full contact between the surfaces. The clamp time is usually 20 to 30 minutes. Full cure takes 24 hours — the joint feels solid after a few hours, but full strength doesn’t develop until the next day. Don’t stress-test a glued wood joint before it’s fully cured.

Wood glue cleans up with water before it cures and can be sanded and painted after curing. It’s the right choice for furniture repair, cabinet assembly, shelf construction, and any wood-to-wood joint that will be finished. It is not the right choice for outdoor projects exposed to standing water or repeated wetting — use a waterproof-rated wood glue (look for Type I water resistance rating on the label) for those applications.

🔴 PVC Cement — Not Actually a Glue

PVC cement doesn’t bond two pieces of PVC pipe the way an adhesive bonds two surfaces. It dissolves the plastic surface of both pieces slightly, then fuses them together at a molecular level as the solvent evaporates. The result isn’t two pieces stuck together — it’s one piece of plastic where a joint used to be.

This is why PVC connections are permanent and essentially impossible to undo, and why using the wrong cement on the wrong plastic is a serious problem. PVC cement works on PVC. ABS cement works on ABS (the black drain pipe used in older homes). CPVC cement works on CPVC (the hot water supply pipe). These are not interchangeable — using PVC cement on CPVC can actually damage the pipe rather than bonding it. The label specifies which plastic the cement is rated for. Read it before applying.

Most residential PVC plumbing work also requires primer before cement — a purple chemical that prepares the plastic surface for bonding. Some cements include primer in the formula; most don’t. The primer step is not optional for pressure-rated plumbing work.

⚫ Construction Adhesive — For Heavy Materials Under Stress

Construction adhesive is for bonding large building materials: subfloor panels to joists, drywall to framing, underlayment to subfloor. It comes in cartridges that fit a caulk gun (the same tool used for caulking, applied in a similar bead pattern).

What makes it different from other adhesives is flexibility. Where super glue and epoxy cure rigid, construction adhesive cures with some flexibility, which allows it to absorb vibration and movement. This is why it’s ideal for subfloors — applied under the panels before screwing them down, it fills the minor gaps between the panel and the joist, eliminating the movement that causes floor squeaks. A subfloor fastened with screws alone squeaks when the wood moves slightly. Add construction adhesive and the movement disappears.

It’s overkill for small repairs and awkward for precise work. It’s the right tool when large surfaces need to be bonded under building conditions.

🛒 Gear Worth Having

Gorilla Wood Glue — 8 oz., Water Resistant PVA, Natural Color, Paintable & Sandable — The benchmark PVA wood glue. Cross-linking formula creates a bond stronger than the wood around it. Twenty to thirty minutes of clamp time, fully cured in 24 hours. Dries a natural translucent tan with no foaming, paintable and sandable for a clean finish. Water resistant (ANSI/HPVA Type II rated) for indoor or outdoor projects. The reliable answer for any wood-to-wood joint from furniture repair to cabinet assembly.

Gorilla Super Glue Gel XL — 25g, Clear, Anti-Clog Cap — The gel formula for precision repair work. Thicker than liquid super glue so it doesn’t run onto adjacent surfaces, dries completely clear, sets in 10 to 45 seconds, full cure in 24 hours. The anti-clog cap keeps the bottle usable months after opening. The right tool for ceramic chips, small plastic repairs, and any close-fitting surface that needs a fast, invisible bond.

J-B Weld ClearWeld 5-Minute Epoxy Syringe — 25ml, Clear — Two-part epoxy in a syringe that dispenses equal amounts of resin and hardener automatically — no measuring, no guessing the ratio. Sets in five minutes, cures to full strength in one hour, dries completely clear. 3,900 PSI tensile strength — stronger than most of the materials it bonds. The structural repair answer for metal, ceramic, glass, and bonding dissimilar materials that nothing else will hold.

As an Amazon affiliate, I earn from qualifying purchases. Thank you for supporting SkippityWhistles.

📖 Related Reads

How to Repair Broken Porcelain and Pottery

How to Choose the Right Caulk for Your Home

Seals, Gaskets, and Plumber’s Tape

The right adhesive is patient. It does its job and disappears into the joint. The wrong adhesive announces itself eventually — usually at the worst possible moment, usually in the most inconvenient location. Ask the four questions, match the chemistry to the materials, and the joint holds. That’s the whole deal.


SkippityWhistles is part of the WhistleBump group – find the rest of the family at WhistleBump.com.

2010

©2026 John D Reinhart/Skippitywhistles.com — All rights reserved

Nuts, Bolts, and Washers: What They Are and Which One You Actually Need

The hardware aisle doesn’t have to be overwhelming. Here’s what hex bolts, carriage bolts, lock nuts, and washers actually do — and the one assortment kit that ends the hardware store trips.

Walk into the hardware aisle and stare at the fastener section. Hex bolts, carriage bolts, lag bolts, cap nuts, lock nuts, fender washers, Grade 5, Grade 8, coarse thread, fine thread. The whole aisle feels like a mechanical dictionary fell off a shelf.

Here’s the thing: you don’t need to understand every variation on the shelf. You need to understand how bolted connections work. Once you understand the principle — how a bolt and nut create clamping force — choosing the right hardware becomes obvious. Everything else is details.

Here’s how it works.

⚡ How a Bolt Actually Works

A bolt is not a screw.

A screw threads directly into the material it’s fastening — wood, drywall, metal. The strength of a screw lies in the grip the screw’s threads (the sharp spiral around the outside) have on the material.

A bolt passes all the way through the material and is secured on the other side with a nut. That distinction matters because it changes what the connection can do.

When you tighten a bolt and nut together, the bolt stretches slightly under tension. The nut resists that tension from the other side. The materials sandwiched between the bolt head and the nut get squeezed together — clamped. That clamping force is what makes a bolted connection strong. The whole joint shares the load across the contact area between the surfaces, not just at the threads.

This is why bolts are the right choice for structural connections, joints that will experience vibration or stress, and anything that might need to come apart later. Screws are convenient. Bolts are dependable. For connections that matter, bolts usually win.

🔵 Hex Bolts — The One You’ll Reach For Most

A line drawing of a hex bolt by John D Reinhart

A hex bolt has a six-sided head that tightens with a wrench or socket. It’s the workhorse of the fastener world — the bolt that handles structural framing, deck ledgers, outdoor projects, and anything that needs serious, reliable strength.

The hex head distributes tightening force evenly and gives a wrench or socket a solid grip from six different angles. It’s not elegant, but it holds. When there’s no specific reason to use something else, hex bolts are the default.

You’ll see “hex bolt” and “hex cap screw” used interchangeably at most hardware stores, and for most DIY purposes they perform the same job. The technical difference — tighter manufacturing tolerances and a washer face built into the cap screw head — matters in precision mechanical applications, not in lumber and deck construction. If it has a six-sided head and the size and grade match the project, it works.

🟤 Carriage Bolts — The Wood-Friendly Option

A line drawing of a carriage bolt by John D Reinhart

A carriage bolt has a smooth, rounded dome head with a square section just below it. That square shoulder is the functional feature: when you push a carriage bolt through a drilled hole in wood, the square shoulder bites into the wood and prevents the bolt from spinning while you tighten the nut from the other side. No second wrench needed on the bolt head.

This makes carriage bolts ideal for wood-to-wood connections — decks, fences, gates, outdoor furniture — where holding a wrench on both sides would be awkward or impossible. The rounded dome head also looks cleaner than a hex head on visible surfaces, which is why carriage bolts show up wherever appearance matters alongside strength.

🪵 Lag Bolts (Lag Screws) — The Structural Wood Fastener

A line drawing of a lag bolt by John D Reinhart

Lag bolts look like very large hex-headed bolts but work like screws — they thread directly into wood without a nut. The distinction matters enough that they’re technically called lag screws, but the name “lag bolt” has stuck because they look like bolts and are sized like bolts.

They’re for heavy structural connections into wood: ledger boards fastened to house framing, mounting heavy items into studs, and any application where you need serious pulling strength into solid wood. The large threads and substantial diameter create a hold that smaller screws can’t match.

Lag screws require a pilot hole — a pre-drilled hole slightly smaller than the bolt diameter — before installation. Skip the pilot hole and the wood can split, or the lag screw strips the threads it’s trying to create. The pilot hole is not optional.

🔒 Lock Nuts — The Ones That Stay Put

A line drawing of a lock nut by John D Reinhart

A standard hex nut tightens against the bolt and stays put under normal conditions. Under vibration — from machinery, from engines, from the general shaking that happens in the real world — it can back off slowly until the connection loosens. A lock nut solves this.

The most common type is the nylon insert lock nut (also called a nyloc nut — a plastic nylon ring inside the nut that grips the bolt threads when tightened). The nylon deforms slightly around the threads, creating friction that resists loosening. Once a nyloc nut is seated, it doesn’t back off under vibration.

Use them on anything that moves, shakes, or vibrates: lawn equipment, appliances, furniture with mechanical parts, outdoor installations exposed to wind loading. They cost slightly more than standard nuts and are worth it every time.

🪣 Washers — The Part Everyone Skips and Shouldn’t

A washer is a flat ring of metal — or a split ring in the case of a lock washer — that sits between the bolt head and the surface, and between the nut and the surface on the other side.

Flat washers distribute the clamping load across a larger area. Without a washer, the bolt head or nut bears against a small contact area, which can compress or damage softer materials — wood, drywall, plastic — and allows the bolt to sink in over time as the material compresses. A washer spreads that load. It also protects the surface from being marred by the rotating bolt head during tightening.

Lock washers add vibration resistance. A split lock washer has a small gap that creates a spring effect, maintaining pressure against the nut even as the joint vibrates slightly. They’re used under nuts on connections that will experience movement.

The practical rule: use a flat washer under every bolt head and every nut, on every project. A washer costs a few cents. The repair it prevents costs considerably more.

📊 Bolt Grades — Strength Ratings Made Simple

Bolts are graded by strength, and the grade is marked on the bolt head with radial lines — the lines that look like clock positions stamped into the top of the bolt.

No markings means Grade 2 — basic strength, light-duty applications. Three radial lines means Grade 5 — medium-high strength, suitable for the vast majority of home and construction projects. Six radial lines means Grade 8 — very high strength, for heavy structural and mechanical applications where the specifications call for it.

Grade 5 handles nearly everything a homeowner encounters. Deck construction, outdoor furniture, shelving hardware, general structural connections — Grade 5 is the right choice and doesn’t require the premium cost of Grade 8. When a specification, building code, or manufacturer instruction calls for Grade 8, use it. Otherwise, Grade 5 is correct.

🛒 Gear Worth Having

1035-Piece Grade 5 Nut, Bolt & Washer Assortment — Hex Bolts, Hex Nuts, Lock & Flat Washers, 30 Bins — The assortment that ends the hardware store trips. 1,035 Grade 5 hex bolts, hex nuts, lock washers, and flat washers in 1/4″, 5/16″, 3/8″, and 7/16″ sizes, organized in 30 labeled bins. Every size you’ll use regularly in home DIY, all in one organized unit that sits on a shelf and stays there. The bins are labeled so finding the right piece takes seconds rather than sorting through a coffee can. This is the investment that pays for itself on the first project it saves a trip for.

Carriage Bolt Assortment — 1/4″-20 & 5/16″-18, with Nuts and Washers, 100 Pieces — The wood-connection companion to the hex bolt assortment. Carriage bolts in the two most common residential sizes, with matching nuts and washers included. Covers deck railings, fence construction, outdoor furniture, and any wood-to-wood connection where the rounded head and self-locking square shoulder make the job easier. Hot-dip galvanized for outdoor use.

Nylon Insert Lock Nut Assortment — 1/4″-20, 5/16″-18, 3/8″-16, 140 Pieces — Nyloc lock nuts in the three most common residential bolt sizes. The nylon ring inside each nut grips the bolt threads and resists loosening under vibration. Use them anywhere a standard nut might back off over time: outdoor connections, equipment mounting, anything that shakes or moves seasonally. Stainless steel for corrosion resistance. Keep these alongside the main assortment — cheap insurance against connections that gradually loosen themselves.

As an Amazon affiliate, I earn from qualifying purchases. Thank you for supporting SkippityWhistles.

📖 Related Reads

How to Use a Torque Wrench

How to Use a Socket Wrench

The DIYer’s Toolbox

The hardware aisle stops being overwhelming the moment the underlying principle is clear: a bolt and nut create clamping force, the grade determines how much load the connection handles, and a washer under every head and nut protects the surface and distributes the load. Everything else — the specific bolt type, the nut style, the washer size — follows from what the joint needs to do. Know the principle and the hardware aisle becomes a resource rather than a riddle.


SkippityWhistles is part of the WhistleBump group – find the rest of the family at WhistleBump.com.

2017

©2026 John D Reinhart/Skippitywhistles.com — All rights reserved

How to Choose the Right Caulk for Your Home (Or: They’re Not All the Same)

Not all caulk is the same — and grabbing the wrong one means peeling, cracking, or paint that won’t stick. Here’s how to match the right caulk to the right job, every time.

The house you moved into — especially if it was built a few decades ago — is not a static object. It breathes. New floors settle. Old framing shifts. Seasons expand and shrink everything twice a year, and suddenly there are seams where there weren’t seams before. The gap between the baseboard and the new floor. The crack where the crown molding meets the wall. The opening at the corner of the shower that wasn’t there last winter.

None of this is failure. It’s physics. Houses move, and caulk is how you make peace with the movement.

The problem is that most people walk into the hardware store, grab the tube that says “All Purpose,” and head home. Sometimes that works. Sometimes it doesn’t — and “doesn’t” means caulk that cracks, peels, won’t hold paint, or grows mold in the shower. The difference is knowing which caulk goes with which job. It’s a short list, and once you have it, the caulk aisle stops being confusing.

🧪 The Four Types You’ll Actually Use

Acrylic latex caulk — sometimes called painter’s caulk — is the one that handles interior trim, baseboards, door and window frames, and any seam that’s going to be painted over. It cleans up with water, accepts paint within thirty minutes to an hour, is easy to apply, and easy to tool smooth with a wet finger. This is the caulk that belongs in every home toolbox.

The key word on the tube to look for is “paintable.” If the tube doesn’t say paintable, the caulk may not accept paint — or it may accept paint but leave a shiny, visible bead underneath it. For interior trim work where the finished result is a painted surface, paintable acrylic latex is the correct choice.

Siliconized acrylic caulk – acrylic caulk with silicone blended in. It’s more flexible than plain acrylic, which matters in older homes where seasonal movement is significant. It’s still paintable. It still cleans up with water. It just holds up longer in joints that move. For an older house with settling floors and shifting framing, siliconized acrylic is often the better answer than plain acrylic — it handles the movement without cracking as quickly.

100% silicone caulk – for wet areas: showers, tubs, sinks, exterior window frames, anywhere that sees consistent water exposure. Silicone is waterproof, extremely flexible, and lasts fifteen to twenty years in wet conditions. It is also not paintable — paint won’t bond to cured silicone — and it’s harder to apply cleanly than acrylic. If silicone gets on a surface where it doesn’t belong, it’s genuinely difficult to remove. Use it where water is the primary concern, and keep it away from anything that’s going to be painted.

Polyurethane caulk – for exterior gaps, concrete cracks, and high-movement joints outside the house. It bonds aggressively to almost any surface, handles significant structural movement, and holds up in conditions that would destroy acrylic. It’s harder to work with than acrylic and overkill for interior trim. For the exterior foundation crack, the gap around the dryer vent, or the joint between the concrete steps and the house — polyurethane is the right material.

📋 The Quick Decision

Sealing interior trim, baseboards, or crown molding before painting? Paintable acrylic latex or siliconized acrylic. These are the same answer — siliconized acrylic if the house moves seasonally, plain acrylic if it doesn’t.

Sealing a shower, tub surround, or sink? 100% silicone, specifically labeled for kitchen and bath use. Do not use acrylic here — it won’t hold up to constant moisture and will develop mold.

Sealing an exterior gap, concrete crack, or high-movement exterior joint? Polyurethane caulk.

The one thing to avoid: using 100% silicone anywhere that needs to be painted, and using acrylic latex anywhere that sees constant water. These are the two mistakes that send people back to redo the job.

📏 How Big a Gap Is Too Big for Caulk?

Caulk is a sealant, not a gap filler. It’s designed to bridge small joints and seal them against air, water, and dust — not to fill structural voids.

A gap under about a quarter inch wide is fine for caulk alone. A gap larger than a quarter inch needs backer rod first. Backer rod is a foam rope (available at any hardware store in various diameters) that you press into the gap before caulking. It gives the caulk something to bond to on both sides, limits how deep the caulk needs to go, and produces a much better result than trying to fill a large gap with caulk alone. Without backer rod, deep gaps consume expensive caulk and often crack as the caulk skins over before the interior fully cures.

🖐️ Applying It — The Technique That Makes the Difference

Cut the nozzle smaller than you think you need. The most common caulking mistake is cutting the tip too wide, which produces a bead that’s too large to tool cleanly and leaves excess everywhere. For most interior trim work, the opening at the tip should be about the diameter of a pencil lead. You can always make a second pass if the bead is too thin. You cannot un-apply a bead that’s too thick.

Run the bead continuously along the joint in one smooth motion. Start at one end and move steadily to the other without stopping. Stopping and restarting creates overlap marks that are visible after painting.

Shape the bead immediately after applying it, before it begins to skin over — usually within two to five minutes. Dampen a finger with water and draw it along the bead with steady, even pressure in a single pass. One pass, not multiple. Overworking caulk tears it up and makes it look worse than if you’d left it alone. The damp finger gives a smooth, slightly concave profile that paints cleanly and looks professional.

Wipe excess onto a rag immediately. Caulk that dries on adjacent surfaces is harder to remove than caulk that’s wiped away wet.

Painter’s tape along both sides of the joint before caulking gives a perfectly clean edge every time and is worth the extra two minutes on visible joints — around a window frame, along a baseboard in a finished room — where a ragged edge would be noticed. Remove the tape immediately after tooling the bead, before the caulk skins over.

⏱️ How Long Does It Last?

Interior acrylic and siliconized acrylic caulk: five to ten years, depending on how much the joint moves. When it starts to crack, shrink visibly, or separate from the surface, replace it. Recaulking over old failed caulk doesn’t work well — remove the old caulk with a utility knife or caulk remover tool first, clean the surface, and start fresh.

100% silicone in wet areas: ten to twenty years. Silicone fails when it starts to peel away from the tile or show dark spots underneath — which is mold growing behind a failing seal. At that point, remove it completely and replace it.

🛒 Gear Worth Having

DAP Alex Plus Acrylic Latex Caulk with Silicone — 10.1 oz, White, Paintable in 30 Minutes — The benchmark paintable interior caulk. Silicone additives give it more flexibility than plain acrylic, it accepts paint in thirty minutes, and it cleans up with water. Bonds to wood, drywall, plaster, masonry, aluminum, and vinyl. This is the tube that handles baseboards, trim, crown molding, and door frames — the everyday interior caulking job. DAP backs it with a 40-year durability guarantee.

GE Advanced Silicone Caulk for Kitchen & Bathroom — 10 fl oz, 100% Waterproof, White — 100% silicone for showers, tubs, sinks, and anywhere that sees constant water. Ready for water exposure in thirty minutes. Won’t shrink, crack, or support mold growth. Forty percent more flexible than standard silicone sealants, which matters in tub surrounds and shower corners where movement is ongoing. Backed by a lifetime guarantee from the number one silicone brand. Not paintable — use this where waterproofing is the priority.

Dripless ETS2000 Composite Caulk Gun — 12:1 Thrust Ratio, Ergonomic Grip — The caulk gun that actually stops when you stop squeezing. Standard ratchet-style caulk guns continue dispensing after the trigger is released, which means a blob of caulk wherever the job ends. The Dripless mechanism retracts after each trigger pull, stopping the flow immediately. Lightweight composite body, ergonomic grip, 12:1 thrust ratio handles both acrylic and silicone cartridges. The tool that makes the whole job cleaner and less frustrating.

As an Amazon affiliate, I earn from qualifying purchases. Thank you for supporting SkippityWhistles.

📖 Related Reads

How to Use Wire Nuts

How to Repair Broken Porcelain and Pottery

The DIYer’s Toolbox

The right caulk in the right place takes twenty minutes and lasts a decade. The wrong caulk in the wrong place takes twenty minutes and fails in two years, at which point the whole job has to be done again. The house is going to keep moving regardless — the only question is whether the seams move with it or crack across it.


SkippityWhistles is part of the WhistleBump group – find the rest of the family at WhistleBump.com.

2013

©2026 John D Reinhart/Skippitywhistles.com — All rights reserved

How to Use a Stud Finder (And Finally Stop Drilling Into Nothing)

There’s a piece of wood hiding behind your drywall right now that can hold a TV, a shelf, or a cast-iron skillet rack — if you know how to find it. Here’s how to stop guessing and start drilling with total confidence.

Ron once found a stud by knocking on the wall and listening for a change in pitch. This is a legitimate technique — if you are a woodpecker. Ron is not a woodpecker. The shelf he hung that day is now a shelf-shaped dent in the carpet.

Nobody starts out knowing where the studs are. The wall gives away nothing on purpose. But there’s a fifteen-dollar tool that ends the guessing forever, and once it’s part of the routine, drilling into drywall stops being a gamble and starts being a plan.

🧠 What’s Actually Behind Your Wall

Drywall is a covering, not a structure. Behind it, vertical framing boards called studs (the wood or metal supports that give a wall its strength) run floor to ceiling, usually spaced 16 inches apart. Anything with real weight — a TV, a floating shelf, a cabinet — needs to grab one of those studs, not just the drywall skin covering it.

A stud finder reads the wall for density. Hollow cavity feels different to the sensor than solid wood. Cross that boundary and the tool lights up, beeps, or both — translation: right here.

🧲 Magnetic or Electronic: Pick a Fighter

Magnetic stud finders don’t find studs directly — they find the metal fasteners holding the drywall to the stud. No batteries, nothing to calibrate, nearly impossible to break. Slower to use, and less exact about where the stud’s actual edges are.

Electronic stud finders sense the density change directly and usually mark both edges of the stud, not just a fastener. Faster, more precise, and worth the extra cost the moment anything heavier than a picture frame is going up.

📏 Finding the Stud, Step by Step

Magnetic Finders:

Place the finder flat against the wall. Slowly slide it horizontally across the wall. You’ll know when you’ve found fastener, and therefore a stud, when the finder latches onto it magnetically. Test your finding by moving the finder vertically up and down the wall, looking for other fasteners. They should all be pretty well lined up. There’s you stud.

Electronic Finders:

Step 1 — Start clean. Stud finders are calibrated for standard drywall. Plaster, tile, and concrete all confuse the reading, so expect a rougher result on older construction.

Step 2 — Calibrate the finder away from the target. Hold it flat against the wall in a spot that’s probably not over a stud, turn it on, and let it settle before moving. If you calibrate directly over a stud and the tool loses its baseline, and everything reads as a stud after that.

Step 3 — Glide the calibrated tool along the wall, don’t rush. Move the tool slowly and horizontally. The first signal marks one edge of the stud — pencil it in. Keep sliding until the signal drops off, and mark that edge too.

Step 4 — Split the difference. The center of the stud sits halfway between the two edge marks. That’s the spot to drill.

📐 The 16-Inch Rule

Studs in most homes are spaced 16 inches on center, occasionally 24. Find one, measure 16 inches over, and there’s a strong chance the next one is waiting right there. That shortcut turns a two-bracket shelf into a five-minute job instead of a twenty-minute one.

⚠️ Mistakes That Cost You a Wall Patch

  • Skipping calibration of the electric finder and trusting the first beep anyway
  • Sliding the tool too fast for it to get a clean read
  • Calling it done after one pass instead of confirming with a second
  • Drilling near an outlet without checking what’s running behind it

That last one matters more than it sounds like it should — wiring tends to run vertically up from outlets and switches, so anything drilled directly above one deserves extra caution.

⚡ Don’t Drill Into a Wire

Before any drill touches the wall: confirm the stud spacing looks normal, cut power to anything nearby, and sweep the area with a voltage tester (a small handheld tool that detects live electrical current without needing to touch a wire directly). Thirty seconds of caution beats an afternoon spent explaining what happened to the breaker panel.

🖼️ When a Stud Isn’t the Point

Light loads — picture frames, small mirrors, floating shelves under a few pounds — can usually ride on a drywall anchor (a small fastener that grips the drywall itself instead of the framing behind it) instead of a stud. Anything heavier gets a stud. No exceptions, no matter how confident the nail looks going in.

✅ Final Verdict

A stud finder doesn’t turn anyone into a carpenter. It turns guessing into knowing, and that’s the whole difference between a shelf that holds and a shelf-shaped dent in the carpet.

🛒 Gear Worth Having

CH Hanson Magnetic Stud Finder — a straightforward magnetic finder for anyone who just needs a yes-or-no answer without spending real money on the question.

Zircon StudSensor Electronic Stud Finder —an electronic finder that marks both edges of the stud and handles the calibration cleanly — the sweet spot for most household projects, from shelving to TV mounts.

Franklin Sensors ProSensor Multi-Sensor Stud Finder — a multi-sensor unit that scans a wider strip of wall at once and reads through thicker material, including some plaster walls that give cheaper units trouble. Overkill for a single picture frame, exactly right for anyone doing this often enough that speed and accuracy start to matter.

As an Amazon affiliate, I earn from qualifying purchases. Thank you for supporting SkippityWhistles.

📖 Related Reads

Working with Electricity: The Basics

How to Use a Voltage Tester

Drill Bit Sets: What You Actually Need

SkippityWhistles is part of the WhistleBump group – find the rest of the family at WhistleBump.com.

2014

©2026 John D Reinhart/Skippitywhistles.com — All rights reserved

How to Use Toggle Bolts and Anchors (Or: What to Grab When the Screw Just Spins)

A screw spinning uselessly in drywall isn’t broken — it’s just missing something to actually grip. Here’s what to give it.

Ron drove a screw into what he was fairly confident was a stud, hung a shelf, and loaded it with exactly the kind of hardcover books that make a point about it later. The shelf held for four days. On the fifth, at roughly 3 AM, it introduced itself to the floor. Ron hadn’t found a stud. He’d found drywall that was very good at pretending, right up until it wasn’t.

A screw spinning uselessly in drywall isn’t a broken screw — it’s a screw with nothing to grip, because drywall’s powdery gypsum core has no fiber for threads to bite into the way solid wood does. That’s the entire reason anchors and toggle bolts exist: they give a fastener something real to hold onto, spreading the load out instead of asking one small point of drywall to carry all of it.

🧩 Four Anchors, Four Strength Levels

  • A plastic expansion anchor (a ridged plastic sleeve that expands against the hole as a screw is driven into it) is the lightest option, good for roughly 5 to 10 pounds — pictures, small hooks, nothing you’d mourn if it failed.
  • A self-drilling anchor (a sharp-tipped screw-style anchor that drills its own hole without a pilot) steps up to around 10 to 25 pounds and skips a step in installation, at the cost of leaving a bigger hole behind if it’s ever removed.
  • A molly bolt (a metal sleeve that expands and locks behind the drywall as its screw is tightened) handles roughly 25 to 50 pounds and stays permanently anchored behind the wall even after the screw comes out.
  • A toggle bolt (a machine screw paired with spring-loaded metal wings that fold flat for insertion and snap open behind the drywall) is the heavyweight option, often rated 50 to 100-plus pounds, because its wings lock flat against the back of the drywall and spread the load across the widest area of any anchor type.

The general rule: light and forgettable gets a plastic anchor, everyday household weight gets a self-drilling anchor or molly bolt, and anything you genuinely cannot afford to have fall — a heavy mirror, a loaded shelf, a TV mount — gets a toggle bolt, or better yet, an actual stud.

🛠️ Installing a Toggle Bolt, Step by Step

Mark the spot and commit — toggle bolts leave a dime-sized hole behind if the anchor’s ever removed, so measure with intention. Drill the hole to the exact size the package specifies; too small and the wings can’t open, too large and the whole anchor spins uselessly in the hole, which defeats the entire point. Thread the screw through whatever you’re hanging first, then thread it through the folded wings until the screw tip just peeks through — don’t tighten yet, just assemble. Fold the wings flat and push the assembly through the hole until you feel a distinct snap as the wings spring open on the other side of the drywall. Finally, tighten while gently pulling the screw back toward you, which keeps the wings flush against the back of the wall for maximum grip — stop at snug, not at Hulk-strength, since overtightening can crush the drywall from the inside and quietly weaken the very hold you’re trying to create.

🤔 The Three-Question Test

Before buying anything, answer three questions honestly.

  • How heavy, really — not just the fixture’s weight, but the fixture plus whatever it’ll eventually hold, since a shelf that weighs two pounds empty might carry thirty pounds of books.
  • What’s the wall made of — standard drywall works with any anchor type here, but solid masonry or concrete needs a completely different masonry anchor, a different category of hardware entirely.
  • And how permanent — plastic anchors come out cleanly for something you’ll rearrange next year, while toggle bolts commit you to that exact spot on the wall for good.

🚫 The One Mistake That Beats Them All

Before reaching for any anchor, check for a stud (the wood or metal framing member inside the wall that a screw can bite into directly). A stud is stronger than every anchor on this list combined, and if one happens to be right where you need it, skip the anchor entirely and drive a wood screw straight into it. Anchors exist specifically for the in-between spots where no stud is available — they’re a very good solution to a problem you’d rather not have in the first place.

🛒 Gear Worth Having

TOGGLER SnapToggle Heavy-Duty Toggle Bolt Kit — Rated well past 100 pounds per anchor and reusable if the screw ever needs to come out — the toggle bolt that makes a heavy mirror a non-issue.

Self-Drilling Drywall Anchor Assortment — No pilot hole, no separate drill bit — for the everyday medium-weight jobs that don’t need the full toggle-bolt commitment.

Zircon MultiScanner Stud Finder — The tool that makes the whole anchor conversation unnecessary in the first place, whenever there’s a stud close enough to use instead.

As an Amazon affiliate, I earn from qualifying purchases. Thank you for supporting SkippityWhistles.

📖 Related Reads


SkippityWhistles is part of the WhistleBump group – find the rest of the family at WhistleBump.com.

2008

©2026 John D Reinhart/Skippitywhistles.com — All rights reserved

How to Repair Broken Porcelain and Pottery (Without Losing Your Mind)

A broken mug or chipped porcelain doesn’t have to be a loss. With the right glue and a little patience, you can make the repair nearly invisible. Here’s exactly how.

Tink. Crash.

“Run, Luke, run! That was Grandma’s teapot!”

Porcelain and pottery are deceptive. They look solid and permanent sitting on the shelf, and then one nudge — one moment of physics doing what physics does — and you’re standing over a pile of shards wondering if this is the kind of thing that can be fixed or the kind of thing you don’t tell anyone about.

Good news: it’s usually the kind of thing that can be fixed. The right adhesive, a little patience, and the willingness to follow a few simple steps can make a break nearly invisible. Ron Screwstrip has done this more times than he’d like to admit — the workshop has a shelf dedicated to “things that were fine before I got to them.”

Here’s how to handle it properly.

🔍 Step One: Assess the Damage Honestly

Before you reach for any glue, look at what you’re actually working with. Not all breaks are equal, and the type of break determines the type of fix.

A clean break — where the piece snapped into two or three large sections with smooth, matching edges — is the best possible outcome. Clean breaks are what super glue and epoxy were designed for. The pieces fit back together precisely, and when done right the repair is nearly invisible.

Multiple small fragments are trickier but still manageable. The key is patience and working in sequence — more on that in a moment.

Missing shards, where a piece has crumbled or gone completely missing, require a gap-filling approach. You can still make a solid structural repair, but cosmetically you’re working with what you have.

A break at a high-stress point — like the handle of a mug or teapot that will regularly bear the weight of a full pot of hot liquid — is worth thinking carefully about. Glue can create a strong bond, but “strong” is relative when the alternative is a pot of boiling tea launching itself off the handle at an inconvenient moment. For purely decorative pieces, repair away. For load-bearing connections on items you actually use, consider whether the repair is genuinely safe before proceeding.

🧴 Choosing the Right Adhesive — This Is the Important Part

There are two adhesives worth knowing about for porcelain and pottery repair, and they are not interchangeable. The break tells you which one you need.

Super glue — technically called cyanoacrylate, or CA glue — is for clean, tight-fitting breaks where the edges match closely and there are no gaps to fill. It sets in seconds, dries completely clear, and when applied correctly leaves an almost invisible bond line. The gel formula is the one you want for this job: it’s thicker than liquid super glue, which means it doesn’t run into places you don’t want it, and it gives you slightly more time to align the pieces before the bond sets. Apply one small drop per square inch of surface area — not more. More glue does not mean a stronger bond. It means a hazy, messy joint that’s harder to close cleanly.

Two-part epoxy is for larger breaks, missing pieces, or any repair where there’s a gap between the surfaces. Epoxy comes in two parts — a resin and a hardener — that you mix together in equal amounts immediately before use. Once mixed, you have a working window of five to thirty minutes depending on the formula, after which it begins to set. Epoxy is stronger than super glue for gap-filling applications and bonds the surfaces with a rigid, durable connection. It also dries clear in most formulas, which matters for porcelain repair. Mix only as much as you need — mixed epoxy cannot be stored — and apply it sparingly. Excess epoxy that squeezes out of the joint when you press the pieces together will harden into a raised ridge that’s extremely difficult to remove cleanly.

A quick rule of thumb: tight-fitting clean break with no gaps? Super glue gel. Larger break, missing material, or any gap between surfaces? Two-part epoxy.

One thing both adhesives have in common: neither belongs on your skin. Super glue bonds to the moisture on skin instantly — it uses that moisture as part of its chemical bonding process — and getting your fingers stuck together is both uncomfortable and embarrassing to explain. Epoxy is caustic and difficult to remove once cured. Wear nitrile gloves for either job. This is not optional advice.

🧹 Before You Glue Anything: Clean and Dry Fit

The surfaces being glued need to be completely clean and completely dry. Dust, oil, old dried glue, or any residue on the break surface will prevent a proper bond. Wipe each broken edge gently with a cotton ball or pad dampened with rubbing alcohol, then let everything dry completely before touching it again. Alcohol evaporates quickly, so this only takes a few minutes.

Once the surfaces are clean, do a dry fit: lay all the pieces out and practice fitting them together without any glue. This step is not optional for multi-piece repairs, and it pays off even for simple two-piece breaks. You need to know how the pieces align before the glue goes on — because once super glue touches both surfaces, you have seconds before the bond sets. There is no “let me just adjust that slightly.” The dry fit is your rehearsal.

For a piece that broke into multiple fragments, think about the order of assembly before you start. Work from the inside of the break outward — the pieces that were deepest inside the break go first, and each successive piece builds toward the outer surface. Imagine the point of impact and work backwards from there. The last piece to go in is usually the one at the surface of the original impact point.

🔧 Applying the Adhesive

For super glue gel: apply one small drop per square inch of surface area to one side of the break only — not both sides. Press the pieces firmly together and hold them in place by hand for a full minute. You’ll feel the bond develop — a slight resistance when you try to shift the pieces. Don’t let go early. The glue feels set before it actually is. Wipe away any squeeze-out immediately with a dry cloth; once super glue cures, it’s there permanently.

For two-part epoxy: squeeze equal amounts of the resin and hardener onto a disposable surface — a piece of cardboard or a paper plate works fine — and mix them together thoroughly with a disposable stick. Scrape from the sides and bottom of the mixing area to ensure the two components are fully combined; unmixed epoxy won’t cure properly. Apply a thin, even coat to one surface, press the pieces together, and hold or clamp the joint until the epoxy sets. For a five-minute epoxy, that’s about five minutes of held pressure. Don’t skip this — pressure during the set phase is what produces a tight, clean bond.

🗜️ Clamping and Curing

For super glue repairs: hand pressure for one minute is usually sufficient. Light handling is possible after five to ten minutes, but the full bond strength develops over twenty-four hours. Don’t stress-test the repair before then.

For epoxy repairs: the joint needs to be held without movement until the epoxy sets. Small clamps work well. Rubber bands looped around the repair work for round pieces like mugs. Painter’s tape wrapped snugly around the joint works for odd shapes. The goal is to hold the pieces together without shifting while the epoxy develops its initial grip. Check the manufacturer’s instructions — five-minute epoxy sets in five minutes but cures to full strength in an hour. Give it the full hour before handling.

One important note about clamping with epoxy: whatever you use to hold the pieces together should not be something that can’t have epoxy on it. Epoxy will bond to painter’s tape, rubber bands, and clamp faces if it squeezes out. Use disposable materials or surfaces you don’t care about for clamping.

✨ Cosmetic Touch-Ups

For small remaining gaps after the repair sets, gap-filling super glue — a thicker, slower-setting formula specifically designed to fill small voids — can be applied with a toothpick and smoothed level with the surrounding surface. It dries clear, so on light-colored porcelain it may disappear entirely.

If the repaired area needs color matching — for a decorative piece where the break line is visible — ceramic touch-up paint or glaze is available at craft stores and some hardware stores. This is a cosmetic step, not a structural one, and it requires the adhesive to be fully cured first. Sand any raised glue ridges lightly with fine-grit sandpaper before painting. Go gently — porcelain is not forgiving of aggressive sanding.

🚫 When Not to Glue

Some repairs aren’t worth attempting, and it’s better to know this before you’ve committed the adhesive.

Extremely thin, fragile shards that can’t be handled without breaking further aren’t good candidates for gluing. If you can’t align the pieces without them disintegrating, the repair isn’t practical.

Pieces that will go in the dishwasher or be exposed to extreme heat regularly are poor candidates for adhesive repair. Both super glue and epoxy can be affected by repeated high-heat and moisture cycling, and a repair that holds perfectly on the shelf may fail in the dishwasher. Hand-wash repaired pieces, and accept that the repair has limits.

And Grandma’s teapot handle — the one that will bear the weight of a full pot of boiling water every morning — deserves an honest assessment. The repair might hold. But “might” is doing a lot of work in that sentence when boiling water is involved. A decorative display piece: absolutely repair it. The working handle on a heavily-used pot: proceed carefully and test the repair with cold water first.

🛒 Gear Worth Having

Gorilla Super Glue Gel XL — 25g, Clear, Anti-Clog Cap — The gel formula is the right choice for porcelain repair: thicker than liquid super glue so it doesn’t run, dries completely clear, and the anti-clog cap means the bottle is still usable three months from now when you need it again. Sets in 10-45 seconds, full cure in 24 hours.

J-B Weld ClearWeld 5-Minute Epoxy Syringe — 25ml, Clear — The two-part epoxy for gap-filling repairs and larger breaks. The syringe dispenses equal amounts of resin and hardener automatically, so there’s no measuring required. Sets in five minutes, cures to full strength in one hour, dries clear. Mixing tray and stick included. 3,900 PSI tensile strength — stronger than the porcelain around the repair once cured.

Gorilla Super Glue with Brush & Nozzle Applicator — 12g, Clear — For repairs where precision application matters. The fine-bristle brush gets into tight cracks and detailed areas; the precision nozzle handles direct application. Particularly useful for decorative pieces with complex surfaces where a standard tip would apply too much glue at once.

Nitrile Disposable Gloves — 100-Count Box, Powder-Free — Wear these for any adhesive work. Super glue bonds to skin using the moisture it finds there, and getting fingers stuck together is genuinely unpleasant. Epoxy is caustic. A box of nitrile gloves costs a few dollars and solves both problems permanently.

As an Amazon affiliate, I earn from qualifying purchases. Thank you for supporting SkippityWhistles.

📖 Related Reads

How to Use Epoxy: The Complete Beginner’s Guide

How to Use Super Glue Without Gluing Your Fingers Together

The DIYer’s Toolbox

Ron Screwstrip repaired the workshop mug — the one his daughter painted for him in second grade — with super glue gel on a Sunday afternoon. The repair took twelve minutes including cleanup. The mug is back on the shelf. He hasn’t mentioned it to anyone, but he looks at it differently now. That’s the quiet satisfaction of a repair done right.


SkippityWhistles is part of the WhistleBump group – find the rest of the family at WhistleBump.com.

2018

©2026 John D Reinhart/Skippitywhistles.com — All rights reserved

How to Work with Wood: Understanding the Material Before You Cut

Wood isn’t complicated, but it has opinions about how you treat it. Here’s what you need to know: grain, knots, movement, and the shortcuts that fail later.

Ron built a set of floating shelves one spring, glued rigid to their wall brackets because rigid seemed sturdier. By August, the boards had swelled with summer humidity, had nowhere to go, and split clean along the glue line. Ron’s shelves weren’t a bad build. They were a build that never got told wood was going to move, and got surprised when it did anyway.

Wood is the most forgiving material in home DIY, right up until it isn’t. Most of what goes wrong with a wood project traces back to a handful of things the material is always doing quietly in the background — and once you know what those are, wood stops being unpredictable and starts being honest.

🌳 Solid Wood vs. Engineered Wood

Solid wood (lumber cut directly from a tree — pine, oak, maple, cedar) is strong along its grain, weaker across it, and moves seasonally with humidity. It’s the material behind shelves, doors, framing, and trim, and it’s genuinely beautiful, but it has a personality.

Engineered wood exists specifically to iron that personality out:

  • Plywood (thin wood layers glued together in alternating grain directions) resists warping and handles large panels well
  • MDF, or medium-density fiberboard (wood fibers pressed and glued into a dense, uniform sheet), takes paint beautifully but has weak edges and hates water
  • OSB, or oriented strand board (wood strands bonded with resin into a rough, strong panel), is affordable and sturdy but utilitarian in appearance

For most DIY furniture and shelving, engineered wood’s predictability is often the better trade against solid wood’s character.

↔️ Grain Direction: The Quiet Rule

Wood fibers run in one direction — the grain — and that direction determines how the board behaves under stress. A screw driven with the grain holds well; a screw driven across the grain, especially near a board’s end, splits it far more easily. This is also why the same fastening approach that worked fine in the middle of a board can fail entirely two inches from its edge. Checking grain direction before driving a fastener costs about a second and heads off a surprising share of split boards.

🕳️ Pilot Holes: The Step That Prevents the Split

A pilot hole is a small hole drilled before driving a screw, sized slightly smaller than the screw itself. It gives a screw somewhere to go besides straight into solid fiber, which is what actually causes splitting in the first place. It matters most near a board’s edge or end, with thick or long screws, and in hardwood or dense engineered material — situations where solid wood has the least room to give.

The honest rule: if you’re ever unsure whether a pilot hole is needed, drill one. It costs thirty seconds. A split board costs the whole piece.

🌦️ Wood Movement: Not a Flaw, a Feature to Plan Around

Solid wood swells and shrinks with humidity — wider in summer, tighter in winter — which is exactly what happened to Ron’s shelves. This isn’t poor craftsmanship showing up later; it’s the material behaving exactly as wood always behaves. Building around it means leaving a small gap instead of a forced-tight fit, skipping glue on joints that might need to shift, and snugging fasteners rather than cranking them down hard. A rigid, over-tightened joint on solid wood isn’t a stronger joint — it’s a joint with nowhere to go when the wood inevitably does.

🪢 Knots: The Hidden Problem in the Board

A knot is where a branch grew out of the tree, and the grain inside it runs at a different angle than the surrounding wood — which makes it harder, denser, and more likely to resist a screw or split unpredictably than the wood around it. A board with knots isn’t ruined; it just deserves a little judgment about where the fasteners actually go. Picking a section of straighter, more consistent grain for anything load-bearing or fastener-heavy avoids the problem before it starts.

🛒 Gear Worth Having

Snappy Self-Centering Countersink Drill Bit Set — Drills a properly sized pilot hole and countersink in one pass, centered automatically — the tool that makes “just drill a pilot hole” a fifteen-second habit instead of an extra step people skip.

Titebond III Ultimate Wood Glue — Water-resistant and strong enough for real joinery, for the joints that are meant to be permanent rather than the ones that need room to move.

IRWIN Quick-Grip One-Handed Bar Clamps (4-Pack) — Holds boards square and steady while glue sets or a pilot hole gets drilled, which solves the very real problem of not having a third hand.

As an Amazon affiliate, I earn from qualifying purchases. Thank you for supporting SkippityWhistles.

📖 Related Reads


SkippityWhistles is part of the WhistleBump group – find the rest of the family at WhistleBump.com.

2005

©2026 John D Reinhart/Skippitywhistles.com — All rights reserved
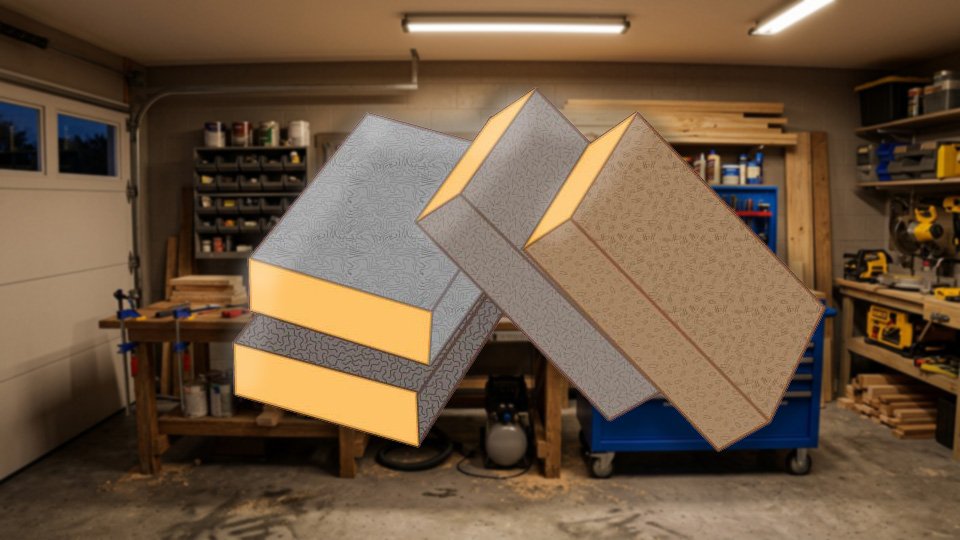
Working with Window Screens (Or: What’s Actually Between You and the Bugs)

A screen looks like one thing, but it’s three parts working together — and knowing which one failed tells you whether to fix it or replace it.

Ron’s fix for a torn window screen, for about three summers running, was a strip of packing tape pressed over the hole from the inside. It held, technically, in the sense that a bug now had to work slightly harder to get through. What Ron never quite figured out was that the screen wasn’t one thing that had failed — it was one of three specific parts, and knowing which one would have told him whether tape was even in the right neighborhood of a fix.

A window screen looks simple because it does one simple job. Understanding the three parts that do that job explains why screens fail the way they do, and which failures are worth your time to address.

🧩 Three Parts, One Job

Every window screen breaks down into a frame (the rigid border, usually aluminum, that holds everything else in shape), mesh (the woven material that blocks insects while letting air and light through), and a spline (a flexible rubber cord pressed into a groove around the inside of the frame, clamping the mesh in place). Nearly every screen problem traces back to a failure in exactly one of these three, which makes diagnosing the issue mostly a process of figuring out which one.

🖼️ The Frame: What Holds Everything

The frame’s only real feature that matters is the groove (a narrow channel running around the inside perimeter of the frame, where the spline sits) — without it, there’d be nothing to clamp the mesh against. Frames fail by bending (which throws the groove out of alignment so the spline can’t seat properly), corroding (aluminum weakens over years, especially near coastlines or in humid climates), or cracking (usually final — a cracked frame isn’t something to patch, it’s something to replace).

🕸️ The Mesh: What Actually Stops the Bugs

Fiberglass mesh is flexible and forgiving, which makes it the friendlier material to work with, though it sags a little more over time. Aluminum mesh holds its shape longer but is stiffer to install. Mesh fails through physical tears, UV-driven brittleness after years in the sun, or simple sagging when the spline behind it has lost its grip. The hole size in any mesh is a deliberate tradeoff — finer mesh blocks smaller insects but cuts down airflow slightly, which is why most residential screens land on a middle-ground size rather than the finest mesh available.

🧵 The Spline: The Part Nobody Notices Until It Fails

The spline is doing all the actual clamping — without it, mesh has nothing holding it against the frame at all. It fails the way most rubber does: UV exposure and years of temperature swings make it brittle and eventually crack, at which point it stops gripping and the mesh works itself loose. It’s also the part most commonly skipped during a repair, since reusing old spline looks like it saves a step. It rarely holds — spline that’s already brittle enough to fail once tends to fail again within months of being reinstalled.

🤔 Repair or Replace: Reading the Signs

A screen is generally worth repairing when the frame itself is straight and undamaged and the failure is limited to the mesh or spline — that’s a genuine fix, not a stopgap, provided both the mesh and spline get replaced together rather than just patched. A screen is generally worth replacing outright when the frame is bent, cracked, or corroded badly enough that the groove itself is compromised, since no amount of new mesh or spline fixes a frame that can’t hold either one properly. Given that a full replacement screen often costs less than an afternoon’s frustration, a compromised frame is rarely worth fighting for.

The actual mesh-and-spline installation — pressing new mesh into the groove and rolling the spline in tight and even all the way around — is a hands-on process that’s genuinely easier to follow by watching than reading. It’s worth a quick YouTube search once you’ve decided repair is the right call; watching someone’s hands roll a spline for thirty seconds will teach the technique faster than any amount of description here.

🛒 Gear Worth Having

Fiberglass Window Screen Repair Kit — Bundles fresh mesh with matching spline and a roller tool in one kit, so you’re not stuck reusing brittle old spline just because it was already in the drawer.

Prime-Line Screen Spline Roller Tool — The dual-wheel design seats spline evenly on the first pass instead of leaving loose spots that work themselves free within a season.

Metro Screenworks Custom-Cut Aluminum Window Screen — Built to your exact window dimensions when the frame itself is the problem — the right call the moment the groove is bent instead of the mesh.

As an Amazon affiliate, I earn from qualifying purchases. Thank you for supporting SkippityWhistles.

📖 Related Reads

SkippityWhistles is part of the WhistleBump group – find the rest of the family at WhistleBump.com.

2020

©2026 John D Reinhart/Skippitywhistles.com — All rights reserved
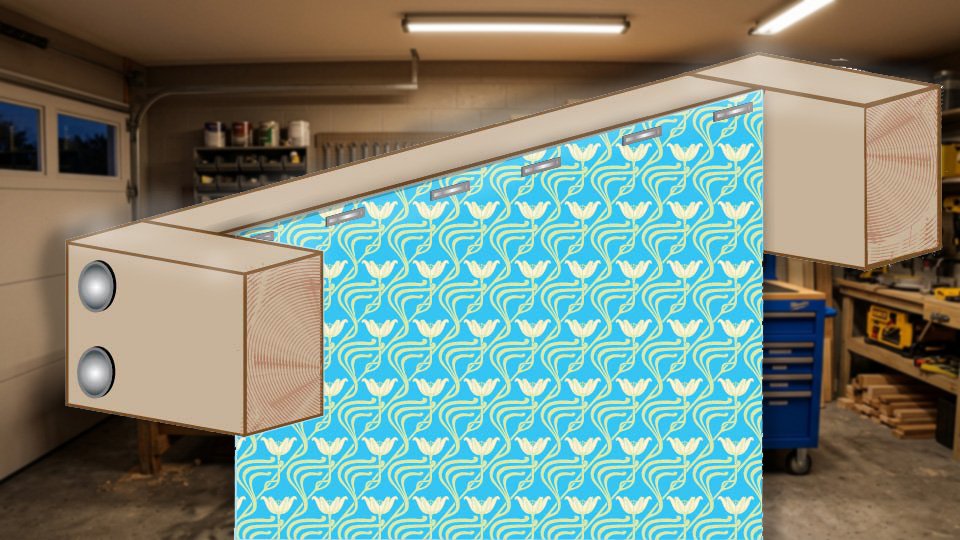
Understanding Drywall: What’s Actually Behind That Smooth Wall

Every interior wall in your house is the same three ingredients — here’s what’s actually behind that smooth surface, and why it cracks the way it does.

Ron owns a house full of drywall and has never once thought about what it actually is — right up until he put a doorknob straight through a bedroom wall and discovered the answer was “surprisingly little.” A wall that looks like solid plaster turned out to be a thin panel with a chalky white interior, and Ron’s working theory about walls being basically indestructible took a real hit that afternoon.

Drywall is the material behind almost every interior wall and ceiling in a modern home, and understanding what it actually is explains both why it’s so easy to damage and why it’s just as easy to bring back.

🪨 What’s Actually Inside the Panel

Drywall is gypsum (a soft, naturally occurring mineral that’s fire-resistant and easy to shape) pressed into a solid core and sandwiched between two layers of thick paper that hold it together and give the surface something smooth to finish. That’s the entire material — no wood, no plaster in the traditional sense, nothing structural on its own. It’s a skin, not a skeleton; the actual framing behind it is what the house depends on for strength.

Panels come in a few standard thicknesses for a reason: 1/2 inch is the standard for most interior walls, 5/8 inch shows up on ceilings and shared walls because the extra mass improves fire resistance and sound dampening, and 1/4 inch exists specifically as a thin overlay for resurfacing over existing damaged drywall rather than tearing it out.

💥 Why It Damages So Easily — and Why That’s Not a Flaw

A doorknob, a moving box corner, or a shelf bracket punches through drywall easily because the gypsum core has no give and the paper facing tears cleanly once the core cracks. That’s actually the tradeoff that makes drywall the standard material it is — a more impact-resistant wall material would also be heavier, harder to cut, and far more expensive to install across an entire house. Drywall trades some durability for being fast to install, inexpensive, and, just as importantly, fast and inexpensive to repair when something inevitably goes through it.

📌 Nail Pops: The Damage That Isn’t Really Damage

A nail pop (a small raised bump or crack where a fastener has worked its way slightly loose from the framing behind the drywall) isn’t the drywall failing — it’s the house settling, wood framing shrinking slightly as it dries over the seasons, and the fastener no longer sitting flush. It shows up as a small bump or hairline crack, usually in a fairly straight line along a stud. It looks alarming the first time you notice it and is almost always cosmetic rather than structural.

🩹 Seams, Tape, and Why Some Walls Are Invisible

Every seam between two sheets of drywall gets covered with joint compound (a plaster-like paste used to fill and smooth seams, dents, and screw holes) and drywall tape (a reinforcing strip — either paper or fiberglass mesh — embedded in the compound to keep the seam from cracking). A wall where you genuinely cannot find the seams is the result of feathering the compound out wide and thin over several coats, not a different material or some hidden trick. Fiberglass mesh tape is more forgiving for small patch jobs; paper tape is what most professional new-construction seams use because it resists cracking slightly better over the long run.

🤔 Patch, Repair, or Call Someone

Small holes, hairline cracks, and nail pops are genuinely reasonable to handle yourself — the material and process for that specific job are covered step by step in the dedicated patching post below, since that’s a hands-on task worth walking through properly rather than summarizing here. Larger jobs change the calculation fast: hanging full new sheets, water-damaged drywall that’s gone soft or moldy, or repairs near electrical boxes all bring in enough complexity, weight, or risk that a contractor’s quote is worth getting before committing a weekend to it. The material itself is forgiving. The scale and safety of the job is what should decide who’s holding the taping knife.

🛒 Gear Worth Having

3M Patch Plus Primer Self-Adhesive Drywall Patch — A metal mesh patch with primer built in, sized for the small-to-medium holes that make up most household drywall damage — no separate backing or tape needed.

USG Sheetrock Pre-Mixed All-Purpose Joint Compound — Ready to use straight from the bucket, which matters most on a first attempt when mixing your own powder compound is one more variable than you need.

3M Drywall Sanding Sponge, Fine/Medium Grit — Contours to the patch better than flat sandpaper, and the dual-grit sides mean one sponge handles both the rough smoothing and the final pass.

As an Amazon affiliate, I earn from qualifying purchases. Thank you for supporting SkippityWhistles.

📖 Related Reads

SkippityWhistles is part of the WhistleBump group – find the rest of the family at WhistleBump.com.

2002

©2026 John D Reinhart/Skippitywhistles.com — All rights reserved
How to Choose the Right Fastener (Or: Not Every Screw Wants the Same Job)

Wood, drywall, concrete, and metal all need a different fastener — here’s how to know which one before you’re holding the wrong screw.

Ron keeps a coffee can of assorted screws on the workbench and, historically, has grabbed from it the same way he’d grab a snack — whatever’s closest, whatever looks about the right size. This worked fine right up until the deck board he was fastening split down the middle, because the screw closest to the top of the can was meant for drywall, not for anything outdoors, and definitely not for anything under load.

A fastener isn’t one decision. It’s three or four smaller decisions stacked together — material, load, drive type, length — and getting even one of them wrong is how a five-minute job turns into a return trip to the hardware store.

🪵 Start With What You’re Fastening Into

Wood generally wants wood screws — deep, widely spaced threads designed to bite into a soft, fibrous material. Drywall wants drywall screws, which have a sharper point and finer thread built for a thin, brittle material that doesn’t take a wood screw’s aggressive thread well. Concrete and masonry need a fastener rated for masonry, usually installed into a pre-drilled hole with a matching anchor, since nothing simply threads directly into cured concrete. Metal-to-metal work needs self-tapping screws (screws with a sharp point and thread specifically designed to cut their own threads into metal as they’re driven, rather than needing a pre-cut thread already in place).

Mismatching this first decision is the single most common fastener failure — not weak material, not the wrong tool, just the wrong screw for what’s actually on the other side of it.

⚖️ Load Changes Everything

A picture frame and a deck railing are not the same fastening problem, even if the screw in the hardware bin looks identical for both. Anything load-bearing or structural — railings, shelving holding real weight, framing connections — calls for a fastener rated for that use, often a structural screw or a bolt with a nut rather than a general-purpose wood screw. Cosmetic or light-duty fastening, like hanging a picture or securing trim, has much more forgiving requirements. When in doubt about how much weight or stress a connection needs to hold, sizing up in both fastener strength and quantity costs very little and fails far less often than guessing light.

🔧 Drive Type Is Not Just Preference

The drive type (the shape of the recess in a screw head that a driver bit fits into — Phillips, Torx, square, slotted) determines how well a driver bit grips under pressure. Phillips heads are the most common but the driver can slip out (“cam out”) under high torque. Torx and square drive resist cam-out much better, which is why more structural and outdoor screws have moved toward those drive types. If a project involves driving a lot of screws or driving into dense material, a Torx or square-drive screw will save real frustration over a Phillips equivalent.

📏 Gauge, Length, and the Pilot Hole Question

Gauge (a number describing a screw’s shaft diameter — higher gauge numbers mean a thicker screw) needs to match the job’s demands: thin trim work uses a lower gauge, structural framing uses a higher one. Length should generally let the screw penetrate at least half its length into the base material beneath whatever’s being fastened, not just through the top piece. A pilot hole (a small hole drilled before driving a screw, sized slightly smaller than the screw itself) prevents splitting in hardwood or near the edge of a board, and is close to mandatory for anything going into hardwood or near a board’s edge — skipping it is how Ron split that deck board in the first place.

🌦️ Indoors vs. Outdoors: Coating Matters

A screw with no corrosion-resistant coating will rust within a season outdoors, and rusted fasteners weaken and stain everything around them. Exterior work needs coated or stainless fasteners rated for outdoor or treated-lumber use specifically — treated lumber’s chemical preservatives corrode standard screw coatings faster than plain weather exposure alone. If a project is going outside or into treated wood, checking the box for an exterior or treated-lumber rating is a five-second step that prevents a much bigger problem eighteen months from now.

📖 When the Fastener Itself Is the Whole Project

Some fastening situations are specific enough to deserve their own deeper dive rather than a paragraph here — hanging something heavy on drywall with no stud behind it, working with actual nuts and bolts and their sizing conventions, or driving anything into cured concrete each have their own decision points worth walking through properly. Those are covered in full in the Related Reads below.

🛒 Gear Worth Having

Wensilon Multi-Material Screw Assortment Kit — Covers wood, deck, and general construction screws with a T-Star drive that resists cam-out, in a size range wide enough to replace most of the mismatched coffee-can situation at once.

DEWALT Titanium Drill and Drive Bit Set — Pairs pilot-hole drill bits with matching driver bits in one case, which solves the actual problem of never having the right pilot bit on hand when the screw calls for one.

Divanc Stainless Steel Exterior Screw Assortment — Rated for treated lumber and outdoor exposure, so the deck or fence project doesn’t come back to haunt you with rust streaks two summers from now.

As an Amazon affiliate, I earn from qualifying purchases. Thank you for supporting SkippityWhistles.

📖 Related Reads

SkippityWhistles is part of the WhistleBump group – find the rest of the family at WhistleBump.com.

2001

©2026 John D Reinhart/Skippitywhistles.com — All rights reserved