
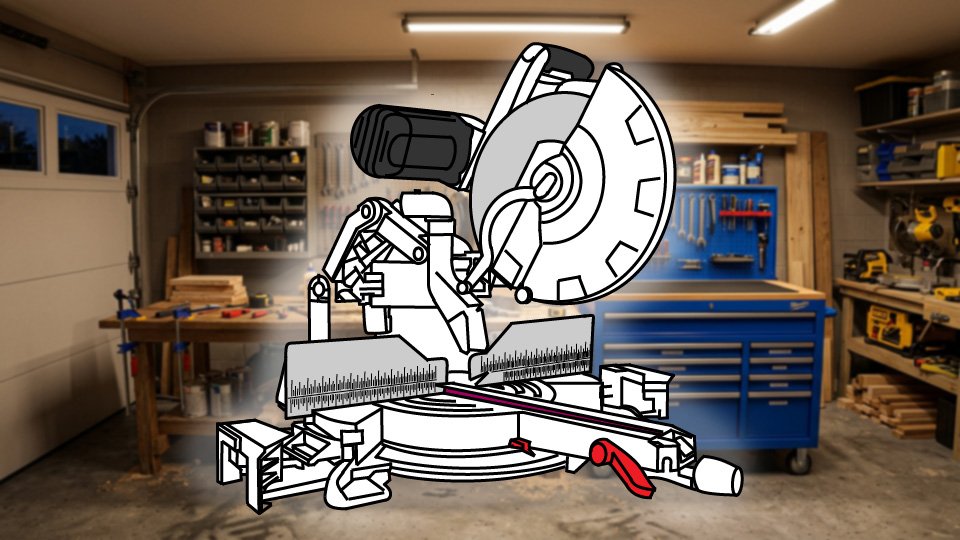
Ron needed to trim a 90-degree corner, so he set his miter saw to 90 degrees, because that is what a reasonable person would assume a 90-degree corner requires. The two pieces came out looking less like a corner and more like a flat, confused line. He tried it again. Same flat, confused line. Ron had discovered, the hard way, that a miter saw’s angle setting has almost nothing to do with the number on the corner it’s supposed to create.
Here’s the part that trips up almost everyone the first time: the angle you set on the saw is half the corner angle, not the corner angle itself. A 90-degree corner needs each piece cut at 45 degrees. Once that clicks, the whole tool suddenly makes sense.
🎯 The Core Idea: Precision, Not Speed
A miter saw’s actual superpower isn’t cutting fast — it’s cutting the exact same angle, over and over, with total consistency. Cut ten pieces of trim at 45 degrees, and all ten come out at genuinely, reliably 45 degrees. That repeatability, not raw speed, is the entire reason this tool exists.
🔩 The Parts You’re Working With
- The blade rotates down into the material in one clean motion — not a back-and-forth or continuous spin, just one decisive cut.
- The table stays stationary and holds your material flat.
- The fence is the backstop your material presses against. The fence needs to sit truly perpendicular to the blade. If it’s off by a tiny amout, every cut inherits that same small error.
- The angle adjustment is what lets the blade swing to a specific degree and lock there.
- Some saws add a bevel adjustment, which tilts the blade itself for compound cuts — genuinely not something most trim work ever needs.
🛠️ Setting Up Before You Cut
- Check that the blade is sharp and matched to your material — a dull or wrong blade tears instead of cutting cleanly.
- Square the fence by holding a square against it and the blade; if there’s a gap anywhere, adjust the fence screw until there isn’t.
- Set your angle, using the saw’s detents at common angles like 45 and 30 degrees, which snap firmly into place.
- Then measure and mark your material clearly before it ever touches the blade.
✂️ Making the Cut
- Position the material against the fence with your mark lined up to the blade, and clamp it — one clamp on each side of the blade, never directly in the blade’s path.
- Stand to the side of the saw, not in front of it; that’s where most miter saw accidents actually happen.
- Squeeze the trigger and let the blade reach full speed before it touches anything — you’ll hear the saw’s motor settle into a consistent pitch.
- Pull the handle down smoothly, no jerking, and let the blade do the cutting rather than forcing it.
- Once through, release the trigger and let the blade come to a complete stop before lifting it back up or reaching for your material.
📐 The Angle Math Nobody Explains Up Front
A miter joint is where two pieces meet at an angle, and the number you set on the saw is always half of the corner you’re trying to create. A 90-degree corner needs each piece cut at 45 degrees. A 60-degree corner needs each piece cut at 30 degrees. This single detail is exactly where Ron went wrong, and it’s exactly where most first-time miter saw users go wrong too — the saw’s angle and the corner’s angle are related, but they are never the same number.
🚫 The Mistakes Worth Avoiding
- An unsquared fence throws off every single cut that follows it. Cutting before the blade hits full speed causes binding and rough edges.
- Jerking the handle down tears the material instead of slicing it.
- Unsecured material shifts mid-cut and ruins the angle you were aiming for.
- Reaching near a blade that’s still slowing down is how most injuries happen.
- And setting the saw to the corner angle instead of half of it is the mistake that started this whole story.
🎯 When to Reach for This Saw (and When Not To)
A miter saw earns its keep on trim, molding, door casings, and anything needing precise, repeatable angled cuts. It’s the wrong tool for ripping boards lengthwise, cutting material wider than its capacity, or making curved cuts — a circular saw or jigsaw covers that ground instead.
🛒 Gear Worth Having
DEWALT 10-Inch Single Bevel Miter Saw — Solid accuracy and reliable power in the size most homeowners actually need — a genuine sweet spot for trim work.
Miter Saw Stand — Holds the saw at a comfortable working height and catches most of the mess before it spreads across the whole garage floor.
Carbide-Tipped Fine-Cut Blade, 80-Tooth — A genuinely cleaner cut on trim than the stock blade most saws ship with, and it holds an edge noticeably longer.
As an Amazon affiliate, I earn from qualifying purchases. Thank you for supporting SkippityWhistles.
📖 Related Reads
SkippityWhistles is part of the WhistleBump group – find the rest of the family at WhistleBump.com.
7043
©2026 John D Reinhart/Skippitywhistles.com — All rights reserved