How to Choose the Right Ladder: The Tall Mistake You’re About To Make

Wrong ladder = broken back. Right ladder = fixed gutter and spine still intact. Here’s how to pick the ladder that won’t betray you halfway up.

You’re standing in the hardware store looking at ladders.

You think: “I need to reach the gutter. That’s, what, 20 feet? I’ll just grab a 20-footer and I’m done.”

Wrong. Oh, so very wrong.

The wrong ladder choice is how you end up explaining to your signigicant other why you’re now wearing a back brace and can’t climb stairs for three months. The right ladder choice is how you fix your gutter, climb down safely, and never think about it again.

Choosing the wrong type of ladder, the wrong height, the wrong material, or the wrong weight rating means your ladder either doesn’t reach what you need to reach, or it reaches it but then betrays you halfway through the job by being unstable, wobbly, or simply collapsing under your weight.

Understanding what types of ladders exist, how tall you actually need to go, what weight rating matters, and how to safely use whatever you choose means the difference between “I fixed the gutter” and “I need emergency room directions.”

Let’s learn how to pick a ladder so you don’t become a cautionary tale your neighbors tell at barbecues.


The Core Principle: The Right Ladder For The Job Exists—And It’s Probably Not The One You’re Thinking Of

This is the mindset shift that separates people who climb ladders safely from people who are currently healing from ladder-related injuries.

Ladders come in different types, heights, and weight ratings. Each one is designed for a specific job. Using the wrong ladder for your job is how accidents happen.

Your job is not:

  • “I need to reach something high”

Your job is:

  • “I need to reach 15 feet safely while leaning against my house”
  • Or: “I need to reach 8 feet while standing in a flower bed”
  • Or: “I need a stable platform to work from while painting my deck”

Each of those requires a different ladder. Use the wrong one and you’re either struggling with a ladder that’s too unstable, or you’re overreaching with a ladder that’s too tall and unstable for the job.

Understanding this means understanding that “tall” and “safe for your job” are not the same thing.


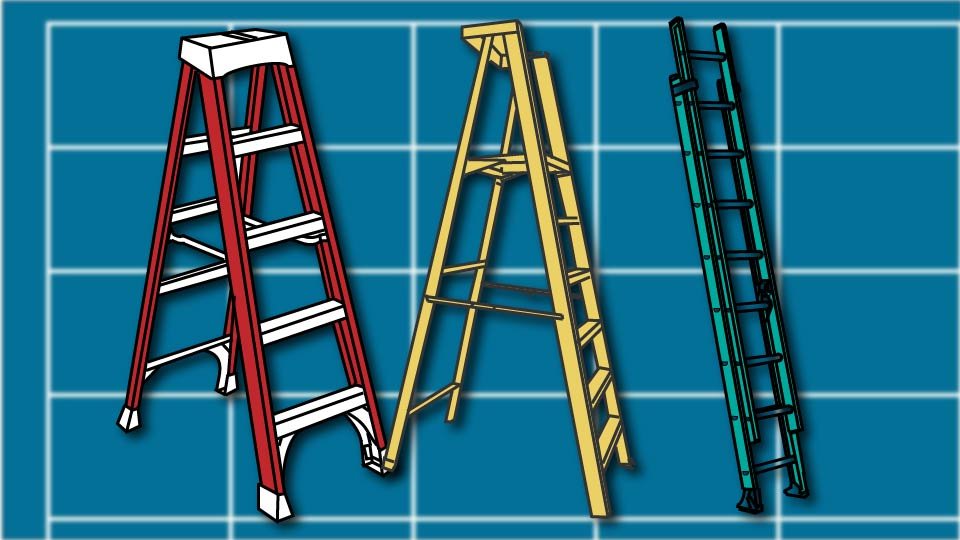
The Ladder Types (What You’re Actually Choosing Between)

Stepladder (The Stable One)
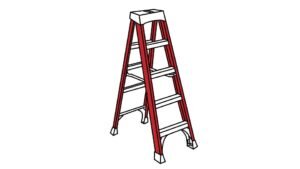
A line drawing of a step ladder by John D Reinhart in the Three-Point method.

This is the A-frame ladder. Two legs, a peak, some steps you stand on.

What it is: A self-supporting ladder that doesn’t need anything to lean against.

What it’s good for: Interior work, painting ceilings, reaching high shelves, working in the middle of a space where you don’t have a wall to lean against.

Height range: Usually 4 to 12 feet.

Real talk: Stepladders are stable because they stand on their own. You don’t need to lean them against anything. But they’re also only good for work directly above you. You can’t reach far to the side without losing stability.


Extension Ladder (The Reach One)
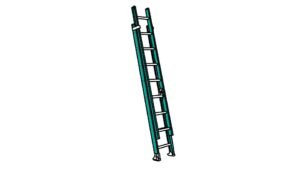
A technical line drawing of an extension ladder by John D Reinhart in the Three-Point method.

This is the long ladder you see leaning against houses. Two rails, rungs, and a pulley system that lets you extend it up and down.

What it is: A ladder that leans against something (wall, gutter, tree) and reaches high.

What it’s good for: Exterior work, reaching gutters, cleaning siding, reaching high branches.

Height range: Usually 20 to 40 feet (fully extended).

Real talk: Extension ladders reach high, but they need something sturdy to lean against. They’re also less stable than stepladders because you’re at an angle. One slip and you’re falling sideways.


Platform Ladder (The Work Platform One)
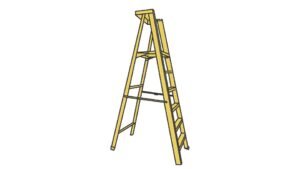
A technical line drawing of a platform ladder by John D Reinhart in the Three-Point method.

This is a stepladder with a flat platform at the top instead of just a single step.

What it is: A stepladder designed to let you stand safely on a wide platform while working.

What it’s good for: Painting, replacing light fixtures, any job where you need to stand still and work with both hands.

Height range: Usually 4 to 12 feet.

Real talk: Platform ladders are more stable than stepladders for extended work because the platform is bigger and more comfortable. But they’re heavier and more awkward to move.


The Height (What You Actually Need, Not What You Think You Need)

This is where most people make mistakes.

You think: “I need to reach 20 feet, so I’ll buy a 20-foot ladder.”

Reality: A 20-foot ladder leaning against your house at a safe angle reaches about 18 feet. And you shouldn’t be standing on the very top rung anyway (that’s a fall risk).

Real math:

  • A 20-foot extension ladder reaches roughly 18 feet when leaned against something
  • You should never stand higher than 3 rungs from the top
  • So a 20-foot ladder gives you safe working height at about 15 feet
  • If you need to reach 15 feet, buy the 20-footer
  • If you need to reach 20 feet, you need a 24 or 28-footer

Real talk: Most home jobs are between 8 and 16 feet. A 20-foot extension ladder covers almost everything residential. Don’t overthink it.


The Weight Rating (The Thing That Actually Matters)

Every ladder has a weight rating. This is the maximum weight the ladder can safely support—including you, your clothes, your tools, your guilt about procrastinating on this job, everything.

Weight rating categories:

  • Type III: 250 lb capacity (light duty, mostly DIY)
  • Type II: 300 lb capacity (medium duty, still DIY-friendly)
  • Type I: 350 lb capacity (heavy duty, professional-grade)
  • Type IA: 375 lb capacity (extra heavy duty, rarely needed around the house)

Real talk: Buy a ladder with a weight rating at least 100 lbs higher than your actual weight plus your tools. If you weigh 200 lbs and your tools weigh 20 lbs, buy a Type I (350 lb) ladder, not a Type III (250 lb).

Why? Because operating at maximum capacity all the time wears out the ladder faster and reduces safety margins. You want headroom.


The Material (Aluminum vs. Fiberglass vs. Wood)

Aluminum

Pros: Light, won’t rust, easy to move, affordable

Cons: Conducts electricity (dangerous around power lines)

Real talk: Great for most residential work, except if you’re near electrical lines or metal roofs.


Fiberglass

Pros: Won’t conduct electricity, durable, stable, professional-grade

Cons: Heavy, more expensive, overkill for most home projects

Real talk: If you’re working near power lines, fiberglass is your only choice. Otherwise, aluminum is just fine and much lighter.


Wood

Pros: Classic, looks nice if that matters, won’t conduct electricity

Cons: Heavy, rots if not maintained, splinters, generally outdated

Real talk: Don’t buy a wood ladder. Aluminum or fiberglass. That’s it.


How To Use A Ladder Safely (The Part You Might Skip But Shouldn’t)

Step 1: Inspect The Ladder Before Using It

Look for cracks, bent rails, loose rungs, anything that looks wrong.

Real talk: A damaged ladder is a falling ladder. Don’t use it.


Step 2: Set It Up On Level Ground

Don’t lean an extension ladder against something on uneven ground. Don’t set a stepladder on a slope.

Real talk: Uneven ground means unstable ladder. Find level ground or use shims to level it out.


Step 3: Lean Extension Ladders At The Right Angle

The magic angle is roughly 75 degrees (or the “1-foot-out-for-every-4-feet-up” rule).

What that means: If your ladder is 20 feet tall, the base should be 5 feet away from the wall.

Real talk: Too steep and the ladder flips backward. Too shallow and the top slides down. Get the angle right.


Step 4: Keep Three Points Of Contact

Two hands and one foot, or two feet and one hand. Always.

Real talk: This is the golden rule. If you’re reaching for something that requires letting go of the ladder with both hands, you’re overreaching. Climb down and reposition the ladder.


Step 5: Don’t Overreach

Your belt buckle should stay between the two rails of the ladder. If you’re leaning sideways, you’re overreaching.

Real talk: Overreaching is how you fall sideways off a ladder. It’s a bad way to learn this lesson.


Step 6: Use Both Feet On The Rung

Not one foot, both feet. Centered on the rung.

Real talk: Standing on one foot is unstable and looks like you’re about to fall. Because you are.


Step 7: Never Jump Down

Climb down like you climbed up. One rung at a time.

Real talk: Jumping might be faster, but it’s also how you twist an ankle or miss a rung and fall. Walk down.


Common Ladder Mistakes (Learn From These)

❌ Using an extension ladder as a stepladder You lean it against something and stand on the side rungs like it’s an A-frame. It’s not. It tips. Solution: Use a stepladder for vertical work.

❌ Standing on the top rung of an extension ladder You think you need those extra 12 inches. You don’t. The top rung isn’t meant to stand on. Solution: Climb down and reposition.

❌ Using the wrong weight rating You’re heavier than the ladder is rated for. The ladder fails. Solution: Check your weight, buy appropriate rating, don’t lie to yourself.

❌ Leaning an extension ladder on a gutter Gutters aren’t designed to support ladder weight. The gutter bends or breaks. Solution: Lean against the fascia board (the flat board behind the gutter) or use a ladder standoff.

❌ Setting up on uneven ground One side of the stepladder is higher than the other. It tips. Solution: Find level ground or shim it.

❌ Overreaching You’re leaning sideways so far that only one foot is on the ladder. You fall. Solution: Climb down, reposition, try again.

❌ Working alone You fall and there’s no one to call for help or find you. Solution: Tell someone you’re working on the ladder. Better yet, have them spot you.

❌ Using a damaged ladder The ladder breaks while you’re on it. Solution: Inspect before use. If it’s damaged, don’t use it.

Real talk: Ladder accidents are preventable. Most of them come from user error, not ladder failure.


When To Hire A Professional

Hire someone when:

  • You need to reach higher than 28 feet (equipment rental territory)
  • You’re working near power lines (electricity kills)
  • You have a medical condition that makes balance difficult
  • You’re uncomfortable with heights (seriously, don’t push through this)
  • The job involves extended work in a dangerous position
  • Your roof is steep or slippery

Your safety is worth $200-500. Don’t be a hero.


The Bottom Line

Choosing the right ladder means:

  • Understanding what type of work you’re doing (not just “I need height”)
  • Buying a ladder tall enough for the job (plus 3 feet of buffer)
  • Checking the weight rating and respecting it
  • Choosing the right material (aluminum or fiberglass, not wood)
  • Using it safely (three points of contact, right angle, no overreaching)
  • Knowing when to hire a professional instead

Do this right, and you’ll climb safely, fix what needs fixing, and climb back down intact.

Do it wrong, and you’ll spend the next three months explaining to everyone why you’re wearing a back brace and moving slowly.

Your choice. 🛠️


Related Guides You Might Find Helpful


Amazon Affiliate Recommendations

Extension Ladders

Extension Ladder (20-Foot) – The workhorse. Reaches about 18 feet safely. Perfect for most home projects.

Extension Ladder (24-Foot) – For bigger homes or higher gutters. Lighter than fiberglass, reaches about 22 feet safely.

Extension Ladder (20-Foot, Fiberglass) – If you’re working near power lines. Heavier, but electrically safe.

Stepladders

Stepladder (8-Foot, Aluminum) – Interior work, reaching shelves, most indoor jobs. Stable and self-supporting.

Platform Stepladder – Better for extended work. Wide platform, more comfortable for painting or fixture replacement.

As an Amazon Associate, I earn from qualifying purchases. Click through the links above to support Skippity Whistles.


Ladder safety is critical. Always inspect ladders before use. Never use a ladder near power lines without fiberglass construction. Never stand on the top rung of an extension ladder. Always maintain three points of contact. Never use a ladder under the influence of alcohol or medication that affects balance. Keep both hands free to grip the ladder—if you need both hands for the job, you’re overreaching. If you fall from a height over 10 feet, seek immediate medical attention even if you feel okay. Know your limitations and hire a professional when necessary.


Skippity Whistles is part of the John D Reinhart content family. Writer, illustrator, videographer, and accidental filmmaker — find the whole story at JohnDReinhart.com.

7058

©2026 John D Reinhart/SkippityWhistles.com All rights reserved

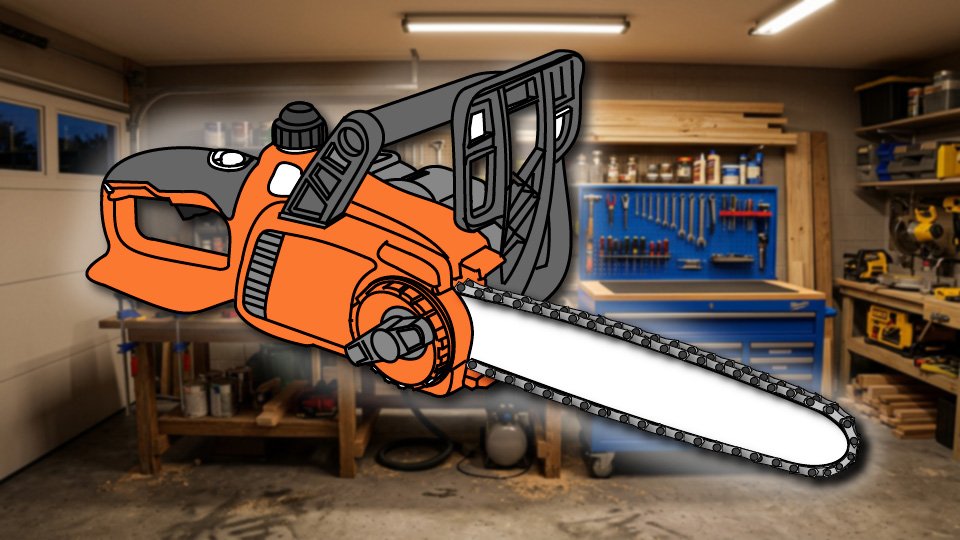
How to Use a Chainsaw (Or: Respect It Completely, Every Single Time)

A chainsaw will hurt you if you give it a chance. Here’s how to use one safely, what protection you need, and when to admit you should’ve hired a professional instead.

Ron had the chaps sitting right there in the garage and almost skipped them for what was going to be one quick branch — thirty seconds of cutting, he figured, didn’t need the full gear-up. A neighbor walking by asked, genuinely, whether he was really about to run a chainsaw without them for a job that takes less time to suit up for than it does to make excuses about skipping it. Ron put the chaps on. That’s the whole story, and it’s the right one — nothing dramatic happened, because nothing dramatic is exactly the goal.

A chainsaw is not a casual tool. It has a moving loop of sharp teeth that cuts wood, and it will cut other things with equal enthusiasm if given the slightest chance. This isn’t about being fearless around it. It’s about being appropriately respectful of it, every single time, with zero exceptions for jobs that feel too quick to matter.

⚠️ The Core Principle

  • Kickback – a sudden, violent upward or backward snap of the guide bar toward the operator – happens when the chain binds or the tip of the bar contacts something unexpectedly.
  • Binding – the chain suddenly stopping or jerking mid-cut – is the warning sign that comes right before kickback.

Both are the reason every rule below exists — not to make chainsaw use complicated, but because a saw that’s fighting you is a saw about to do something sudden.

🔩 The Parts You’re Working With

  • The engine or motor spins the chain — gas engines are more powerful and louder, electric motors are quieter and lower-maintenance, and both are equally capable of causing serious injury if mishandled.
  • The guide bar is the long metal track the chain spins around; treat it as live the entire time the saw is running, full stop.
  • The chain is the actual loop of teeth doing the cutting, and it moves fast enough to cut through flesh more easily than it cuts through wood.
  • The throttle trigger is the entire relationship between you and whether the chain is spinning — squeeze for full speed before cutting, release to stop.

🦺 Safety Equipment: Not Optional, Not Negotiable

  • Eye protection (safety glasses or a face shield) stops flying wood chips before they reach an eye that doesn’t get a second chance.
  • Hearing protection (earplugs or earmuffs) prevents permanent hearing loss that shows up gradually and never reverses.
  • Chainsaw chaps, made from ballistic material designed to jam the chain the instant it contacts them, are the single most important item on this list — the difference between a jammed chain and a serious leg injury.
  • Steel-toed boots protect feet from falling wood and dropped saws.
  • A hard hat is required any time you’re cutting above head height, since falling branches are a real and common hazard.
  • Work gloves protect against splinters and minor cuts while handling both the wood and the saw.

Every item here gets worn every time, not just on the cuts that feel risky.

🛠️ Before You Start

  • Check chain tension — snug against the bar but able to pull slightly by hand; too loose and it can fly off mid-cut, too tight and it binds.
  • Check fuel or battery charge before starting, not mid-job.
  • Inspect the bar for damage or dull spots.
  • Confirm the oil tank is full — a dry chain smokes, grinds, and fights the cut instead of gliding through it. Five minutes of this prevents the kind of afternoon nobody wants.

🧍 Positioning and Starting

  • Stand on stable, solid ground only — a chainsaw and a ladder, or any unstable footing, is a combination worth avoiding entirely.
  • Follow the manufacturer’s starting procedure exactly, since cold-start sequences vary by model.
  • Once running, stand to the side of the saw, never directly behind it, so kickback has less of you in its path.
  • Keep both hands on the saw at all times, no exceptions for a quick adjustment.
  • Hold it at waist height or slightly above, and never reach or stretch toward the cut.

✂️ Making the Cut

  • Bring the chain to full throttle before it ever touches the wood — a chain running at partial speed binds far more easily and is a direct path to kickback.
  • Guide the saw into the cut smoothly and let the chain do the actual cutting rather than forcing it through.
  • If the saw is struggling or binding, that’s the signal to stop, back out slowly, release the throttle, and reassess rather than push harder.
  • Once through, back the saw out and release the throttle completely before setting it down or reaching toward the cut.

🚫 The Mistakes Worth Never Making

  • Loose clothing or untied long hair can catch on a moving chain and pull the rest of you toward it.
  • Operating with one hand removes real control at the exact moment control matters most.
  • Running at partial throttle invites binding.
  • Working alone means nobody’s there if something goes wrong.
  • Working tired or rushed is how careful people make careless mistakes. Working on a ladder or unstable ground turns a slip into a much bigger problem.
  • Ignoring maintenance — a dull or loose chain — makes every one of these risks worse.
  • And not planning for where a cut piece or falling branch will land is how people get hit by the very thing they just cut.

🎯 When to Just Hire a Professional

Cutting firewood, clearing fallen branches, or light work on your own property with a clear, controlled setup is reasonable territory for a homeowner who’s trained and comfortable with the tool. Large trees, anything complex or genuinely dangerous, or any real uncertainty about your own ability to control the situation is a job for a professional — one who typically handles it for a few hundred dollars, which is a small price next to the alternative. There’s no shame in that call. It’s the correct one.

😬 If This Post Scared You a Little

Good.

That’s not a side effect of this post — that’s the actual point of it. A chainsaw is one of the few tools in a home garage that can cause genuinely serious harm in a fraction of a second, and a little healthy fear is exactly the response that keeps both hands where they belong and the chaps on for every cut, not just the ones that feel risky.

The people who get hurt by chainsaws are rarely the ones who were nervous about them. Take that nervousness as a feature, not a flaw — it’s the same instinct that makes you double-check the chain tension and skip the ladder.

Respect the tool, keep the fear, and you’ll be exactly the kind of cautious this job actually calls for.

🛒 Gear Worth Having

Chainsaw Safety Chaps, Ballistic Fabric — The single most important item on this entire list — designed to jam a chain instantly on contact instead of letting it reach skin.

Forestry Safety Helmet with Face Shield and Ear Muffs — Combines head, eye, and hearing protection into one piece of gear, so there’s no excuse for skipping any one of the three.

16-Inch Electric Chainsaw — Right-sized power for firewood and fallen branches, with lower maintenance and noise than a gas equivalent for occasional homeowner use.

As an Amazon affiliate, I earn from qualifying purchases. Thank you for supporting SkippityWhistles.

📖 Related Reads


SkippityWhistles is part of the John D Reinhart content family. Writer, illustrator, videographer, and accidental filmmaker — find the whole story at JohnDReinhart.com.

7051

©2026 John D Reinhart/SkippityWhistles.com — All rights reserved
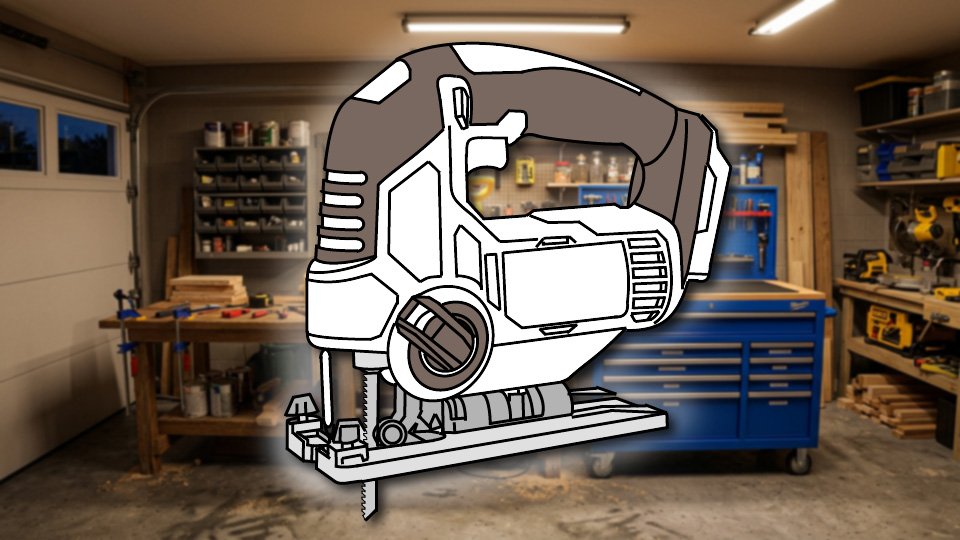
How to Use a Jigsaw (Or: The Blade that Was Never in a Hurry)

A jigsaw cuts curves with a vibrating blade. Here’s how to guide it smoothly, what blades work best, and why forcing it ruins everything.

Ron was halfway through a curve, running a little behind schedule, and decided the saw could probably keep up if he just pushed a bit harder through the tight part. It could not. There was a small, distinct ping, and the blade — which had been doing exactly what it was designed to do right up until that moment — was now in two pieces instead of one. The jigsaw hadn’t failed. It had simply reached the end of what “a bit harder” was willing to tolerate.

A jigsaw isn’t a power tool in the aggressive, brute-force sense. It’s a controlled, patient tool that cuts curves other saws simply can’t manage — and the entire skill is guiding it smoothly along a line rather than trying to hurry it toward the finish.

⚙️ The Core Idea: Controlled Vibration, Not Power

The blade moves up and down — oscillates — hundreds of times a minute, cutting on the upstroke and resetting on the downstroke. You’re not forcing material through the blade. You’re guiding the tool along a line while the blade does its own small, repetitive work. Push it faster than that rhythm wants to go, and the blade either binds, tears the material, or, as Ron discovered, simply breaks.

🔩 The Parts You’re Holding

The motor drives the blade’s up-and-down motion, and many modern jigsaws offer variable speed — slower for delicate work, faster for aggressive cutting. An older, fixed-speed model, the kind that tends to get inherited rather than bought, just means you control the pace with how fast you feed the saw instead of a dial.

The blade itself comes in several types: coarse wood-cutting blades for fast cuts, fine metal-cutting blades for slower and cleaner work, and fine scroll blades for genuinely intricate curves.

The base plate rests flat against the material and keeps the blade perpendicular — a bent or worn plate throws off every cut that follows.

Some jigsaws include an adjustable shoe for bevel cuts, though square (90 degrees) covers the overwhelming majority of everyday use.

🛠️ Using It, Step by Step

  • Secure the material firmly — a piece that shifts mid-cut ruins the line and announces itself with a distinctive, unmistakable bucka-bucka-bucka that everyone in the house will hear and correctly interpret.
  • Mark the cut line clearly; freehanding a curve with no line to follow isn’t really a technique, it’s a guess.
  • Match the blade to the material — running a wood blade against thin metal sounds uncannily like a baseball card caught in bicycle spokes, and does about as much good. Insert the blade fully into the quick-change chuck and confirm it’s seated tight, since a loose blade breaks, falls out, or both.
  • Position yourself to the side of the saw in a stable, comfortable stance, since curve-cutting takes patience and fine control over a longer stretch than a quick straight cut.
  • Turn it on and let the blade reach full speed before it touches anything.
  • Guide it along the line with light, steady pressure, letting the blade’s own rhythm do the actual cutting — rushing it is exactly how Ron ended up with two shorter blades instead of one working one.
  • Follow the line smoothly without jerking to correct direction. Once through, lift the saw clear, release the trigger, and let it coast to a stop rather than forcing it still.

🕳️ Plunge Cuts: Starting in the Middle

Cutting a hole in the middle of material, rather than starting from an edge, calls for a plunge cut. Drill a small starter hole slightly larger than the blade, tilt the saw so the front of the base plate touches the material with the blade held above it, start the saw and let it reach full speed, then lower the blade slowly and steadily into the starter hole. Once the base plate sits flat, begin guiding the cut normally. This is a genuinely advanced technique — worth trying only once ordinary edge cuts feel comfortable and predictable.

🚫 The Mistakes Worth Avoiding

  • Forcing the saw through a cut is the direct cause of binding, tearing, and the specific ping that ended Ron’s afternoon early.
  • A dull blade demands more force and fails faster than a sharp one. Unsecured material moves mid-cut and ruins the line.
  • Jerking the saw to correct direction mid-curve is a reliable way to snap a blade.
  • Plunging too fast binds or breaks the blade before it’s even fully seated.
  • Rushing along the line produces a torn, ragged edge instead of a clean one.
  • Using the wrong blade for the material wastes both the blade and the material.
  • And a blade vibrating or sounding strange is a warning worth stopping for immediately, not a background noise to push through.

🛒 Gear Worth Having

Variable Speed Corded Jigsaw — Genuine speed control for matching the cut to the material, instead of managing pace entirely through feed rate on a fixed-speed model.

Jigsaw Blade Assortment (Wood, Metal, Scroll) — Covers the actual range of materials and curve tightness a jigsaw gets asked to handle, so the wrong blade never has to fake its way through a cut.

3M Impact-Resistant Safety Glasses — Cheap protection against flying sawdust and splinters on every single cut, not just the ones that feel risky.

As an Amazon affiliate, I earn from qualifying purchases. Thank you for supporting SkippityWhistles.

📖 Related Reads


SkippityWhistles is part of the John D Reinhart content family. Writer, illustrator, videographer, and accidental filmmaker — find the whole story at JohnDReinhart.com.

7057

©2026 John D Reinhart/SkippityWhistles.com — All rights reserved
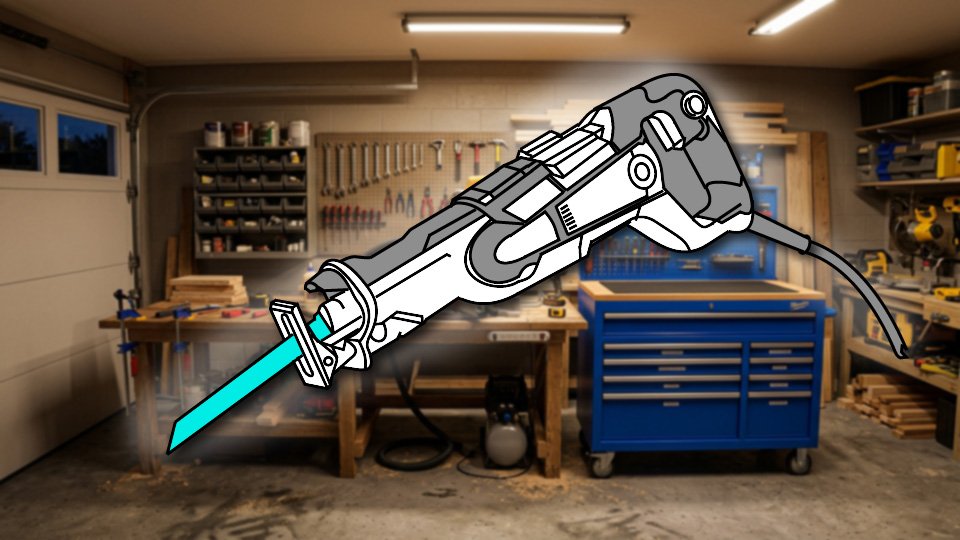
How to Use a Reciprocating Saw (Or: It Wants to Get Away From You)

Reciprocating saws cut aggressively through almost anything. Here’s how to grip it safely so it doesn’t escape, and when it’s the right tool for the job.

Ron gripped his reciprocating saw with just his his hand wrapped around the trigger, figuring the front of the tool was just there to point the blade. The blade caught on a hidden nail mid-cut, and the whole tool twisted hard and fast, nearly wrenching out of his grip entirely. Nothing was wrong with the saw. Ron just hadn’t put his other hand where it actually needed to be — on the front handle, holding on like the tool meant it, because it did. What did you think that grip on the front was for, eh Ronnie?

A reciprocating saw isn’t a precision tool. It’s controlled aggression — a blade moving back and forth hundreds of times a second, built for rough cuts and demolition. Respected properly, it tears through wood, metal, and even nails with real speed. Held wrong, it’s a tool that genuinely tries to twist itself loose the moment it meets real resistance.

⚠️ The Core Principle

The back-and-forth blade motion creates real torque, especially the instant the blade catches on something solid. That torque tries to twist the saw out of your hands or twist your wrist along with it. Your job isn’t to fight the tool’s cutting power — let it cut aggressively, that’s what it’s for. Your job is to make sure it can’t do to your hands what it wants to do the moment it catches.

🔩 The Parts You’re Holding

The blade moves back and forth thousands of strokes per minute, and different blades suit different materials —

  • wood blades with larger teeth cut fast through lumber
  • metal blades with finer teeth handle pipe and studs
  • demolition blades are built for rough, aggressive cutting through mixed material including embedded nails.

Stroke length — how far the blade travels on each cycle, typically 3/4 to 1 1/4 inch depending on the saw — is a fixed spec of the tool itself, not something you adjust; a longer-stroke saw cuts more aggressively and demands more experience to control.

Variable speed, where available, adjusts how fast the blade cycles, but speed is never a substitute for proper grip.

🖐️ The Grip: Two Hands, Straight Wrist, Non-Negotiable

  • Your dominant hand, on the trigger handle, is the main control point — grip firmly, all fingers and thumb locked underneath, without crushing the handle.
  • Your other hand belongs on the front handle, and this is the grip that actually matters most: it’s what prevents the saw from twisting out of your hands the instant the blade catches on something.
  • Grip it like it’s trying to get away, because it genuinely is.
  • Keep your wrist straight rather than bent — a bent wrist acts like a lever, rotating your hand instead of resisting the twist, while a straight wrist actually holds firm against it.
  • Stand with feet shoulder-width apart, leaning slightly into the tool, positioned so that if it does slip, it slides away from your body rather than toward it.

🛠️ Using It: Secure, Position, Cut

  • Secure whatever you’re cutting first — clamps, bracing, or gravity, but it needs to be stable. Material that shifts mid-cut is one of the most common causes of the tool binding and twisting unexpectedly.
  • Position the blade against the material before starting; plunge cuts, starting mid-material with the saw already running, are an advanced technique worth learning after edge cuts feel comfortable.
  • Let the blade reach full speed before pushing into the cut — starting already embedded in material invites binding immediately.
  • Push forward and slightly downward, guiding rather than forcing; pressing hard doesn’t cut faster, it just works the tool harder and makes a twist more likely.
  • Follow your cut line steadily, and don’t expect precision — the blade wanders a little, and that’s normal for a demolition tool.
  • Once through, pull the saw away from the material rather than leaving a running blade sitting in the cut.

🚫 The Mistakes Worth Never Making

  • Gripping with only one hand removes the exact control that stops the tool from twisting loose.
  • A bent wrist turns into a lever instead of resistance. Pressing too hard works the saw harder without cutting any faster.
  • Unsecured material shifts mid-cut and causes binding.
  • A dull blade demands more force and binds more easily than a sharp one.
  • Starting before the blade reaches full speed causes it to bind on first contact.
  • Leaving a running blade in the material creates unnecessary wear and risk.
  • And reaching any part of your body near a running blade is exactly as dangerous as it sounds — just never do it.

🎯 When to Reach for It (and When Not To)

Reach for it for demolition, cutting through nails or metal, rough and fast cuts, salvaging material from something being torn out, or cutting in spots a circular saw can’t reach.

Reach for something else — a circular saw or miter saw — when the job needs precision, a genuinely clean final cut, or speed on a long straight run, since a reciprocating saw simply isn’t built to deliver any of those three.

🛒 Gear Worth Having

Cordless Reciprocating Saw — Genuine freedom of movement for demolition work, without a cord getting caught in exactly the debris you’re trying to cut through.

Demolition Blade Assortment (Wood, Metal, Nail-Embedded) — Covers the mixed, unpredictable material demolition work actually throws at a blade, including the nails a wood blade alone won’t survive.

Bessey Bar Clamp Set — Keeps material from shifting mid-cut, which is one of the most common ways this saw ends up binding and twisting unexpectedly.

As an Amazon affiliate, I earn from qualifying purchases. Thank you for supporting SkippityWhistles.

📖 Related Reads


SkippityWhistles is part of the John D Reinhart content family. Writer, illustrator, videographer, and accidental filmmaker — find the whole story at JohnDReinhart.com.

7054

©2026 John D Reinhart/SkippityWhistles.com — All rights reserved
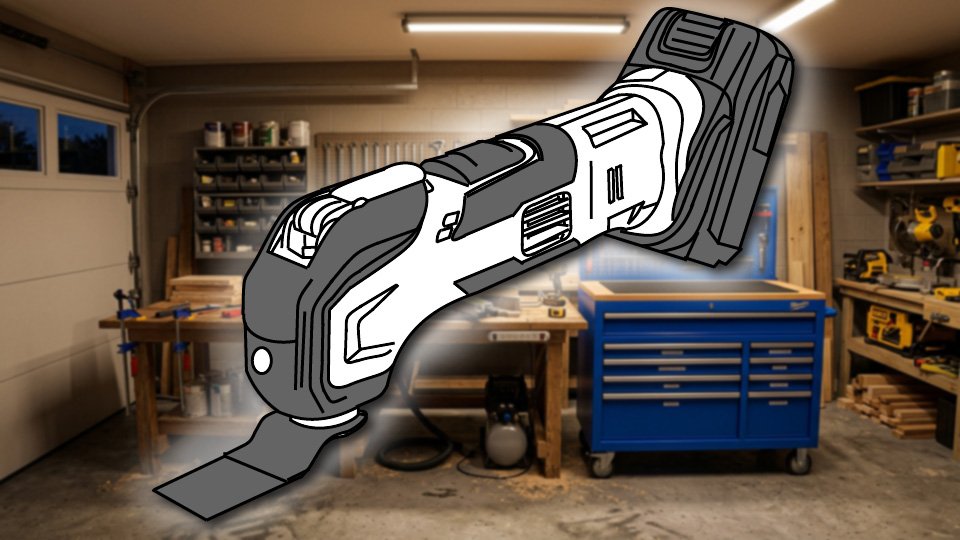
How to Use an Oscillating Multi-Tool (Or: Why It Feels Weirder Than It Is)

This tool doesn’t spin, doesn’t stroke back and forth like a saw, and doesn’t move the way anything else in the garage does — and that’s exactly the point.

Ron grips his oscillating tool like it might buck loose from his hand at any second, and presses it into the work harder than he means to every single time, bracing for something to go wrong. Nothing ever does. What actually happens is the harder grip and the extra pressure slow the blade’s own motion down, which makes the cut worse, not safer — the tool was never fighting him. It just moves in a way nothing else in the garage moves, and that unfamiliar feeling reads as danger even when it isn’t.

An oscillating tool doesn’t spin like a drill and doesn’t stroke back and forth in one long motion like a saw. It vibrates rapidly side to side, hundreds of times a second, and once that specific motion clicks, the whole tool stops feeling unpredictable.

🎯 The Core Idea: Precision, Not Power

This tool isn’t trying to compete with a circular saw or a reciprocating saw on speed or raw material removal. It’s built for one specific advantage: precision in tight spaces nothing else can reach. Trim in a corner, a plunge cut through drywall, sanding right up against an edge — that’s its actual job, not big cuts or heavy demolition.

🔩 The Parts You’re Holding

The body is the handle — small enough for one hand, though two hands give steadier control. The head holds whatever attachment is doing the work, and most modern tools use a quick-change system that swaps attachments without extra tools, which matters, since a fiddly swap process means those extra attachments just never get used. Many models include speed control, letting you dial back for delicate work and up for more aggressive cutting or sanding.

🛠️ Choosing the Right Attachment

  • A saw blade cuts wood, metal, or drywall, in various shapes for different cut types.
  • A sanding pad handles finish work and tight corners a bigger sander can’t reach.
  • A scraper blade removes paint, caulk, or adhesive. A grout blade is built specifically for the narrow lines between tile.
  • A basic starter kit with a saw blade and a sanding pad covers the large majority of what most people ever actually use one for.

✋ Using It: Guide, Don’t Fight

  • Secure whatever’s being worked on — clamp small pieces, and for installed trim or fixtures, a steady hand or gravity is often enough.
  • Turn the tool on and let it reach full speed before the blade ever touches the material.
  • Bring the blade to the work and let the oscillation itself do the cutting or sanding — this is the exact instinct Ron gets backwards every time. Pressing harder doesn’t speed anything up; it slows the blade’s actual motion and wears out the attachment faster.
  • Move in slow, smooth passes rather than jabbing or rushing, and let the tool’s own speed do the work it’s already built to do.

🚫 Common Mistakes

  • Pressing too hard is the one nearly everyone makes first, and it’s counterproductive every time.
  • Using the wrong attachment for the job — sanding with a saw blade, cutting with a sanding pad — just wastes both.
  • Letting the work shift mid-cut produces uneven, damaged results.
  • Jerky, aggressive movement causes rough cuts where smooth passes would have been cleaner and faster.
  • And trying to use it for heavy material removal, the job a reciprocating saw actually exists for, is asking a precision tool to do a demolition tool’s work.

🎯 When to Reach for It (and When Not To)

Reach for it when cutting trim in a tight corner, removing paint or caulk from a small area, sanding inside a corner, cutting a clean hole for an outlet, or doing any detail work where precision matters more than speed.

Reach for something else when the job involves large pieces, heavy material removal, long straight cuts, or genuine time pressure — a circular saw, jigsaw, or reciprocating saw covers that ground far better.

🛒 Gear Worth Having

Variable Speed Oscillating Multi-Tool — Speed control adds real precision for delicate work without giving up power for the more aggressive jobs.

Oscillating Blade and Sanding Pad Assortment Kit — Covers the saw blades and sanding pads that handle the overwhelming majority of what this tool actually gets used for.

AXEMIS Half-Face Respirator Mask Combo Kit with Anti-Fog Safety Glasses — Covers eyes and lungs against the dust this tool kicks up during cutting, sanding, or scraping.

As an Amazon affiliate, I earn from qualifying purchases. Thank you for supporting SkippityWhistles.

📖 Related Reads


SkippityWhistles is part of the John D Reinhart content family. Writer, illustrator, videographer, and accidental filmmaker — find the whole story at JohnDReinhart.com.

7052

©2026 John D Reinhart/SkippityWhistles.com — All rights reserved
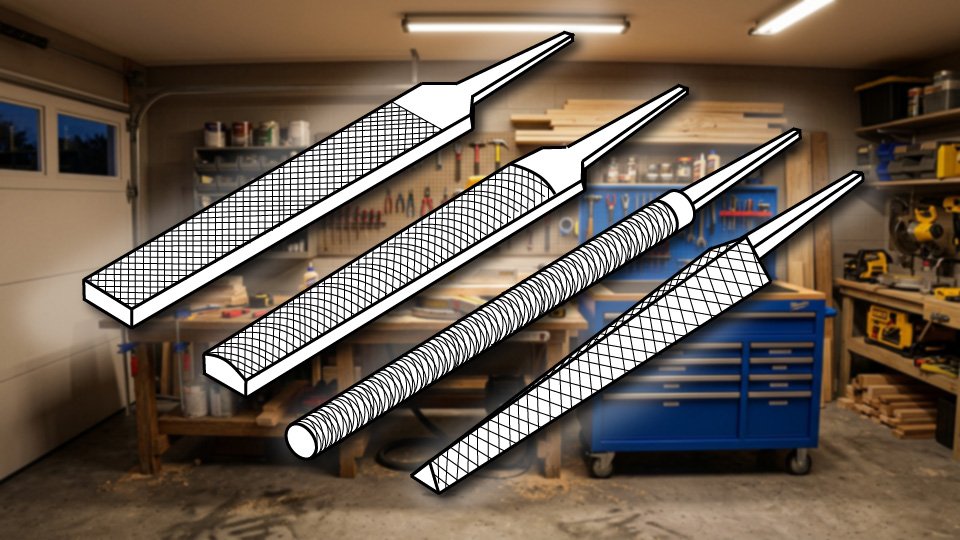
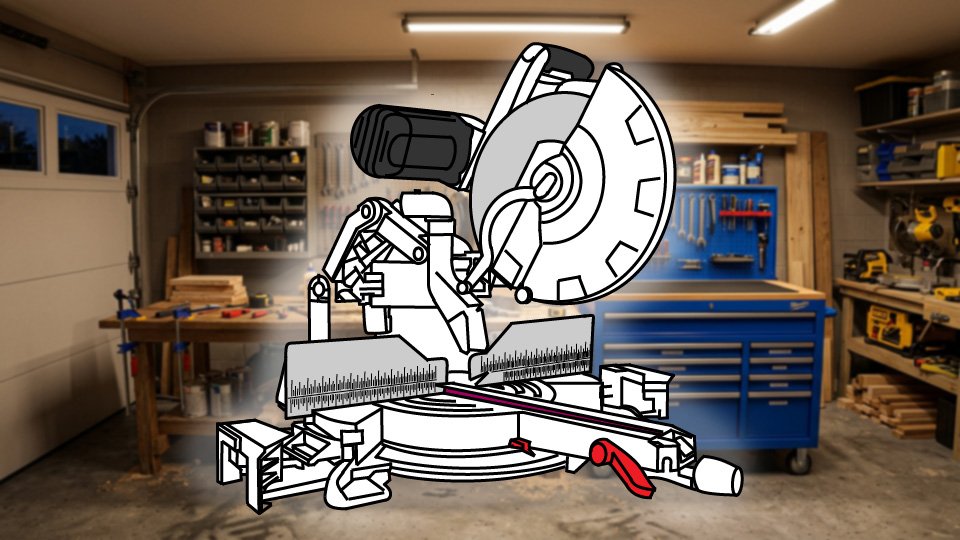
How to Use a Miter Saw (Or: The Angle Is Not What You Think)

A miter saw cuts trim at exact angles. Here’s how to square it up, set your angle (it’s not what you think), and get perfect fits every time.

Ron needed to trim a 90-degree corner, so he set his miter saw to 90 degrees, because that is what a reasonable person would assume a 90-degree corner requires. The two pieces came out looking less like a corner and more like a flat, confused line. He tried it again. Same flat, confused line. Ron had discovered, the hard way, that a miter saw’s angle setting has almost nothing to do with the number on the corner it’s supposed to create.

Here’s the part that trips up almost everyone the first time: the angle you set on the saw is half the corner angle, not the corner angle itself. A 90-degree corner needs each piece cut at 45 degrees. Once that clicks, the whole tool suddenly makes sense.

🎯 The Core Idea: Precision, Not Speed

A miter saw’s actual superpower isn’t cutting fast — it’s cutting the exact same angle, over and over, with total consistency. Cut ten pieces of trim at 45 degrees, and all ten come out at genuinely, reliably 45 degrees. That repeatability, not raw speed, is the entire reason this tool exists.

🔩 The Parts You’re Working With

  • The blade rotates down into the material in one clean motion — not a back-and-forth or continuous spin, just one decisive cut.
  • The table stays stationary and holds your material flat.
  • The fence is the backstop your material presses against. The fence needs to sit truly perpendicular to the blade. If it’s off by a tiny amout, every cut inherits that same small error.
  • The angle adjustment is what lets the blade swing to a specific degree and lock there.
  • Some saws add a bevel adjustment, which tilts the blade itself for compound cuts — genuinely not something most trim work ever needs.

🛠️ Setting Up Before You Cut

  • Check that the blade is sharp and matched to your material — a dull or wrong blade tears instead of cutting cleanly.
  • Square the fence by holding a square against it and the blade; if there’s a gap anywhere, adjust the fence screw until there isn’t.
  • Set your angle, using the saw’s detents at common angles like 45 and 30 degrees, which snap firmly into place.
  • Then measure and mark your material clearly before it ever touches the blade.

✂️ Making the Cut

  • Position the material against the fence with your mark lined up to the blade, and clamp it — one clamp on each side of the blade, never directly in the blade’s path.
  • Stand to the side of the saw, not in front of it; that’s where most miter saw accidents actually happen.
  • Squeeze the trigger and let the blade reach full speed before it touches anything — you’ll hear the saw’s motor settle into a consistent pitch.
  • Pull the handle down smoothly, no jerking, and let the blade do the cutting rather than forcing it.
  • Once through, release the trigger and let the blade come to a complete stop before lifting it back up or reaching for your material.

📐 The Angle Math Nobody Explains Up Front

A miter joint is where two pieces meet at an angle, and the number you set on the saw is always half of the corner you’re trying to create. A 90-degree corner needs each piece cut at 45 degrees. A 60-degree corner needs each piece cut at 30 degrees. This single detail is exactly where Ron went wrong, and it’s exactly where most first-time miter saw users go wrong too — the saw’s angle and the corner’s angle are related, but they are never the same number.

🚫 The Mistakes Worth Avoiding

  • An unsquared fence throws off every single cut that follows it. Cutting before the blade hits full speed causes binding and rough edges.
  • Jerking the handle down tears the material instead of slicing it.
  • Unsecured material shifts mid-cut and ruins the angle you were aiming for.
  • Reaching near a blade that’s still slowing down is how most injuries happen.
  • And setting the saw to the corner angle instead of half of it is the mistake that started this whole story.

🎯 When to Reach for This Saw (and When Not To)

A miter saw earns its keep on trim, molding, door casings, and anything needing precise, repeatable angled cuts. It’s the wrong tool for ripping boards lengthwise, cutting material wider than its capacity, or making curved cuts — a circular saw or jigsaw covers that ground instead.

🛒 Gear Worth Having

DEWALT 10-Inch Single Bevel Miter Saw — Solid accuracy and reliable power in the size most homeowners actually need — a genuine sweet spot for trim work.

Miter Saw Stand — Holds the saw at a comfortable working height and catches most of the mess before it spreads across the whole garage floor.

Carbide-Tipped Fine-Cut Blade, 80-Tooth — A genuinely cleaner cut on trim than the stock blade most saws ship with, and it holds an edge noticeably longer.

As an Amazon affiliate, I earn from qualifying purchases. Thank you for supporting SkippityWhistles.

📖 Related Reads


SkippityWhistles is part of the John D Reinhart content family. Writer, illustrator, videographer, and accidental filmmaker — find the whole story at JohnDReinhart.com.

7043

©2026 John D Reinhart/SkippityWhistles.com — All rights reserved
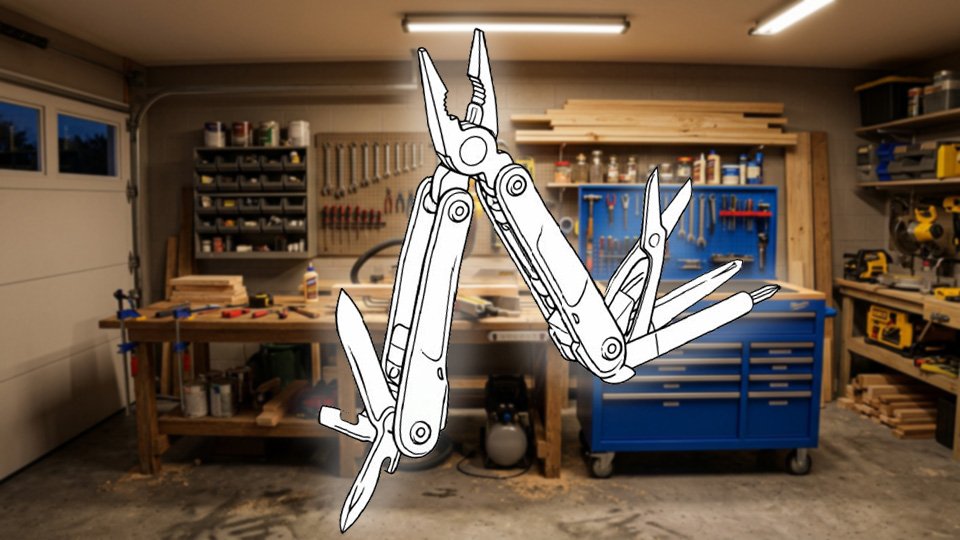
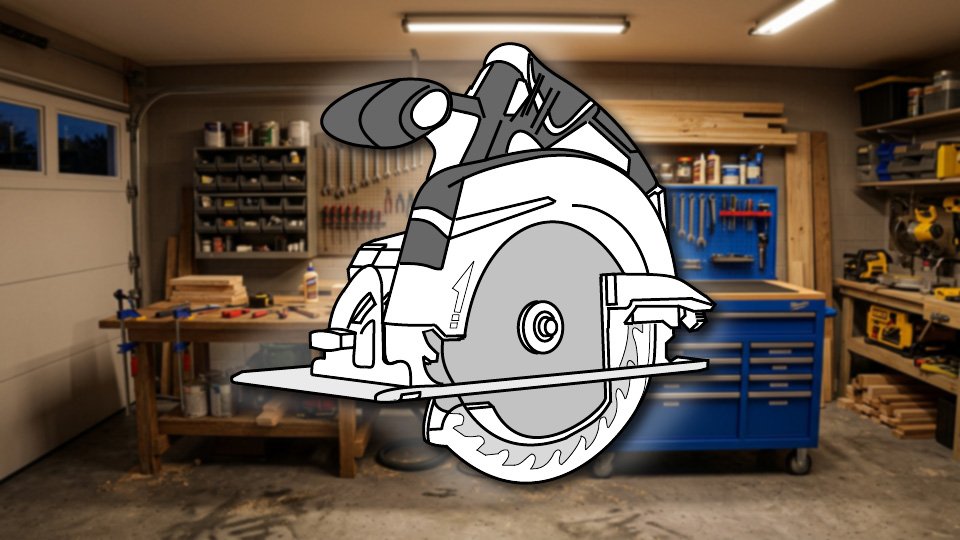
How to Use a Circular Saw (Or: Your Eye Is Not as Straight as You Think)

A circular saw doesn’t do straight lines on its own — it does whatever your eye tells it to, and your eye is a much worse judge of straight than it thinks.

Ron had a sheet of plywood, a pencil line, and total confidence in his own hand-eye coordination, so he skipped the clamped guide and just eyeballed the cut freehand. The line wandered. Not dramatically — just enough that the two halves of that plywood sheet now have a very different opinion about where their edge actually is. Ron’s eye wasn’t the problem in some deep, personal sense. It’s just that everyone’s eye is bad at this, and a circular saw has zero interest in correcting for it on your behalf.

A circular saw is the workhorse of home DIY — handheld, aggressive, and genuinely one of the most useful tools in any garage. It’s also a spinning blade with real opinions about physics, and understanding those opinions is what separates a clean cut from a crooked one, or worse.

⚠️ The Core Principle

As the blade cuts, it generates real forces: it pulls itself forward into the cut, it pulls upward toward you, and if it binds on something, it can twist hard and fast in your hands. None of this is the saw malfunctioning — it’s just what a spinning blade under load does. Your job is two hands, a flat base, and steady guidance, directing those forces instead of fighting them.

🔩 The Parts You’re Holding

The blade determines the quality of the cut more than anything else —

  • a crosscut blade with many teeth cuts cleanly across the grain
  • a rip blade with fewer teeth cuts fast along the grain
  • a combination blade splits the difference
  • and a fine-tooth plywood blade minimizes tear-out on finished sheets.

The base is the flat plate riding on the material; keep it flat, since a tilted base means a tilted cut every time.

The depth adjustment should be set so the blade barely clears the material’s underside — deeper isn’t safer, it’s just more exposed blade with nothing gained.

The guards, one fixed above the blade and one spring-loaded below, exist specifically to keep your hand away from a spinning edge — they don’t get removed, tied back, or “worked around.” Ever. Got that?

🛠️ Using It Safely, Step by Step

  • Mark your cut line clearly and double-check it against a square or tape measure before committing — a wrong cut ruins material either way, guide or no guide.
  • Clamp the material so it can’t shift, and make sure whatever the blade extends below isn’t something you meant to keep.
  • Stand to the side of the saw, never directly behind it, so a bind sends the saw away from your body rather than toward it.
  • Grip with both hands — one on the main handle, one supporting the front — firmly but without white-knuckling it.
  • Let the blade reach full speed before it touches the material; starting already engaged is one of the fastest ways to bind and tear the cut.
  • Guide the saw forward smoothly once it’s cutting, letting the blade do the work rather than pressing hard.
  • Keep the base flat the entire way through, follow all the way to the end of the material without stopping partway, and let the blade coast to a stop naturally once you’re clear.

📐 Straight Cuts: The Secret Ron Skipped

Circular saws are not naturally good at straight lines — they’re only as straight as whatever’s guiding them. A clamped straight edge (a 2×4 or a dedicated guide clamped along the cut line) is the reliable, repeatable way to get a genuinely straight cut, and it’s what separates a clean edge from Ron’s now-two-different-opinions plywood sheet.

A rip fence attachment works reasonably for simple parallel cuts.

Freehanding it, trusting your eye alone, works fine for people with genuinely exceptional depth perception and steady hands — and produces a wandering line for basically everyone else.

✂️ Ripping vs. Crosscutting

Crosscutting means cutting across the grain, and it calls for a crosscut blade and a straight path across the board.

Ripping means cutting along the grain, lengthwise down a board’s full length, and a guide here isn’t optional — without one, the cut wanders over distance in a way that’s hard to correct once it starts.

For long rip cuts specifically, a table saw handles the job more reliably; a circular saw can do it, but only with real guide discipline.

🚫 The Mistakes Worth Avoiding

  • Skipping the clamp lets material shift mid-cut and ruins the line.
  • Starting the blade already inside the material invites an immediate bind.
  • Pressing hard doesn’t cut faster, it just increases the odds of binding.
  • Letting the base tilt turns a square cut into a bevel nobody asked for.
  • Stopping partway through a cut is exactly how a blade binds in the kerf — the narrow slot the blade cuts as it passes through, which can pinch shut on the blade the moment the cut stops.
  • Reaching anywhere near the blade, guard or no guard, is never worth whatever convenience it seems to offer.
  • And removing or defeating the guards trades a genuine safety feature for nothing at all.

🛒 Gear Worth Having

Cordless Circular Saw — Reliable, mobile power for plywood, lumber, and trim — the actual workhorse most home shops reach for first.

Straight Edge Guide Clamp — The tool that would have saved Ron’s plywood — clamps to the material and keeps the blade honest along a real straight line.

Circular Saw Blade Assortment (Crosscut, Rip, Combination) — Matches the blade to the cut instead of asking one blade to do every job adequately and none of them well.

As an Amazon affiliate, I earn from qualifying purchases. Thank you for supporting SkippityWhistles.

📖 Related Reads


SkippityWhistles is part of the John D Reinhart content family. Writer, illustrator, videographer, and accidental filmmaker — find the whole story at JohnDReinhart.com.

7055

©2026 John D Reinhart/SkippityWhistles.com — All rights reserved
How to Use a Torque Wrench (Or: How Tight Is Tight Enough?)

A torque wrench isn’t complicated. It’s just a tool that tells you when to stop tightening. Here’s what it does, when you actually need one, and which one to buy first.

You’re tightening a bolt. It feels snug. You give it one more turn because snug feels like not quite enough. Then another, because the second turn felt like the first one — still not tight enough. Then something either strips, cracks, or gives way, and now a simple job has become a more complicated one.

This is the problem that torque wrenches solve. Not every bolt needs one — most household fasteners are fine with a regular wrench and reasonable judgment. But for bolts that hold structural things together, bolts that go into softer materials like aluminum, or bolts where the manufacturer has specified an exact tightening value — a torque wrench takes “how tight is tight enough” out of the equation entirely.

It’s also a significantly simpler tool than most people assume. Here’s what it does and how to use it.

⚙️ What a Torque Wrench Actually Does

A torque wrench measures rotational force — called torque — as you tighten a fastener. Torque is measured in foot-pounds (ft-lbs), inch-pounds (in-lbs), or Newton-meters (Nm), depending on the application and which measurement system the spec was written in.

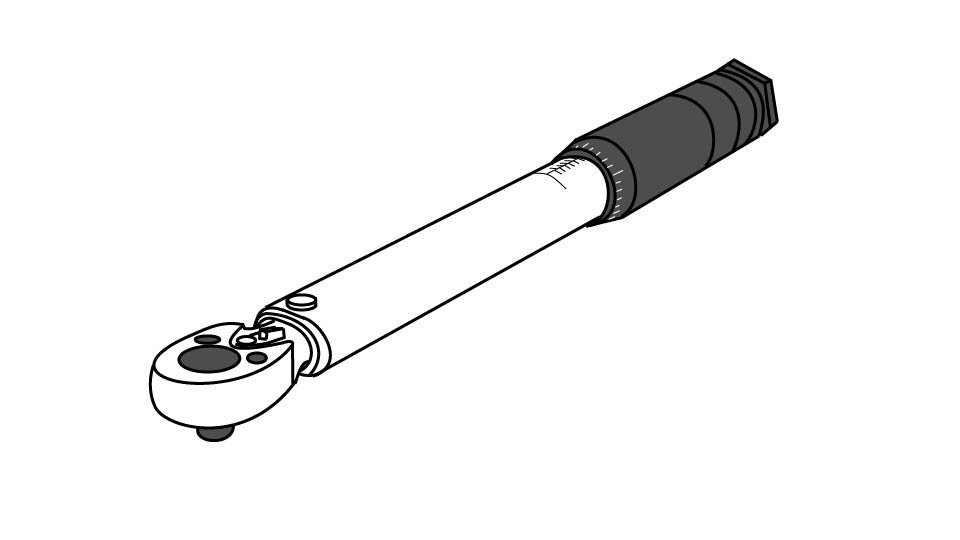
The tool lets you set a target value before you start tightening. When you reach that value — when you’ve applied exactly the amount of rotational force the fastener requires — the wrench signals you to stop. On the most common type (the click-type torque wrench), that signal is a distinct click you can both hear and feel. On a beam-type wrench, it’s a pointer reaching a mark on a visible scale. Either way, the message is the same: you’re done. Stop tightening.

The reason this matters is that different fasteners in different materials have very specific tightening requirements. A deck ledger bolt connecting your deck to the house framing needs a precise amount of torque — too loose and the connection fails structurally, too tight and you can damage the threads or the wood. A bolt going into aluminum needs less torque than the same bolt going into steel, because aluminum strips more easily. The torque specification exists to get the fastener to exactly the right tightness for its application, and the torque wrench is the tool that gets you there.

🔧 The Click-Type Wrench — This Is the One to Buy

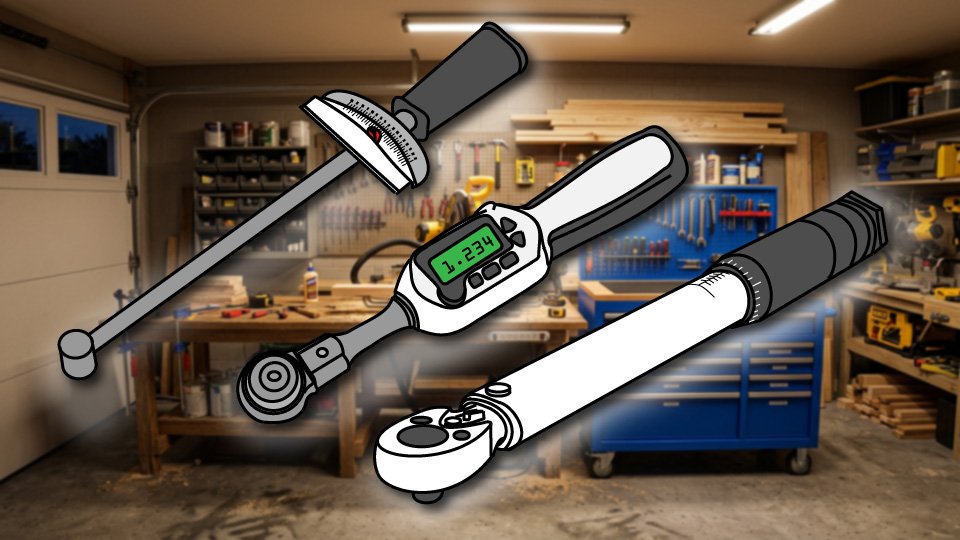
There are three types of torque wrenches: click-type, beam-type, and digital. For home DIY use, the click-type is the right choice. It’s reliable, affordable, requires no batteries, and is easy to use without a learning curve.

A click-type torque wrench looks like a long-handled ratchet wrench. The handle is hollow, and inside it is a calibrated spring mechanism. You set your target torque value by gripping the handle and rotating the adjustment knob at the bottom — this compresses the spring to a specific tension. When you tighten a fastener and the applied force reaches the preset value, the spring releases with a distinctive click. The click is unmistakable. You stop, the bolt is torqued correctly, and you move on.

The beam-type wrench uses a visible pointer on a scale — you watch it while you tighten and stop when the pointer reaches your target. It’s accurate and requires no calibration, but it requires you to watch the scale while tightening, which can be awkward in tight spaces. The digital type has an electronic display and beeps at the target value — accurate and convenient, but more expensive and battery-dependent.

For most people buying their first torque wrench: click-type, 3/8-inch drive (the square post size that connects to sockets — the same standard 3/8-inch drive used by most socket sets), range of 10 to 80 foot-pounds. That covers the majority of home DIY applications: automotive work, deck construction, furniture assembly with specified torque, and general structural fasteners.

📋 Finding the Torque Specification

Before using a torque wrench, you need to know what value you’re tightening to. This is not a number you guess — it comes from the manufacturer or from a standard reference.

For furniture and equipment assembly, the manual specifies torque values for critical fasteners. For automotive work — lug nuts, spark plugs, oil drain plugs — the vehicle’s service manual specifies the values, and they’re also widely available online by searching the vehicle year, make, model, and the specific component. For structural fasteners like deck ledger bolts, the building code or the fastener manufacturer’s documentation specifies the values.

As a general reference for hardware that doesn’t come with specifications: small bolts (1/4 inch diameter) typically land in the 5 to 15 foot-pound range; medium bolts (3/8 inch) in the 20 to 40 foot-pound range; larger bolts (1/2 inch) at 50 foot-pounds and up. But these are starting points, not substitutes for the actual spec. When a spec exists, use it.

📐 How to Set and Use the Wrench

Look up the torque specification for your fastener and write it down. Misremembering a number mid-job is more common than it should be.

Select a socket that fits the bolt head precisely — no wobble, no play. A socket that’s even slightly loose on the fastener will give an inaccurate reading and can round off the fastener head. On click-type wrenches, the drive size needs to match your socket set — 3/8-inch drive wrench with 3/8-inch drive sockets.

Set the torque value on the wrench. On most click-type wrenches, hold the handle firmly with one hand and rotate the knurled adjustment knob at the bottom of the handle with the other. The scale on the handle shows your current setting. Turn until the indicator line aligns with your target value. Check it again before you start — a misread of even five foot-pounds can matter on critical fasteners.

Thread the bolt in by hand until it’s snug against the surface. Hand-tightening first ensures the threads are properly engaged before any torque is applied, and prevents cross-threading — the frustrating situation where the bolt goes in at a slight angle and damages both the bolt threads and the receiving threads.

Attach the torque wrench and begin tightening with slow, steady pressure. Don’t jerk or apply sudden force. The click mechanism needs consistent pressure to trigger accurately — rapid or jerky tightening can cause the wrench to click early or late. When you hear and feel the click, stop immediately. The bolt is torqued to specification. Tightening further past the click does not improve the connection — it just adds force beyond the rated value, which can strip threads or damage the fastener.

🔄 One Important Storage Rule

When you’re done using a click-type torque wrench, turn the adjustment knob back to its lowest setting before putting it away. The spring inside the wrench that creates the click mechanism can take a permanent set — weaken slightly — if stored under compression at a high torque setting. Over time, a wrench stored at maximum torque loses calibration accuracy. Back it off to the minimum after every use. It takes ten seconds and it keeps the wrench accurate for years.

Store the wrench in its case rather than loose in a toolbox. Torque wrenches are precision tools — the calibration can be affected by a sharp impact. A drop onto a concrete floor is worth getting the wrench recalibrated before trusting it on critical fasteners again. Professional calibration runs about twenty to fifty dollars and is worth it for anything structural.

🛒 Gear Worth Having

TEKTON 3/8 Inch Drive Micrometer Torque Wrench (10-100 ft.-lb.) | 24330 — The 3/8-inch drive click-type wrench that handles the majority of home DIY torque work: automotive fasteners, deck construction, structural hardware, furniture with specified torque values. Calibrated to ±4% accuracy out of the box. All-steel construction with no plastic parts. Dual-range scale in both foot-pounds and Newton-meters. Ships in a storage case. TEKTON is the respected mid-range brand that professional mechanics and serious DIYers reach for when they want accuracy without a professional price point.

TEKTON 1/4 Inch Drive Click Torque Wrench (20-200 in.-lb.) | 24320 — The smaller companion to the 3/8-inch wrench, for lighter fasteners measured in inch-pounds (in-lbs) rather than foot-pounds. Spark plugs, small engine components, bicycle fasteners, and precision assembly work all typically call for inch-pound torque values. Same TEKTON build quality, same ±4% calibration accuracy, same all-steel construction. If the 3/8-inch wrench is for the deck and the car, the 1/4-inch is for everything smaller.

SUERCUP Torque Wrench Set — 1/4″, 3/8″ & 1/2″ Drive, 3-Piece with Case — For the toolbox that wants all three drive sizes in one purchase. The 1/4-inch handles small precision work, the 3/8-inch covers most DIY applications, and the 1/2-inch handles heavy-duty automotive and structural work. Chrome vanadium steel throughout, calibrated to ±4%, organized storage case keeps all three accessible. The complete answer if you want to buy torque wrenches once and have what you need for any job.

As an Amazon affiliate, I earn from qualifying purchases. Thank you for supporting SkippityWhistles.

📖 Related Reads

How to Use a Socket Wrench

How to Use an Adjustable Wrench

How to Choose the Right Fastener

The torque wrench isn’t the tool for every bolt — most household fasteners are perfectly fine tightened by feel with a regular wrench. But for the ones that matter, for the structural connections and the precision assemblies and the fasteners where the manufacturer took the time to specify an exact value, the torque wrench is the tool that gets it right the first time. The click is the sound of a fastener done correctly. It’s a satisfying sound.


SkippityWhistles is part of the John D Reinhart content family. Writer, illustrator, videographer, and accidental filmmaker — find the whole story at JohnDReinhart.com.

7053

©2026 John D Reinhart/SkippityWhistles.com – all rights reserved

How to Tame a Sawhorse (Or: Collapse Insurance Not Included)

Sawhorses wobble? Shift? Feel unsafe? Here’s how to choose, set up, and use them so they stay put and actually support your work—no more fighting your tools.

Ron found a pair of sawhorses at a suspiciously good price, made of the kind of plastic that looks confident in the store and reconsiders that confidence the moment real weight shows up. They held a sheet of plywood for about ninety seconds before folding sideways like a lawn chair meeting its true purpose in life. He set them back up, tried again, and watched it happen a second time — because apparently once wasn’t a clear enough message.

A sawhorse looks like the simplest object in the entire garage. Four legs, a beam, nothing to think about. Right up until it’s under real weight and it turns out “simple” and “correctly rated for the job” are two very different things.

🐴 What a Sawhorse Actually Does

A sawhorse elevates and stabilizes a workpiece — no bending over, no material shifting mid-cut, and a pair of them with a sheet of plywood on top instantly becomes a workbench. It sounds unglamorous because it is. Unglamorous and reliable is exactly the goal here.

⚖️ Weight Capacity: Don’t Be Ron

Light-duty sawhorses, rated around 500 pounds per pair, are fine for small projects and light assembly — but a standard sheet of plywood already weighs around 55 pounds before you add a person leaning on it, which eats into that rating faster than it looks like it should. Medium-duty, in the 1,000 to 2,000 pound range, is the actual sweet spot for most home DIY work — stable, reasonably priced, and unlikely to stage a dramatic collapse mid-project. Heavy-duty, 2,500 pounds and up, is genuinely overkill unless renovation work is a regular occurrence rather than an occasional weekend.

🧱 Material: Plastic, Metal, or Homemade

  • Plastic folds up small and travels light, which is exactly why it tempts people into a suspiciously good price — but it flexes under real load and the tops get slippery fast.
  • Metal costs more and weighs more to move, but it’s the durable, stable upgrade that doesn’t fold sideways under a sheet of plywood the way Ron’s did.
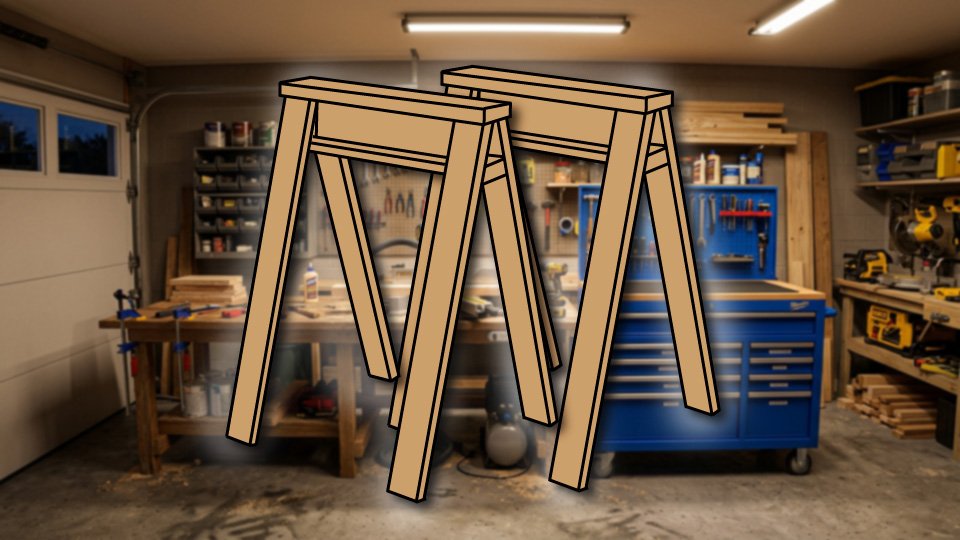
  • Building your own from wood takes an afternoon and gives you exact control over height and grip, at the cost of portability and storage space. None of these is wrong.

Matching the material to the actual load is the part that matters.

🐎 Taming the Wobble

Always use them in pairs — a single sawhorse offers nothing but a false sense of accomplishment. Check the ground before loading anything on top; uneven concrete or a sloped driveway puts all the weight on one leg and turns a stable stand into a seesaw. A scrap of wood shimmed under a short leg fixes this in about ten seconds.

Spacing matters too — roughly 4 to 6 feet apart for lumber, closer at 3 to 4 feet for sheet goods, since anything wider needs the extra support to keep from sagging in the middle.

🎿 Stopping the Slide

A slick plastic top lets material slide the instant you press down with a saw, which turns a straight cut crooked fast. Non-slip grip tape on the top solves this in minutes for a few dollars. A sacrificial scrap board clamped across the top works just as well for free, and takes the cut damage instead of the sawhorse itself. For anything heavy or awkward, clamping the workpiece directly to the sawhorse removes the sliding problem entirely — worth the extra minute of setup on anything that actually matters.

🪑 Turning Two Sawhorses Into a Workbench

Two properly spaced sawhorses plus a sheet of plywood on top is an instant, adjustable, portable workbench — genuinely one of the better cheap upgrades in a home shop. When the plywood top gets chewed up from use, swap it for a fresh sheet instead of replacing the whole setup.

🚫 The Mistakes Worth Avoiding

  • Standing on a sawhorse treats it like a ladder, which it was never built to be.
  • Exceeding the weight rating is exactly how Ron’s plastic pair met their end, twice.
  • Cutting directly into an unprotected top chews up the surface and leaves splinters behind.
  • Using just one sawhorse for anything real is asking for trouble.
  • And ignoring uneven ground is the fastest way to lose control of a workpiece mid-cut.

🛒 Gear Worth Having

WORX Medium-Duty Adjustable Sawhorses — The sweet-spot rating and adjustable height that covers the overwhelming majority of home DIY work without folding sideways under a sheet of plywood.

Non-Slip Grip Tape for Sawhorse Tops — A few dollars and a couple minutes to stop material from sliding mid-cut — one of the cheapest upgrades on this whole list.

Steel Heavy-Duty Folding Sawhorses — For anyone who’s already had the suspiciously-cheap-plastic experience and is ready to never have it again.

As an Amazon affiliate, I earn from qualifying purchases. Thank you for supporting SkippityWhistles.

📖 Related Reads


SkippityWhistles is part of the John D Reinhart content family. Writer, illustrator, videographer, and accidental filmmaker — find the whole story at JohnDReinhart.com.

7035

©2026 John D Reinhart/SkippityWhistles.com — All rights reserved
How to Choose a Drill Bit Set (And Stop Buying Replacement Bits One at a Time)

A cheap drill bit snaps like chalk. A good one cuts clean and lasts for years. Here’s how to choose the right set for what you’re actually drilling — and stop replacing broken bits one at a time.

Halfway through a project, you reach for a drill bit. It’s not quite the right size, but close enough — except it isn’t, and the hole comes out wrong. Or it is the right size, but the bit is the cheap one, and it snaps in the chuck like a tiny piece of chalk. Or the right bit exists somewhere in the garage, loose, in a coffee can with seventeen other bits of unknown size, none of them labeled, several of them dull.

A good drill bit set solves all three problems at once: the right sizes available, organized and labeled, made from material that actually cuts rather than breaks. A bad drill bit set — or no set at all — means buying individual bits at $2.99 each every time a project needs one, which is both expensive and slow.

Here’s how to pick a set that matches the work you actually do.

🔴 Start with the Material — This Is the First Decision

Different materials require different drill bits, and the wrong bit for the wrong material either won’t cut effectively or will break. This isn’t a preference — it’s how drill bit metallurgy works.

HSS (High-Speed Steel) bits — the standard, most common type — handle wood, plastic, and soft metals without difficulty. If the work involves hanging shelves, assembling furniture, drilling through wood framing, or occasional light metalwork, an HSS set covers the job. They’re affordable and widely available.

Titanium-coated bits are HSS bits with a thin titanium nitride coating applied to the surface. The coating reduces friction, dissipates heat more effectively, and extends the working life of the bit compared to uncoated HSS. They cost slightly more but last meaningfully longer, especially when drilling into metal. For most home toolboxes where wood and light metal are the primary materials, titanium-coated HSS is the practical sweet spot — better than plain HSS without the premium price of cobalt.

Cobalt – the bits are made from a high-speed steel alloy with cobalt content, which makes them significantly harder and more heat-resistant than standard HSS or titanium-coated bits. They’re the right tool for drilling into stainless steel, hardened steel, cast iron, and other tough metals that quickly dull regular bits. If drilling into metal is a regular part of the work, cobalt is worth the investment. For occasional metalwork, titanium-coated HSS is usually sufficient.

Carbide-tipped masonry bits are for concrete, brick, stone, and tile — materials that would destroy HSS or cobalt bits almost immediately. The carbide tip is harder than the masonry material and grinds through it rather than cutting. Masonry bits require either a hammer drill (a drill with a hammering action that chips the material as the bit rotates) or a rotary hammer for serious work. If the project involves anchoring into concrete or drilling through brick, these are non-negotiable.

🔢 How Many Bits Do You Actually Need?

Drill bit sets range from compact 15-piece kits to sprawling 200-piece collections. More pieces is not automatically better — what matters is having the right sizes for the work, in a case organized well enough to find them quickly.

For most home projects, a set covering 1/16 inch through 1/2 inch in the common fractional increments (1/16, 3/32, 1/8, 5/32, 3/16, 7/32, 1/4, and so on) handles the majority of situations. That range covers pilot holes (holes you drill to make it easier to drive in a screw) for most screw sizes, holes for drywall anchors and toggle bolts, and clearance holes for bolts and lag screws. A 21 to 29 piece set typically covers this range well.

The temptation of a 100-piece or 200-piece set is understandable — it feels like comprehensive preparation. The reality is that many of those extra pieces are rarely-used sizes, and the quality of individual bits in a very large set is often lower because the manufacturer is spreading budget across more pieces. A solid 21-piece set from a reputable brand outperforms a 100-piece set from a budget manufacturer in practice. Quality beats quantity every time.

One specific note on small bits: in any set, the smallest bits — 1/16 and 3/32 inch — are the ones that snap most often, because they’re narrow enough to flex under side load. Cheap small bits break frustratingly quickly. A quality set uses the same material standards for the small bits as the large ones, which is where the difference between a mid-range and budget set is most obvious.

📦 The Case Matters More Than Most People Think

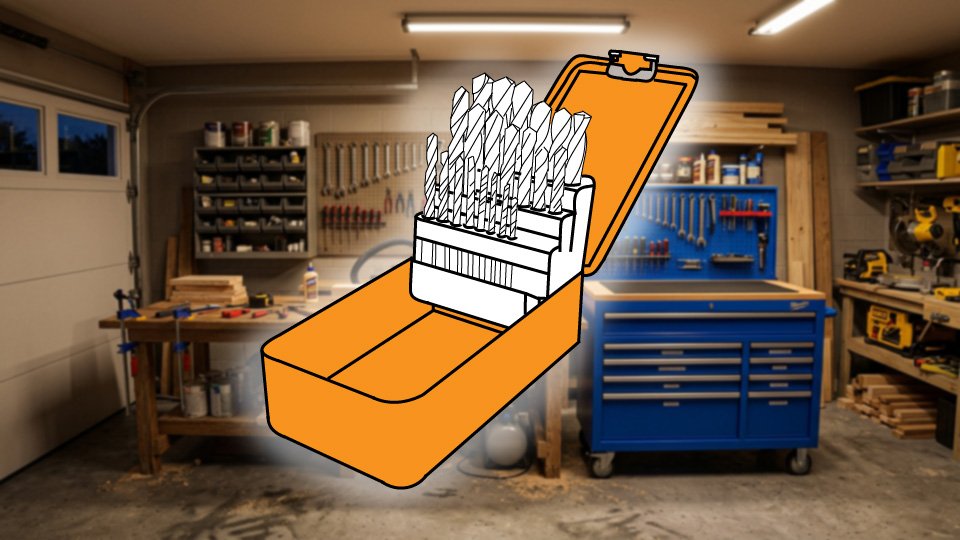
A drill bit set without organized storage is a drill bit collection waiting to become a problem. Bits that roll loose in a toolbox drawer dull against each other. Bits dumped in a coffee can require handling every bit to find the right size. Bits in an unmarked case require guessing.

The right case has labeled individual slots — each bit has a home, and the label tells you which size goes where. When a bit is missing from the case, you know immediately which size you need to replace. When you need a specific size mid-project, you can find it in seconds without handling every other bit in the collection.

A case with a clear lid is also useful — a quick visual confirms what you have before opening anything. This sounds minor until the third time you’ve opened a case looking for a bit that turns out not to be there.

If a set comes in a flimsy plastic tray that flexes when handled, the bits will eventually escape their slots. Look for a case with a positive latch, rigid construction, and slots that actually hold the bits securely. The case is part of the tool.

🔍 The One Thing That Identifies a Quality Bit on Sight

Examine the tip of a drill bit before buying. A quality bit has what’s called a split point — the very tip of the bit is ground to a sharp point that starts cutting immediately on contact, without requiring pressure to keep it centered. A cheap bit has a rounded or blunt tip that tends to “walk” across the surface before it starts cutting, producing a hole in a slightly different location than intended.

On titanium-coated bits, look for even, consistent coloring across the bit. Uneven coating or bits that look more yellow than gold-colored are usually thinner, lower-quality coatings that wear off quickly.

On cobalt bits, the bit should be uniformly silver-gray throughout — cobalt alloy steel doesn’t have a coating, it’s the material itself. A “cobalt” bit with a colored coating is probably a coated HSS bit being marketed misleadingly.

💰 The False Economy of Cheap Bits

The $9.99 drill bit set at the checkout aisle of the hardware store is one of the most consistent disappointments in DIY. The small bits snap under minimal pressure. The larger bits go dull after a few holes. The case falls apart. Within a few months, the useful bits have been replaced individually and the original set is mostly sorted into a coffee can of questionable history.

The math on replacement bits: a good individual 1/4-inch titanium bit costs $3 to $5. A good 21-piece titanium set costs $25 to $35. Buy the set and have the right size every time. Buy three or four individual replacement bits and you’ve spent the same money with far less coverage.

The right price range for a capable general-purpose set is $25 to $45. Above $60 for a general set is diminishing returns unless the work regularly involves hard metals or specialty materials. Below $15 for a set covering the full fractional range is almost certainly compromised quality somewhere — usually in the coating, the steel alloy, or the small bit sizes.

🛒 Gear Worth Having

DEWALT 21-Piece Titanium Nitride Pilot Point Drill Bit Set with Case (DW1361) — The benchmark general-purpose set. Titanium nitride coating over HSS steel, pilot point tips that start on contact without walking, 21 bits from 1/16 to 1/2 inch in the common fractional sizes. Labeled case with individual slots and clear lid. DEWALT is the number one selling set in Amazon’s Jobber Drill Bits category and has earned it — these bits cut cleanly in wood, plastic, and light metal, and hold their edge through years of regular use. The right starting point for any toolbox.

DEWALT 14-Piece Cobalt Alloy Steel Pilot Point Drill Bit Set (DWA1240) — For work that involves metal regularly — stainless steel, angle iron, hardened fasteners, metal cabinets. Industrial-grade cobalt alloy steel holds its edge significantly longer than titanium-coated HSS in hard metals. Pilot point tips eliminate bit walking even on curved metal surfaces. 14 bits from 1/16 to 5/16 inch covering the sizes most commonly needed in metalwork, in DEWALT’s ToughCase+ system. Buy this alongside the titanium set and have the right bit for every material.
Bosch 7-Piece Carbide-Tipped Masonry Drill Bit Set (BC007) — For concrete, brick, block, and stone. Carbide-tipped bits that grind through masonry rather than cutting it. Seven bits from 3/16 to 1/2 inch covering the common anchor and bolt hole sizes. Requires a hammer drill (a standard drill with a hammering function, typically marked on the drill’s mode selector) for best results in concrete. Keep these separate from the general set — masonry bits look similar to HSS bits but are not interchangeable with them.

As an Amazon affiliate, I earn from qualifying purchases. Thank you for supporting SkippityWhistles.

📖 Related Reads

How to Use a Power Drill

How to Choose the Right Fastener

The DIYer’s Toolbox

The right drill bit set is the one that has the right size for the job, made from material that matches the material being drilled, organized well enough to find quickly. Buy that set once and stop thinking about drill bits for the next several years. Buy the wrong one and spend the next several years thinking about drill bits constantly.

SkippityWhistles is part of the John D Reinhart content family. Writer, illustrator, videographer, and accidental filmmaker — find the whole story at JohnDReinhart.com.

7049

©2026 John D Reinhart/SkippityWhistles.com – all rights reserved