Tools for Working With Plumbing Systems

A pair of pliers works on almost anything until it meets a pipe fitting — here’s the small set of tools actually built for plumbing.

Ron’s approach to any plumbing fitting has historically been the same pair of channel-lock pliers he uses for everything else in the garage — right up until he rounded the corners off a brass fitting badly enough that it needed replacing instead of just loosening. Pliers grip. They don’t grip a hex-shaped pipe fitting the way a tool actually built for the job would.

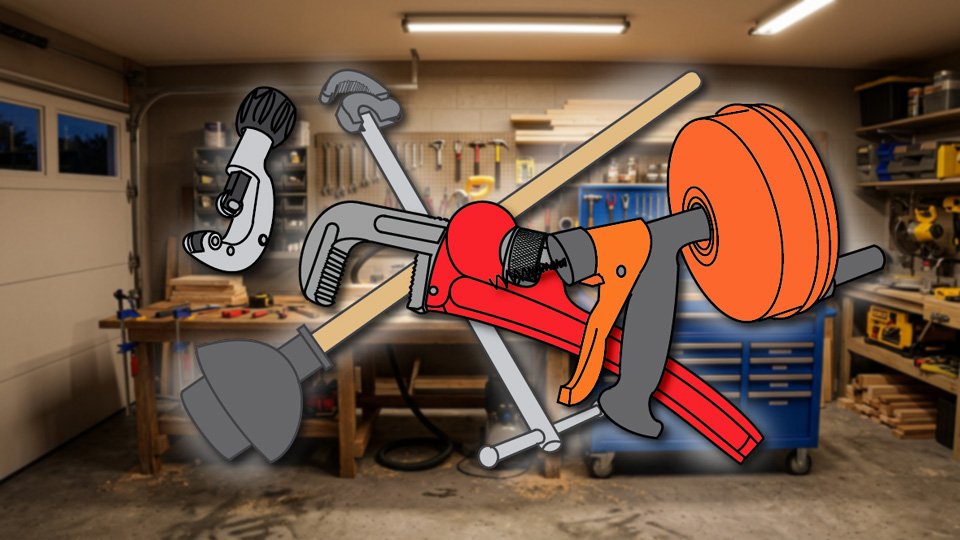
Plumbing has its own small, specific toolkit, and most of it exists to solve one problem: pipe fittings and drain lines have shapes and spaces that general-purpose tools weren’t built for.

🔧 The Pipe Wrench

A pipe wrench (a wrench with self-tightening, serrated jaws that bite harder into round pipe the more force you apply) is built specifically for round pipe and rounded fittings, which a standard wrench’s flat jaws tend to slip on. The serrated jaws leave marks, which is exactly why pipe wrenches are for rough, functional pipe — not for polished chrome fixtures where the finish matters. Two pipe wrenches used against each other, one holding and one turning, is the standard technique for loosening a threaded pipe joint without twisting the whole line.

🔩 The Basin Wrench

A basin wrench (a long-handled tool with a pivoting, spring-loaded jaw at the end, designed to reach up into the tight space behind a sink) solves a problem no other tool handles well: the mounting nuts holding a faucet in place sit in a cramped gap behind the sink basin, often too tight for a hand or a standard wrench to reach. The basin wrench’s long shaft and pivoting head reach up into that gap and grip the nut from an angle nothing else can manage.

✂️ The Tubing Cutter

A tubing cutter (a small tool with a sharp cutting wheel that rotates around a pipe, tightening gradually to slice through it cleanly) makes a square, clean cut on copper or thin-wall pipe — the kind of cut a hacksaw can approximate but rarely matches. A clean, square cut matters more than it seems: a ragged or angled cut makes a proper watertight fitting connection much harder to achieve later.

🪠 The Plunger — And Why There Are Two Kinds

A standard cup plunger has a simple rubber dome and works fine on flat surfaces like a shower or floor drain. A flange plunger (also called a funnel-cup plunger, with an extra fold of rubber that unfolds down into a toilet’s drain opening) seals against a toilet’s curved opening far better than a standard cup, which is why a flat-bottomed plunger so often underperforms on a toilet specifically — it’s the wrong shape for that one job, not a weaker tool overall.

🌀 The Drain Auger

A drain auger, or hand-crank drain snake (a flexible steel cable on a hand-cranked reel, fed into a drain to break up or hook a clog), reaches well past where a plunger’s suction can do anything useful — often several feet into a drain line. It’s the right tool for a single stubborn fixture clog. A whole-house backup involving multiple fixtures at once calls for something with far more reach and power than a hand-crank auger provides — that’s motorized drum auger territory, covered in the sewer line post below.

🧵 The One Tool That’s Really a Material

Thread seal tape and pipe dope don’t get their own tool category here because they already have a full post dedicated to exactly what they do and why — see Related Reads. Worth mentioning only because no plumbing toolkit is complete without one of the two on hand.

🛒 Gear Worth Having

RIDGID 10-Inch Straight Pipe Wrench — Sized right for most household supply and drain pipe without being too bulky to fit under a sink or behind a toilet.

Superior Tool Telescoping Basin Wrench — The telescoping handle reaches the deep, awkward gap behind a sink without needing to contort an arm into the cabinet first.

IMPERIAL Tube Cutter for Copper and Thin-Wall Pipe — A clean, square cut every time, which matters more once you’re trying to get a fitting to seal properly afterward.

As an Amazon affiliate, I earn from qualifying purchases. Thank you for supporting SkippityWhistles.

📖 Related Reads


SkippityWhistles is part of the WhistleBump group – find the rest of the family at WhistleBump.com.

3027

©2026 John D Reinhart/Skippitywhistles.com — All rights reserved
How to Use a Pipe Wrench (Or: It’s Not Upside Down, You Are)

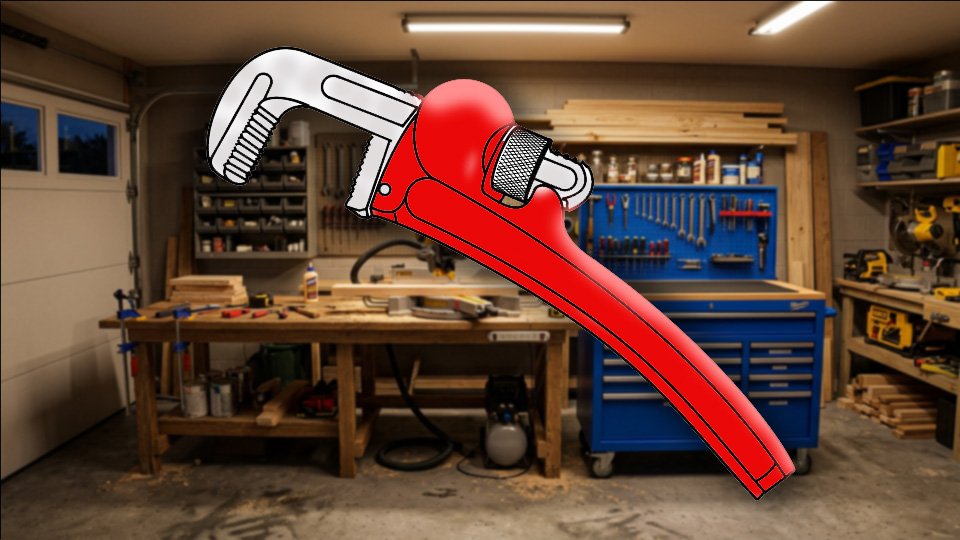
A pipe wrench looks like it’s on backwards compared to every other wrench you own. That’s not a flaw. That’s the entire design.

Ron picked up a pipe wrench for the first time and used it exactly like his adjustable wrench — same grip, same angle. It slipped off the pipe almost immediately. He flipped it around, certain he’d had it backwards, and it slipped again. Ron hadn’t had it backwards. He’d had it right the first time and wrong the second, and a pipe wrench genuinely does look upside down compared to every other wrench in the garage.

That’s not a manufacturing defect or a weird design choice. It’s the entire mechanism, and once you understand why it’s shaped that way, it stops slipping.

🔧 Why It Looks Backwards

An adjustable wrench grips with both jaws squeezing evenly, like a clamp. A pipe wrench doesn’t work that way at all.

A pipe wrench has one fixed jaw and one moving jaw, and the moving jaw is designed to bite down harder the more force you pull with. That’s the whole design. The harder you pull, the tighter the teeth dig in.

That’s why the wrench has to face a specific direction. The jaws need to close in the same direction you’re about to pull. Point it the wrong way, and pulling actually loosens the grip instead of tightening it — which is exactly what slipping feels like.

🧩 The Parts You’re Holding

The fixed jaw stays in one position, mounted to the frame. The moving jaw slides along a hinge and is the part actually doing the biting.

The adjustment knob sets the gap between the two jaws — turn it to roughly match the pipe’s diameter before you ever try to grip anything.

Both jaws have hardened, angled teeth. Those teeth are what bite into the pipe, and they only work well when they’re sharp — more on that later.

🎯 Setting Up the Grip Correctly

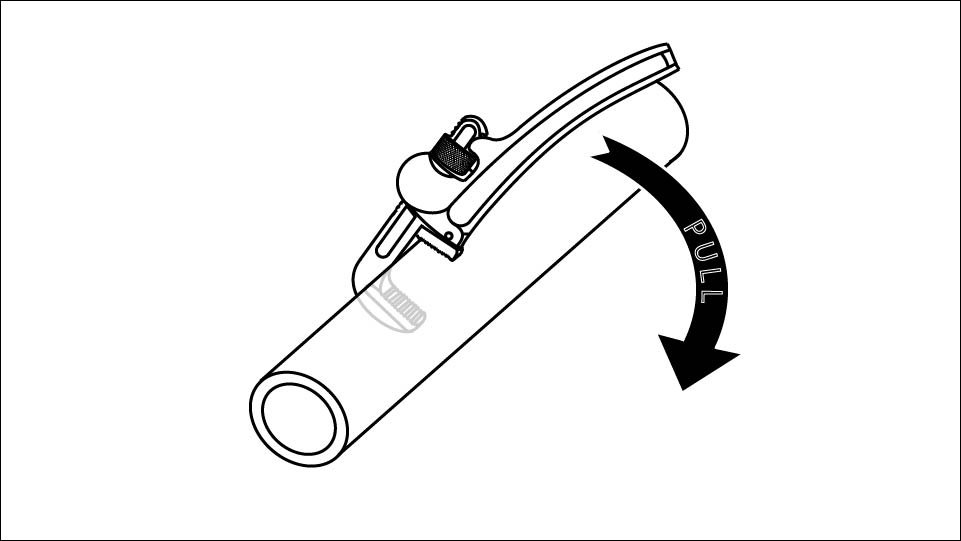
A line drawing of a pipe wrench gripping a piece of pipe. The handle is towards us, and an arrow shows that we want to pull the wrench.

Open the jaws wide enough to slide over the pipe easily. Don’t crank them down tight yet.

Position the wrench so the fixed jaw sits on the side you’re about to pull toward. This is the step Ron got backwards.

Leave a small gap, roughly half an inch, between the jaws and the pipe before you pull. That gap isn’t sloppiness — it’s what lets the moving jaw travel into its bite as you pull, instead of already being jammed against the pipe with nowhere to go.

If the wrench slips once you start pulling, don’t just pull harder. Flip the wrench around a full 180 degrees and try again — the orientation was likely wrong, not the amount of force.

💪 Pull, Don’t Push

Always pull the handle toward you. Pushing away from you is fighting the entire design of the tool and won’t generate a real bite.

Apply steady pressure rather than a sharp jerk. You’ll feel the moving jaw settle into the pipe as it grips — that settling feeling is the wrench working correctly.

If you need more leverage, reach for a longer wrench rather than sliding a pipe over the handle for extra length. A longer wrench keeps the tool’s geometry intact. A cheater bar changes the leverage in ways that make the wrench more likely to slip or fail.

🔄 Two Wrenches for Threaded Joints

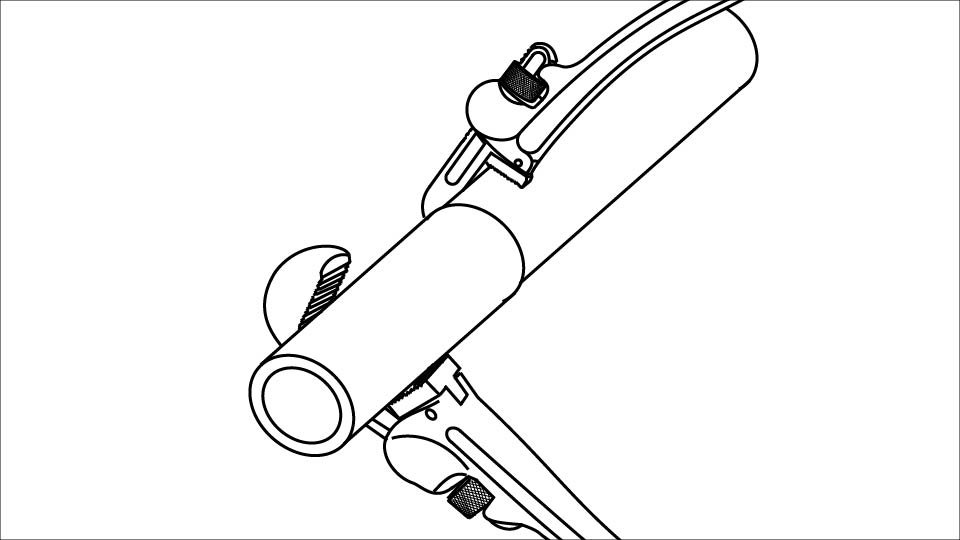
Loosening a threaded pipe fitting takes two wrenches, not one. One wrench turns the fitting. A second wrench holds the pipe itself steady so the whole line doesn’t twist along with it.

The second wrench faces the opposite direction from the first — genuinely backwards compared to the one doing the turning. That’s intentional. It needs to resist rotation, not create it.

Skip the second wrench, and the twisting force meant for one joint travels down the whole pipe run instead, which is how one loosened fitting turns into several damaged ones.

🚫 What Not to Do

Never hit a pipe wrench with a hammer to break a stuck fitting loose. The uncontrolled shock can crack the fitting, the pipe, or the wrench itself. If a fitting won’t budge, try tightening it slightly first, then reversing — sometimes breaking the initial seal in the tightening direction frees it up to loosen afterward.

Never use a pipe wrench as a pry bar or a lifting tool. It’s built for rotation, not leverage in other directions, and using it that way is how the jaw or handle bends.

Retire a wrench once its teeth are visibly rounded or worn smooth. Dull teeth can’t bite, and a wrench that can’t bite just slips, no matter how much force goes into it.

🧽 Keeping It Working

Brush grit and debris out of the teeth with a wire brush after use — trapped debris is a quiet cause of slipping that has nothing to do with technique. Add a drop of oil to the moving jaw’s hinge occasionally so it keeps sliding freely. Store it somewhere dry; rust on the teeth is exactly the kind of thing that turns a reliable wrench into a useless tool.

🛒 Gear Worth Having

Duratech 3-Piece Aluminum Pipe Wrench Set — Covers small, medium, and large diameter pipe in one set, lightweight enough that the larger sizes don’t turn into an arm workout.

RIDGID 14-Inch Straight Pipe Wrench — A second wrench sized for backing up threaded joints, since that job genuinely needs two wrenches facing opposite directions.

Oil Eater Wire Brush Premium 6-Piece Kit — Steel, brass, and nylon brushes in one set, so the right bristle is on hand whether it’s caked debris or just light surface grime in the teeth.

As an Amazon affiliate, I earn from qualifying purchases. Thank you for supporting SkippityWhistles.

📖 Related Reads

SkippityWhistles is part of the WhistleBump group – find the rest of the family at WhistleBump.com.

7019

©2026 John D Reinhart/Skippitywhistles.com — All rights reserved