
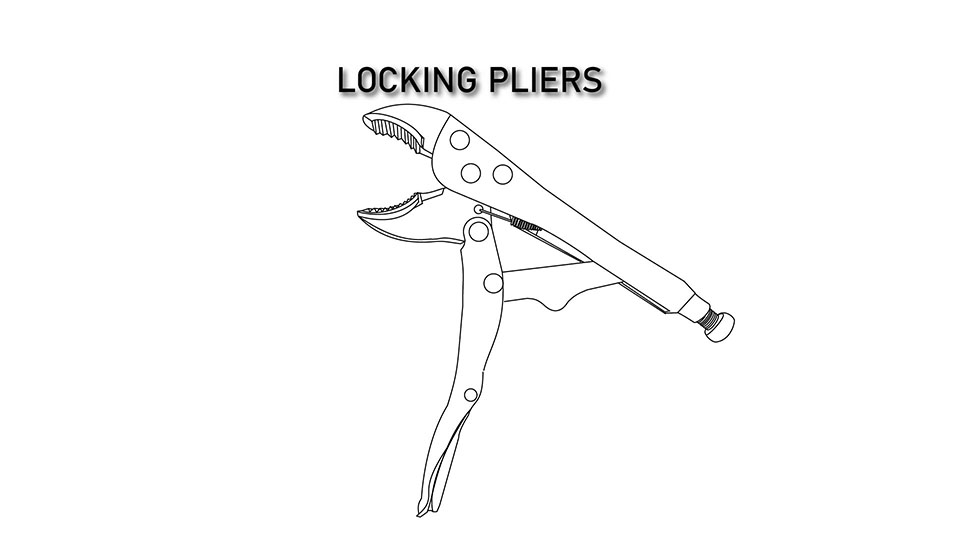
Locking pliers are ingenious devices are the jacks of all trades, masters of quite a few, and something you should rush right out and buy. Once you have them, you won’t be able to imagine how you got along without them.
In this post we’ll learn how to use locking pliers safely and effectively — with step-by-step tips on adjustment, gripping, and release for common fastening jobs.
We’ll talk about:
- What are Locking Pliers
- Why Do You Need Locking Pliers?
- What Are the Parts of Locking Pliers
- How Do Locking Pliers Work?
- How to Adjust Locking Pliers
- How to Safely Use Locking Pliers
- Where to Find Locking Pliers
- Related Posts
What are Locking Pliers?
Of the many types of pliers you can get, from the trusty old slip-joints in the kitchen drawer to the linesman’s pliers that do just about everything, you can’t go wrong in finding a nice pair of locking pliers.
Locking pliers feature a unique and adjustable mechanism that locks into place on an object, giving you a strong and hands-free grip.
Even though they come in a huge variety of shapes and sizes, from needle-nosed to welding pliers, you use them all pretty much the same way.
Why Do You Need Locking Pliers?
Locking pliers, also known as vise-grips, will quickly become vital members of your tool team.
First, they’re super-strong pliers. They grip on to things with a force that’s way beyond anything you could generate on your own.
Next, they can grab on to just about anything. Is half-out screw bent so you can’t turn it? Lock onto it with these pliers and you’ll have it out in a second.
They also function like a portable mini vise. Need to hold that piece firmly without crushing it? Put it in the pliers and set them on the workbench. Now the piece is accessible, and you have both hands free.
Need to get that fitting off the end of that pipe? Lock the pliers onto the pipe and use a wrench to remove the fitting. The pliers keep the pipe from turning without crushing it.
Need to clamp those two pieces together while the glue dries?
Can’t get a grip on that nut? Latch on with the pliers.
Need to hold the bolt while you turn the nut? Latch on with the pliers.
These pliers are excellent for removing rusty bolts.
The list goes on and on.
You’ll be tempted to use them on everything, but remember that their value lies in that iron grip. Sometimes a box-head or socket wrench may be more efficient.
What Are the Parts of Locking Pliers?
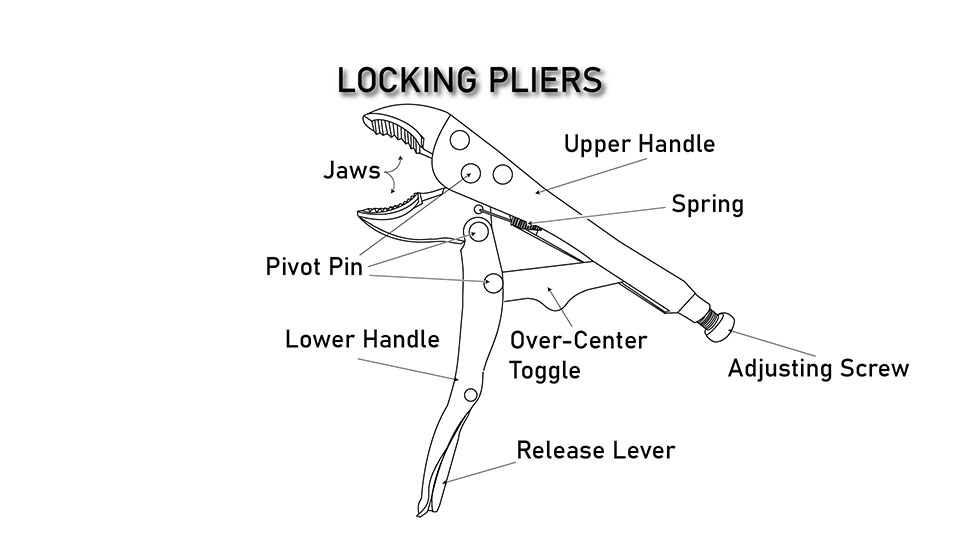
Most locking pliers feature these same parts, although the names might be slightly different between designs.
- Jaws
- Upper Handle
- Spring
- Pivot Pin
- Lower Handle
- Over-Center Toggle
- Adjusting Screw
- Release Lever
How Do Locking Pliers Work?
The secret to locking pliers lies in the over-center toggle, a lobed strut that acts like a cam.
One end of the toggle is connected to a pivot in the lower handle, and the other rests against the end of an adjusting screw in the upper handle.
While the upper jaw is fixed to the upper handle, the lower jaw features two pivot points: one with the upper handle and one with the lower handle. A spring, located between these two pivot points, connects the lower jaw to the upper handle.
When open, the toggle lies at rest between the pliers’ upper and lower handles. There is no tension in the spring.
As the handles are pushed towards one another, the toggle pivots in the lower handle, forcing the lower jaw closed and stretching the spring. The degree of closure is determined by the adjusting screw, against which the pivot rests.
When fully closed, the toggle lies at rest inside the lower handle. The lower jaw is wedged tightly between the object and the toggle, with the spring firmly pulling the handles together.
To release the grip, a release lever pushes against the lobe on the toggle, forcing it out of the lower handle. The spring pulls the toggle back towards the upper handle, releasing tension in the spring, and pushing the handles apart.
How to Use Locking Pliers
The adjusting screw on the end on the upper handle is another secret weapon in the locking pliers arsenal.
When you turn it, you tell the lower handle how far it can push the moveable jaw, which determines how tight the grip will be.
First, determine how you want to hold the object. If it’s a pipe or a cylindrical item, you will want to grip it with the curved, serrated edges of the jaws. If it’s hex nut or other square-sided object, you’ll want to use the flat sections at the front of the jaws.
To adjust it, first close the pliers without gripping the object.
Notice the motion of the lower handle as you squeeze the pliers shut. The moveable jaw pushes towards the upper jaw and you can feel the spring tension push the handles apart. Then, suddenly, the tension goes away and the wrench is closed.
Turn the adjusting screw and watch the lower jaw – you’ll see it move closer or farther from the other jaw.
When the opening between the jaws looks about the same size as the object you’re planning to grip, open the pliers up.
Now, gently close the pliers around the object.
If they grip the object but still wobble around a little, open the pliers. Turn the adjusting screw one turn clockwise to tighten them up.
If they feel like they might crush the object, open them up. Turn the adjusting screw one turn counterclockwise to loosen them.
When they are adjusted correctly, they will firmly grip the object without deforming it.
How to Safely Use Locking Pliers
It goes without saying that all pliers are inherently dangerous. Pivot and pinch points abound on even the simplest pair, so it always pays to use these tools with respect.
That being said, locking pliers carry some particular caveats.
Do not over-tighten them. You can position the adjusting screw too far, and force the handles together, so that they latch so firmly onto an object that you can’t get them loose. When you do that, you will most likely damage the object.
To release a stuck pair of locking pliers, go fetch another pair of pliers – hopefully something with long handles, like groove-joint pliers. Use the pliers to squeeze the release lever against the lower handle.
Do not under-tighten them. The jaws on these pliers are made of serrated, hardened metal. Trying to turn an object when they are not tight will cause them to scrape those edges around the object, damaging it. In the case of nuts and bolts, you can actually round-off their metal edges, making them useless.
Always use caution with these pliers – those serrated edges can dig into wood and plastic and can mar chrome finishes. Believe it or not, you can protect most chromed metal by putting a cloth over the area where the pliers will fit.
Where to Find Locking Pliers
These adjustable workhorses are available at most big-box home improvement stores. Prices range from around $10 USD for a single pair to over $100 USD for multi-plier sets.
View an affordable three-plier set on Amazon.
(As an Amazon associate, I earn from qualifying purchases)
The strength in these pliers lies in the quality of the metal and the workmanship that goes into them. For that reason, try to avoid low-priced, no-name pliers you find in bins at your local hardware store.
And it’s best to steer away from those big, expensive sets that offer you a half-dozen or more pliers. You won’t need more than three of them at most.
Related Posts
- The DIYer’s Toolbox
- How to Use Slip-Joint Pliers
- How to Use Linesman Pliers
- How to Use Channel-Lock Pliers
DIY projects involve risk. Always follow manufacturer instructions and use appropriate safety precautions.
7015
©2026 SkippityWhistles.com All rights reserved
