
A good vise doesn’t cut, drill, or fasten anything — it simply holds your work still. And yet, it might be the single tool that most improves accuracy, safety, and confidence in a DIY workspace.
If you’ve ever tried to drill into a spinning board, file something you were gripping with one hand, or tighten a bolt that refused to stay put, you already understand the value of a vise. The trick is choosing the right type of vise for the work you actually do.
What a Vise Really Does (and Why It Matters)
A vise is a fixed clamping tool designed to hold materials securely while you work on them. Unlike clamps, which are often temporary, a vise becomes part of your workspace — a dependable third hand that doesn’t get tired or slip at the wrong moment.
Used properly, a vise:
- Improves precision
- Reduces tool slip
- Makes power tools safer to use
- Frees both hands for better control
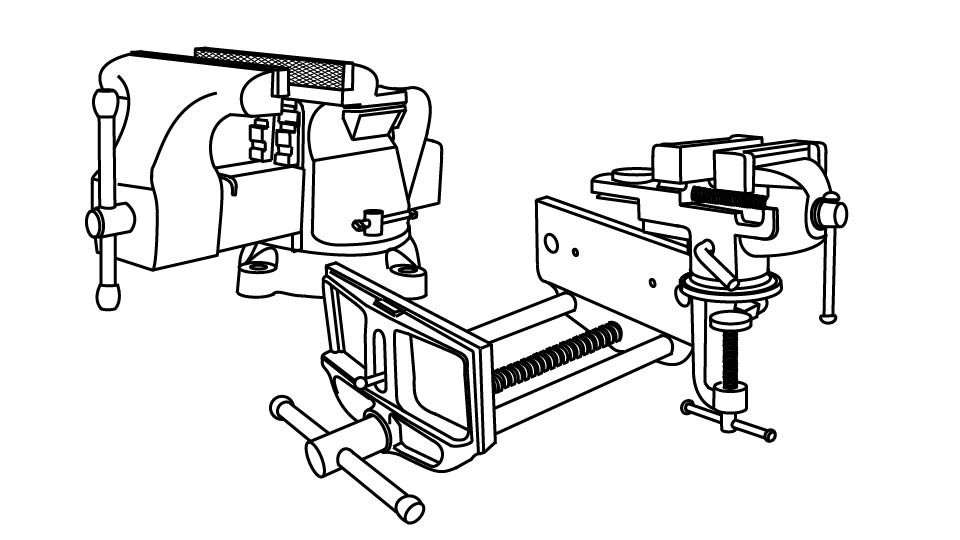
Common Types of Vises (and When to Use Each)
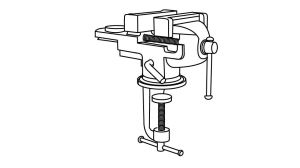
Bench Vises: The All-Purpose Workhorse

A bench vise mounts permanently (or semi-permanently) to a workbench. It’s designed for general DIY and light metalworking tasks.
Best for:
- Filing, sawing, drilling
- Holding metal or wood securely
- General shop work
Look for:
- Cast or forged steel construction
- Replaceable jaw inserts
- A swivel base for flexibility
This highly-rated Bench Vise is a good choice for almost all workshop vise duties.
(As an Amazon affiliate, I earn from qualifying purchases)
Woodworking Vises: Grip Without Damage
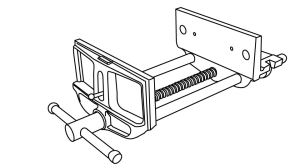
Woodworking vises are designed to hold wood firmly without marring the surface. They often use wide jaws and smoother faces.
Best for:
- Planing, sanding, and joinery
- Holding boards flat or on edge
- Furniture and trim work
Many woodworkers add wooden jaw liners to protect delicate pieces.
Portable and Clamp-On Vises: Small Space Solutions
If you don’t have a dedicated bench, portable or clamp-on vises offer surprising versatility. They attach temporarily to tables or work surfaces and store easily.
Best for:
- Apartments and small garages
- Occasional DIY projects
- Light-duty holding tasks
They’re not as rigid as bench vises, but they’re far better than trying to improvise.
Specialty Vises (Worth Knowing About)
- Drill press vises for precision drilling
- Machinist vises for metalworking accuracy
- Panavise-style vises for electronics and small parts
You don’t need these starting out — but it helps to know they exist.
Key Factors When Choosing a Vise
Jaw Width and Opening
A wider jaw spreads pressure evenly, while a larger opening handles thicker materials. Bigger isn’t always better — choose what matches your typical projects.
Mounting Style
- Permanent mounting = maximum stability
- Clamp-on mounting = flexibility
If the vise moves, it not only defeats the purpose, it can also become a safety threat.
Build Quality
A vise should feel boringly solid. Avoid lightweight castings that flex under pressure. Slop in the screw or jaws is a red flag.
Replaceable Jaws
Hard jaws are great for metal; soft jaws protect wood and finished surfaces. Replaceable inserts give you both.
Vise Safety Basics (Often Overlooked)
- Don’t overtighten — crushing your work helps no one
- Keep fingers clear when tightening (duh)
- Never use a vise as an anvil unless it has an anvil built into it. Then ONLY use that anvil surface, and respect the strength of the bench below the vise.
- Secure the vise firmly before applying force
A vise is a safety tool — treat it like one.
When a Vise Beats Clamps (and When It Doesn’t)
A vise is ideal when:
- The work stays in one place
- You need repeatable accuracy
- You’re using hand or power tools nearby
Clamps still win for:
- Large panels
- Irregular shapes
- Temporary positioning
Most workshops eventually use both.
Bottom Line
The right vise turns frustration into focus. It doesn’t speed you up — it slows the chaos down so you can work deliberately and safely.
Choose a vise that fits your space, your projects, and your patience level. Once you have one, you’ll wonder how you ever worked without it.
For a broader look at how vises fit into a beginner’s tool setup, see our guide to The DIYer’s Toolbox.
DIY projects involve risk. Always follow manufacturer instructions and use appropriate safety precautions.
7047
