
Are bugs sneaking into your home through a torn window screen? Fixing a damaged screen is easier than you think—and you don’t need to call a professional. With a few simple tools like a spline roller, replacement fiberglass or aluminum screen mesh, and a utility knife, you can restore your window screens in under an hour. In this step-by-step guide, we’ll show you how to repair, replace, and secure your screens so your windows look great and keep unwanted pests out—all while saving money and avoiding a full replacement.
Tools and Materials You’ll Need
- Replacement screen mesh – Available in fiberglass or aluminum; fiberglass is easier to work with.
- Spline roller – Essential for securing the screen into the frame.
- Spline – The rubber cord that holds the screen in place.
- Scissors or utility knife – To trim excess screen material.
- Flathead screwdriver – Helpful for removing old spline or frames.
- Measuring tape – To size the replacement screen.
Optional: Small clamps to hold the screen in place while rolling in the spline.
This highly-rated Window Screen and Screen Door Repair Kit features everything you’ll need at an economical price.
(As an Amazon affiliate, I earn from qualified purchases)
Step-by-Step Instructions
Step 1: Remove the Window Screen
- Carefully remove the screen from the window frame.
- Lay it flat on a clean, level surface.
Step 2: Remove the Old Spline
- Use a flathead screwdriver or spline removal tool to pull out the old spline.
- Remove the old screen mesh and clean the frame of any debris.
Step 3: Cut the Replacement Screen
- Measure the frame and cut a piece of replacement mesh slightly larger than the frame (about 1 inch extra on all sides).
Step 4: Install the New Screen
- Lay the screen over the frame, ensuring it overlaps evenly.
- Press the screen into the groove along one side, then work your way around.
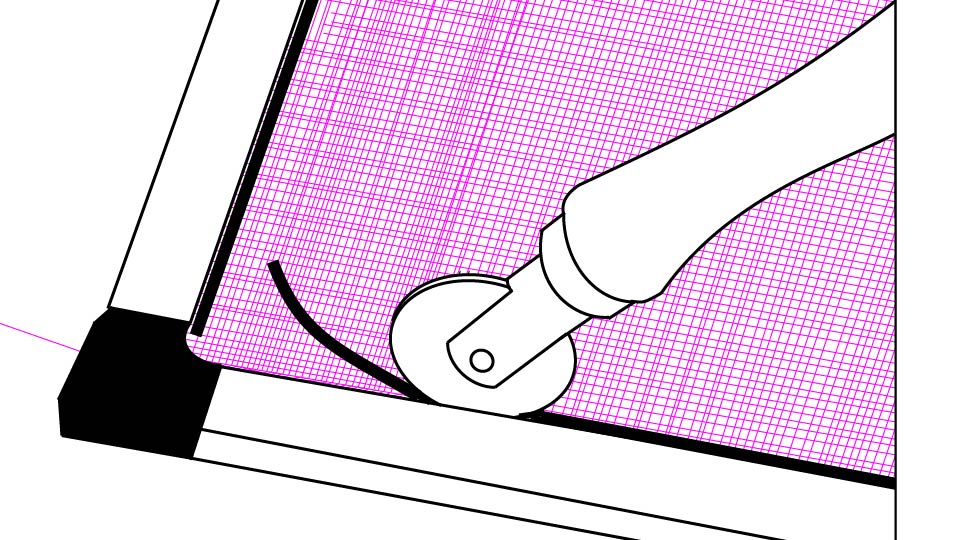
Step 5: Roll in the Spline
- Using a spline roller, press the spline into the groove over the screen, securing it tightly.
- Keep the screen taut to avoid wrinkles.
Step 6: Trim Excess Screen
- Once the spline is fully seated, trim the excess screen material with scissors or a utility knife.
Step 7: Reinstall the Screen
- Place the screen back into the window frame and test the fit. Make sure it sits securely.
Tips for a Perfect Repair
- Keep the screen tight to prevent sagging over time.
- Fiberglass mesh is easier to cut and install than aluminum, especially for beginners.
- For large windows, ask a friend to help hold the screen while rolling in the spline.
- Consider replacing old or cracked spline along with the screen for a longer-lasting repair.
When to Replace Instead of Repairing
- Multiple tears or large rips
- Frame is bent or broken
- Spline groove is damaged
Replacing the screen entirely may be a better long-term investment in these cases.
Suggested Amazon Affiliate Links
- Replacement fiberglass or aluminum screens
- Spline rollers and spline
- Utility knives and scissors
- Measuring tape
Recommended Tools & Materials for Fixing Your Window Screen
Upgrade your DIY repair with these essential tools. Each item is available on Amazon for easy ordering:
| Tool / Material | Why You Need It | Affiliate Link Example |
|---|---|---|
| Spline Roller | Secures the screen into the frame tightly | Buy on Amazon |
| Replacement Screen Mesh (Fiberglass or Aluminum) | Fiberglass is easier to cut; aluminum is more durable | Buy on Amazon |
| Spline (Rubber Cord) | Holds the screen in place inside the frame groove | Buy on Amazon |
| Utility Knife or Scissors | Trim excess screen neatly | Buy on Amazon |
| Measuring Tape | Ensures your screen fits perfectly | Buy on Amazon |
| Flathead Screwdriver | Helps remove old spline and frames | Buy on Amazon |
| Optional: Small Clamps | Hold the screen in place while rolling spline | Buy on Amazon |
Tip: If this is a one-off screen repair, same yourself some money and pick up a highly-rated all-in-one Window Screen Repair Kit.
Conclusion
Fixing a window screen doesn’t have to be frustrating or expensive. With a few simple tools—like a spline roller, replacement screen mesh, and a utility knife—you can have your windows looking neat and keeping bugs out in no time.
Whether you’re patching a small tear or replacing the entire screen, these steps make the repair straightforward and affordable. Ready to get started? Check out the recommended tools above—they’ll make the process fast, easy, and even a little satisfying.
By taking a little time now, you’ll protect your home, save money, and enjoy screens that actually do their job—without calling a professional.
DIY projects involve risk. Always follow manufacturer instructions and use appropriate safety precautions.
4034
