
(Or: How I learned to hang a shelf and sleep through the night)
When you’re fastening something to a wall, the screw itself is only half the story. The other half is what’s holding that screw inside the wall — and that’s where anchors and toggle bolts come in.
If you’ve ever driven a screw into drywall and felt it spin uselessly, congratulations: you’ve discovered why anchors exist.
This guide will walk you through:
- what anchors and toggle bolts are,
- when to use each type,
- and how to install them correctly so your shelf, TV, mirror, or towel bar stays exactly where you put it.
What Are Anchors and Toggle Bolts?
Anchors and toggle bolts are fasteners designed to work in hollow or weak materials, especially drywall. They spread the load over a larger area so the wall doesn’t crumble or give way.
Think of it this way:
- A screw in wood bites and holds onto the surrounding wood.
- A screw in drywall bites into the powdery gypsum surrounding it but nothing else.
That help comes in a few different forms.
Common Types of Wall Anchors
Plastic Expansion Anchors
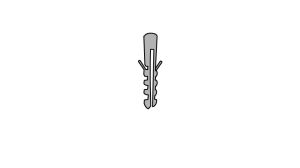
These are the small plastic sleeves that come bundled with most shelving sets.
Best for:
- very light loads,
- small picture frames,
- wall-mounted accessories.
How they work:
As the screw goes in, the plastic expands and presses against the drywall.
Limitations:
They’re easy to use, but easy to overload. Once they spin, they’re done.
Self-Drilling Drywall Anchors
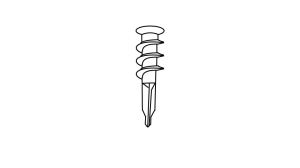
Often made of plastic or metal, these screw directly into drywall without a pilot hole.
Best for:
- medium-weight items,
- towel bars,
- small shelves,
- curtain rods.
Why people like them:
Fast installation and better grip than basic plastic anchors.
Caution:
They still rely on drywall strength alone — not magic. And, when they come out, they leave a very big hole behind them.
Molly Bolts (Hollow-Wall Anchors)
Metal anchors that expand behind the wall as you tighten the screw.
Best for:
- heavier fixtures,
- items you don’t want moving,
- semi-permanent installations.
Once set, the sleeve stays locked behind the wall, even if you remove the screw.
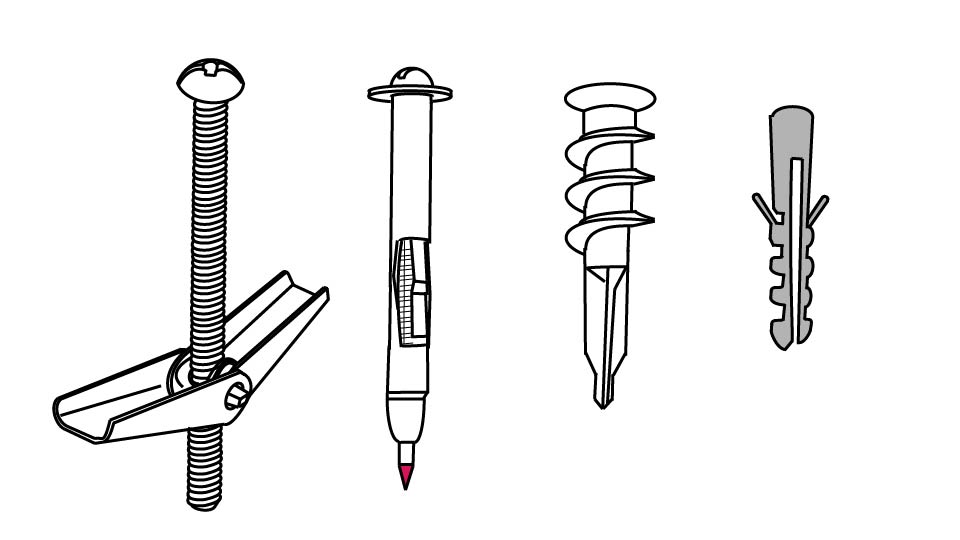
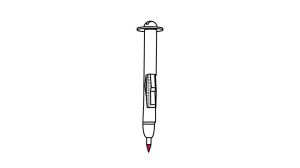
Toggle Bolts: When Strength Really Matters
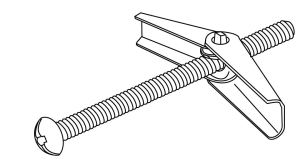
Toggle bolts are the heavy lifters of the anchor world.
They consist of:
- a machine screw, and
- spring-loaded wings that open behind the wall.
Once tightened, those wings clamp against the back of the drywall, spreading the load across a wide area.
Best for:
- shelves,
- large mirrors,
- cabinets,
- TV mounts (where studs aren’t available).
If you’re thinking, “I really don’t want this to fail,” toggle bolts are usually the answer.
When you remove a toggle bolt, all you get is the screw – the toggle portion falls down the inside of the wall and is lost to posterity. That is what makes these strong anchors single-use.
How to Use a Plastic Anchor
Installing plastic anchors and drywall screws follow the same procedures – mark, pilot hole, install.
- Mark the Location: Use a pencil or marker to identify the spot in which you’d like to place the anchor.
- Make the Hole: Use a hammer to drive a Phillips screwdriver straight into the drywall at the marked location. MAKE SURE THE SCREWDRIVER SHAFT IS NARROWER THAN THE ANCHOR. If the screwdriver doesn’t punch through the drywall, you’ve hit a stud and don’t need the anchor – use a screw instead.
- Install the Anchor: Push the anchor into the hole until it is flush with the wall.
- Drive the Screw: Slowly drive the screw that came with the anchor (or an appropriately-sized sheet metal screw) into the anchor until the head is about 1/8 of an inch from the wall.
- If the anchor doesn’t hold, use a toggle bolt.
ALWAYS DRIVE A PLASTIC ANCHOR BY HAND: A power driver can turn the screw too fast, causing the anchor to twist with the screw. When that happens, the anchor has lost its grip on the drywall and will come right out. Move to a larger anchor, or up to a toggle bolt.
How to Use Toggle and Molly Bolts
Molly bolts and toggle bolts follow pretty much the same procedure: mark, drill, mount, and insert.
- Mark the Location: Use a pencil or marker to identify the spot in which you’d like to place the toggle bolt. The thing about these bolts is that they leave a dime-sized hold, so measure wisely, my friend.
- Drill the correct hole: These bolts require a larger hole than standard anchors. Check the package and drill exactly that size.
- Assemble the bolt:
- Toggle Bolt -FIRST: thread the screw through the item you plan to hang on the wall, and THEN through the toggle wings. The flat part of the wings must face the screw head. Only thread the wings onto the screw until you can just see the screw sticking out of the folded part of the wings.
- Molly Bolt – thread the screw through the item you plan to hang on the wall.
- Insert into the wall:
- Toggle Bolt -Fold the wings and push the assembled toggle bolt through the hole. You’ll feel the wings snap open behind the drywall.
- Molly Bolt -Push the bolt shaft into the hole until the outer flange is flush with the wall. Then thread the screw into the bolt shaft.
- Tighten carefully:
- Toggle Bolt – Pull back gently on the screw as you tighten the screw. Pulling back keeps the wings flush against the back of the wall.
- Molly Bolt – You’ll feel the end of the screw bite into the end of the bolt shaft.
- Stop when snug: Overtightening can crush drywall. Firm is good. Hulk strength is not.
Choosing the Right Anchor or Bolt
Ask yourself three questions:
- How heavy is the item — really?
Include what it will hold, not just the fixture itself.- PLASTIC ANCHORS: Pictures, artwork, lightweight fixtures
- MOLLY/TOGGLE BOLTS: Shelves, heavy fixtures, heavier artwork
- What is the wall made of?
- PLASTIC ANCHORS/MOLLY BOLTS: Drywall, plaster, hollow masonry
- TOGGLE BOLTS: Drywall, hollow masonry, thin plywood
- Permanence?
- PLASTIC ANCHORS: temporary use, lightweight permanent use
- MOLLY/TOGGLE BOLTS: Permanent use
Molly and toggle bolts are fantastic, but removing them leaves a larger hole.
If the load matters, err on the side of stronger anchors. Overkill is cheaper than repairs.
Common Mistakes to Avoid
- Using anchors where a stud is available. Always use the stud.
- Choosing anchors based on convenience instead of load rating. That anchor that happens to be lying around may not always be the correct one.
- Overtightening and crushing drywall. Avoid using a power driver on a plastic anchor runs the risk of twisting the anchor. Overtightening a toggle bolt can cause the toggle to dig through the other side of the drywall, weaking it.
- Assuming “it feels tight” means “it’s secure.” Always test the anchor by gently tugging and trying to make it wobble. If it moves, it’s not holding.
Final Thoughts
Anchors and toggle bolts aren’t complicated, but they are decisive. Choosing the right one turns drywall from a weak point into a reliable mounting surface.
When in doubt:
- light loads →plastic anchors
- heavier loads → molly and toggle bolts
- critical loads → find a stud
Your walls — and whatever you hang on them — will thank you.
DIY projects involve risk. Always follow manufacturer instructions and use appropriate safety precautions.
2008
