How to Choose the Right Ladder: The Tall Mistake You’re About To Make

Wrong ladder = broken back. Right ladder = fixed gutter and spine still intact. Here’s how to pick the ladder that won’t betray you halfway up.

You’re standing in the hardware store looking at ladders.

You think: “I need to reach the gutter. That’s, what, 20 feet? I’ll just grab a 20-footer and I’m done.”

Wrong. Oh, so very wrong.

The wrong ladder choice is how you end up explaining to your signigicant other why you’re now wearing a back brace and can’t climb stairs for three months. The right ladder choice is how you fix your gutter, climb down safely, and never think about it again.

Choosing the wrong type of ladder, the wrong height, the wrong material, or the wrong weight rating means your ladder either doesn’t reach what you need to reach, or it reaches it but then betrays you halfway through the job by being unstable, wobbly, or simply collapsing under your weight.

Understanding what types of ladders exist, how tall you actually need to go, what weight rating matters, and how to safely use whatever you choose means the difference between “I fixed the gutter” and “I need emergency room directions.”

Let’s learn how to pick a ladder so you don’t become a cautionary tale your neighbors tell at barbecues.


The Core Principle: The Right Ladder For The Job Exists—And It’s Probably Not The One You’re Thinking Of

This is the mindset shift that separates people who climb ladders safely from people who are currently healing from ladder-related injuries.

Ladders come in different types, heights, and weight ratings. Each one is designed for a specific job. Using the wrong ladder for your job is how accidents happen.

Your job is not:

  • “I need to reach something high”

Your job is:

  • “I need to reach 15 feet safely while leaning against my house”
  • Or: “I need to reach 8 feet while standing in a flower bed”
  • Or: “I need a stable platform to work from while painting my deck”

Each of those requires a different ladder. Use the wrong one and you’re either struggling with a ladder that’s too unstable, or you’re overreaching with a ladder that’s too tall and unstable for the job.

Understanding this means understanding that “tall” and “safe for your job” are not the same thing.


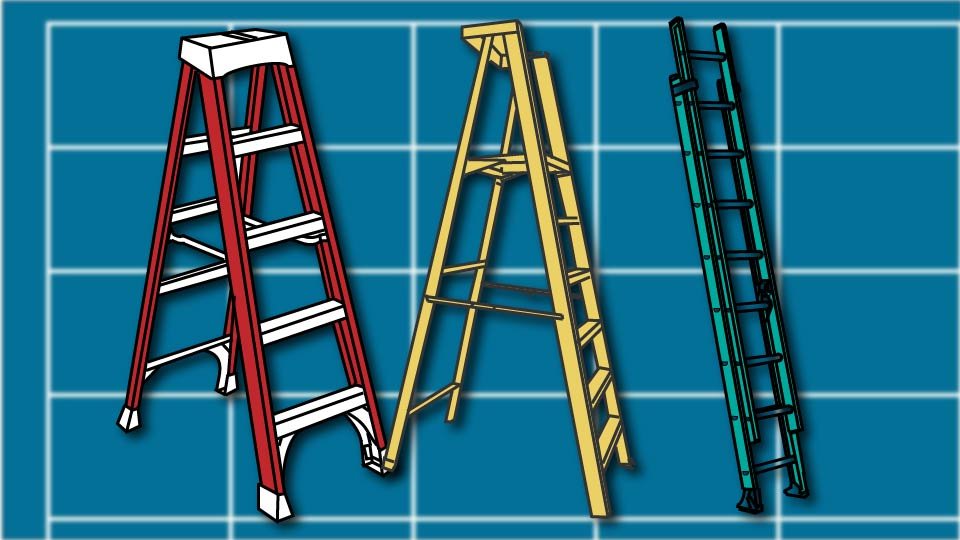
The Ladder Types (What You’re Actually Choosing Between)

Stepladder (The Stable One)
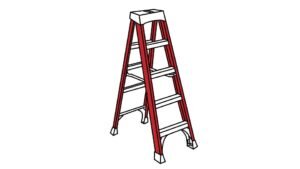
A line drawing of a step ladder by John D Reinhart in the Three-Point method.

This is the A-frame ladder. Two legs, a peak, some steps you stand on.

What it is: A self-supporting ladder that doesn’t need anything to lean against.

What it’s good for: Interior work, painting ceilings, reaching high shelves, working in the middle of a space where you don’t have a wall to lean against.

Height range: Usually 4 to 12 feet.

Real talk: Stepladders are stable because they stand on their own. You don’t need to lean them against anything. But they’re also only good for work directly above you. You can’t reach far to the side without losing stability.


Extension Ladder (The Reach One)
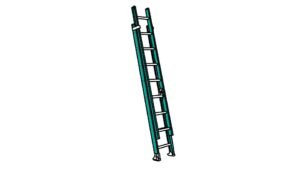
A technical line drawing of an extension ladder by John D Reinhart in the Three-Point method.

This is the long ladder you see leaning against houses. Two rails, rungs, and a pulley system that lets you extend it up and down.

What it is: A ladder that leans against something (wall, gutter, tree) and reaches high.

What it’s good for: Exterior work, reaching gutters, cleaning siding, reaching high branches.

Height range: Usually 20 to 40 feet (fully extended).

Real talk: Extension ladders reach high, but they need something sturdy to lean against. They’re also less stable than stepladders because you’re at an angle. One slip and you’re falling sideways.


Platform Ladder (The Work Platform One)
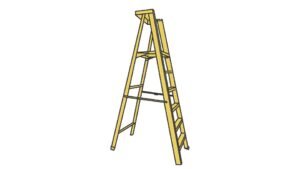
A technical line drawing of a platform ladder by John D Reinhart in the Three-Point method.

This is a stepladder with a flat platform at the top instead of just a single step.

What it is: A stepladder designed to let you stand safely on a wide platform while working.

What it’s good for: Painting, replacing light fixtures, any job where you need to stand still and work with both hands.

Height range: Usually 4 to 12 feet.

Real talk: Platform ladders are more stable than stepladders for extended work because the platform is bigger and more comfortable. But they’re heavier and more awkward to move.


The Height (What You Actually Need, Not What You Think You Need)

This is where most people make mistakes.

You think: “I need to reach 20 feet, so I’ll buy a 20-foot ladder.”

Reality: A 20-foot ladder leaning against your house at a safe angle reaches about 18 feet. And you shouldn’t be standing on the very top rung anyway (that’s a fall risk).

Real math:

  • A 20-foot extension ladder reaches roughly 18 feet when leaned against something
  • You should never stand higher than 3 rungs from the top
  • So a 20-foot ladder gives you safe working height at about 15 feet
  • If you need to reach 15 feet, buy the 20-footer
  • If you need to reach 20 feet, you need a 24 or 28-footer

Real talk: Most home jobs are between 8 and 16 feet. A 20-foot extension ladder covers almost everything residential. Don’t overthink it.


The Weight Rating (The Thing That Actually Matters)

Every ladder has a weight rating. This is the maximum weight the ladder can safely support—including you, your clothes, your tools, your guilt about procrastinating on this job, everything.

Weight rating categories:

  • Type III: 250 lb capacity (light duty, mostly DIY)
  • Type II: 300 lb capacity (medium duty, still DIY-friendly)
  • Type I: 350 lb capacity (heavy duty, professional-grade)
  • Type IA: 375 lb capacity (extra heavy duty, rarely needed around the house)

Real talk: Buy a ladder with a weight rating at least 100 lbs higher than your actual weight plus your tools. If you weigh 200 lbs and your tools weigh 20 lbs, buy a Type I (350 lb) ladder, not a Type III (250 lb).

Why? Because operating at maximum capacity all the time wears out the ladder faster and reduces safety margins. You want headroom.


The Material (Aluminum vs. Fiberglass vs. Wood)

Aluminum

Pros: Light, won’t rust, easy to move, affordable

Cons: Conducts electricity (dangerous around power lines)

Real talk: Great for most residential work, except if you’re near electrical lines or metal roofs.


Fiberglass

Pros: Won’t conduct electricity, durable, stable, professional-grade

Cons: Heavy, more expensive, overkill for most home projects

Real talk: If you’re working near power lines, fiberglass is your only choice. Otherwise, aluminum is just fine and much lighter.


Wood

Pros: Classic, looks nice if that matters, won’t conduct electricity

Cons: Heavy, rots if not maintained, splinters, generally outdated

Real talk: Don’t buy a wood ladder. Aluminum or fiberglass. That’s it.


How To Use A Ladder Safely (The Part You Might Skip But Shouldn’t)

Step 1: Inspect The Ladder Before Using It

Look for cracks, bent rails, loose rungs, anything that looks wrong.

Real talk: A damaged ladder is a falling ladder. Don’t use it.


Step 2: Set It Up On Level Ground

Don’t lean an extension ladder against something on uneven ground. Don’t set a stepladder on a slope.

Real talk: Uneven ground means unstable ladder. Find level ground or use shims to level it out.


Step 3: Lean Extension Ladders At The Right Angle

The magic angle is roughly 75 degrees (or the “1-foot-out-for-every-4-feet-up” rule).

What that means: If your ladder is 20 feet tall, the base should be 5 feet away from the wall.

Real talk: Too steep and the ladder flips backward. Too shallow and the top slides down. Get the angle right.


Step 4: Keep Three Points Of Contact

Two hands and one foot, or two feet and one hand. Always.

Real talk: This is the golden rule. If you’re reaching for something that requires letting go of the ladder with both hands, you’re overreaching. Climb down and reposition the ladder.


Step 5: Don’t Overreach

Your belt buckle should stay between the two rails of the ladder. If you’re leaning sideways, you’re overreaching.

Real talk: Overreaching is how you fall sideways off a ladder. It’s a bad way to learn this lesson.


Step 6: Use Both Feet On The Rung

Not one foot, both feet. Centered on the rung.

Real talk: Standing on one foot is unstable and looks like you’re about to fall. Because you are.


Step 7: Never Jump Down

Climb down like you climbed up. One rung at a time.

Real talk: Jumping might be faster, but it’s also how you twist an ankle or miss a rung and fall. Walk down.


Common Ladder Mistakes (Learn From These)

❌ Using an extension ladder as a stepladder You lean it against something and stand on the side rungs like it’s an A-frame. It’s not. It tips. Solution: Use a stepladder for vertical work.

❌ Standing on the top rung of an extension ladder You think you need those extra 12 inches. You don’t. The top rung isn’t meant to stand on. Solution: Climb down and reposition.

❌ Using the wrong weight rating You’re heavier than the ladder is rated for. The ladder fails. Solution: Check your weight, buy appropriate rating, don’t lie to yourself.

❌ Leaning an extension ladder on a gutter Gutters aren’t designed to support ladder weight. The gutter bends or breaks. Solution: Lean against the fascia board (the flat board behind the gutter) or use a ladder standoff.

❌ Setting up on uneven ground One side of the stepladder is higher than the other. It tips. Solution: Find level ground or shim it.

❌ Overreaching You’re leaning sideways so far that only one foot is on the ladder. You fall. Solution: Climb down, reposition, try again.

❌ Working alone You fall and there’s no one to call for help or find you. Solution: Tell someone you’re working on the ladder. Better yet, have them spot you.

❌ Using a damaged ladder The ladder breaks while you’re on it. Solution: Inspect before use. If it’s damaged, don’t use it.

Real talk: Ladder accidents are preventable. Most of them come from user error, not ladder failure.


When To Hire A Professional

Hire someone when:

  • You need to reach higher than 28 feet (equipment rental territory)
  • You’re working near power lines (electricity kills)
  • You have a medical condition that makes balance difficult
  • You’re uncomfortable with heights (seriously, don’t push through this)
  • The job involves extended work in a dangerous position
  • Your roof is steep or slippery

Your safety is worth $200-500. Don’t be a hero.


The Bottom Line

Choosing the right ladder means:

  • Understanding what type of work you’re doing (not just “I need height”)
  • Buying a ladder tall enough for the job (plus 3 feet of buffer)
  • Checking the weight rating and respecting it
  • Choosing the right material (aluminum or fiberglass, not wood)
  • Using it safely (three points of contact, right angle, no overreaching)
  • Knowing when to hire a professional instead

Do this right, and you’ll climb safely, fix what needs fixing, and climb back down intact.

Do it wrong, and you’ll spend the next three months explaining to everyone why you’re wearing a back brace and moving slowly.

Your choice. 🛠️


Related Guides You Might Find Helpful


Amazon Affiliate Recommendations

Extension Ladders

Extension Ladder (20-Foot) – The workhorse. Reaches about 18 feet safely. Perfect for most home projects.

Extension Ladder (24-Foot) – For bigger homes or higher gutters. Lighter than fiberglass, reaches about 22 feet safely.

Extension Ladder (20-Foot, Fiberglass) – If you’re working near power lines. Heavier, but electrically safe.

Stepladders

Stepladder (8-Foot, Aluminum) – Interior work, reaching shelves, most indoor jobs. Stable and self-supporting.

Platform Stepladder – Better for extended work. Wide platform, more comfortable for painting or fixture replacement.

As an Amazon Associate, I earn from qualifying purchases. Click through the links above to support Skippity Whistles.


Ladder safety is critical. Always inspect ladders before use. Never use a ladder near power lines without fiberglass construction. Never stand on the top rung of an extension ladder. Always maintain three points of contact. Never use a ladder under the influence of alcohol or medication that affects balance. Keep both hands free to grip the ladder—if you need both hands for the job, you’re overreaching. If you fall from a height over 10 feet, seek immediate medical attention even if you feel okay. Know your limitations and hire a professional when necessary.


Skippity Whistles is part of the John D Reinhart content family. Writer, illustrator, videographer, and accidental filmmaker — find the whole story at JohnDReinhart.com.

7058

©2026 John D Reinhartskippitywhistles.com/ All rights reserved

Water Heater Connections Simplified

A water heater has just three real plumbing connections — cold in, hot out, drain — plus one cheap sacrificial part most homeowners never learn exists.

Ron’s water heater lasted almost exactly ten years before it started leaking rusty water from the base, and the plumber who came to replace it mentioned, almost in passing, that a thirty-dollar part called an anode rod probably would have kept the tank going another five years if anyone had ever swapped it out. Nobody had. Nobody had ever heard of it. Ron bought a whole new water heater instead of a thirty-dollar rod, which is a genuinely expensive way to learn a part exists.

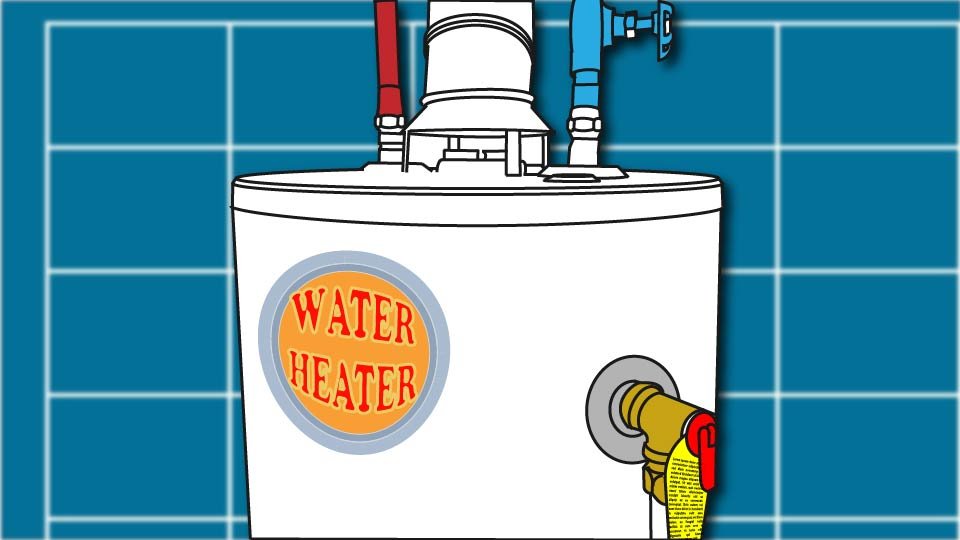
A water heater looks intimidating sitting in the corner of a basement or garage, covered in pipes and a mystery valve on top. It’s actually simple once you know what each connection is doing — and one of those parts is quietly working the entire time, right up until it isn’t.

🎯 Three Connections, One Job

Every water heater boils down to three essential connections: a cold water inlet where water enters, a hot water outlet where it leaves, and a drain valve for emptying the tank when needed.

Everything else — safety devices, support piping — exists to serve those three. That’s the entire mental model worth keeping in mind.

🔵 The Cold Water Inlet and the Dip Tube Nobody Sees

Cold water enters here, usually through a 1/2-inch pipe connected at the top of the tank.

The water travels down the dip tube, a plastic pipe that carries it from the inlet at the top to the bottom of the tank.

If hard-water sediment builds up in the cold-water inlet, the flow of water into the tank can get restricted. Separately, over years the dip tube’s plastic can crack or degrade on its own — from heat cycling or just age — letting cold water release near the top of the tank instead of the bottom. The result is lukewarm water running from the hot water taps.

The cold water inlet has a valve on it, so that you can turn off the water supply to the water heater.

🔴 The Hot Water Outlet

The cold water flows into the tank through the dip tube, releasing near the bottom.

A heating element (electric) or a burner (gas), controlled by a thermostat, heats the water in the tank to a preset temperature.

When you open a tap in the house, hot water leaves through a connection at the top of the tank, typically the same 1/2-inch sizing as the inlet.

🚰 The Drain Valve

The drain valve is a small faucet-like valve at the tank’s base lets it drain completely — for replacement, sediment removal, or general maintenance.

Turn it counterclockwise and water flows out through a connected hose.

Opening it slightly once a year to release a bit of water is a genuinely underused habit that clears settled sediment and keeps the tank running efficiently.

But be careful – the water in the tank is hot!

🛡️ The T&P Relief Valve: The Safety Guard

The Temperature and Pressure (T&P) Relief Valve is a small valve with a lever on high up on the side of the tank. The T&P relief valve exists for one serious reason: water doesn’t compress, and as it heats inside a sealed tank, pressure builds right along with it.

If pressure climbs past roughly 150 PSI, or temperature past around 210°F, this valve opens automatically and releases water to bring both back down to within the proper limits.

The T&P relief valve is the entire reason a water heater doesn’t become a genuine hazard.

  • Occasional slow dripping from its discharge pipe is usually normal pressure relief.
  • Constant draining points to a real problem worth a plumber’s attention.
  • Hard water leaves behind lime — a chalky mineral deposit — anywhere water sits or flows repeatedly, and the T&P valve is exactly that kind of spot. Over time, lime can coat the valve’s internal seat, the same way a showerhead gets crusty in a hard-water area. A valve fighting through mineral buildup may not open fully when a real pressure spike actually calls for it — the one moment this whole valve exists for.
  • Checking it is simple: lift the small test lever on top of the valve briefly. Water should flow out immediately, then stop cleanly once you release the lever. If nothing comes out, or it keeps dripping afterward instead of shutting off, that’s the valve telling you it’s not sealing or opening the way it should — worth a call to a plumber rather than waiting to find out during an actual emergency.

🔩 The Anode Rod: The Invisible Protector

Inside the tank sits a sacrificial metal rod, usually magnesium or aluminum, whose entire job is to corrode instead of the tank itself. Over three to five years it slowly dissolves, and once it’s fully spent, the steel tank starts rusting in its place — which is exactly what happened to Ron’s.

If a water heater is eight to ten years old and otherwise running fine, replacing this one cheap, mostly unknown part can genuinely extend its life another five years or more.

Most people never learn it exists until after the tank’s already failed, at which point the only remaining option is the expensive one.

🔥⚡ Gas vs. Electric, Briefly

Gas water heaters add a gas line and a vent pipe carrying combustion exhaust up to the roof or chimney — gas connections are strictly a professional’s job, since a gas leak is a serious hazard, not a DIY judgment call.

Electric water heaters run on a 240-volt circuit powering heating elements inside the tank, and that electrical work belongs to a licensed professional too, for the same reason.

🔍 Reading the Symptoms

  • No hot water at all points to a closed inlet valve, a failed dip tube, or a dead heating element or burner.
  • Lukewarm water suggests a thermostat set too low, a broken dip tube mixing cold in, or sediment buildup reducing efficiency.
  • Water dripping from the drain valve is often normal pressure relief, but constant draining signals a failing valve.
  • Rumbling or popping sounds mean sediment settled at the bottom — a flush usually clears it.
  • Rusty or discolored water is the anode rod’s warning sign, exactly the one Ron missed for a decade.

📞 When to Call a Professional

  • Any actively leaking connection
  • a T&P valve that won’t stop draining or won’t operate at all
  • the smell of gas
  • persistent lukewarm water after checking the obvious
  • rusty water

Are all past the DIY line. Gas lines, electrical work, and anything inside the tank itself belong to a licensed professional every time — no exceptions worth the risk.

🛒 Gear Worth Having

Magnesium Anode Rod Replacement — The thirty-dollar part that could have saved Ron’s tank five extra years — check compatibility with your specific model before buying.

Temperature and Pressure Relief Valve Replacement — A critical safety component worth replacing the moment it’s failing or won’t operate — not a part to leave in question.

Strap Wrench (Rubber or Rope-Style) — Grips smooth, hard-to-reach fittings without marking them up, in the tight clearance around a water heater where a standard wrench often can’t get proper leverage.

As an Amazon affiliate, I earn from qualifying purchases. Thank you for supporting SkippityWhistles.

📖 Related Reads


SkippityWhistles is part of the John D Reinhart content family. Writer, illustrator, videographer, and accidental filmmaker — find the whole story at JohnDReinhart.com.

3025

©2026 John D Reinhartskippitywhistles.com/ — All rights reserved

How to Use Push Fit Plumbing Fittings (Or: The Step Everyone’s Tempted to Skip)

A push-fit fitting seals with tiny teeth and a rubber O-ring — skip one thirty-second prep step, and that O-ring is the first thing to fail.

Ron cut a piece of copper tubing, looked at the slightly rough edge left behind, and decided it was close enough to smooth — deburring felt like a formality for a cut that already looked basically fine. It wasn’t fine. That rough edge sliced a thin nick into the fitting’s O-ring on the way in, and a slow drip started sometime overnight, discovered the next morning as a small, persistent puddle that silicone tape ended up saving the day on. The fitting hadn’t failed. The prep work had been skipped.

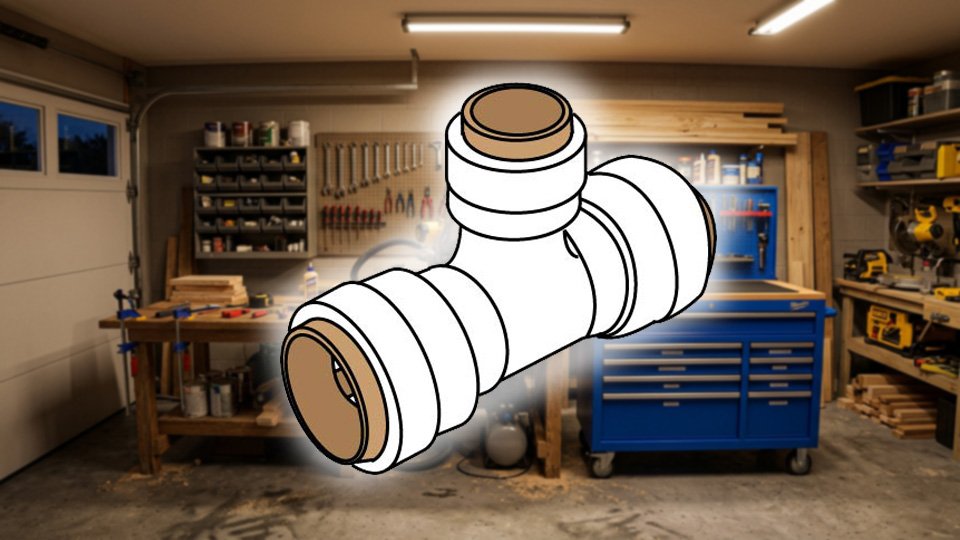
Push-fit fittings feel like they shouldn’t work — push a tube in, no solder, no threading, and somehow it holds. They’re not a gimmick. They’re genuine, code-approved engineering, and the entire mechanism depends on two things staying perfect: the teeth gripping the tube, and the O-ring sealing against it.

⚙️ The Core Mechanism

Inside every push-fit fitting sit small internal teeth, usually stainless steel, that grip a tube the instant it’s pushed in — functioning like a ratchet that only allows movement in one direction.

Right behind those teeth sits an O-ring (a rubber ring that compresses against the tube to create a watertight seal). Teeth grip, O-ring seals, water doesn’t leak.

That’s the entire mechanism — no solder, no threads, no special tools, and no soldering iron needed anywhere near it.

🧩 The Parts You’re Working With

  • The fitting body, usually brass or reinforced plastic, holds the teeth and O-ring in a fixed internal chamber. A cheap body flexes or collapses under pressure, so name-brand fittings are worth the extra couple dollars over an unbranded equivalent.
  • The gripping teeth do the actual holding, and they’re delicate enough that scratching them or dropping a fitting in dirt or gravel can compromise their bite.
  • The O-ring only seals properly against a smooth, straight, correctly sized tube — which is exactly the detail Ron’s rough-cut edge got wrong.

🛠️ Using It Correctly, Step by Step

  • Cut the tubing straight, using a pipe cutter or hacksaw — a crooked cut won’t seat evenly and undermines the whole connection from the start.
  • Deburr the cut end (smooth the sharp edge left behind, with a deburring tool or even sandpaper) — this thirty-second step is the single most skipped, most important part of the entire process, since a sharp edge slices the O-ring on the way in exactly the way it did for Ron.
  • Confirm the fitting size matches the tube exactly; push-fit fittings are size-specific, and a mismatch simply won’t seal.
  • Push the tube in straight, aiming for the center of the opening rather than any angle — resistance partway in usually means it’s off-center, so back out and try again rather than forcing it.
  • Push until it bottoms out completely; it’ll feel like it’s gone in further than expected, and that’s correct, not a sign to stop early.
  • Tug the tube once seated — it shouldn’t move at all, and if it pulls free, that’s the connection telling you something went wrong before water ever touches it.
  • Finally, run water through the connection and watch closely for drips, since some leaks only reveal themselves under real pressure.

🔓 Disconnecting Without Destroying It

The genuinely clever part: a disconnect tool (a small key-shaped tool, often included with quality fitting packages) lets a push-fit connection come apart cleanly and get reused.

Insert the tool into the fitting opening, push until it clicks past the gripping teeth, and pull the tube free — the fitting is then ready for a fresh tube, no cutting or waste involved.

🎯 Where They Excel, and Where They Don’t

Push-fit fittings are excellent for copper-to-copper, PEX-to-PEX, and copper-to-PEX connections, quick repairs, and situations where soldering nearby isn’t safe.

They’re not rated for underground burial — the connection needs to stay accessible for inspection, and manufacturers don’t rate the O-ring seal for constant ground moisture and freeze-thaw exposure over years. And they’re built for standard residential pressure, not high-pressure commercial applications.

🚫 The Mistakes Worth Avoiding

  • Skipping the deburring step is the one that got Ron — a sharp cut edge damages the O-ring on the way in, and the leak that follows can take hours or days to show up.
  • A crooked or angled cut prevents the tube from seating straight, letting water leak unevenly around the edges.
  • Not pushing the tube all the way to the bottom leaves it under-seated and prone to pulling free under pressure.
  • A mismatched size simply won’t create a proper seal at all.
  • And creating a solder joint on a push-fit fitting anyway, just to feel extra safe, melts the plastic and destroys the O-ring — the fitting was never designed to be soldered, and doesn’t need to be.

🛒 Gear Worth Having

Push-Fit Coupling Multi-Pack (1/2-Inch) — The most common residential size, worth buying in bulk since a mid-project trip back to the store is the last thing anyone wants.

Tubing Deburring Tool — The exact thirty-second step that would have saved Ron his overnight puddle — smooths the cut edge before it ever meets an O-ring.

Push-Fit Disconnect Tool (Key-Style) — Takes a connection apart cleanly for reuse, instead of cutting the fitting off and starting over from scratch.

As an Amazon affiliate, I earn from qualifying purchases. Thank you for supporting SkippityWhistles.

📖 Related Reads


SkippityWhistles is part of the John D Reinhart content family. Writer, illustrator, videographer, and accidental filmmaker — find the whole story at JohnDReinhart.com.

3023

©2026 John D Reinhartskippitywhistles.com/ — All rights reserved

How to Choose the Right Sandpaper

Confused about sandpaper grit? Here’s the simple rule: lower numbers remove, higher numbers finish. Stock four grits and you’re set for 90% of DIY sanding.

Rhonda’s sander had 80-grit loaded in it from the last project, and swapping it out for something finer felt like an extra step she didn’t have time for — right up until the “light sanding” between coats of paint left visible scratches in the finish that no amount of extra coats fully hid. The sandpaper wasn’t the wrong tool. It was the wrong number on the wrong day.

Sandpaper looks like one product with a confusing number printed on the back. It’s actually a spectrum, and knowing roughly where you are on it is the whole trick.

🔢 What Grit Numbers Actually Mean

Sandpaper grit is a number rating system defining how coarse or fine a sandpaper’s abrasive particles are.

Lower numbers are coarser and remove material fast, higher numbers are finer and smooth or polish without removing much at all. An 80-grit sheet cuts through old paint aggressively. A 320-grit sheet barely leaves a mark, which is exactly the point once you’re past removing anything and into finishing.

The rule that covers almost every situation: start coarse when you’re removing material, start fine when you’re finishing a surface that’s already close to done.

🧰 Four Grits Cover Almost Everything

  • 80 grit handles aggressive removal — stripping old paint, leveling filler, shaping rough wood.
  • 120 grit is the middle ground, smoothing raw lumber or patched drywall without being aggressive enough for real removal work.
  • 180 grit is the prep stage, the last pass before paint or stain goes on.
  • 220 grit is for between coats — light enough to leave no visible scratch, coarse enough to help the next coat of paint or polyurethane actually adhere.

Stocking those four grits covers the overwhelming majority of household sanding without needing a drawer full of specialty papers.

The thing is, when you’re sanding, you don’t want to jump straight from an 80-grit pass to a 220-grit finish. Do that and you skip the middle, you’ll find the high-grit paper just glazes right over those deeper scratches without ever actually removing them. Working down through the grits in order, rather than skipping ahead, is what actually produces a smooth result. No. Shortcuts.

🧱 Sandpaper Material: Aluminum Oxide Covers Most Jobs

The abrasive material on the paper affects how it cuts and how long it lasts.

  • Aluminum oxide is the standard choice for home DIY — durable, reasonably priced, and effective on wood, painted surfaces, and most general projects.
  • Silicon carbide is better suited to metal and wet sanding.
  • Garnet has a more traditional, gentler cut favored for fine woodworking.
  • Ceramic lasts the longest and cuts the most aggressively, at a price that reflects it. For nearly everything on a typical project list, aluminum oxide is the reliable default.

🖐️ Loose Sheets vs. Sanding Blocks

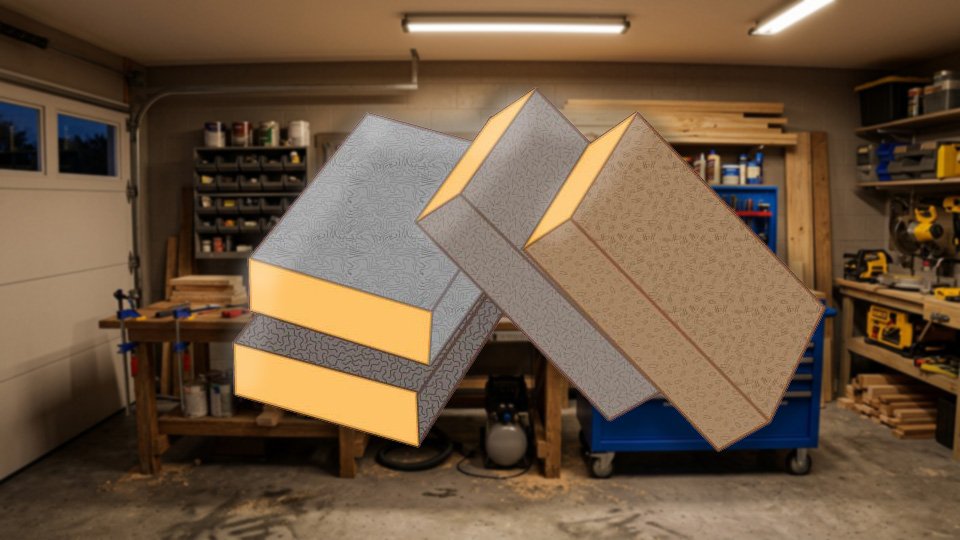
Loose sandpaper sheets are flexible, cheap, and good for wrapping around a scrap of wood to get into tight or curved spaces — but bare fingers behind the paper tend to press unevenly and leave shallow grooves in the surface. A sanding block spreads pressure evenly across a flat area, which matters most on doors, panels, and trim where a professional-looking, consistent surface is the goal. Both are legitimate tools; the choice comes down to whether the surface is flat and wide or tight and detailed.

🚮 Knowing When Sandpaper Is Done

Sandpaper dulls with use, and the tell is simple: if you’re pressing harder and getting less result, the paper is worn out, not the technique. Sandpaper is supposed to cut with light pressure — pushing harder on dull paper mostly generates heat and frustration rather than progress. A sheet costs very little compared to the time lost fighting a dull one.

🛒 Gear Worth Having

3M Pro-Pak Sandpaper Assortment (80/120/180/220 Grit) — Covers exactly the four grits that handle nearly every household job, in one pack instead of four separate hardware store trips.

3M Sanding Sponge Multi-Pack — Flexes into curves and detail work where a rigid block can’t reach, while still holding up better than a loose sheet on edges and corners.

BLACK+DECKER Mouse Detail Orbital Sander — Turns a project big enough to make your arm tired into one that takes a fraction of the time, especially on drywall prep or large flat panels.

As an Amazon affiliate, I earn from qualifying purchases. Thank you for supporting SkippityWhistles.

📖 Related Reads


SkippityWhistles is part of the John D Reinhart content family. Writer, illustrator, videographer, and accidental filmmaker — find the whole story at JohnDReinhart.com.

2004

©2026 John D Reinhartskippitywhistles.com/ — All rights reserved

How to Use a Chainsaw (Or: Respect It Completely, Every Single Time)

A chainsaw will hurt you if you give it a chance. Here’s how to use one safely, what protection you need, and when to admit you should’ve hired a professional instead.

Ron had the chaps sitting right there in the garage and almost skipped them for what was going to be one quick branch — thirty seconds of cutting, he figured, didn’t need the full gear-up. A neighbor walking by asked, genuinely, whether he was really about to run a chainsaw without them for a job that takes less time to suit up for than it does to make excuses about skipping it. Ron put the chaps on. That’s the whole story, and it’s the right one — nothing dramatic happened, because nothing dramatic is exactly the goal.

A chainsaw is not a casual tool. It has a moving loop of sharp teeth that cuts wood, and it will cut other things with equal enthusiasm if given the slightest chance. This isn’t about being fearless around it. It’s about being appropriately respectful of it, every single time, with zero exceptions for jobs that feel too quick to matter.

⚠️ The Core Principle

  • Kickback – a sudden, violent upward or backward snap of the guide bar toward the operator – happens when the chain binds or the tip of the bar contacts something unexpectedly.
  • Binding – the chain suddenly stopping or jerking mid-cut – is the warning sign that comes right before kickback.

Both are the reason every rule below exists — not to make chainsaw use complicated, but because a saw that’s fighting you is a saw about to do something sudden.

🔩 The Parts You’re Working With

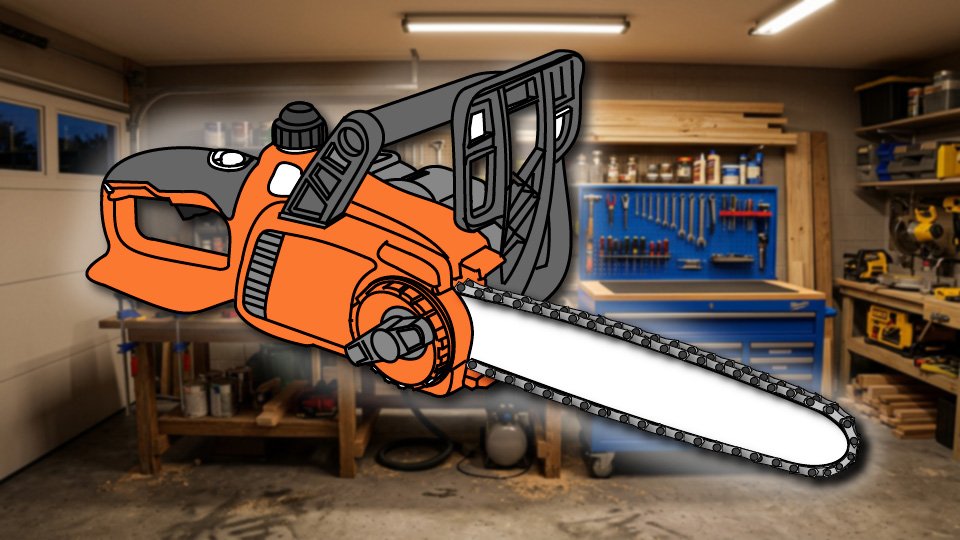
  • The engine or motor spins the chain — gas engines are more powerful and louder, electric motors are quieter and lower-maintenance, and both are equally capable of causing serious injury if mishandled.
  • The guide bar is the long metal track the chain spins around; treat it as live the entire time the saw is running, full stop.
  • The chain is the actual loop of teeth doing the cutting, and it moves fast enough to cut through flesh more easily than it cuts through wood.
  • The throttle trigger is the entire relationship between you and whether the chain is spinning — squeeze for full speed before cutting, release to stop.

🦺 Safety Equipment: Not Optional, Not Negotiable

  • Eye protection (safety glasses or a face shield) stops flying wood chips before they reach an eye that doesn’t get a second chance.
  • Hearing protection (earplugs or earmuffs) prevents permanent hearing loss that shows up gradually and never reverses.
  • Chainsaw chaps, made from ballistic material designed to jam the chain the instant it contacts them, are the single most important item on this list — the difference between a jammed chain and a serious leg injury.
  • Steel-toed boots protect feet from falling wood and dropped saws.
  • A hard hat is required any time you’re cutting above head height, since falling branches are a real and common hazard.
  • Work gloves protect against splinters and minor cuts while handling both the wood and the saw.

Every item here gets worn every time, not just on the cuts that feel risky.

🛠️ Before You Start

  • Check chain tension — snug against the bar but able to pull slightly by hand; too loose and it can fly off mid-cut, too tight and it binds.
  • Check fuel or battery charge before starting, not mid-job.
  • Inspect the bar for damage or dull spots.
  • Confirm the oil tank is full — a dry chain smokes, grinds, and fights the cut instead of gliding through it. Five minutes of this prevents the kind of afternoon nobody wants.

🧍 Positioning and Starting

  • Stand on stable, solid ground only — a chainsaw and a ladder, or any unstable footing, is a combination worth avoiding entirely.
  • Follow the manufacturer’s starting procedure exactly, since cold-start sequences vary by model.
  • Once running, stand to the side of the saw, never directly behind it, so kickback has less of you in its path.
  • Keep both hands on the saw at all times, no exceptions for a quick adjustment.
  • Hold it at waist height or slightly above, and never reach or stretch toward the cut.

✂️ Making the Cut

  • Bring the chain to full throttle before it ever touches the wood — a chain running at partial speed binds far more easily and is a direct path to kickback.
  • Guide the saw into the cut smoothly and let the chain do the actual cutting rather than forcing it through.
  • If the saw is struggling or binding, that’s the signal to stop, back out slowly, release the throttle, and reassess rather than push harder.
  • Once through, back the saw out and release the throttle completely before setting it down or reaching toward the cut.

🚫 The Mistakes Worth Never Making

  • Loose clothing or untied long hair can catch on a moving chain and pull the rest of you toward it.
  • Operating with one hand removes real control at the exact moment control matters most.
  • Running at partial throttle invites binding.
  • Working alone means nobody’s there if something goes wrong.
  • Working tired or rushed is how careful people make careless mistakes. Working on a ladder or unstable ground turns a slip into a much bigger problem.
  • Ignoring maintenance — a dull or loose chain — makes every one of these risks worse.
  • And not planning for where a cut piece or falling branch will land is how people get hit by the very thing they just cut.

🎯 When to Just Hire a Professional

Cutting firewood, clearing fallen branches, or light work on your own property with a clear, controlled setup is reasonable territory for a homeowner who’s trained and comfortable with the tool. Large trees, anything complex or genuinely dangerous, or any real uncertainty about your own ability to control the situation is a job for a professional — one who typically handles it for a few hundred dollars, which is a small price next to the alternative. There’s no shame in that call. It’s the correct one.

😬 If This Post Scared You a Little

Good.

That’s not a side effect of this post — that’s the actual point of it. A chainsaw is one of the few tools in a home garage that can cause genuinely serious harm in a fraction of a second, and a little healthy fear is exactly the response that keeps both hands where they belong and the chaps on for every cut, not just the ones that feel risky.

The people who get hurt by chainsaws are rarely the ones who were nervous about them. Take that nervousness as a feature, not a flaw — it’s the same instinct that makes you double-check the chain tension and skip the ladder.

Respect the tool, keep the fear, and you’ll be exactly the kind of cautious this job actually calls for.

🛒 Gear Worth Having

Chainsaw Safety Chaps, Ballistic Fabric — The single most important item on this entire list — designed to jam a chain instantly on contact instead of letting it reach skin.

Forestry Safety Helmet with Face Shield and Ear Muffs — Combines head, eye, and hearing protection into one piece of gear, so there’s no excuse for skipping any one of the three.

16-Inch Electric Chainsaw — Right-sized power for firewood and fallen branches, with lower maintenance and noise than a gas equivalent for occasional homeowner use.

As an Amazon affiliate, I earn from qualifying purchases. Thank you for supporting SkippityWhistles.

📖 Related Reads


SkippityWhistles is part of the John D Reinhart content family. Writer, illustrator, videographer, and accidental filmmaker — find the whole story at JohnDReinhart.com.

7051

©2026 John D Reinhartskippitywhistles.com/ — All rights reserved

Staples vs. Nails: Two Different Jobs Wearing Similar Outfits

Your stapler isn’t a hammer and your hammer isn’t a stapler. Here’s how to pick the right fastener before your project falls apart and your significant other asks ‘why did you do that?’

Rhonda spent one entire hot Saturday reupholstering her grandmother’s recliner in the garage, and the specific smell of forty-year-old furniture dust never fully left her memory since. What she does remember clearly, dust and all, is that the staple gun made quick, clean work of the fabric — and that reaching for the same staple gun to reinforce the chair’s wobbly wooden frame underneath would have been a complete mistake.

Staples and nails look like they’re competing for the same job. They’re not. They hold material in two fundamentally different ways, and knowing which mechanism you actually need is the entire decision.

🔗 Two Mechanisms: Clamping vs. Gripping

A staple works by clamping (the two legs of a staple bend flat against the back of the material once fired, pinching it against the backing like a small mechanical vise). That clamping force is excellent at holding something thin and flat in place — fabric, paper, veneer — but it isn’t built to resist a strong pull or carry real weight.

A nail works by friction and grip: a single shaft drives through material and the surrounding fibers squeeze around it, resisting the nail’s removal along its entire length. That grip is what lets a nail carry load, resist being pulled loose, and hold a structural joint together under stress. Different mechanism, different job — and reaching for a staple gun when a project actually needs a nail’s grip is how a shelf, not just old upholstery, ends up on the floor.

🧷 Staple Sizes: Match the Leg Length to the Material

  • Light-duty staples, roughly a quarter to half an inch, suit paper, thin cardboard, and craft projects — minimal holding power by design.
  • Medium-duty staples, around 5/8 to 3/4 inch, are the everyday workhorse for upholstery, trim, and thin wood backing.
  • Heavy-duty staples, an inch or more, handle thick material and genuinely demanding jobs like roofing felt.

Going too light for the material means the staple simply won’t seat properly; going too heavy on something delicate risks tearing straight through it.

🔨 Nail Types: Different Shafts for Different Jobs

  • Common nails have a thick shaft and broad head, built for framing and structural work where raw holding strength matters more than appearance.
  • Finishing nails trade shaft thickness for a small, easily hidden head, making them the right call for trim and cabinetry where looks matter and the joint isn’t load-bearing.
  • Brad nails go even thinner still, for delicate trim and detail work with essentially no structural ambition.
  • Specialty nails exist too — galvanized roofing nails resist weather and rust, and ring-shank drywall nails are cut specifically to grip drywall’s soft gypsum core better than a smooth shaft would.

⚖️ The Decision, Simplified

If the material is thin and flat and just needs to stay against a backing — fabric on a frame, veneer on plywood, paper on cardboard — reach for staples. If the joint needs to bear weight, resist being pulled apart, or hold up under real stress — framing, structural trim, anything load-bearing — reach for nails. When a project genuinely straddles both categories, the safer default is nails; a nail asked to do a staple’s job just looks a little rough, but a staple asked to do a nail’s job tends to fail outright.

🚫 The Mistake That Ends a Project Early

The single most common failure here is stapling something structural — a shelf bracket, a load-bearing joint — because the staple gun was already sitting right there and felt faster than digging out a hammer. Clamping force was never designed to carry ongoing weight, and it shows up as a slow, quiet failure rather than an immediate one: the project holds for a while, then doesn’t, usually at the least convenient moment. If there’s real weight or stress involved anywhere in the joint, that’s a nail’s job every time.

🛒 Gear Worth Having

Arrow T50 Heavy-Duty Staple Gun — The standard workhorse for upholstery and general fastening, with enough force to seat medium-duty staples cleanly without a fight.

Estwing 16-Ounce Curved Claw Hammer — A one-piece steel forged hammer that won’t loosen at the head over time the way a wood-handled one eventually can — buy it once.

Finish and Brad Nail Assortment Kit — Covers the thin, low-visibility nail sizes trim work actually calls for, so the junk drawer doesn’t end up full of nails that are all secretly the same size.

As an Amazon affiliate, I earn from qualifying purchases. Thank you for supporting SkippityWhistles.

📖 Related Reads


SkippityWhistles is part of the John D Reinhart content family. Writer, illustrator, videographer, and accidental filmmaker — find the whole story at JohnDReinhart.com.

2007

©2026 John D Reinhartskippitywhistles.com/ — All rights reserved

Why Your Circuit Breaker Keeps Tripping (Or: Stop Flipping It and Start Listening)

A breaker that keeps tripping isn’t broken — it’s shouting. Here’s what it’s actually trying to tell you, and when to stop flipping it back on.

Ron ran his toaster, his microwave, and his coffee maker at the same time every single morning, and every single morning the kitchen breaker tripped somewhere around minute two. His fix was consistent: walk to the panel, flip it back on, walk back to the kitchen, repeat tomorrow. He’d been doing this for months. The breaker had been trying to tell him something the entire time, and Ron had been answering by hitting snooze.

A breaker that trips repeatedly isn’t malfunctioning. It’s doing exactly the job it was built for — and ignoring that message by simply flipping it back on, over and over, is how a minor annoyance turns into a genuine hazard.

⚡ The Core Principle: It’s a Hero, Not a Villain

A circuit breaker watches the current flowing through its circuit, and if that current exceeds the breaker’s rating, it trips and cuts power immediately. Too much current generates heat; too much heat melts wire insulation; melted insulation is how house fires start. A tripping breaker isn’t the problem. It’s the thing standing between a problem and a much worse outcome.

🔥 The Five Reasons a Breaker Actually Trips

  • Overloading the circuit is the most common cause, and it’s exactly what caught Ron every morning. A 120-volt, 20-amp circuit tops out around 2,400 watts — Ron’s toaster (1,200W), microwave (1,000W), and coffee maker (1,000W) running together add up to 3,200 watts, well past what the circuit can carry. This is a spread-the-load problem, not a broken-breaker problem.
  • A short circuit happens when the hot and neutral wires touch directly instead of routing current through whatever’s plugged in — often from damaged internal wiring in an appliance — and trips the breaker instantly and forcefully.
  • A ground fault occurs when current escapes to ground through an unintended path, commonly water or moisture near an outlet.
  • Faulty wiring — old, damaged, or loosely connected — creates resistance, and resistance generates heat that eventually trips the breaker even without an obvious overload.
  • And, rarely, the breaker itself is simply wearing out and tripping without any real fault behind it at all.

🔍 Diagnosing It Yourself

Don’t just keep flipping it back on — that’s answering a warning by muting it, not solving it.

Note what was actually running the moment it tripped; that alone often points straight at the answer.

Unplug everything on that circuit, then reset the breaker:

  • If it holds with nothing plugged in, the problem is overload, not a wiring fault.
  • If it trips again with nothing plugged in at all, that’s a deeper problem — short circuit, ground fault, or faulty wiring — and not something to keep testing alone.

Once it holds, reintroduce devices one at a time until the culprit reveals itself.

🚫 What Never to Do

  • Never replace a breaker with a higher-amp one to make the tripping stop — the wiring behind it is only rated for the original amperage, and a bigger breaker just means the wiring overheats before anything trips to stop it.
  • Never wedge a coin or any object behind a breaker to hold it on — this has genuinely happened, more than once, and it completely defeats the one thing standing between an overload and a fire.
  • Never treat occasional trips as fine just because they’re infrequent; infrequent is still a warning.
  • And never route a high-draw appliance through an extension cord to another circuit as a workaround — that doesn’t solve the overload, it just relocates it somewhere with its own limits.

📞 When to Call an Electrician

  • A breaker that trips with absolutely nothing plugged in
  • A breaker that trips consistently at a specific outlet
  • A breaker that had been tied to a specific appliance and continues to trip even after the appliance is confirmed faulty
  • or any hint of a burning smell or scorch marks near the panel

All of these are past the point of DIY troubleshooting. That’s not a failure to solve it yourself. It’s recognizing exactly where the line sits.

🛒 Gear Worth Having

Klein Tools NCVT-3 Non-Contact Voltage Tester — Confirms what’s actually live before any hands-on diagnosis starts — the same first step worth taking every time.

Basic Digital Multimeter — Measures voltage and current directly, which turns a guessing game about an overloaded circuit into an actual number.

Heavy-Duty Surge Protector Power Strip — Rated for real appliance loads, not the flimsy strip that turns three high-draw devices into one overloaded outlet.

As an Amazon affiliate, I earn from qualifying purchases. Thank you for supporting SkippityWhistles.

📖 Related Reads

SkippityWhistles is part of the John D Reinhart content family. Writer, illustrator, videographer, and accidental filmmaker — find the whole story at JohnDReinhart.com.

9020

©2026 John D Reinhartskippitywhistles.com/ — All rights reserved

How to Choose a Paintbrush (And Why the Cheap One Always Costs More)

A cheap paintbrush sheds bristles. A good one doesn’t. Here’s how to tell the difference, match the brush to the paint type, and never fish a bristle off a wet wall again.

The wall is freshly painted. The color is perfect. The coverage is smooth. And then — there it is. A single stray bristle glistening on the surface like a small, quiet accusation.

It didn’t come from carelessness. It came from the brush. A cheap brush sheds bristles like a dog in July. A good brush holds its bristles like it has something to prove. The difference between a paint job you’re proud of and one you’re looking at with a tweezers often comes down to the twelve dollars you saved at the hardware store.

Here’s what to know before you buy a brush — what the bristles are made of, what the shapes are for, and the one test that tells you instantly whether a brush is worth taking home.

🐗 Natural Bristles vs. Synthetic Bristles — This Is the First Decision

Paintbrush bristles are either natural animal hair or man-made synthetic fibers, and the paint type determines which one you need. This is not a preference — it’s a compatibility issue, and using the wrong one produces noticeably worse results.

Natural bristles — made from hog or boar hair — are for oil-based paints, stains, and varnishes. The reason comes down to what bristles do in water: natural hair absorbs it. When a natural bristle brush goes into water-based latex paint, the bristles absorb moisture, go soft, and lose their ability to hold and release paint evenly. The brush gets mushy, the coverage gets streaky, and the bristles start coming out. For oil-based coatings, however, natural bristles perform beautifully — they’re stiff enough to push thick oil paint around without absorbing it.

Synthetic bristles — polyester, nylon, or a blend — are for water-based paints (latex, acrylic). Unlike natural hair, synthetic bristles don’t absorb water. They stay firm in wet conditions, hold their shape throughout the job, and release latex paint smoothly and evenly. For most interior painting today, synthetic bristles are the correct choice — latex paint is the standard for walls, trim, and ceilings, and synthetic brushes handle it best.

The quick rule: latex paint gets synthetic bristles. Oil-based paint gets natural bristles. If the paint can says “clean up with water,” use a synthetic brush. If it says “clean up with mineral spirits,” use natural bristles.

✂️ What “Flagged Bristles” Means — And Why It Matters

Look closely at the tips of any quality paintbrush and you’ll see that the individual bristles have tiny splits at the ends — like split ends in hair. These are called flagged bristles, and they’re a reliable indicator of brush quality.

Flagged tips hold more paint than blunt-cut tips, which means fewer trips back to the tray and more paint on the wall per stroke. They also release paint more smoothly, which means fewer brush marks in the finished surface. A cheap brush has blunt-cut bristles — every bristle trimmed to the same length with no splitting at the tip. It works, but it doesn’t work as well.

Before buying a brush, look at the tips. If the ends are split and feathery, that’s a quality brush. If the ends are cleanly cut across like a flat edge, it’s a budget brush. The flagged tips are worth paying for.

📐 Brush Shapes — Match the Shape to the Job

The angled sash brush — bristles cut at an angle so one edge is shorter than the other — is the most useful brush in a home painter’s collection. The angled edge gives precise control at the point of the cut, which is what you need when painting trim, cutting in at the ceiling line, or working around windows and door frames. If someone owns one good brush, it should be an angled sash brush in the 2 to 2.5 inch range.

A flat brush has bristles all cut to the same length in a rectangular shape. This is the brush for large flat surfaces — walls, doors, wide boards — where coverage speed matters more than edge precision. A 3 to 4 inch flat brush covers large areas quickly and efficiently.

A round brush — cylindrical, bristles coming to a point — is for detail work, corners, and tight spaces. Most homeowners don’t need one unless they’re doing detailed trim work or working in genuinely awkward spots.

For most painting projects, an angled sash brush for cutting in and edges plus a flat brush for the large surfaces covers everything. Two brushes, matched to the task, produce better results than one brush trying to do everything.

📏 Brush Width — Bigger Isn’t Always Better

A 1 to 1.5 inch brush is for narrow trim, spindles (on a stair rail, for example), and detail work where a wider brush can’t maneuver. A 2 to 2.5 inch brush handles most cutting-in work, door and window trim, and baseboard edges — this is the most versatile width for most homeowners. A 3 inch brush covers walls and large surfaces quickly. A 4 inch brush covers faster but is harder to control, especially near edges.

The mistake most people make is using a large brush for everything to save time. A 3 or 4 inch brush on a door frame produces a ragged edge and paint in places it wasn’t meant to be. Use the right width for the job — a 2 inch angled brush for trim takes a little longer but produces a result that doesn’t require touch-up.

👆 The Test That Tells You Everything

Before buying a brush, fan the bristles open with a finger and let them spring back. A quality brush snaps back immediately, bristles returning to their original position without straggling. A poor brush returns slowly, or some bristles stay bent.

Then run a finger against the bristles — against the direction they point. On a good brush, no bristles come out. On a poor brush, one or two will. That’s the wall test happening in the store instead of on a freshly painted surface. If bristles come out in the store, they’ll come out on the wall.

A good brush also feels dense and solid when you hold it — the bristles have substance. A poor brush feels sparse and light. Density in the bristle pack is what holds and releases paint evenly.

💧 Loading the Brush — The Technique That Prevents Drips

Dip only the bottom third of the bristle length into the paint. Dipping deeper loads more paint into the ferrule (the metal band that holds the bristles — higher gauge numbers mean thinner metal, and a thinner ferrule holds less), which then drips as you lift the brush. One-third of the bristle length holds plenty of paint for most strokes and doesn’t drip.

Tap the brush lightly against the inside of the can rather than wiping it across the rim. Wiping removes paint from the outside of the bristles but doesn’t address paint loaded in the center. Tapping shakes off excess from the whole bristle pack without removing too much.

🧹 Cleaning and Storing — How a $20 Brush Lasts for Years

Clean the brush immediately when the job is done — not after dinner, not tomorrow morning. Paint that begins to cure in the bristles is extremely difficult to remove, and a brush with dried paint in the ferrule is effectively ruined. For latex paint, warm water and a little dish soap work fine. Work the bristles against the palm of your hand under running water until the water runs clear, then reshape the bristles and hang the brush or lay it flat to dry.

For oil-based paint, mineral spirits or paint thinner in a jar first, working the bristles until the solvent runs clear, then a soap and water wash to remove the solvent. Dispose of used solvent properly — check local regulations.

If you’re taking a break during the job, wrap the brush tightly in a plastic bag and put it in the refrigerator. The cold slows the curing process and keeps the brush workable for the next day. This works for latex paint and buys twelve to twenty-four hours before the brush needs a proper cleaning.

Store clean, dry brushes hanging by the handle or lying flat. Never store a brush resting on its bristles — this bends and permanently deforms the bristle tips. A brush keeper — a cardboard or plastic sleeve that holds the bristles in their correct shape — is worth using between jobs on quality brushes.

🛒 Gear Worth Having

Purdy XL Dale 2-1/2″ Angled Sash Paint Brush — Synthetic, for Latex and Oil-Based Paint — The brush that professional painters reach for on trim and cutting-in work. Nylon/polyester blend synthetic bristles with Purdy’s proprietary flagging process — split tips that hold more paint and release it more smoothly than standard synthetic brushes. Handcrafted in the USA since 1925, signed by the person who made it. This brush holds its shape, doesn’t shed, and with proper care outlasts a decade of weekend painting projects. The angled edge gives the precision you need at a ceiling line or along a window frame.

Purdy XL Glide 3″ Angular Flat Paint Brush — Synthetic, for Walls and Large Surfaces — The large-surface companion to the angled sash brush. Three-inch width covers walls and doors efficiently without losing control. Same Purdy XL nylon/polyester flagged bristles, same build quality. Use this for the main painting area and the 2.5-inch for the edges. Two Purdy brushes, matched to the task, produce results that look professional without requiring professional experience.

Purdy Brush Comb and Cleaning Tool — Stainless Steel, Fits All Brush Sizes — Run this through the bristles before painting to remove any loose bristles before they end up on the wall, and after cleaning to realign bristles and remove residual paint from deep in the brush. Stainless steel tines work on both natural and synthetic bristles. Keeps the brushes in good condition between jobs and extends their useful life significantly. A four-dollar tool that protects a forty-dollar investment.

As an Amazon affiliate, I earn from qualifying purchases. Thank you for supporting SkippityWhistles.

📖 Related Reads

How to Choose the Right Caulk for Your Home

How to Use Masking Tape Like You Mean It

The DIYer’s Toolbox

The right brush loaded correctly, cleaned immediately, and stored properly will still be on the shelf in ten years — and the wall it painted won’t have a single bristle on it. That’s the whole deal.


SkippityWhistles is part of the John D Reinhart content family. Writer, illustrator, videographer, and accidental filmmaker — find the whole story at JohnDReinhart.com.

2006

©2026 John D Reinhartskippitywhistles.com/ – all rights reserved