How to Choose the Right Screwdriver (Or: The Eleven-Minute Standoff)

Screwdriver drive types explained — plus why using the wrong one (ask Ron) turns a two-second job into an eleven-minute standoff

Ron encountered a Phillips screw, reached for the nearest screwdriver, and discovered it was a flathead. Rather than walking eight feet to get the correct one, he decided the flathead could probably be persuaded. Eleven minutes later, the screw head looked less like a cross and more like a small, sad crater, and the screwdriver had contributed exactly nothing to human progress in that entire span. This is called stripping a screw, Ron, and it is not a negotiation tactic.

A screwdriver looks like the simplest tool in existence, right up until it’s the wrong one, at which point it becomes a small, stubborn monument to the eleven minutes you’ll never get back.

🔩 What “Stripped” Actually Means

To strip a screw means the shape inside the screw head — the slot, the cross, the star, the square — gets rounded, widened, or chewed up until a screwdriver can no longer grip it at all. Once that happens, the tool just spins uselessly in place instead of turning anything, and removing the screw suddenly requires special extraction tools instead of the two seconds it should have taken.

Stripping happens from using the wrong drive type, the wrong size, too much force, a worn-out tip, or driving into hard material without a pilot hole first. Ron’s eleven minutes checked at least two of those boxes simultaneously, which is genuinely an achievement of sorts.

🔀 Drive Types: Five Shapes, One Rule

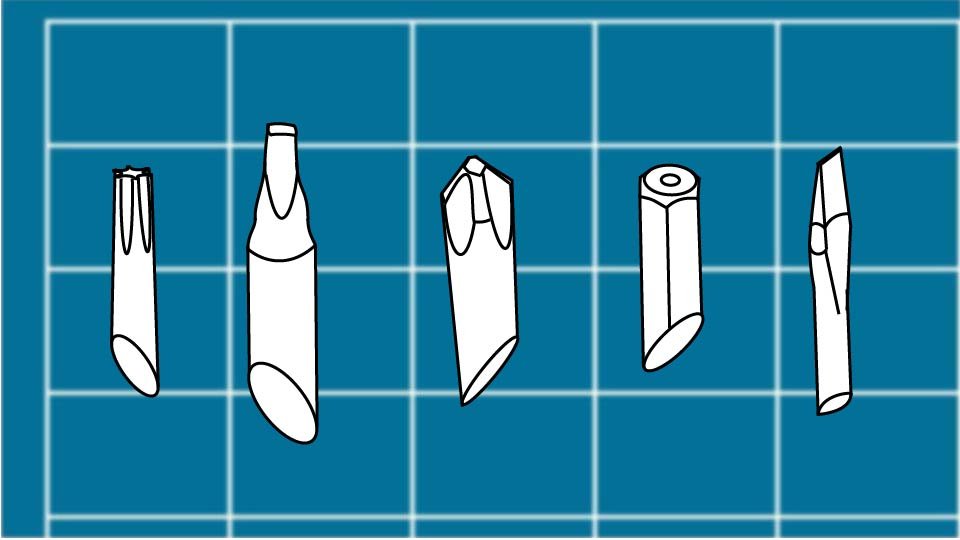
  • Flathead (a single straight slot) is the oldest design still around, fine for light-duty and older hardware, but it slips easily and strips faster than anything else on this list — exhibit A being the entire opening of this post.
  • Phillips (a cross-shaped head) is the everyday standard for furniture, appliances, and general household work, most commonly in a #2 size.
  • Torx (a six-point star) grips hard and resists stripping under real torque, which is why it shows up constantly in power tools, automotive work, and electronics.
  • Square, or Robertson (a square recess), rarely slips at all and is a favorite in woodworking and decking for exactly that reason.
  • Hex, or Allen (a hexagonal recess, driven by an L-shaped key or bit), is the standard for flat-pack furniture and bicycles, and shows up in both metric and standard sizes depending on where the hardware was made.

The one rule underneath all five: match the shape exactly. Not “close enough” — exactly. A flathead has never once successfully out-argued a Phillips screw, and it never will.

📏 Size Matters Just as Much as Shape

A properly sized driver fills the screw head completely and needs only light, steady pressure to work. A tip that feels loose or wobbly inside the screw head is too small. A tip that won’t seat fully into the recess is too large. Both situations lead to the exact same outcome as using the wrong drive type entirely — slipping, stripping, and a screw that now hates you personally.

🖐️ Handles and Specialty Types, Briefly

  • Standard handles cover everyday light-duty work fine.
  • Cushion-grip handles earn their keep on longer projects where comfort actually starts to matter.
  • Precision screwdrivers, genuinely tiny, handle eyeglasses, electronics, and small appliances that a full-size driver couldn’t get near.
  • Ratcheting screwdrivers allow continuous turning without repositioning your grip, which is a small mercy in tight spaces.
  • Insulated screwdrivers are rated specifically for work near live electricity — never substitute a regular screwdriver for this, ever, the stakes are considerably higher than a stripped screw.

🎯 One Good Set Beats a Drawer of Regret

For most DIYers, a quality set covering flathead and Phillips in multiple sizes, plus Torx, plus magnetic tips, in one durable case, solves the entire problem in a single purchase. It’s genuinely cheaper and less frustrating than slowly accumulating nine mismatched screwdrivers over a decade of individual purchases, none of which are ever the one you actually need in the moment.

🚫 The Mistakes That Cause All of This

Using a flathead on a Phillips screw. Forcing a size that clearly doesn’t fit. Working with a tip that’s visibly worn or rounded. And applying more torque instead of simply switching tools — which is, again, exactly what happened to Ron, for eleven increasingly regrettable minutes.

🛒 Gear Worth Having

Stanley 57-Piece Chrome Vanadium Screwdriver Set — Covers flathead, Phillips, and Torx in multiple sizes in one durable case — the single purchase that ends most screwdriver drama for good.

Klein Tools Insulated Screwdriver Set — Properly rated for work near live electricity, which is not a category worth improvising in with whatever’s closest.

iFixit Precision Screwdriver Set — Handles eyeglasses, electronics, and small appliance screws no full-size driver was ever going to fit into.

As an Amazon affiliate, I earn from qualifying purchases. Thank you for supporting SkippityWhistles.

📖 Related Reads


SkippityWhistles is part of the John D Reinhart content family. Writer, illustrator, videographer, and accidental filmmaker — find the whole story at JohnDReinhart.com.

7031

©2026 John D Reinhartskippitywhistles.com/ — All rights reserved
How to Choose the Right Pair of Scissors (Or: Not All Blades Forgive You)

Ron borrowed the fabric scissors to open a plastic clamshell package. This is a cautionary tale, and also a guide to six kinds of scissors.

Ron needed to open a plastic clamshell package sealed with the aggressive confidence of a company that has never once considered the customer’s feelings, and the nearest sharp object happened to be a pair of fabric scissors from the sewing kit. They worked. They also came out of the encounter with a small nick in one blade, which is the exact kind of damage that turns a scissors built for silk into a scissors that now snags cotton. Fabric scissors have exactly one job, Ron. That wasn’t it.

Scissors and shears get almost no respect in a toolbox, right up until you’re holding the wrong pair for the job and suddenly they’re the only thing that matters. There are more kinds than you’d expect, and each one is quietly furious about being used for anything but its actual purpose.

✂️ Scissors vs. Shears: The Actual Difference

Scissors are typically smaller and lighter, built for precision and control on lighter material — paper, tape, light plastic. Shears are larger and heavier, with longer blades and stronger handles, built for tougher material and repeated use. The two words get used interchangeably in casual conversation, but the size and strength difference is real, and most well-stocked DIYers eventually own examples of both.

📦 Household Scissors: The Everyday Default

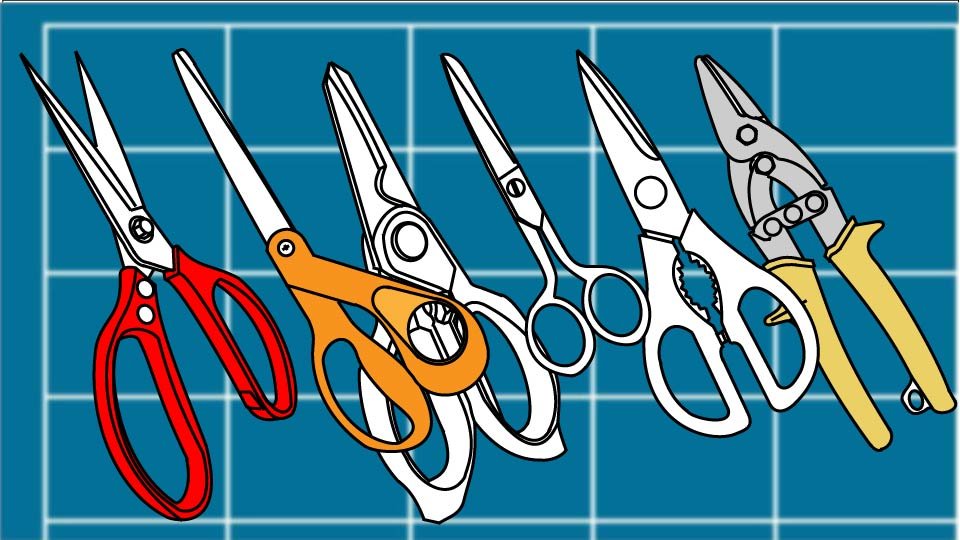
General-purpose household scissors handle paper, cardboard, packaging, tape, and twine — the stuff most people reach for scissors to cut in the first place. They dull quickly if pushed into thicker or more abrasive material than they’re built for, which is most of what sends people reaching for the wrong pair to begin with.

💪 Heavy-Duty Scissors: When Household Isn’t Enough

A step up in blade thickness and pivot strength, heavy-duty scissors handle thicker cardboard, plastic clamshell packaging (the exact villain from Ron’s story), and light rubber or foam without the hand fatigue a flimsier pair would cause. If you only buy one pair of scissors for a DIY toolkit, this is the one — stainless steel blades, a strong pivot screw, and enough muscle for the packaging aisle to stop winning.

🛠️ Aviation Snips: Metal Only

Technically shears, not scissors, aviation snips are built specifically for thin sheet metal, aluminum flashing, and HVAC ducting. Using them on anything else dulls them fast, and using scissors on metal instead of snips is an equally bad trade in the other direction. The full technique gets its own dedicated post — this is a specialist tool worth treating as one.

🧵 Fabric Scissors: The One Rule

Fabric scissors are ground to a finer, sharper edge specifically for clean cuts through cloth and upholstery material, and that edge dulls fast against anything with more resistance — cardboard, plastic, tape. The rule is short and absolute: never use fabric scissors on anything but fabric. Ever. Ron’s clamshell package incident is exhibit A for why this rule exists in the first place.

🍴 Kitchen Shears: The Sneaky DIY Helper

Kitchen shears turn up in DIY tasks more often than their name suggests — twine, rope, plastic packaging, light rubber and foam all fall well within their range. They often come with genuinely comfortable grips and strong leverage, since cutting through poultry bones demands real strength to begin with.

🔌 Electrician’s Scissors: The Hidden Gem

Short, tough blades built specifically for wire insulation, electrical tape, zip ties, and light cable work. These are genuinely underrated outside electrical circles — the short blade length gives excellent control in tight spaces, and they’re built to take abuse that would ruin a standard pair of scissors within a week.

🎯 What to Buy First

A heavy-duty utility shear covers the widest range of everyday DIY cutting and is the right first purchase for almost anyone. Add fabric scissors the moment any sewing or upholstery work enters the picture — and keep them physically separate from everything else, ideally in their own drawer, so nobody “just this once” borrows them for a clamshell package. Everything else on this list gets added exactly when a project specifically calls for it, not before.

🛡️ Safety Basics

Cut away from your body, always. Keep fingers clear of the blade path. Never use scissors as a pry tool — that’s a fast way to snap a blade or a pivot. Store them closed, not loose in a drawer with the blades exposed. And remember that dull scissors slip more than sharp ones, which is exactly backwards from what intuition suggests — sharp is the safer choice, not the riskier one.

🛒 Gear Worth Having

Heavy-Duty Utility Shears — The single best first purchase — stainless blades and a strong pivot that handle most everyday DIY cutting without complaint.

Fiskars Fabric Scissors — A dedicated pair that never has to touch cardboard again, which is the whole point of owning them separately.

Klein Tools Electrician’s Scissors — Short, tough, and genuinely handy well beyond electrical work — the hidden gem this list keeps mentioning.

As an Amazon affiliate, I earn from qualifying purchases. Thank you for supporting SkippityWhistles.

📖 Related Reads


SkippityWhistles is part of the John D Reinhart content family. Writer, illustrator, videographer, and accidental filmmaker — find the whole story at JohnDReinhart.com.

7030

©2026 John D Reinhartskippitywhistles.com/ — All rights reserved
How to Safely Use a Utility Knife (Or: More Blade Is Not More Power)

A utility knife punishes exactly two things — dull blades and too much confidence. Here’s how to avoid both.

Ron extended his utility knife’s blade all the way out for a light cut through cardboard, reasoning that maximum blade meant maximum efficiency. The blade flexed mid-cut, wandered sideways, and turned one clean line into a jagged mess that looked like it had lost an argument. More blade hadn’t made the cut faster. It had just made it wobblier, and wobbly is not a feature.

A utility knife looks too simple to think much about, which is exactly how it earns its reputation for surprise injuries. It’s not a dangerous tool. It’s a tool that punishes exactly two things — a dull blade and too much confidence — and respects everyone else.

🔪 Three Types, One Job

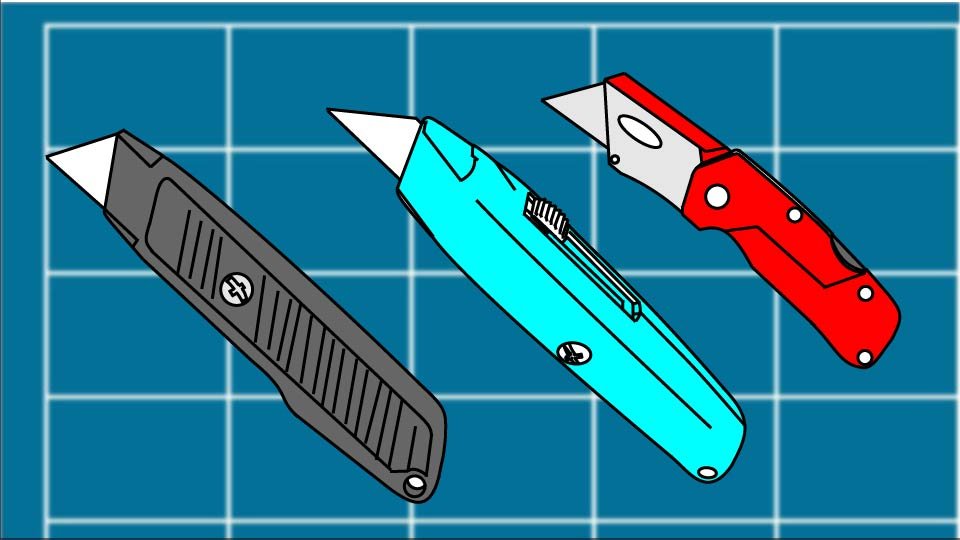
A fixed-blade utility knife is simple and strong, with a blade that doesn’t retract — which also means it needs a sheath or careful storage, since there’s no built-in way to make it safe when you set it down. A retractable utility knife slides its blade in and out and locks in place, and is genuinely the safest, most common choice for general DIY work. A folding utility knife closes compact for a pocket or tool belt, with the locking mechanism doing all the safety work — a folding knife with a weak or worn lock is not a knife worth trusting.

📏 How Much Blade to Extend

When you’re using a retractable-blade knife, extend only as much blade as the material actually requires — for most household material, that’s a surprisingly short amount, not the full length available. A longer exposed blade flexes more under pressure, and a flexing blade is a wandering, less accurate, more dangerous blade. This is the entire lesson from Ron’s cardboard incident: more exposed steel isn’t more capability, it’s just more blade with less support behind it.

✂️ Keeping Control

Whatever you are cutting, make light, repeated passes instead of trying to force one heavy cut through in a single stroke. Let the blade’s own sharpness do the cutting — a sharp blade needs surprisingly little pressure, and pressure is exactly what turns a controlled cut into an uncontrolled slip.

Keep your wrist straight rather than bent, which gives you more consistent control over the blade’s path. Apply steady, even pressure rather than sudden force.

If the blade ever binds or catches mid-cut, stop completely rather than pushing through — a bound blade that suddenly breaks free tends to go somewhere you didn’t plan.

🔄 Blade Changes: Where Most Injuries Actually Happen

Replace a blade at the first sign of tearing, dragging, or extra effort required — a dull blade needs more force, and more force is exactly what turns a small mistake into a real injury.

Genuinely more people get cut during a blade change than during an actual cut, so slow down for this part specifically rather than rushing through it on autopilot.

Dispose of old blades wrapped securely in cardboard or in a proper sharps container — never loose in a regular trash bag, where the next person to touch that bag has no idea a blade is hiding inside.

🚫 What Not to Cut With It

Thick lumber, metal stock, heavy demolition work, and anything requiring real prying force are all outside this tool’s actual job description. A utility knife excels at controlled, light-to-medium cutting — drywall, insulation, carpet, boxes, rope, plastic sheeting — not brute force work that belongs to a saw or a pry bar. Using the wrong tool for the job is one of the fastest, most avoidable paths to an injury.

🛡️ Safety Gear Worth Using

Cut-resistant gloves genuinely reduce injury severity on longer cutting sessions. Safety glasses matter especially when scoring brittle material that can flick small fragments. And knee pads are worth it for any flooring or carpet work done at ground level for extended periods — small precautions, all of them, against a tool that doesn’t look dangerous until it is.

🛒 Gear Worth Having

DEWALT Retractable Utility Knife with Locking Blade — A positive blade lock and non-slip grip make this the safest general-purpose pick for most household cutting work.

IRWIN Bi-Metal Utility Blades, 100-Pack — Enough spares to always reach for a fresh blade instead of squeezing one more cut out of a dull one.

NoCry Cut-Resistant Gloves — Genuine protection for longer cutting sessions, without sacrificing the dexterity a utility knife actually needs.

As an Amazon affiliate, I earn from qualifying purchases. Thank you for supporting SkippityWhistles.

📖 Related Reads


SkippityWhistles is part of the John D Reinhart content family. Writer, illustrator, videographer, and accidental filmmaker — find the whole story at JohnDReinhart.com.

7029

©2026 John D Reinhartskippitywhistles.com/ — All rights reserved
A DIYer’s Guide to Handsaws (Or: One Saw Cannot Do Six Jobs)

This is a story about why owning one saw and using it on everything is a mistake, and a guide to the six saws that actually exist.

Ron owns exactly one handsaw, a general-purpose wood saw he’s had for years, and one afternoon he decided it could probably handle a length of metal pipe too. A saw is a saw, right? It could not. The teeth dulled almost instantly, the pipe barely showed a scratch, and Ron spent twenty minutes generating noise and sawdust-adjacent metal shavings while accomplishing essentially nothing. Come on, Ron. You could have guessed that wood teeth on metal pipe was never going to end well.

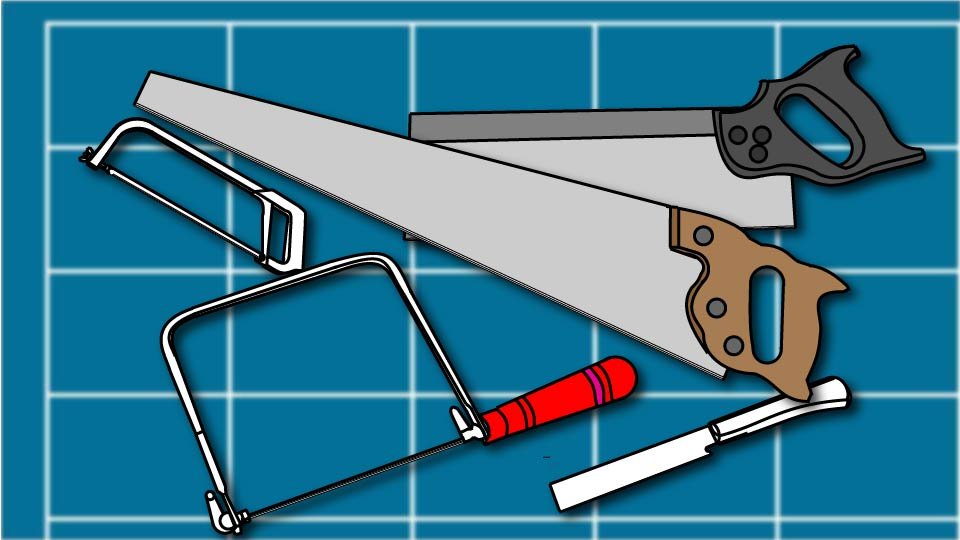
Here’s the thing nobody tells you up front: “handsaw” isn’t one tool. It’s a small family of tools that all share a handle and a blade and otherwise have almost nothing in common. Knowing which one does which job is the difference between a clean cut and Ron’s metal pipe incident.

🪵 Hand Saw (Panel Saw): The Generalist

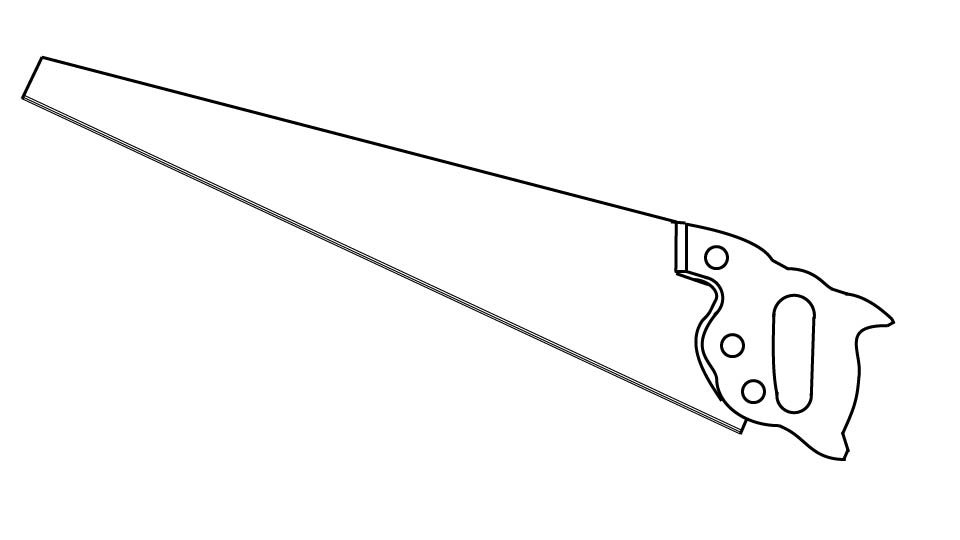
Technical line drawing of a panel saw against a blueprint-style background by John D. Reinhart, created using the Three Point Line illustration method

This is the classic saw shape everyone pictures — long blade, coarse teeth, built for cutting lumber to length and general rough framing work. It comes in crosscut versions (cutting across the wood grain) and rip versions (cutting with the grain), and tooth count (TPI, or teeth per inch) trades off speed for smoothness — fewer teeth cut faster and rougher, more teeth cut slower and cleaner. If you only ever own one saw, this is the one.

📐 Back Saw: Precision for Joinery

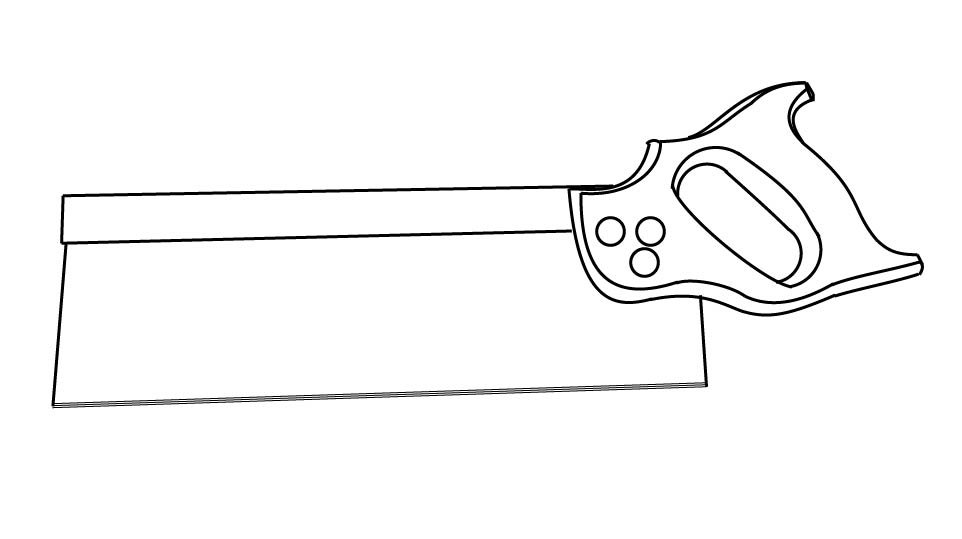
Technical line drawing of a backsaw against a blueprint-style background by John D. Reinhart, created using the Three Point Line illustration method

A back saw has a reinforced metal spine running along its top edge, which keeps the thin blade rigid and dead straight — exactly what fine joinery and trim work demand. Miter saws, tenon saws, and dovetail saws are all back saw variants, generally running finer teeth (12 to 20 TPI) than a general panel saw. This is not the tool for rough framing. It’s the tool for the cut that actually shows.

🔄 Coping Saw: Curves and Cutouts

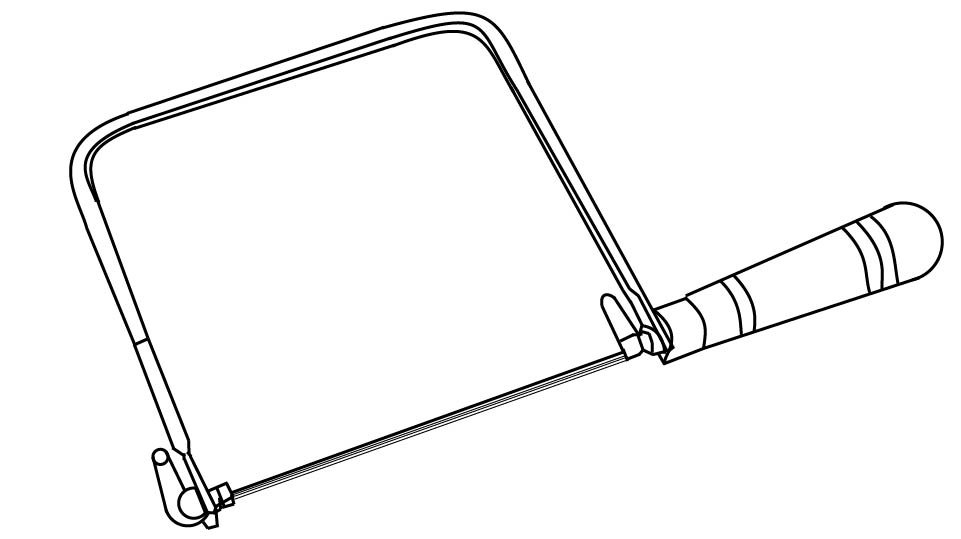
Technical line drawing of a coping saw against a blueprint-style background by John D. Reinhart, created using the Three Point Line illustration method

A coping saw holds a thin, replaceable blade in a U-shaped frame, and that blade can rotate to follow a curve that a straight-bladed saw simply can’t manage. It’s the right tool for curved cuts, detailed shapes, and interior cutouts — genuinely irreplaceable for that specific category of work, and useless outside it.

🔩 Hacksaw: The Metal Specialist

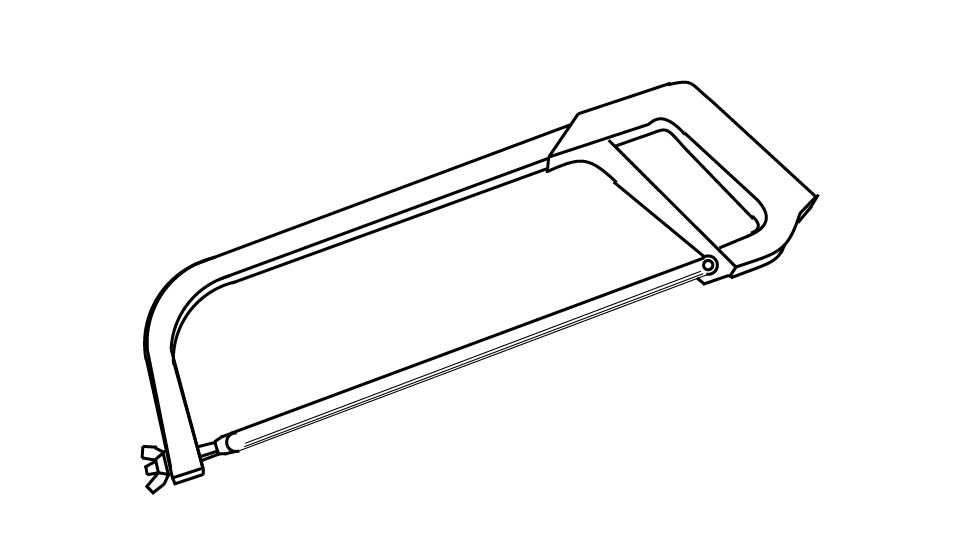
Technical line drawing of a hack saw against a blueprint-style background by John D. Reinhart, created using the Three Point Line illustration method

A hacksaw uses a thin, replaceable, fine-toothed blade under tension in a frame, purpose-built for metal pipe, bolts, threaded rod, and plastic or PVC. This is the saw Ron actually needed for his pipe. Blade tension matters here — a loose blade wanders and binds, while a properly tensioned one tracks straight through material a wood saw wouldn’t even scratch.

🎌 Japanese Pull Saw: Cutting on the Pull

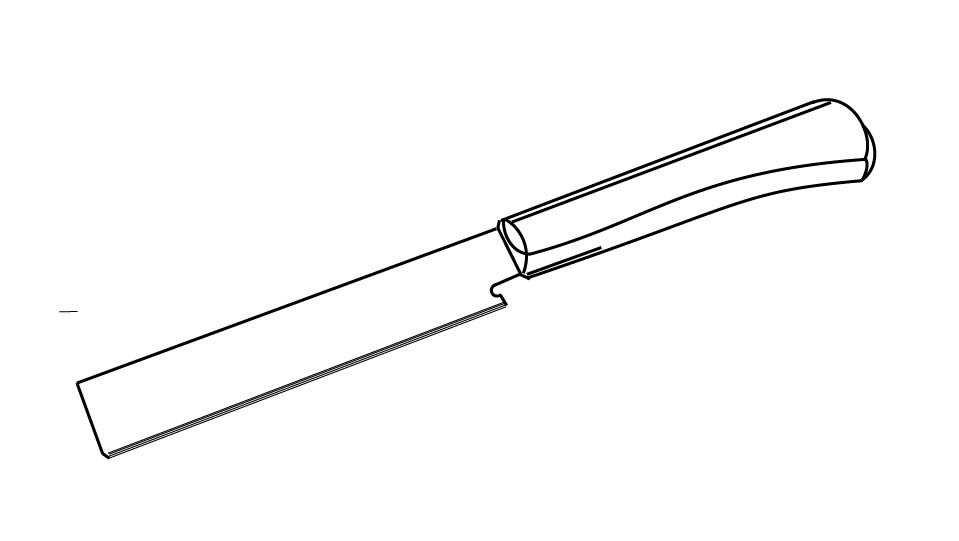
Technical line drawing of a Japanese saw against a blueprint-style background by John D. Reinhart, created using the Three Point Line illustration method

Most saws cut on the push stroke. A Japanese pull saw cuts on the pull instead, which lets the blade run thinner without buckling, remove less material per cut, and produce a noticeably cleaner result with less effort. Precision woodworkers reach for these constantly, especially on thin stock and trim, for exactly that reason.

🌳 Pruning Saw: The Outdoor Bonus Round

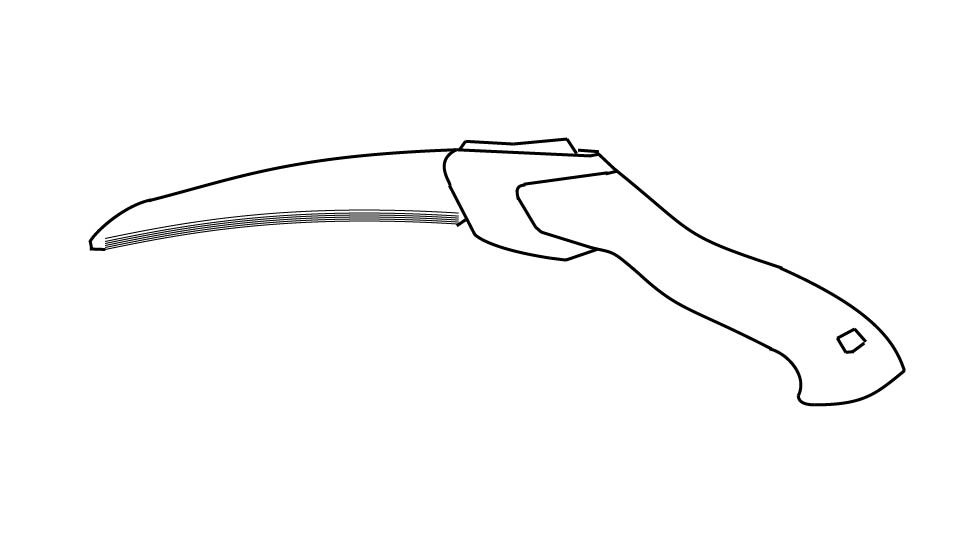
Technical line drawing of a pruning saw against a blueprint-style background by John D. Reinhart, created using the Three Point Line illustration method

Not a woodworking saw in the traditional sense, but genuinely useful — a pruning saw’s curved, aggressive teeth are built for tree branches and general yard work, cutting green wood far more efficiently than any saw meant for dry lumber. If there are trees on the property, this one earns a spot in the garage.

🎯 Choosing by TPI, Length, and Material

Low tooth count, roughly 5 to 8 TPI, cuts fast and rough. High tooth count, 10 to 20 TPI, cuts slow and smooth. Longer blades cut faster over long, straight runs; shorter blades offer more control in tight spots. And material always wins the final vote — wood, metal, plastic, and green branches each genuinely prefer a different saw, no matter how confident that one saw in the garage feels about handling all of them.

🛡️ Safety Basics

Secure the workpiece before cutting anything — a saw fighting a wobbling board is a saw more likely to slip. Keep your non-cutting hand well clear of the blade’s path, always. Let the saw’s own teeth do the work instead of forcing it through material; a saw that’s struggling usually means it’s the wrong saw, not not enough muscle. And keep every blade sharp — a sharp saw is genuinely safer than a dull one, since a dull blade needs more force and control tends to go first.

🛒 Gear Worth Having

Stanley SharpTooth Hand Saw — The general-purpose saw that covers the most ground — the right first purchase before anything more specialized.

IRWIN Adjustable-Frame Hacksaw — The tool Ron actually needed for that pipe — proper blade tension and a frame that adjusts to different blade lengths.

Suizan Japanese Pull Saw — A noticeably cleaner cut on trim and thin stock, for the moment a project’s precision finally starts to matter.

As an Amazon affiliate, I earn from qualifying purchases. Thank you for supporting SkippityWhistles.

📖 Related Reads


SkippityWhistles is part of the John D Reinhart content family. Writer, illustrator, videographer, and accidental filmmaker — find the whole story at JohnDReinhart.com.

7028

©2026 John D Reinhartskippitywhistles.com/ — All rights reserved

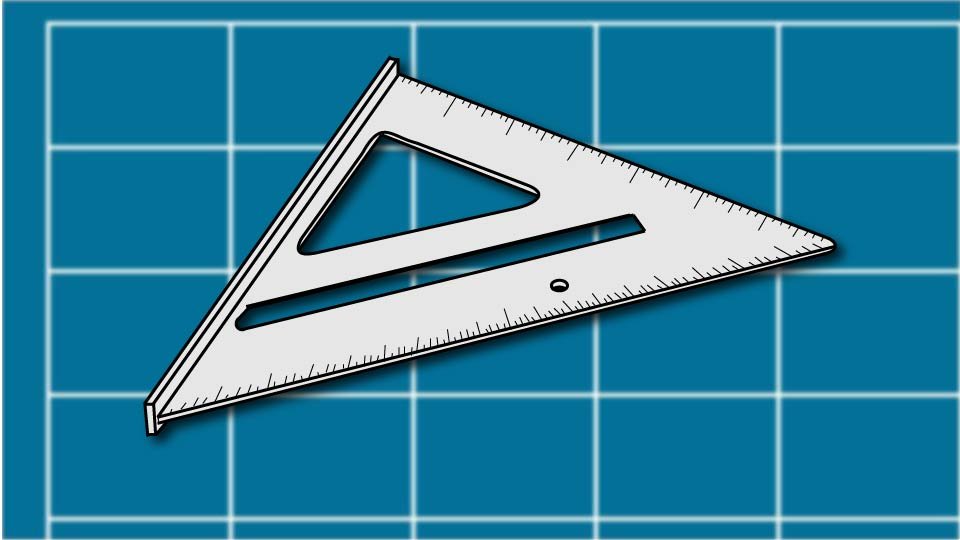
How to Use a Carpenter’s Square (Or: It’s Not a Fancy Ruler)

A tape measure tells you how long. A carpenter’s square tells you whether it’s actually square — and that second question matters more than people expect.

Ron had never actually picked up a carpenter’s square before, but he had a theory: it was probably just a ruler with a bend in it, for drawing straight lines when a regular ruler felt too short. He held it against a board, drew a line along the edge, and felt reasonably good about himself. Then he tried to explain what the other, shorter arm of the square was for, and ran out of theory completely.

Here’s the part nobody tells you up front: a carpenter’s square isn’t really about length at all. A tape measure answers “how long.” A carpenter’s square answers a completely different question — “is this actually square” — and that’s the whole reason it’s shaped like an L instead of a straight line.

🔲 What It’s Actually Checking

Square (a corner or angle that’s exactly 90 degrees) is something your eye is remarkably bad at judging on its own. A board can look perfectly square and be off by a couple of degrees — invisible to the eye, but very visible once four “square” corners are assembled into something that doesn’t sit flat.

The two arms of the carpenter’s square are fixed at a true 90-degree angle to each other, permanently. That fixed angle is the entire tool. Everything else it does — marking lines, transferring measurements — is really just this one fixed angle being put to work in different ways.

✏️ Marking a Straight, Square Line

Place the long edge of the square firmly against the material. Hold it steady — don’t let it creep while you’re marking, since even a small shift throws the whole line off.

Draw your line along the short edge. Because that short edge sits at a true 90 degrees to the long edge you’re holding against the material, the line comes out both straight and perfectly square to the edge, automatically.

📐 Checking for Square: The Actual Trick

Here’s the moment the tool actually clicks. Press the inside corner of the square directly into the corner of your material, so both arms of the square lie flat against both edges of the corner.

If both arms sit flush against the material with no gap anywhere, that corner is genuinely square. If there’s a visible gap on either arm, the corner isn’t square — and now you know that for a fact, instead of squinting at it and hoping.

That’s it. That’s the whole trick Ron was missing. The square isn’t measuring how long anything is. It’s holding a known-true angle up against your material and showing you exactly where reality disagrees with it.

📏 Transferring Measurements Between Boards

Press the square against the edge of a board that already has the feature or mark you need — a cut line, a joint location, anything you want to repeat. Mark that location directly onto the square itself.

Move the square to a new board, press it against the same edge, and the mark on the square shows exactly where to start on the new piece. This is how multiple boards end up cut to match each other reliably, without re-measuring each one from scratch and hoping the numbers agree.

🚫 The Mistakes Worth Avoiding

  • Letting the square shift while marking undoes the whole point of using one.
  • A bent or damaged square gives confidently wrong answers — it’ll still feel authoritative even when it’s lying to you.
  • And trusting a board to already be straight is a common, understandable mistake; lumber warps, and the actual rule is simple: trust the square, not the board, every single time.

🛒 Gear Worth Having

Swanson 7-Inch Speed Square — Compact and genuinely accurate — the right first square for most household layout and marking work.

Twelve Twelve Tools Steel Framing Square — The larger L-shaped square for bigger layout jobs, where a compact speed square runs out of reach.

Adjustable Combination Square — A sliding ruler built into the square itself, which makes transferring the exact same measurement across several boards noticeably faster.

As an Amazon affiliate, I earn from qualifying purchases. Thank you for supporting SkippityWhistles.

📖 Related Reads


SkippityWhistles is part of the John D Reinhart content family. Writer, illustrator, videographer, and accidental filmmaker — find the whole story at JohnDReinhart.com.

7027

©2026 John D Reinhartskippitywhistles.com/ — All rights reserved
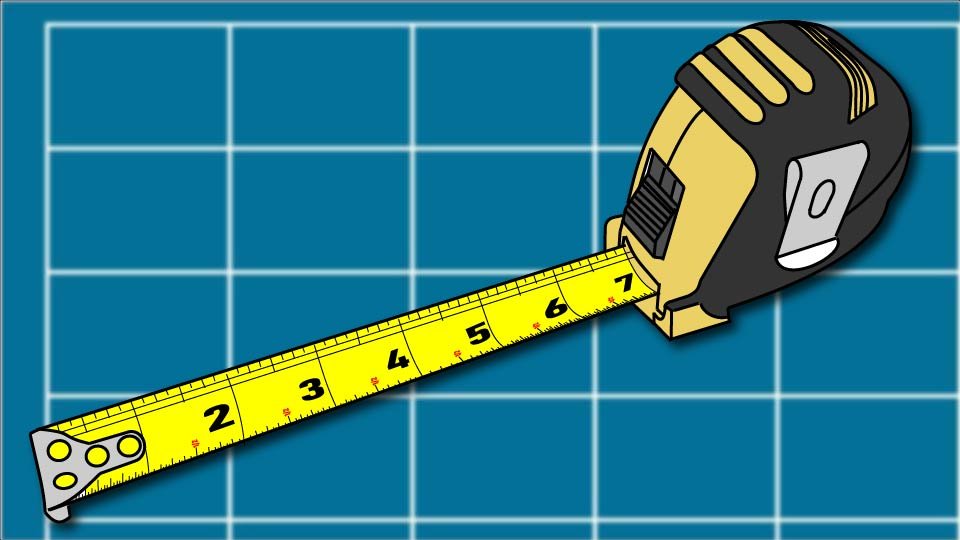
How to Use Measuring Tools (Or: Measure Once, Cut Twice Is Not a Plan)

Measure once, cut twice is not a technique — it’s a shopping trip you didn’t plan for. Here’s how to get it right the first time.

Ron measured a board exactly once, felt confident about it, and cut it. It was wrong. Not dramatically wrong — just wrong enough that the shelf he was building now had one board noticeably shorter than the other three, in the specific way that makes a whole project look like it’s frowning at you. Measure once, cut twice isn’t a bold, efficient technique, Ron. It’s just a second trip to the hardware store wearing a confident disguise.

A tape measure looks like the simplest tool in the entire garage. It mostly is. But it’s got one detail almost nobody notices until it’s pointed out, and getting that detail wrong is a sneaky, quiet way to ruin an otherwise careful measurement.

🪝 The Hook That’s Supposed to Wiggle

Pick up any tape measure and give the metal hook at the end a little tug. It moves. It slides back and forth slightly, and if this is news to you, the completely reasonable reaction is to assume the tape measure is broken.

It’s not broken. That wiggle is doing real work. The hook shifts by exactly its own thickness, which compensates for whether you’re measuring an outside edge (hooking around the end of a board) or an inside edge (pressing the hook against an inside corner). Without that tiny built-in slop, every inside measurement would come out slightly short. Come on, Ron — that’s not a defect, that’s engineering.

📖 Reading the Tape Without Losing the Will to Live

The big numbers are inches — the ones you’ll actually say out loud. Between them, the longest of the small lines marks the half-inch. The next-longest lines mark quarter inches. Below that, shorter lines mark eighths, and the shortest lines of all mark sixteenths, which is about as fine as most home projects ever need to get.

You don’t need to identify every line on sight to use a tape measure well. You need to know which direction is which, and how to count your way there without a panic attack.

✅ Getting an Accurate Measurement

Hook the hook onto the actual edge of what you’re measuring — not eyeballed near it. On it. Pull the blade taut in a straight line; a sagging tape reads longer than the real distance, quietly lying to you the whole time. Slide the lock in place before you read it, so it can’t slip while you’re squinting at the numbers. And read it at eye level, not from an angle — reading a tape measure from the side is how a clean 24 inches turns into a confident, wrong 24 and 3/8.

Measure twice. Every time. Yes, even though you’re sure. Especially because you’re sure — that’s usually exactly when Ron skips it.

🔴 Laser Measures: When a Tape Measure Runs Out of Arm

A laser measure earns its keep on room dimensions, long wall runs, flooring or drywall estimates, and any distance too long or awkward for one person to stretch a tape across alone. Set it flat against a starting surface, aim the laser at the far surface, press the button, and read the digital number — genuinely that simple.

The one thing worth being consistent about: always measure from the same type of reference point, wall to wall or floor to ceiling, rather than mixing starting points between measurements on the same project. Consistency matters more than precision down to the millimeter for almost everything a laser measure gets used for.

🚫 The Mistakes That Quietly Ruin a Measurement

  • A sagging tape reads long.
  • A diagonal measurement instead of a straight one reads long. An unlocked tape that slips mid-read reads however it feels like that day.
  • And rushing — just generally rushing — is how a correct measurement and a wrong one end up looking identical right up until the cut’s already made. Slow is smooth. Smooth is accurate.

Rushed is a second trip to the store.

🛒 Gear Worth Having

Stanley 25-Foot PowerLock Tape Measure — Durable, accurate, and long enough to cover nearly every household measurement without running out of blade.

Bosch Blaze GLM 165-40 Laser Measure — Handles long room and wall measurements a tape measure genuinely can’t manage solo, with a digital readout that removes the guesswork.

Carpenter’s Pencil Multi-Pack — Marks a clean, visible line on wood without the tip snapping the way a regular pencil’s does under real workshop use.

As an Amazon affiliate, I earn from qualifying purchases. Thank you for supporting SkippityWhistles.

📖 Related Reads


SkippityWhistles is part of the John D Reinhart content family. Writer, illustrator, videographer, and accidental filmmaker — find the whole story at JohnDReinhart.com.

7026

©2026 John D Reinhartskippitywhistles.com/ — All rights reserved
How to DIY It Safely (Or: The Fifteen Seconds That Prevent the Bad Afternoon)

Eye protection, gloves, respiratory gear, ladder safety, electrical awareness—here’s what keeps DIY from becoming a trip to the ER. Safety is a habit.

Ron climbed a ladder to clean a gutter, felt it wobble slightly on the uneven ground, and decided to just lean a little further instead of climbing down to reposition it. That lean is exactly how a six-foot ladder turns into a trip to urgent care — not because Ron was careless in general, just impatient for about four seconds at the wrong moment.

Almost every DIY injury traces back to that same root cause: someone in a hurry, skipping a step that would have taken less time than the injury will cost. Safety isn’t about being anxious. It’s a short list of habits and gear that turn a possible disaster into a non-event.

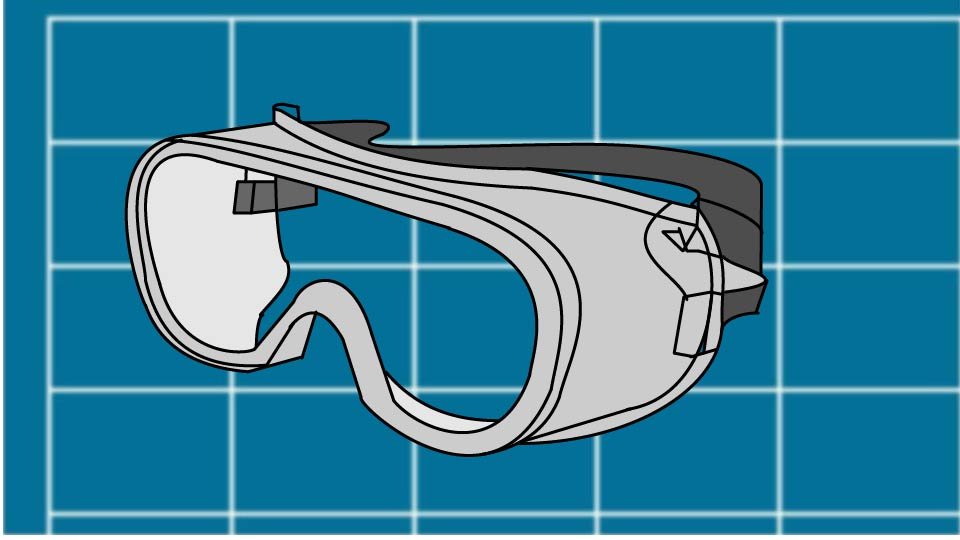
👁️ Eye Protection: The One Nobody Regrets Wearing

Eyes are genuinely easy to injure and impossible to replace. Debris from cutting, drilling, sanding, hammering, or anything with a chance of flying deserves eye protection every time, not just when a project feels risky. Impact-rated safety glasses with clear lenses are the standard — keep a pair at the workbench and another in a car or toolbox, since gear you actually have on hand gets worn far more often than gear buried in a drawer.

🧤 Hand Protection — and the One Real Danger

Gloves protect against splinters, sharp edges, and rough handling during general work, demolition, and material handling. Match the material to the job: canvas or leather for rough general work, nitrile for chemicals and adhesives, rubber for wet cleanup.

One rule overrides everything else: never wear gloves around spinning tools — a drill, a lathe, an angle grinder, anything with a fast-spinning bit or blade. A glove can catch on a spinning tool and pull a hand in before there’s any time to react. Bare hands, kept clear, are safer than gloved ones near anything that spins.

😷 Respiratory Protection: Don’t Breathe the Project

Fine dust from sanding, cutting drywall, or working with old materials floats in the air long after the work stops, and it settles in lungs the same way. A basic dust mask covers light work with minimal dust. An N95 respirator (rated to filter 95 percent of particles down to 0.3 microns) is the right minimum for any project generating visible dust — wood sanding, drywall cutting, general demolition. A reusable respirator with swappable cartridges steps up further for heavy, extended dust or chemical fumes, and needs the cartridge matched to the actual hazard, since a dust cartridge won’t filter fumes and vice versa.

👂 Hearing Protection: Damage That Doesn’t Heal

Power tools, mowers, and grinders run loud enough, long enough, to cause real hearing damage — and unlike most injuries on this list, hearing loss doesn’t come back once it’s gone. Foam earplugs handle general power tool work cheaply. Earmuffs suit longer sessions since they go on and off instantly with no insertion needed. For genuinely loud, extended work, both together isn’t overkill.

🪜 Ladder Safety: Preventing the Fall

The 4-to-1 rule keeps a ladder’s base positioned safely: for every 4 feet of height, the base sits 1 foot away from the wall — a 12-foot ladder needs its base 3 feet out. Keep three points of contact on the ladder at all times, meaning two hands and one foot, or two feet and one hand, never fewer. Never stand on the top rung, lean sideways past your hips, or work a ladder on uneven ground or in wind. If a ladder feels unstable even slightly, that feeling is correct — climb down and reposition rather than push through it, exactly the step Ron skipped.

⚡ Electrical Safety: Respect the Shock

Never touch electrical components without confirming power is off first, and never trust a circuit is dead just because it should be — verify it. A non-contact voltage tester (a tool that detects live current by holding it near a wire, no direct contact needed) is genuinely non-negotiable for any electrical work at all. A GFCI outlet (a ground-fault circuit interrupter, which cuts power automatically the instant it detects current leaking somewhere it shouldn’t) is required in bathrooms, kitchens, and outdoor circuits for good reason — it reacts faster than a person possibly could. Anything beyond simple, well-understood electrical work is worth a licensed electrician, every time, without exception.

🏋️ Lifting: Protect Your Back Before It Needs Protecting

Bend at the knees, not the waist, and keep the load close to your body — distance from your body multiplies the strain on your back dramatically. Lift with your legs doing the work, not your spine, and never twist while holding weight. As a rough guide, 50 pounds is reasonable for most people alone; past 75 pounds, or with anything heavy and awkward like a full sheet of plywood, get a second person or a hand truck involved rather than testing your luck.

🩹 First Aid: Ready for the Small Stuff

Most DIY injuries are minor — cuts, scrapes, splinters, pinched fingers — and a basic kit within arm’s reach handles the overwhelming majority of them. Bandages, gauze, antiseptic wipes, tweezers, and antibiotic ointment cover most workshop mishaps completely. Anything more serious — a deep cut that won’t stop bleeding, any eye injury, a suspected electrical burn, or real confusion about how bad it is — is a call to 911, not a wait-and-see.

🧠 The Actual Habit Worth Building

Nearly every injury on this list traces back to rushing — skipping the glasses “just this once,” not double-checking a circuit, leaning a little further instead of climbing down. The fifteen seconds it takes to put on safety glasses is nothing compared to the weeks an eye injury costs. That pause, right before the risky part of any task, is where safety actually lives — not in owning more gear, just in taking the four extra seconds to use what’s already sitting there.

🛒 Gear Worth Having

AXEMIS Half-Face Respirator Mask Combo Kit with Anti-Fog Safety Glasses & Earplugs — Covers eyes, lungs, and ears in one kit — the three protection categories that get skipped most often simply because they’re not already on hand.

Klein Tools NCVT-3 Non-Contact Voltage Tester — The one tool worth owning before any electrical work at all — confirms a wire is dead without ever needing to touch it.

Compact Workshop First Aid Kit — Covers the small cuts, splinters, and scrapes that make up most DIY injuries, kept close enough that reaching for it is never the hard part.

As an Amazon affiliate, I earn from qualifying purchases. Thank you for supporting SkippityWhistles.

📖 Related Reads


SkippityWhistles is part of the John D Reinhart content family. Writer, illustrator, videographer, and accidental filmmaker — find the whole story at JohnDReinhart.com.

7025

©2026 John D Reinhartskippitywhistles.com/ — All rights reserved
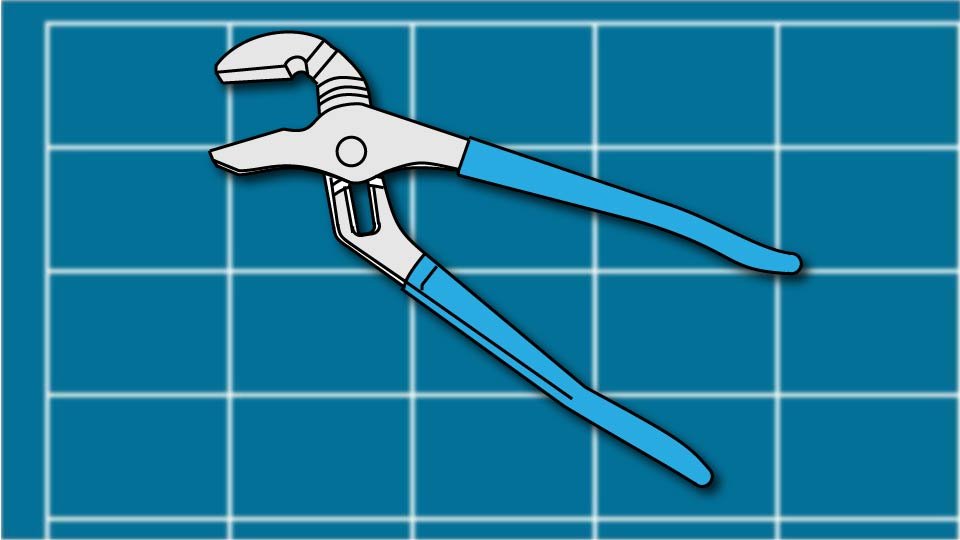
How to Use Channel-Lock Pliers (Or: The Tool That Shows Up When Everything Else Has Given Up)

When slip-joint pliers give up and a wrench doesn’t fit, channel-lock pliers show up like they’ve been waiting their whole life for this moment.

Ron spent a solid four minutes trying to grip a fat plumbing fitting with his slip-joint pliers, which opened about half as wide as the job required, and then another two minutes trying to convince himself that squeezing harder was a legitimate engineering strategy. It was not. His knuckles found the pipe twice. The fitting did not move once. Somewhere in his garage, a pair of channel-lock pliers sat quietly, capable of solving this entire problem in one confident squeeze, judging him.

Channel-lock pliers exist for exactly the moment your other pliers tap out. They’re bigger, they open wider, and they have opinions about leverage that your slip-joint pliers were simply never built to have.

🔩 What Makes Them Special

Channel-lock pliers, also called groove-joint pliers, work off the same basic idea as slip-joint pliers — an adjustable pivot — but taken several steps further and with noticeably more attitude. The pivot slides along a whole row of grooves instead of just two positions, which means the jaw opening ranges from “small nut” to “honestly, alarming.”

That extra range is the entire point. Where a slip-joint pliers gives up, a channel-lock pliers is just getting started.

🎚️ Adjusting the Jaw Width

Open the handles all the way — properly wide, not a polite little stretch.

Slide the pivot along the grooves until the jaw gap roughly matches whatever you’re about to grip. There’s no shame in sliding it back and forth a bunch of times to find the right one; that’s what the grooves are for.

Close the jaws around the object and give it a test squeeze before committing to full force. A little preview now saves a lot of slipping later.

🧲 Gripping Round or Awkward Objects

This is the job channel-locks were basically born for — pipes, round fittings, oddly shaped hardware, anything a flat-jawed wrench looks at and quietly declines. The wide grooved jaws wrap around curves that would make a wrench throw up its hands and go home.

🔩 Turning Nuts and Bolts (When a Wrench Won’t Fit)

When a fastener is too large, too round, or too stubborn for the wrenches on hand, channel-locks step in with real leverage to spare. Match the groove size to the fastener before applying force — an ill-fitting grip here is exactly how a good fastener turns into a rounded, defeated one. Once it’s seated properly, it holds like it means it.

〰️ Bending Light Metal

Channel-locks can bend a light metal rod or nudge a stubborn wire into shape in a pinch. For anything genuinely hard or thick, that’s a job for a dedicated tool — channel-locks are strong, not infinite.

🚫 What Not to Do (a Short but Important List)

Don’t use them on live electrical work — that rule never takes the day off. Don’t use them as a hammer, no matter how tempting the handle looks in that moment. And don’t use them as a pry bar; they’re built to grip and turn, not to lever something apart, and asking them to do both at once tends to end in a bent tool and a bad mood.

🛡️ Safety Basics

Wear safety glasses whenever you’re gripping, bending, or working near anything that could slip or fly loose. Test the grip before applying full force — every single time, not just the times you remember to. And if the pliers are straining against something, that’s the tool politely telling you to grab a bigger one, not a cue to lean in harder.

🛒 Gear Worth Having

CHANNELLOCK 12-Inch Straight Jaw Tongue-and-Groove Pliers — The genuinely satisfying size upgrade from a slip-joint pair — enough reach and grip range to handle the job that started this whole mess.

CHANNELLOCK 6.5-Inch Mini Tongue-and-Groove Pliers — A compact version for tight spaces where the full-size pair simply doesn’t fit — same grip logic, smaller footprint.

3M Impact-Resistant Safety Glasses — Cheap protection for the moment something finally lets go all at once, which it eventually will.

As an Amazon affiliate, I earn from qualifying purchases. Thank you for supporting SkippityWhistles.

📖 Related Reads


SkippityWhistles is part of the John D Reinhart content family. Writer, illustrator, videographer, and accidental filmmaker — find the whole story at JohnDReinhart.com.

7024

©2026 John D Reinhartskippitywhistles.com/ — All rights reserved
How to Use Linesman Pliers: Masters at Managing Wire

Learn how to cut, bend, and shape wire, and much more with this helpful DIYer’s guide.

Ron crossed two wires and tried to twist them together, muttering in surprise when he cut them off. Come on, Ron! Look at the pliers! Right there, next to the pivot? Those are wire cutters, man!

Linesman pliers look like a heavier, more serious version of the pliers in the kitchen drawer, and that’s basically accurate. They’re not the jack-of-all-trades pliers like the slip-joints – they’re built for a narrower set of jobs that they do very well.

🔌 What Makes Them Different

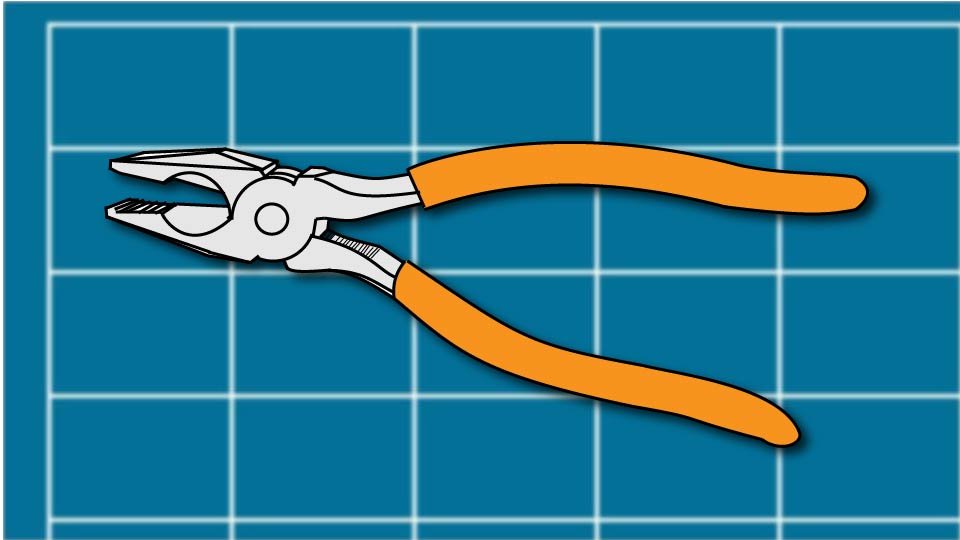
A linesman pliers has flat, straight gripping jaws instead of the curved jaws on a slip-joint pair. Built into the jaws, near the pivot, is a genuine cutting edge — not an add-on, but a real part of the tool’s design.

Unlike slip-joint pliers, the jaw opening on a linesman pliers doesn’t adjust. It makes up in strength and control what it gives up in flexibility, which is exactly why electricians reach for this pliers specifically, over and over.

✋ Gripping and Twisting

To join two wires together, cross them and grip both, holding them toward the back of the flat jaws, close to the cutting notch but not inside it. That spot gives you the most leverage for a tight, clean twist.

Twist steadily, like turning a key, rather than in short jerks — a steady twist keeps both wires locked together instead of slipping apart mid-turn.

✂️ Cutting Wire

The cutting notch sits right behind the flat jaws, near the pivot. It handles household electrical wire and small metal rods or nails cleanly. Ask Ron, he can show it to you.

Confirm the electrical circuit is off before cutting any wire, every single time, regardless of how minor the wire looks.

Wear eye protection. A cut wire end can flick unpredictably the instant it separates.

〰️ Pulling and Bending

The jaws pull small nails and bend light metal cleanly, using the same flat gripping surface as it does for general holding work.

Don’t force the tool against hard or oversized material. A linesman pliers that’s straining is a sign to switch tools, not a sign to push harder — forcing it risks damaging the pliers, the material, or both.

🛡️ Safety Basics

Wear safety glasses any time you’re cutting wire. Never use any pliers on a live electrical circuit — confirm power is off first, no exceptions for a job that looks small. And don’t use a linesman pliers as a makeshift hammer or wrench; it’s built specifically for gripping, twisting, and cutting, not striking or turning fasteners.

🛒 Gear Worth Having

Klein Tools Linesman Pliers — The standard, reliable choice most electricians already reach for — sturdy jaws and a genuine cutting edge built to last.

Klein Tools 1000V Insulated Linesman Pliers — Rated insulated handles for anyone doing real electrical work regularly, not just an occasional household fix.

IRWIN Wire Stripper and Cutter — The companion tool that strips insulation cleanly, so the linesman pliers can focus on cutting and twisting instead of double-duty stripping.

As an Amazon affiliate, I earn from qualifying purchases. Thank you for supporting SkippityWhistles.

📖 Related Reads


SkippityWhistles is part of the John D Reinhart content family. Writer, illustrator, videographer, and accidental filmmaker — find the whole story at JohnDReinhart.com.

7023

©2026 John D Reinhartskippitywhistles.com/ — All rights reserved
How to Use Slip-Joint Pliers (Or: The Pliers in Your Kitchen Drawer Actually Have a Name)

Slip-joint pliers grip almost anything, which is exactly why they’re the wrong tool for turning a bolt. Here’s what they’re actually for.

Ron reached for his slip-joint pliers to loosen a stubborn bolt, since they were closer than the toolbox with his wrenches in it. The pliers gripped fine. They also slipped twice under real torque, and by the third try, the bolt’s corners were rounded smooth enough that no tool was turning it cleanly anymore. The bolt muttered “jeez, Ron. What’d I do to you?”

A slip-joint pliers is the pliers most households already own without knowing the name — the classic shape sitting in a kitchen drawer or a junk drawer somewhere. It’s genuinely useful. It’s just not built to replace a wrench, and knowing where that line sits is the whole skill.

🤏 What Makes Them Special

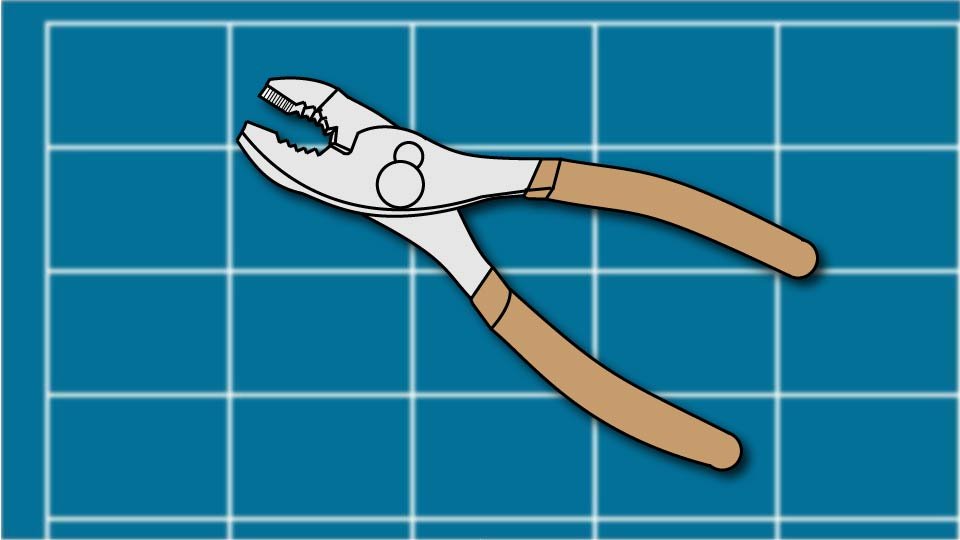
The defining feature is the pivot point — the hinge where the two halves cross. On a slip-joint pliers, that pivot can slide into a second position, widening the gap the jaws can open to.

That’s the entire trick behind the name. One tool, two jaw ranges, covering both small objects and noticeably larger ones without switching pliers.

🎚️ Adjusting the Jaw Width

Open the handles wide. At full extension, you’ll feel the pivot reach a point where it can slide.

Slide the pivot into the other slot to change the jaw range — wider for bigger objects, narrower for smaller ones.

Close the jaws partway and test the fit against whatever you’re about to grip before committing to a full squeeze.

✋ Gripping and Holding

Set the jaw width to match the object first. Then squeeze firm enough to hold it steady, not hard enough to crush it.

This is the tool’s actual home turf — holding a loose nut steady, gripping a bent nail, keeping a small part from sliding while you work on it with your other hand.

〰️ Bending and Shaping Wire

The serrated jaws grip light-gauge wire well enough to bend it into a shape and hold that shape while you work. This is genuinely reliable for craft wire, picture-hanging wire, and similarly light material.

It’s not the tool for anything heavier. Thick wire or metal rod needs a tool built for real leverage, not a pair of general-purpose pliers.

✂️ Light Cutting, If Equipped

Some slip-joint pliers include a small cutting notch near the pivot, meant for thin wire and soft metal only.

Position the material perpendicular to the cutting edge before squeezing. Wear safety glasses — a cut wire end can flick unpredictably.

This cutting notch is not a substitute for actual wire cutters on anything beyond light-gauge material.

🚫 What They’re Not Built For

Fasteners are the big one. Slip-joint pliers can loosen or turn a nut in a pinch, but the adjustable jaw is imprecise by nature and slips under real torque — which is exactly how a bolt’s corners get rounded off, sometimes badly enough that no tool can grip it cleanly afterward.

A wrench is built for that job. Reach for that.

Finished surfaces are the other one. The serrated jaws that grip so reliably will also mark chrome, painted metal, or anything else with a finish worth protecting. A folded cloth between the jaws and the object solves this without giving up any real grip.`

🛡️ Safety Basics

Wear eye protection any time you’re cutting or twisting wire.

Grip with control rather than force — if something genuinely won’t budge, that’s the signal to switch tools, not to squeeze harder.

And never use any pliers on a live electrical circuit; confirm power is off first, every time.

🛒 Gear Worth Having

IRWIN VISE-GRIP Slip-Joint Pliers, 6.5-Inch — A compact size that covers the everyday gripping and holding jobs this tool was actually built for.

CHANNELLOCK Slip-Joint Pliers, 8-Inch — A larger size for bigger objects, worth having alongside the smaller pair rather than instead of it.

Microfiber Cloth Multi-Pack — A folded layer between the jaws and a finished surface, so a good grip doesn’t come at the cost of a scratched fixture.

As an Amazon affiliate, I earn from qualifying purchases. Thank you for supporting SkippityWhistles.

📖 Related Reads


SkippityWhistles is part of the John D Reinhart content family. Writer, illustrator, videographer, and accidental filmmaker — find the whole story at JohnDReinhart.com.

7022

©2026 John D Reinhartskippitywhistles.com/ — All rights reserved