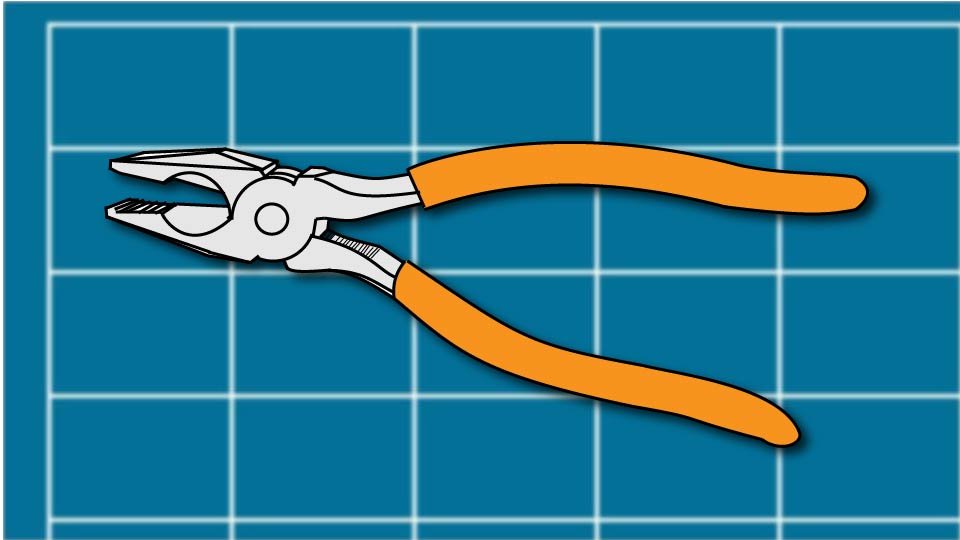
How to Use Channel-Lock Pliers (Or: The Tool That Shows Up When Everything Else Has Given Up)

When slip-joint pliers give up and a wrench doesn’t fit, channel-lock pliers show up like they’ve been waiting their whole life for this moment.

Ron spent a solid four minutes trying to grip a fat plumbing fitting with his slip-joint pliers, which opened about half as wide as the job required, and then another two minutes trying to convince himself that squeezing harder was a legitimate engineering strategy. It was not. His knuckles found the pipe twice. The fitting did not move once. Somewhere in his garage, a pair of channel-lock pliers sat quietly, capable of solving this entire problem in one confident squeeze, judging him.

Channel-lock pliers exist for exactly the moment your other pliers tap out. They’re bigger, they open wider, and they have opinions about leverage that your slip-joint pliers were simply never built to have.

🔩 What Makes Them Special

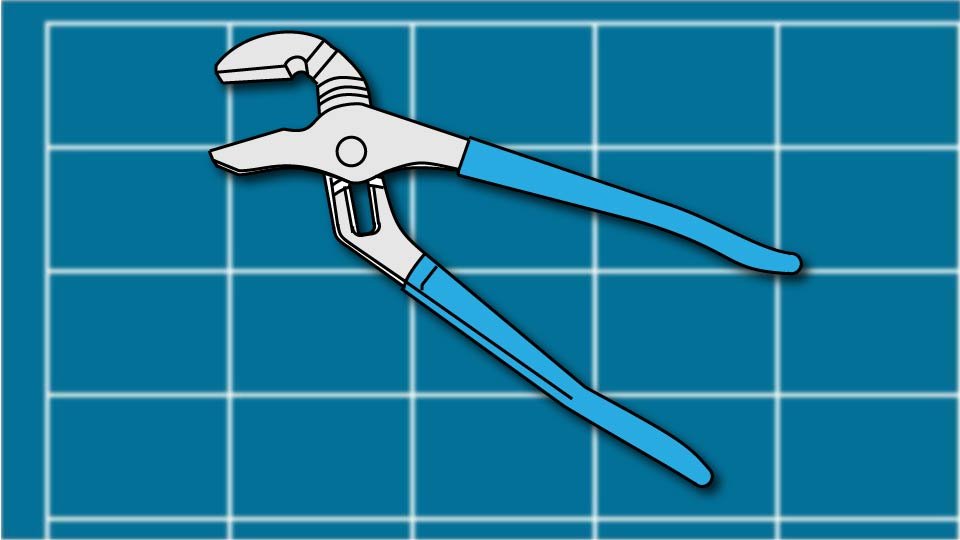
Channel-lock pliers, also called groove-joint pliers, work off the same basic idea as slip-joint pliers — an adjustable pivot — but taken several steps further and with noticeably more attitude. The pivot slides along a whole row of grooves instead of just two positions, which means the jaw opening ranges from “small nut” to “honestly, alarming.”

That extra range is the entire point. Where a slip-joint pliers gives up, a channel-lock pliers is just getting started.

🎚️ Adjusting the Jaw Width

Open the handles all the way — properly wide, not a polite little stretch.

Slide the pivot along the grooves until the jaw gap roughly matches whatever you’re about to grip. There’s no shame in sliding it back and forth a bunch of times to find the right one; that’s what the grooves are for.

Close the jaws around the object and give it a test squeeze before committing to full force. A little preview now saves a lot of slipping later.

🧲 Gripping Round or Awkward Objects

This is the job channel-locks were basically born for — pipes, round fittings, oddly shaped hardware, anything a flat-jawed wrench looks at and quietly declines. The wide grooved jaws wrap around curves that would make a wrench throw up its hands and go home.

🔩 Turning Nuts and Bolts (When a Wrench Won’t Fit)

When a fastener is too large, too round, or too stubborn for the wrenches on hand, channel-locks step in with real leverage to spare. Match the groove size to the fastener before applying force — an ill-fitting grip here is exactly how a good fastener turns into a rounded, defeated one. Once it’s seated properly, it holds like it means it.

〰️ Bending Light Metal

Channel-locks can bend a light metal rod or nudge a stubborn wire into shape in a pinch. For anything genuinely hard or thick, that’s a job for a dedicated tool — channel-locks are strong, not infinite.

🚫 What Not to Do (a Short but Important List)

Don’t use them on live electrical work — that rule never takes the day off. Don’t use them as a hammer, no matter how tempting the handle looks in that moment. And don’t use them as a pry bar; they’re built to grip and turn, not to lever something apart, and asking them to do both at once tends to end in a bent tool and a bad mood.

🛡️ Safety Basics

Wear safety glasses whenever you’re gripping, bending, or working near anything that could slip or fly loose. Test the grip before applying full force — every single time, not just the times you remember to. And if the pliers are straining against something, that’s the tool politely telling you to grab a bigger one, not a cue to lean in harder.

🛒 Gear Worth Having

CHANNELLOCK 12-Inch Straight Jaw Tongue-and-Groove Pliers — The genuinely satisfying size upgrade from a slip-joint pair — enough reach and grip range to handle the job that started this whole mess.

CHANNELLOCK 6.5-Inch Mini Tongue-and-Groove Pliers — A compact version for tight spaces where the full-size pair simply doesn’t fit — same grip logic, smaller footprint.

3M Impact-Resistant Safety Glasses — Cheap protection for the moment something finally lets go all at once, which it eventually will.

As an Amazon affiliate, I earn from qualifying purchases. Thank you for supporting SkippityWhistles.

📖 Related Reads


SkippityWhistles is part of the John D Reinhart content family. Writer, illustrator, videographer, and accidental filmmaker — find the whole story at JohnDReinhart.com.

7024

©2026 John D Reinhartskippitywhistles.com/ — All rights reserved

How to Use Linesman Pliers: Masters at Managing Wire

Learn how to cut, bend, and shape wire, and much more with this helpful DIYer’s guide.

Ron crossed two wires and tried to twist them together, muttering in surprise when he cut them off. Come on, Ron! Look at the pliers! Right there, next to the pivot? Those are wire cutters, man!

Linesman pliers look like a heavier, more serious version of the pliers in the kitchen drawer, and that’s basically accurate. They’re not the jack-of-all-trades pliers like the slip-joints – they’re built for a narrower set of jobs that they do very well.

🔌 What Makes Them Different

A linesman pliers has flat, straight gripping jaws instead of the curved jaws on a slip-joint pair. Built into the jaws, near the pivot, is a genuine cutting edge — not an add-on, but a real part of the tool’s design.

Unlike slip-joint pliers, the jaw opening on a linesman pliers doesn’t adjust. It makes up in strength and control what it gives up in flexibility, which is exactly why electricians reach for this pliers specifically, over and over.

✋ Gripping and Twisting

To join two wires together, cross them and grip both, holding them toward the back of the flat jaws, close to the cutting notch but not inside it. That spot gives you the most leverage for a tight, clean twist.

Twist steadily, like turning a key, rather than in short jerks — a steady twist keeps both wires locked together instead of slipping apart mid-turn.

✂️ Cutting Wire

The cutting notch sits right behind the flat jaws, near the pivot. It handles household electrical wire and small metal rods or nails cleanly. Ask Ron, he can show it to you.

Confirm the electrical circuit is off before cutting any wire, every single time, regardless of how minor the wire looks.

Wear eye protection. A cut wire end can flick unpredictably the instant it separates.

〰️ Pulling and Bending

The jaws pull small nails and bend light metal cleanly, using the same flat gripping surface as it does for general holding work.

Don’t force the tool against hard or oversized material. A linesman pliers that’s straining is a sign to switch tools, not a sign to push harder — forcing it risks damaging the pliers, the material, or both.

🛡️ Safety Basics

Wear safety glasses any time you’re cutting wire. Never use any pliers on a live electrical circuit — confirm power is off first, no exceptions for a job that looks small. And don’t use a linesman pliers as a makeshift hammer or wrench; it’s built specifically for gripping, twisting, and cutting, not striking or turning fasteners.

🛒 Gear Worth Having

Klein Tools Linesman Pliers — The standard, reliable choice most electricians already reach for — sturdy jaws and a genuine cutting edge built to last.

Klein Tools 1000V Insulated Linesman Pliers — Rated insulated handles for anyone doing real electrical work regularly, not just an occasional household fix.

IRWIN Wire Stripper and Cutter — The companion tool that strips insulation cleanly, so the linesman pliers can focus on cutting and twisting instead of double-duty stripping.

As an Amazon affiliate, I earn from qualifying purchases. Thank you for supporting SkippityWhistles.

📖 Related Reads


SkippityWhistles is part of the John D Reinhart content family. Writer, illustrator, videographer, and accidental filmmaker — find the whole story at JohnDReinhart.com.

7023

©2026 John D Reinhartskippitywhistles.com/ — All rights reserved

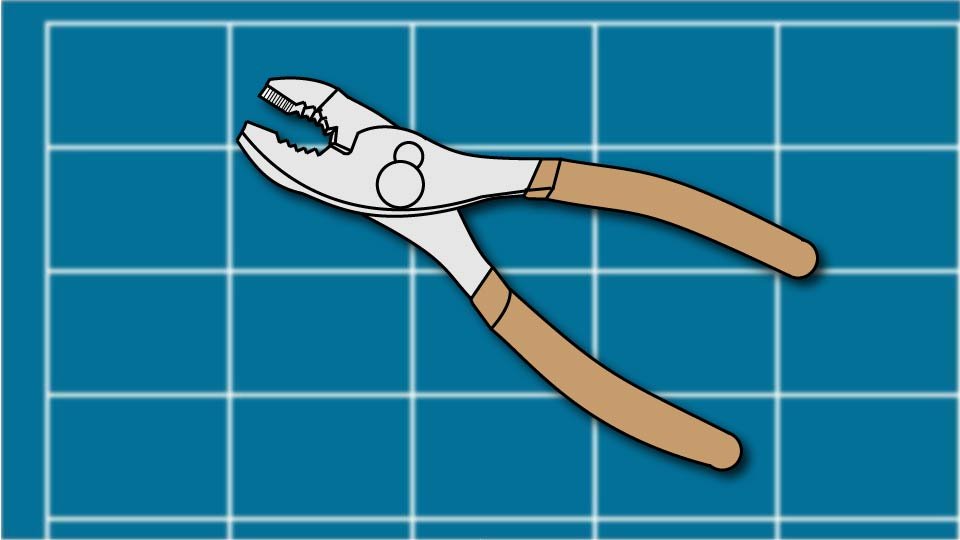
How to Use Slip-Joint Pliers (Or: The Pliers in Your Kitchen Drawer Actually Have a Name)

Slip-joint pliers grip almost anything, which is exactly why they’re the wrong tool for turning a bolt. Here’s what they’re actually for.

Ron reached for his slip-joint pliers to loosen a stubborn bolt, since they were closer than the toolbox with his wrenches in it. The pliers gripped fine. They also slipped twice under real torque, and by the third try, the bolt’s corners were rounded smooth enough that no tool was turning it cleanly anymore. The bolt muttered “jeez, Ron. What’d I do to you?”

A slip-joint pliers is the pliers most households already own without knowing the name — the classic shape sitting in a kitchen drawer or a junk drawer somewhere. It’s genuinely useful. It’s just not built to replace a wrench, and knowing where that line sits is the whole skill.

🤏 What Makes Them Special

The defining feature is the pivot point — the hinge where the two halves cross. On a slip-joint pliers, that pivot can slide into a second position, widening the gap the jaws can open to.

That’s the entire trick behind the name. One tool, two jaw ranges, covering both small objects and noticeably larger ones without switching pliers.

🎚️ Adjusting the Jaw Width

Open the handles wide. At full extension, you’ll feel the pivot reach a point where it can slide.

Slide the pivot into the other slot to change the jaw range — wider for bigger objects, narrower for smaller ones.

Close the jaws partway and test the fit against whatever you’re about to grip before committing to a full squeeze.

✋ Gripping and Holding

Set the jaw width to match the object first. Then squeeze firm enough to hold it steady, not hard enough to crush it.

This is the tool’s actual home turf — holding a loose nut steady, gripping a bent nail, keeping a small part from sliding while you work on it with your other hand.

〰️ Bending and Shaping Wire

The serrated jaws grip light-gauge wire well enough to bend it into a shape and hold that shape while you work. This is genuinely reliable for craft wire, picture-hanging wire, and similarly light material.

It’s not the tool for anything heavier. Thick wire or metal rod needs a tool built for real leverage, not a pair of general-purpose pliers.

✂️ Light Cutting, If Equipped

Some slip-joint pliers include a small cutting notch near the pivot, meant for thin wire and soft metal only.

Position the material perpendicular to the cutting edge before squeezing. Wear safety glasses — a cut wire end can flick unpredictably.

This cutting notch is not a substitute for actual wire cutters on anything beyond light-gauge material.

🚫 What They’re Not Built For

Fasteners are the big one. Slip-joint pliers can loosen or turn a nut in a pinch, but the adjustable jaw is imprecise by nature and slips under real torque — which is exactly how a bolt’s corners get rounded off, sometimes badly enough that no tool can grip it cleanly afterward.

A wrench is built for that job. Reach for that.

Finished surfaces are the other one. The serrated jaws that grip so reliably will also mark chrome, painted metal, or anything else with a finish worth protecting. A folded cloth between the jaws and the object solves this without giving up any real grip.`

🛡️ Safety Basics

Wear eye protection any time you’re cutting or twisting wire.

Grip with control rather than force — if something genuinely won’t budge, that’s the signal to switch tools, not to squeeze harder.

And never use any pliers on a live electrical circuit; confirm power is off first, every time.

🛒 Gear Worth Having

IRWIN VISE-GRIP Slip-Joint Pliers, 6.5-Inch — A compact size that covers the everyday gripping and holding jobs this tool was actually built for.

CHANNELLOCK Slip-Joint Pliers, 8-Inch — A larger size for bigger objects, worth having alongside the smaller pair rather than instead of it.

Microfiber Cloth Multi-Pack — A folded layer between the jaws and a finished surface, so a good grip doesn’t come at the cost of a scratched fixture.

As an Amazon affiliate, I earn from qualifying purchases. Thank you for supporting SkippityWhistles.

📖 Related Reads


SkippityWhistles is part of the John D Reinhart content family. Writer, illustrator, videographer, and accidental filmmaker — find the whole story at JohnDReinhart.com.

7022

©2026 John D Reinhartskippitywhistles.com/ — All rights reserved

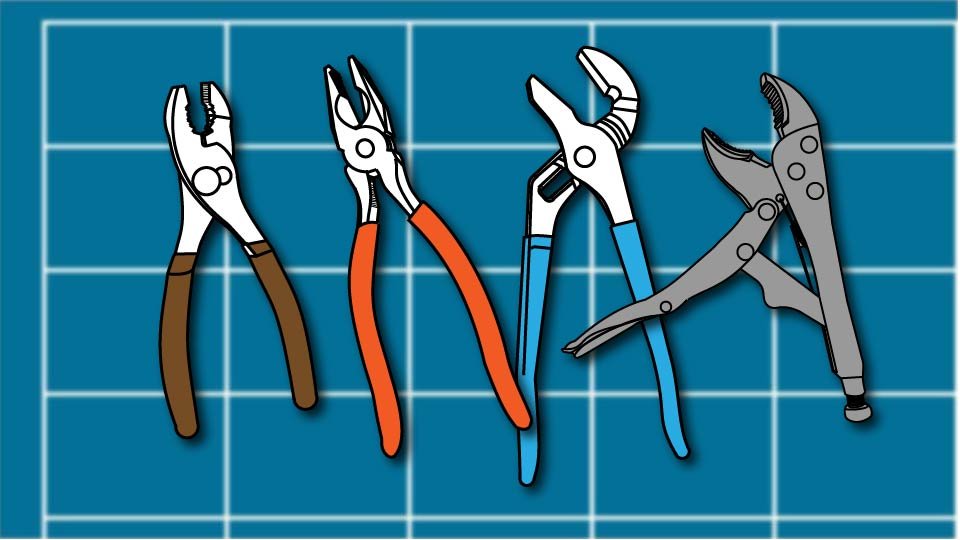
How to Choose and Use Pliers (Or: The Tool That Does More Than You Think)

Most drawers have one mystery pair of pliers doing every job badly. Here’s what the different types actually do, and which one to reach for.

Ron owns exactly one pair of pliers, and he genuinely doesn’t know what kind they are. He’s used them to grip, to twist, and once, memorably, to cut a wire — which mostly just crushed the wire flat and left him bending it back and forth until it snapped on its own. The pliers weren’t broken. They just weren’t built for cutting, and nothing about how they looked told Ron that.

Pliers aren’t one tool. They’re a small family of tools that all look vaguely similar and do genuinely different jobs. Knowing which one you’re holding — and which one a task actually calls for — is most of the battle.

🤏 Slip-Joint Pliers: The Everyday Starter

a Line drawing of slip-joint pliers by John D Reinhart

A slip-joint pliers (the classic pliers shape, with a pivot point that slides to widen or narrow the jaw opening) is the one pair most households already own without necessarily knowing its name.

That adjustable pivot is the whole trick — narrow it for small objects, widen it for bigger ones, all from one tool. It handles general gripping, holding, light bending, and gentle nail-pulling well, and covers a genuinely large share of everyday DIY tasks. It’s not built for cutting wire cleanly or gripping something round and stubborn — those jobs belong to other pliers on this list.

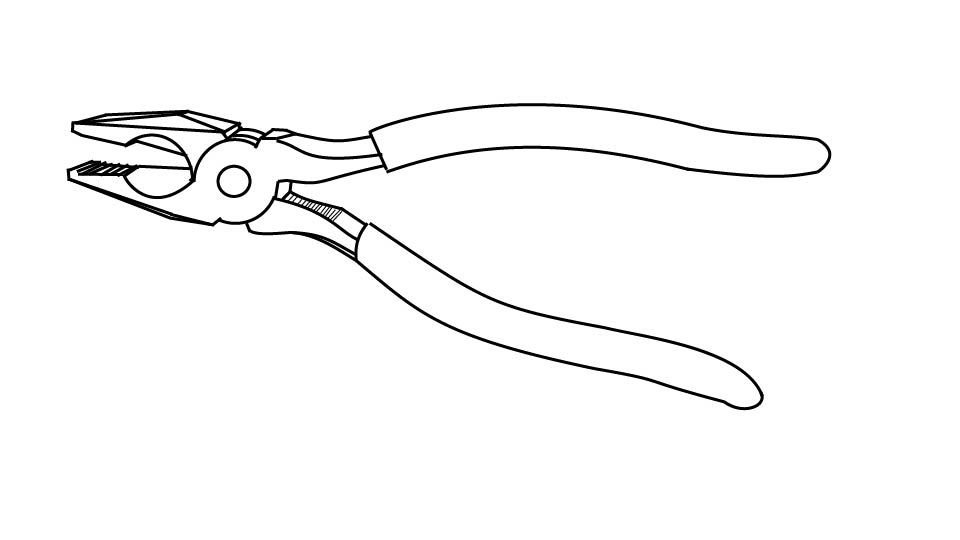
✂️ Linesman Pliers: Built to Cut and Twist Wire

A line drawing of linesman pliers by John D Reinhart

A linesman pliers (a heavier-duty pliers with a built-in wire cutter machined right into the jaws) exists specifically for the job slip-joint pliers can’t do well.

The cutting edge bites through wire cleanly instead of crushing it flat, and the shorter, thicker handles give real leverage and control. Electricians reach for these constantly, for exactly that reason.

Always confirm power is off before using any pliers on an electrical task — that rule doesn’t bend for a “small” job.

🔩 Channel-Lock Pliers: Wide Grip for Plumbing and Big Fasteners

A line drawing of channel-lock-style pliers by John D Reinhart

A channel-lock pliers, also called groove-joint pliers (a wider, heavier pliers whose pivot slides along a grooved channel for a much larger adjustment range than slip-joint), opens far wider than a slip-joint pair ever can.

That extra range is what lets it grip pipes, large nuts, and irregular shapes that a slip-joint pliers simply can’t reach around. Adjust the jaw to the object before gripping — a loose fit here either damages the fastener or lets the tool slip under load.

🔒 Locking Pliers: Hands-Free Holding

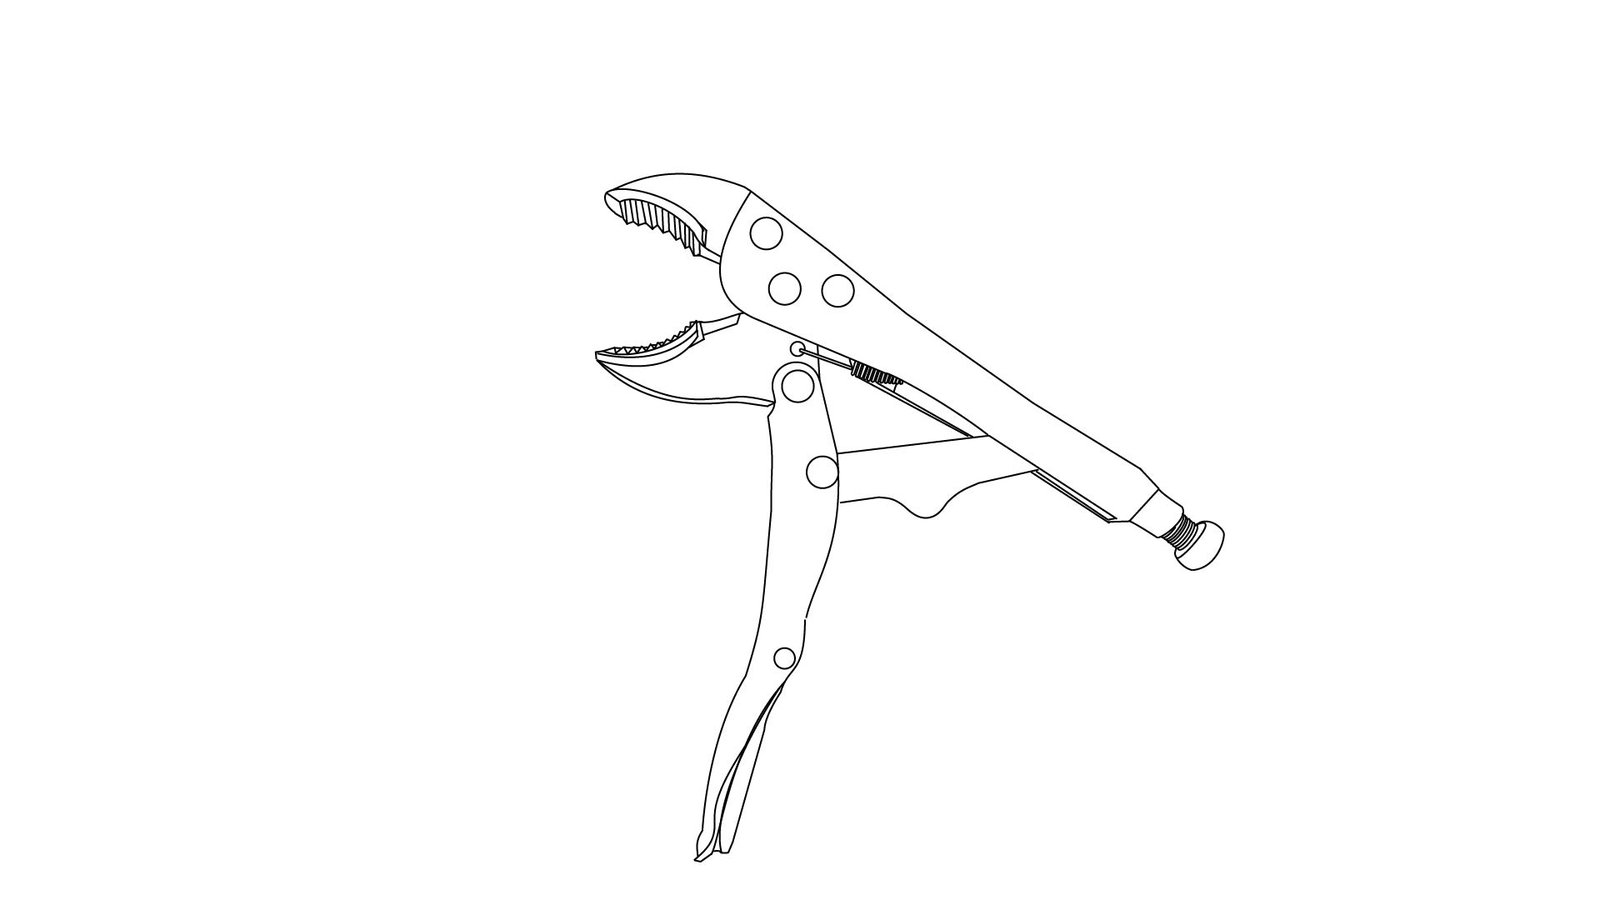
A line drawing of an open pair of locking pliers by John D Reinhart

A locking pliers, often called vise-grips (a pliers with a toggle mechanism that locks the jaws clamped shut without needing continuous hand pressure), solves a problem none of the others do — staying clamped on its own once locked, freeing both hands for the actual work.

The full mechanism, adjustment, and release technique gets a complete walkthrough in the dedicated locking pliers post, since that’s genuinely a different skill worth its own space rather than a paragraph here.

🧰 The Rest of the Family, Briefly

  • A needle-nose pliers reaches into tight spaces and handles small, precise objects a standard jaw can’t get near.
  • A diagonal cutting pliers, sometimes called dikes, gives a cleaner wire cut than a linesman pliers can manage in certain spots.
  • Specialty pliers — crimping, adjustable, and beyond — exist for specific jobs you’ll recognize the moment you actually need them.

None of these are worth buying ahead of a project that calls for them specifically.

🛡️ Safety Basics

Wear safety glasses whenever cutting or twisting — flying bits of wire and metal are a real risk. Match the pliers to the job; forcing a slip-joint pair to turn a bolt built for channel-locks usually damages the tool, the fastener, or both. Never grip a wire without first confirming the power is off, gloves or no gloves. Keep pliers clean and free of rust, since a slipping tool is far more often a dirty or corroded one than a broken one.

🎯 Building the Set: What to Buy First

  • A single pair of slip-joint pliers covers most early projects and is the right first purchase for almost anyone.
  • Add linesman pliers the moment any electrical work enters the picture — the ability to cut and twist wire safely is worth having before it’s needed.
  • Add channel-locks once plumbing or larger fasteners show up in a project.

That three-tool combination covers the overwhelming majority of home DIY without needing a full wall of specialty pliers.

🛒 Gear Worth Having

IRWIN VISE-GRIP Slip-Joint Pliers — The right first pair for almost anyone — versatile enough to cover most early projects before anything more specialized is needed.

Klein Tools Linesman Pliers — A genuine wire-cutting edge machined into the jaws, worth owning the moment any electrical task enters a project.

CHANNELLOCK Straight Jaw Tongue-and-Groove Pliers — The wide-range grip that handles pipe and oversized fasteners a slip-joint pair was never built to reach around.

As an Amazon affiliate, I earn from qualifying purchases. Thank you for supporting SkippityWhistles.

📖 Related Reads


SkippityWhistles is part of the John D Reinhart content family. Writer, illustrator, videographer, and accidental filmmaker — find the whole story at JohnDReinhart.com.

7021

©2026 John D Reinhartskippitywhistles.com/ — All rights reserved

The DIYer’s Toolbox: What You Actually Need, and When

You don’t need a fully stocked workshop for most home projects. You need a handful of the right tools, a little patience, and the confidence that grows with every project.

Rhonda stood in the tool aisle at the hardware store, surrounded by a wall of options she couldn’t name and didn’t know if she needed, and left with nothing because buying the wrong thing felt worse than buying nothing at all. That’s a completely reasonable place to freeze. The tool aisle is built to look like you need all of it at once. You don’t.

A toolbox isn’t something you buy in one trip. It’s something you build, one real project at a time, until one day you realize you already own exactly what the next job calls for.

📏 Measuring and Marking: Where Every Project Starts

  • A 25-foot tape measure is the one tool you’ll reach for more than any other — cheap, durable, and essential from the very first project.
  • A pencil or carpenter’s pencil marks cut lines and placement points, and costs next to nothing.
  • A 2- to 4-foot level tells you honestly whether something is straight, which your eye is genuinely bad at judging on its own.
  • A speed square or carpenter’s square keeps corners at true 90 degrees and helps mark straight lines.

None of this is exciting. All of it prevents the kind of mistake that only shows up after the cut’s already made.

✂️ Cutting Tools: Sharp and Safe

  • A handsaw handles straight cuts in lumber with zero batteries required.
  • A utility knife might be the single most-used tool in the whole box. From scoring drywall and opening boxes to cutting nearly anything thin, the blades are cheap enough to replace regularly.
  • A hacksaw earns its keep the day you need to cut metal pipe or hardware, which isn’t every project, but is worth owning ahead of that day.

Whatever the tool, the same rule applies: cut away from your body, always.

🔧 Driving Tools: Fastening and Assembly

  • A multi-bit screwdriver set covers flathead and Phillips in one compact tool, and matching bit size to screw size prevents the single most common cause of a stripped screw head.
  • A 16-ounce hammer handles nails, taps anchors into place, and does light demolition — let its weight do the work rather than swinging from the shoulder.
  • A cordless power drill is the one tool on this entire list worth buying earlier rather than later; it drives screws faster than any manual driver and turns tedious work into quick work on almost every project that follows.

An impact driver and a dedicated drywall screwgun are both genuinely useful upgrades, but neither is essential until a specific project calls for it.

🗜️ Holding Things Steady

  • A pair of bar clamps frees up both hands for cutting, fastening, or gluing, and gets used more than most people expect once they own a set.
  • Two sawhorses turn any flat door or sheet of plywood into a stable elevated workspace — one of the better investments in this entire list.
  • An adjustable wrench does the job of a whole set of fixed wrenches until specific jobs demand otherwise.
  • A basic pair of slip-joint pliers covers general gripping, twisting, and holding for nearly everything a beginner toolkit needs. More specialized pliers can be added only once a project specifically calls for them.

🎨 Finishing Tools: Where Good Becomes Great

  • An assortment of sandpaper or a sanding block smooths rough edges and makes a project look intentional instead of hasty.
  • A basic brush and roller combo handles most painting and finishing work, and spending a little more on quality bristles shows up directly in the final result.
  • A caulk gun keeps sealant application clean and controlled instead of squeezed straight from the tube by hand.

None of these tools are complicated — they’re just the difference between a project that’s technically finished and one that actually looks finished.

⚡ Electrical and Testing: Stay Safe

  • A non-contact voltage tester is the one tool worth owning before touching any electrical work at all. Hold it near a wire and it tells you honestly whether that wire is live.
  • A multimeter goes a step further, testing voltage, continuity, and more, and is worth adding once basic electrical work becomes a regular occurrence rather than a one-time job.
  • Wire strippers matter the moment any low-voltage work is on the table.

None of this replaces real caution — anything beyond simple, well-understood work is worth a licensed electrician, every time.

🛡️ Safety Gear: Not Optional

  • Work gloves protect hands from cuts and splinters on nearly every project.
  • Safety glasses guard against flying debris the instant you’re cutting, sanding, or drilling — keep them within reach and actually use them.
  • A dust mask or respirator matters most for drywall, sanding, and insulation work, where fine particles are genuinely bad to breathe.
  • Hearing protection around power tools prevents damage that doesn’t heal once it’s done.

None of this is about being overly cautious. It’s about still having full use of your hands, eyes, lungs, and hearing for the next fifty projects, not just this one.

🧠 The Real Point of All This

Owning the right tool for a job changes how a project feels, not just how it goes. Fighting the wrong tool is frustrating in a way that has nothing to do with skill. Reaching for the right one, because you already own it, is confidence you can feel in your hands before the project even starts. That confidence is the actual payoff here — not a fully stocked garage, just one project at a time, built on tools that were worth having when you needed them.

🛒 Gear Worth Having

Amazon Basics 178-Piece Home Repair Tool Kit — Covers the measuring, driving, and holding basics in one box, which solves the very real problem of not knowing where to start.

DEWALT 20V MAX Cordless Drill/Driver — The single tool on this list most worth buying early — it changes more projects from tedious to easy than anything else here.

AXEMIS Half-Face Respirator Mask Combo Kit with Anti-Fog Safety Glasses & Earplugs — Covers eyes, lungs, and ears in one kit, which is the actual protection combo that exists as a real product — gloves are worth adding separately if a project calls for them.

As an Amazon affiliate, I earn from qualifying purchases. Thank you for supporting SkippityWhistles.

📖 Related Reads


SkippityWhistles is part of the John D Reinhart content family. Writer, illustrator, videographer, and accidental filmmaker — find the whole story at JohnDReinhart.com.

7020

©2026 John D Reinhartskippitywhistles.com/ — All rights reserved

How to Use a Pipe Wrench (Or: It’s Not Upside Down, You Are)

A pipe wrench looks like it’s on backwards compared to every other wrench you own. That’s not a flaw. That’s the entire design.

Ron picked up a pipe wrench for the first time and used it exactly like his adjustable wrench — same grip, same angle. It slipped off the pipe almost immediately. He flipped it around, certain he’d had it backwards, and it slipped again. Ron hadn’t had it backwards. He’d had it right the first time and wrong the second, and a pipe wrench genuinely does look upside down compared to every other wrench in the garage.

That’s not a manufacturing defect or a weird design choice. It’s the entire mechanism, and once you understand why it’s shaped that way, it stops slipping.

🔧 Why It Looks Backwards

An adjustable wrench grips with both jaws squeezing evenly, like a clamp. A pipe wrench doesn’t work that way at all.

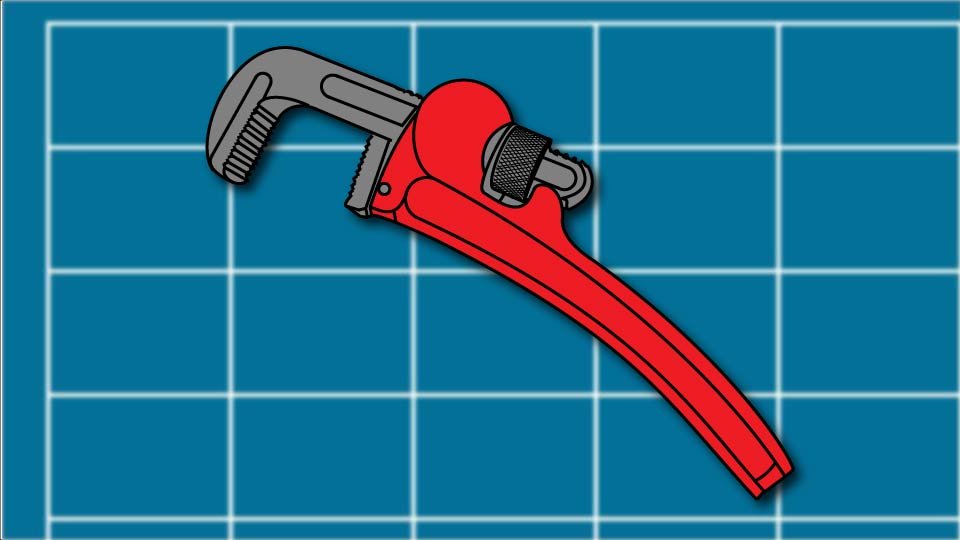
A pipe wrench has one fixed jaw and one moving jaw, and the moving jaw is designed to bite down harder the more force you pull with. That’s the whole design. The harder you pull, the tighter the teeth dig in.

That’s why the wrench has to face a specific direction. The jaws need to close in the same direction you’re about to pull. Point it the wrong way, and pulling actually loosens the grip instead of tightening it — which is exactly what slipping feels like.

🧩 The Parts You’re Holding

The fixed jaw stays in one position, mounted to the frame. The moving jaw slides along a hinge and is the part actually doing the biting.

The adjustment knob sets the gap between the two jaws — turn it to roughly match the pipe’s diameter before you ever try to grip anything.

Both jaws have hardened, angled teeth. Those teeth are what bite into the pipe, and they only work well when they’re sharp — more on that later.

🎯 Setting Up the Grip Correctly

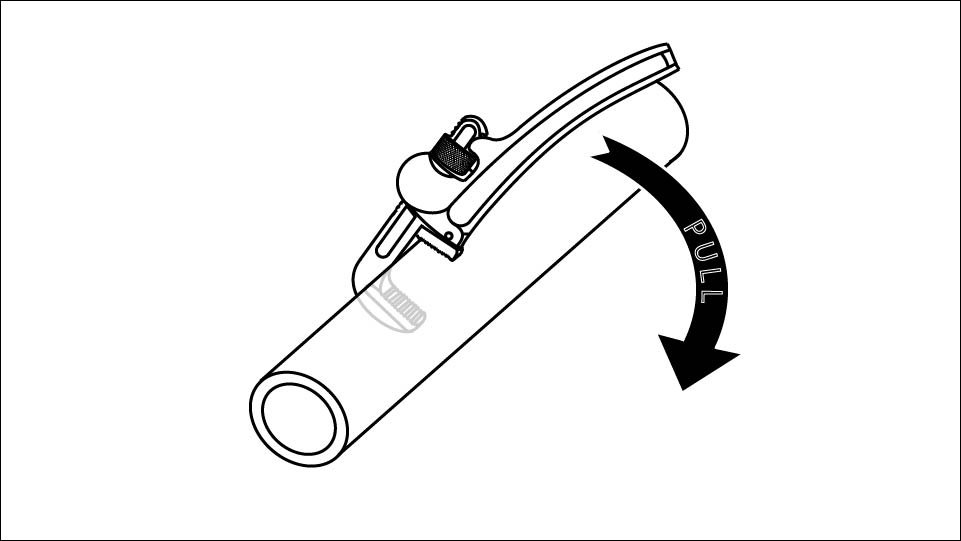
A line drawing of a pipe wrench gripping a piece of pipe. The handle is towards us, and an arrow shows that we want to pull the wrench.

Open the jaws wide enough to slide over the pipe easily. Don’t crank them down tight yet.

Position the wrench so the fixed jaw sits on the side you’re about to pull toward. This is the step Ron got backwards.

Leave a small gap, roughly half an inch, between the jaws and the pipe before you pull. That gap isn’t sloppiness — it’s what lets the moving jaw travel into its bite as you pull, instead of already being jammed against the pipe with nowhere to go.

If the wrench slips once you start pulling, don’t just pull harder. Flip the wrench around a full 180 degrees and try again — the orientation was likely wrong, not the amount of force.

💪 Pull, Don’t Push

Always pull the handle toward you. Pushing away from you is fighting the entire design of the tool and won’t generate a real bite.

Apply steady pressure rather than a sharp jerk. You’ll feel the moving jaw settle into the pipe as it grips — that settling feeling is the wrench working correctly.

If you need more leverage, reach for a longer wrench rather than sliding a pipe over the handle for extra length. A longer wrench keeps the tool’s geometry intact. A cheater bar changes the leverage in ways that make the wrench more likely to slip or fail.

🔄 Two Wrenches for Threaded Joints

Loosening a threaded pipe fitting takes two wrenches, not one. One wrench turns the fitting. A second wrench holds the pipe itself steady so the whole line doesn’t twist along with it.

The second wrench faces the opposite direction from the first — genuinely backwards compared to the one doing the turning. That’s intentional. It needs to resist rotation, not create it.

Skip the second wrench, and the twisting force meant for one joint travels down the whole pipe run instead, which is how one loosened fitting turns into several damaged ones.

🚫 What Not to Do

Never hit a pipe wrench with a hammer to break a stuck fitting loose. The uncontrolled shock can crack the fitting, the pipe, or the wrench itself. If a fitting won’t budge, try tightening it slightly first, then reversing — sometimes breaking the initial seal in the tightening direction frees it up to loosen afterward.

Never use a pipe wrench as a pry bar or a lifting tool. It’s built for rotation, not leverage in other directions, and using it that way is how the jaw or handle bends.

Retire a wrench once its teeth are visibly rounded or worn smooth. Dull teeth can’t bite, and a wrench that can’t bite just slips, no matter how much force goes into it.

🧽 Keeping It Working

Brush grit and debris out of the teeth with a wire brush after use — trapped debris is a quiet cause of slipping that has nothing to do with technique. Add a drop of oil to the moving jaw’s hinge occasionally so it keeps sliding freely. Store it somewhere dry; rust on the teeth is exactly the kind of thing that turns a reliable wrench into a useless tool.

🛒 Gear Worth Having

Duratech 3-Piece Aluminum Pipe Wrench Set — Covers small, medium, and large diameter pipe in one set, lightweight enough that the larger sizes don’t turn into an arm workout.

RIDGID 14-Inch Straight Pipe Wrench — A second wrench sized for backing up threaded joints, since that job genuinely needs two wrenches facing opposite directions.

Oil Eater Wire Brush Premium 6-Piece Kit — Steel, brass, and nylon brushes in one set, so the right bristle is on hand whether it’s caked debris or just light surface grime in the teeth.

As an Amazon affiliate, I earn from qualifying purchases. Thank you for supporting SkippityWhistles.

📖 Related Reads

SkippityWhistles is part of the John D Reinhart content family. Writer, illustrator, videographer, and accidental filmmaker — find the whole story at JohnDReinhart.com.

7019

©2026 John D Reinhartskippitywhistles.com/ — All rights reserved


How to Use Aviation Shears (Or: Why One Pair Is Never Enough)

Aviation shears are color-coded for a reason — and one pair is never enough. Here’s what the colors mean, how to use them correctly, and why this tool belongs in every home toolbox.

Most people who own a pair of aviation shears own one pair. They reach for them when something needs cutting, use them, put them back, and never think much about it. The cuts are fine, mostly. Sometimes the metal binds. Sometimes the edge comes out ragged. Sometimes the hand gives out before the job does.

What most people don’t know — because nobody mentioned it and the shears didn’t come with an explanation — is that aviation shears are color-coded. Red, green, and yellow. Each color cuts differently. Using the wrong color for the job is why metal binds, why edges come out rough, and why hands get tired. Using the right color makes the cut feel almost effortless.

Here’s what the colors mean, how to use the tool correctly, and why a three-piece set is almost always the right answer.

✈️ What Aviation Shears Actually Are

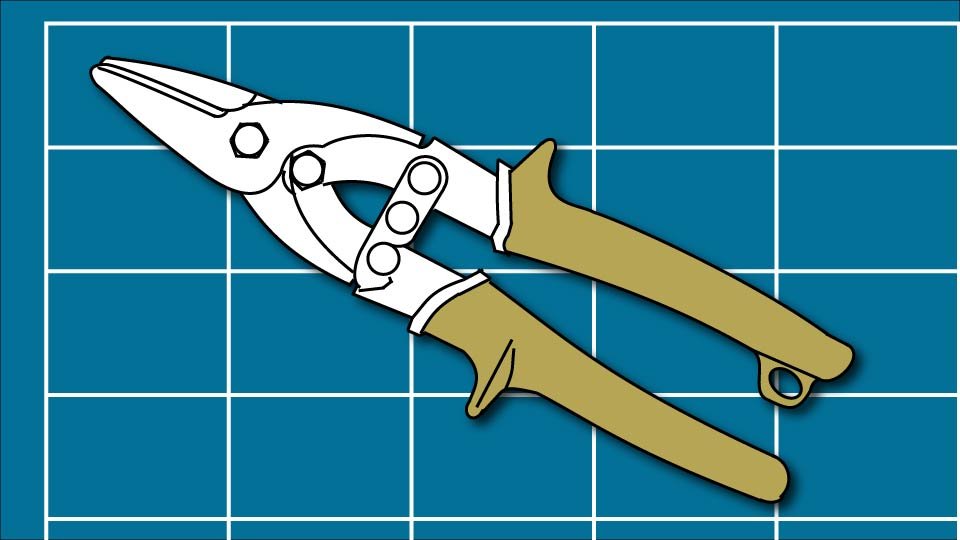
Aviation shears — also called tin snips, aviation snips, or compound snips — are cutting tools designed to slice cleanly through thin metal with minimal hand effort. Despite the name, they have nothing to do with aircraft in daily use. Plumbers reach for them. HVAC technicians live by them. Roofers use them constantly. Anyone who’s ever had to cut sheet metal, aluminum flashing, galvanized steel, vinyl siding, or wire mesh has either used aviation shears or wished they had.

The key engineering feature is compound leverage — a mechanism inside the tool that multiplies the force from your hand before it reaches the blades. This is why aviation shears cut through 18-gauge steel without leaving the user exhausted. The tool does most of the work. Your job is to guide it.

They are meaningfully different from old-style straight tin snips, which use simple leverage and require considerably more hand effort. If the snips in the toolbox have plain metal handles and feel like heavy scissors, those are traditional tin snips. If they have colored handles — red, green, or yellow — and feel more substantial, those are aviation shears. The upgrade is noticeable immediately.

🔴🟢🟡 The Color Code — This Is the Important Part

Aviation shears are sold in three colors, and each color designates the direction the tool is designed to cut. This is not decorative. It is functional information, and using the wrong color produces worse cuts with more effort.

🔴Red-handled shears cut to the left. When you’re cutting a curve that turns counterclockwise — or when you want the waste material to curl away to the left — red is the pair to reach for. The blade geometry is offset so that cutting pressure naturally follows a leftward arc.

🟢Green-handled shears cut to the right. Clockwise curves, right-turning arcs, situations where the waste needs to curl right — that’s green. The blade offset works in the opposite direction from red.

🟡Yellow-handled shears cut straight. They’re designed for long straight lines and wide, gentle curves in either direction. Yellow handles most of the routine cutting jobs — trimming a piece of flashing to length, cutting a straight edge on sheet metal, making the initial entry cut before switching to red or green for curves.

The practical implication: for a straight cut, reach for yellow. For a curve turning left, reach for red. For a curve turning right, reach for green. Using green for a left-turning curve causes the metal to bind against the blade, the cut gets ragged, and the hand has to work much harder than it should. The right pair makes the cut follow the line naturally, the waste curls away cleanly, and the edge comes out smooth.

This is why a three-piece set is the right purchase. Any serious sheet metal job involves a mix of straight cuts and curves in both directions. Having all three colors means always having the right tool for the next cut.

📐 How to Actually Use Them

Mark the cut line clearly before starting. A permanent marker works on most metals. A scribe — a pointed tool that scratches a line into the metal surface — works better on shiny or coated surfaces where marker can smear. Aviation shears follow lines accurately, but only if the line is visible throughout the cut.

Select the correct color for the cut direction. This step takes two seconds and makes the entire job go better.

Cut in short bites rather than trying to push the full blade length through the metal at once. Open the shears, advance them a few inches along the cut line, close them. Open, advance, close. Short, controlled strokes give more accuracy, produce cleaner edges, and generate far less hand fatigue than long forcing cuts. If the hand is getting tired, the bites are probably too long.

Let the waste piece curl naturally. Aviation shears are designed so the waste material curls away from the cut as you work — usually upward and to the side, depending on which color you’re using. Don’t fight this. Don’t try to hold the waste flat. Let it curl. Fighting the curl is what causes binding and rough edges.

Keep the wrist neutral. Aviation shears are engineered to do the cutting — the compound leverage mechanism handles the hard part. If the wrist is straining or the hand is aching after a short cut, something is wrong: either the wrong color shears are in use, the material is too thick for the tool, or the blades need sharpening or replacement.

⚠️ The Edges Are Sharp — This Is Not a Metaphor

Cut sheet metal has edges that are genuinely dangerous. A freshly cut edge of aluminum flashing or galvanized steel is sharp enough to cut skin easily, and the cut happens before you feel it coming. Work gloves are not optional for sheet metal work. Heavy leather or cut-resistant gloves are better than thin ones for this job specifically.

Store aviation shears with the safety latch engaged. Every pair has a small latch that locks the blades closed. It exists so the tool doesn’t open accidentally in a toolbox and cut whatever else is in there — or the hand reaching into it. Engage it every time. It takes one second.

🔍 What Aviation Shears Can and Can’t Cut

Most quality aviation shears handle up to 18-gauge mild steel and up to 22-gauge stainless steel (higher gauge numbers mean thinner material — and since stainless is harder than mild steel, the shears reach their limit at a thinner gauge). They also cut aluminum flashing, copper sheet, vinyl siding, wire mesh, and thin plastics cleanly. These are the materials they were designed for.

What they’re not designed for: hardened steel, rods, wire rope, or anything substantially thicker than 18-gauge mild steel. Using aviation shears on material that exceeds their rating damages the blades — the cutting edge rolls or chips — and the shears won’t cut cleanly afterward. When the material seems too tough for the shears, it probably is. The right tool for heavy material is a different tool.

🛠️ Keeping Them in Good Condition

Wipe the blades dry after use. Metal shavings and moisture accelerate rust on the blade edges. A dry cloth takes ten seconds and extends the life of the tool significantly.

A drop of oil on the pivot joint occasionally keeps the compound mechanism moving smoothly. Any light machine oil works. The pivot is where the compound leverage operates — keeping it lubricated keeps the cutting effort low.

Store with the safety latch engaged, in a dry location. Aviation shears left loose in a wet environment rust quickly. A tool roll, a dedicated drawer, or a hook on the pegboard all work fine. Just not loose in a damp garage.

🛒 Gear Worth Having

HURRICANE 3-Piece Aviation Tin Snips Set — 10″, Cr-V Steel, Red/Green/Yellow — All three cutting directions in one purchase, which is the right way to buy aviation shears. Chrome vanadium steel blades with micro-serrations that grip metal rather than skating off it. Non-slip rubber grips reduce hand fatigue on longer jobs. Safety latch on each pair. Cuts up to 20-gauge cold-rolled steel and 22-gauge stainless. The complete answer for anyone who cuts sheet metal at home more than occasionally.

MIDWEST Aviation Snip Set — Left & Right Cut, Forged Blade, KUSH’N-POWER Grips (MWT-6510C) — The professional-grade pair. Forged blades rather than stamped, which holds a sharper edge longer under heavy use. The KUSH’N-POWER grip is genuinely comfortable for extended cutting sessions. MIDWEST is the brand that HVAC technicians and sheet metal workers reach for on the job. Includes left and right cut — pair with a yellow-handle straight snip for the complete set.

Klein Tools 2402S Straight-Cutting Aviation Tin Snips — Forged Blade, Offset Design — For the toolbox that needs one reliable straight-cut snip and nothing more. Offset blade design keeps knuckles clear of the work surface. Forged blade from Klein, who has been making professional hand tools since 1857. The single-snip option for trim work, flashing, and straight-line jobs where left and right curves aren’t part of the project.

As an Amazon affiliate, I earn from qualifying purchases. Thank you for supporting SkippityWhistles.

📖 Related Reads

How to Use a Utility Knife

The DIYer’s Toolbox

How to DIY It Safely

Once the color code clicks, aviation shears stop being the tool that sort-of works and start being the tool that gets reached for first. The right pair for the right cut, waste curling cleanly away, edge coming out smooth. It takes one job with all three colors to understand why one pair was never quite enough.


SkippityWhistles is part of the John D Reinhart content family. Writer, illustrator, videographer, and accidental filmmaker — find the whole story at JohnDReinhart.com.

7018

©2026 John D Reinhartskippitywhistles.com/ – all rights reserved
How to Use a Socket Wrench (And Why It’s the Most Satisfying Tool in the Box)

The socket wrench is the tool that makes you feel like you know what you’re doing. Here’s what the parts are called, what SAE and metric actually mean, and which size to buy first.

Ron Screwstrip’s dad had a socket set in a red metal case that lived on the second shelf of the garage. Ron was not allowed to touch it. This made it the most interesting thing in the garage.

He eventually got his own. It sat in its case for two years before he figured out what all the pieces were actually for. Once he did, it became the tool he reached for first — faster than a screwdriver, more satisfying than a wrench, and capable of reaching fasteners that nothing else could get to.

The socket wrench — also called a ratchet — is the tool that makes you feel like you know what you’re doing. Here’s everything you need to understand it before you open the case.

🧩 What the Pieces Are and How They Fit Together

A socket wrench set has two main components: the ratchet handle and the sockets. They work together as a team, and neither is much use without the other.

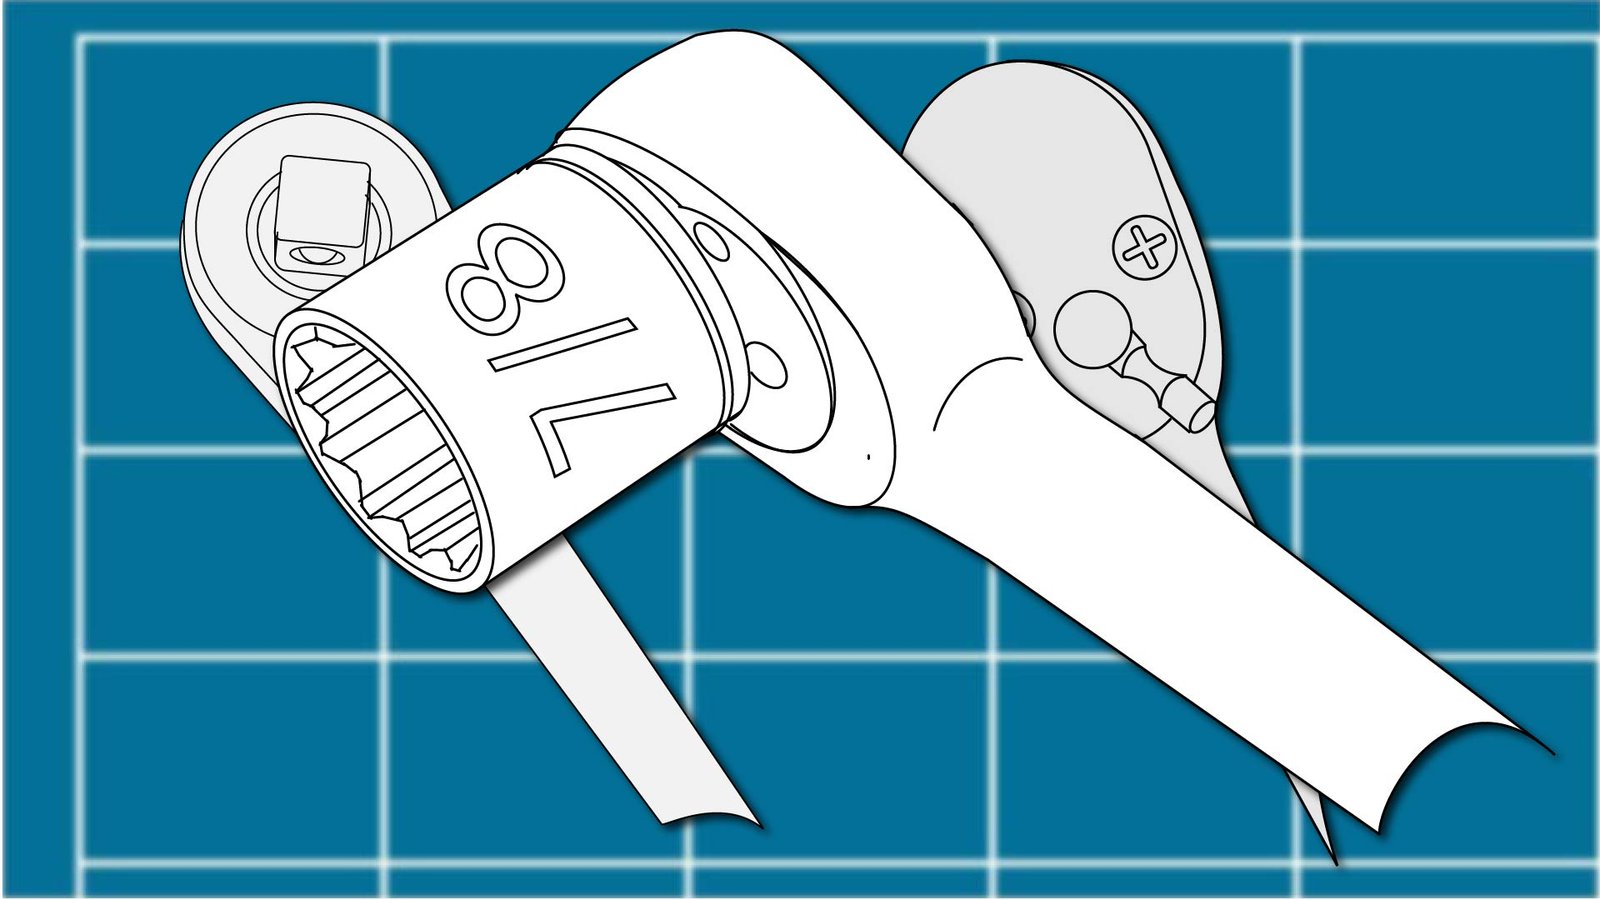
The ratchet handle is the part you hold. At one end it has a square post sticking out — this is called the drive, or the drive dog. This square post is what the sockets attach to. On the back or side of the ratchet head, there’s a small switch or lever. That switch controls the direction the ratchet turns. More on that in a moment.

The sockets are the small cup-shaped pieces that fit over fasteners — nuts and bolts, mainly. Each socket has two openings: one square hole on top that fits onto the drive post of the ratchet, and one hexagonal opening on the bottom that fits over the fastener. The size of that hexagonal opening is what determines whether a socket fits a given nut or bolt. The size is stamped right on the side of the socket so you can read it without guessing.

To assemble the tool: push a socket down onto the square drive post of the ratchet until it clicks into place. The click means a small ball bearing inside the drive has engaged a groove in the socket — it’s locked on and won’t fall off while you’re working. Fit the hexagonal end of the socket over the fastener, set your direction switch, and turn the handle. That’s the complete operation.

⚙️ The Ratchet Mechanism — This Is the Part That’s Genuinely Clever

Every other wrench requires you to remove it from the fastener and reposition it when you run out of turning arc. You turn, lift, reposition, turn again. On a stubborn bolt in a tight space this is a tedious process.

The socket wrench doesn’t work that way. Inside the ratchet head is a mechanism that engages the drive in only one direction. When you turn the handle in the working direction, the drive engages and turns the socket. When you swing the handle back to reset for the next turn, the mechanism disengages and the socket stays where it is. The fastener doesn’t move backward. You just swing the handle back and go again.

This means you never have to lift the tool off the fastener. You can work in tight spaces with very short swings of the handle, turning a bolt a few degrees at a time, as long as you need. On a fastener with twelve turns between loose and tight, this is the difference between a manageable job and a frustrating one.

The direction switch on the ratchet head reverses which direction the mechanism engages. Flip it one way for tightening (clockwise), flip it the other way for loosening (counterclockwise). If the wrench seems to be doing the wrong thing — loosening when you want to tighten — flip the switch. This is a thing that happens to everyone at least once, and it’s not a malfunction.

📏 SAE vs. Metric — What Those Words Actually Mean

This is the part that confuses most people who didn’t grow up around tools, and it’s worth understanding clearly because buying the wrong type of sockets means they won’t fit the fasteners you’re working with.

SAE stands for Society of Automotive Engineers. SAE sockets are measured in fractions of an inch — 1/4 inch, 3/8 inch, 7/16 inch, and so on. These sizes were standard on American-made vehicles and equipment for most of the twentieth century. If you’re working on anything older and American-made, you likely need SAE sockets.

Metric sockets are measured in millimeters — 8mm, 10mm, 13mm, and so on. Most vehicles made after about 1980, and virtually all vehicles made outside the United States, use metric fasteners. If you’re working on a Japanese, Korean, German, or modern American vehicle, you’re in metric territory.

An SAE socket will not fit a metric fastener, and a metric socket will not fit an SAE fastener. They’re close enough in some sizes to be tempting, but using the wrong standard is how fasteners get rounded off. When in doubt about which standard you need, look at the fastener and try sockets from both sets until one fits properly with no wiggle.

For most homeowners who work on a mix of household projects, furniture, and the occasional car, a combination set that includes both SAE and metric sockets is the practical answer. You buy one set, you have what you need regardless of what you’re working on.

📐 Drive Size — The Number That Determines What Works Together

Sockets and ratchet handles come in different drive sizes — the measurement of that square post on the ratchet and the square hole in the socket. The most common sizes are 1/4 inch, 3/8 inch, and 1/2 inch drive.

The 3/8-inch drive is the right starting point for most homeowners and DIYers. It handles the range of fasteners you’ll encounter in household projects, plumbing, basic automotive work, and general repairs — from small nuts to moderately large bolts. It’s the size most socket sets are built around, and the size most how-to guides assume you’re using.

The 1/4-inch drive is for small, precise work — electronics, tight spaces, small fasteners. The 1/2-inch drive is for heavy-duty automotive and mechanical work where serious torque is required. You’ll know when you need the 1/2-inch drive because the fasteners you’re dealing with will make the 3/8-inch feel inadequate. Start with 3/8-inch.

One important note: a 3/8-inch drive ratchet works with any 3/8-inch drive socket, regardless of brand. The drive standard is universal. You can mix and match ratchet handles and socket sets from different manufacturers as long as the drive size matches.

💪 Using It — The Actual Motion

Fit the socket over the fastener. The socket should sit flat and fully over the nut or bolt head with no gap showing. If it doesn’t seat fully, it’s the wrong size — try the next one up or down, or use a metric or SAE socket.

Set the direction switch for the direction you need. Tightening means clockwise; if you’re facing the fastener straight on, you turn the handle to the right. Loosening means counterclockwise — handle to the left.

Turn the handle in the working direction with steady pressure. When you’ve used up your turning arc, swing the handle back in the opposite direction — the ratchet disengages and the socket holds position — and turn again. Repeat until the fastener is where you want it.

For stubborn fasteners that won’t budge: most ratchet sets include extension bars — short metal rods that fit between the ratchet and the socket to reach fasteners in recessed locations, and also to increase your leverage slightly. If a fastener is genuinely seized and won’t move, penetrating oil (like WD-40) applied and left to work for fifteen to thirty minutes is a better first step than extreme force. Forcing a stubborn fastener with too much torque can strip threads or snap the bolt, which turns a tight fastener into a significantly worse problem.

🛒 Gear Worth Having

DEWALT Socket Set — 1/4″ & 3/8″ Drive, SAE & Metric, 34-Piece (DWMT73804) — Both drive sizes and both measurement standards in one set. The 72-tooth ratchet gives a 5-degree swing arc, which means you can work in very tight spaces with minimal handle movement. Hard-stamped markings on every socket so the sizes don’t wear off. DEWALT backs this with a lifetime guarantee. The right first socket set for a homeowner who wants one kit that handles everything.

CASOMAN 3/8″ Drive Impact Socket Set — 49-Piece, SAE & Metric, Cr-V Steel — A 3/8-inch drive set that covers the full range of common household and automotive fastener sizes in both standards. Chrome vanadium steel, 6-point sockets that grip fasteners without rounding them, includes extension bars and a universal joint for reaching awkward angles. Blow-molded case keeps everything organized. For the homeowner who’s settled on 3/8-inch drive and wants a comprehensive set.

Milwaukee 3/8″ Drive SAE/Metric Ratchet & Socket Mechanics Tool Set — 56-Piece — The professional-grade option. Milwaukee’s 90-tooth ratchet delivers a 4-degree arc swing — tighter than almost anything else at this price — which matters in engine bays and cramped mechanical spaces. The four-flat socket design prevents rolling when sockets are loose on a workbench. Backed by Milwaukee’s mechanics hand tool lifetime guarantee. For the homeowner who uses tools seriously and wants a set that lasts thirty years.

As an Amazon affiliate, I earn from qualifying purchases. Thank you for supporting SkippityWhistles.

📖 Related Reads

How to Use an Adjustable Wrench

How to Choose the Right Wrench

The DIYer’s Toolbox

Ron Screwstrip now owns a 3/8-inch drive set with both SAE and metric sockets in a molded case on his workbench. He reaches for it first. The direction switch confused him exactly once, on the first day. He has not made that mistake since. The red case from his dad’s garage is still out there somewhere. Ron would like it back.


SkippityWhistles is part of the John D Reinhart content family. Writer, illustrator, videographer, and accidental filmmaker — find the whole story at JohnDReinhart.com.

7017

©2026 John D Reinhartskippitywhistles.com/ – all rights reserved