Dual-Flush Toilets Explained: How the Buttons Operate

Two buttons, one tank, very different amounts of water — here’s what’s actually happening when you push each one.

Ron had a working theory about the two buttons on his in-laws’ toilet: the big one is for “a lot” and the small one is for “a little,” and beyond that he’d never thought about it once in eleven years of visits. Then the small button stopped doing anything at all, and “a lot” versus “a little” turned out not to explain a single thing about how to fix it.

That’s fair. Most people interact with a dual-flush toilet purely as two buttons on top of a tank, with no visibility into what’s happening underneath. Once you see the mechanism, both the water savings and the eventual repair make a lot more sense.

🔘 One Valve, Two Openings

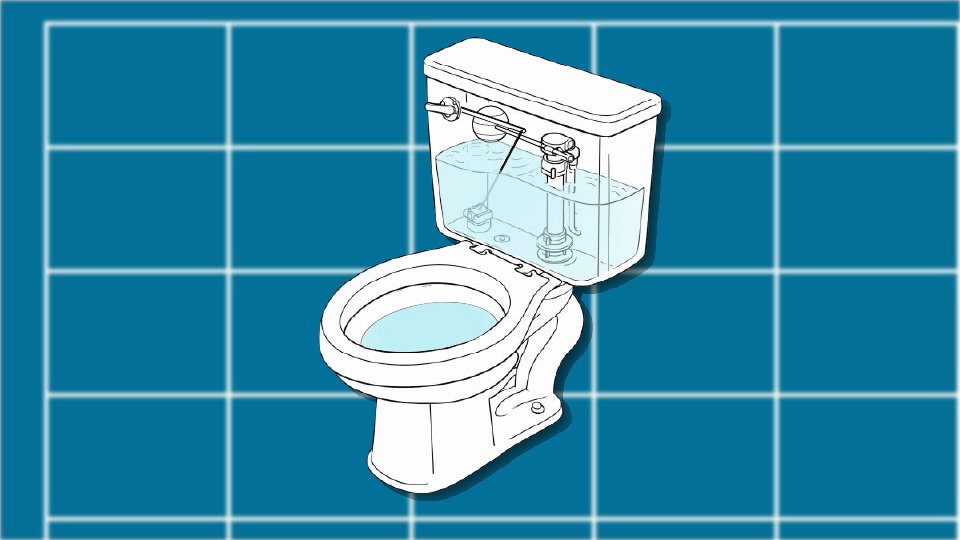
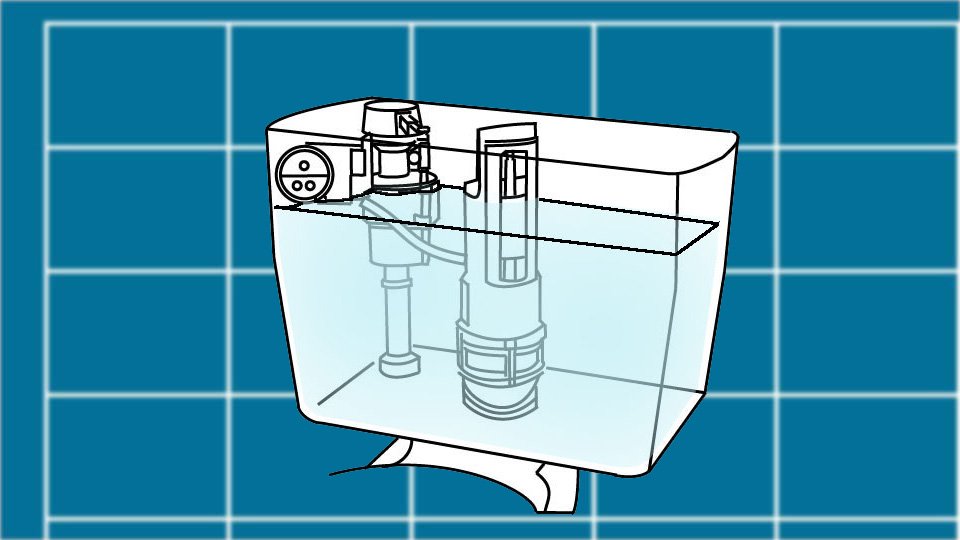
A dual-flush toilet uses a single flush valve (the mechanism at the bottom of the tank that opens to release water into the bowl) — but that valve has two different openings, or in some designs two separate valves that open to different degrees. The small button opens a smaller passage or opens the valve only partway, releasing roughly half the water. The large button opens the full passage, releasing the complete tank volume.

This matters because it’s not two separate flush systems bolted together — it’s one flush valve engineered to release water in two different amounts depending on which actuator gets pressed.

💧 Why Less Water Still Clears the Bowl

The reduced flush works because of siphon action (the suction effect created by a rush of water that pulls waste and water through the trap and into the drain line) — liquid waste needs less water volume to trigger that siphon and clear the bowl than solid waste does. The half-flush is calibrated to move enough water fast enough to start the siphon for liquid waste. The full flush releases more volume because solid waste needs more water moving through the bowl to clear the trap completely.

A dual-flush toilet typically uses somewhere around 0.8 to 1.1 gallons on the reduced setting and 1.6 gallons on the full setting, compared to 3.5 to 7 gallons per flush on toilets manufactured before the mid-1990s. That gap is the entire reason dual-flush systems exist — the buttons aren’t a gimmick, they’re a plumbing-code-driven water-savings feature.

🔄 Refilling the Tank: The Fill Valve’s Job

After either button releases water, a fill valve (the mechanism that refills the tank with water after a flush and shuts off automatically once the tank reaches the correct level) brings the tank back to ready. A float — either a ball on an arm or a cylindrical float around the fill valve shaft — rises with the water level and shuts the valve off at the right point. If a dual-flush toilet won’t stop running, the fill valve is almost always the first thing to check, not the buttons themselves.

The overflow tube (the open tube inside the tank that carries any excess water down into the bowl instead of letting the tank flood) is the backup — if the fill valve fails to shut off, water spills into the overflow tube instead of over the top of the tank. A tank that refills endlessly usually means the fill valve isn’t seating, not that something is wrong with the overflow tube itself.

🔧 When the Buttons Stop Working Right

If one button does nothing, the actuator arm connecting that specific button to the valve has often disconnected, corroded, or the seal on that side of the valve has degraded — common after several years, especially in hard-water areas where mineral buildup affects the seal’s ability to seat properly. If both buttons run continuously, suspect the fill valve first, then the main flush valve seal second. Most dual-flush repair kits replace the entire valve assembly at once rather than asking you to diagnose which specific seal failed, which is usually the faster and more reliable fix.

🛒 Gear Worth Having

Fluidmaster 507AKP7 PerforMAX Universal Dual Flush Valve Repair Kit — Replaces the entire dual-flush valve assembly at once instead of chasing down which individual seal failed. Fits most two-button tanks without swapping the whole toilet.

Korky 528MP QuietFILL Platinum Fill Valve — A fill valve upgrade for the toilet that refills forever or refills loudly enough to announce itself through the whole house. Adjustable for tank height, quiet by design.

Neiko 60166A Heavy Duty Toilet Plunger with Funnel Cup — The funnel cup seals against the bowl’s curve instead of just sitting on top of it, which is the difference between a plunger that works and one that just splashes.

As an Amazon affiliate, I earn from qualifying purchases. Thank you for supporting SkippityWhistles.

📖 Related Reads


SkippityWhistles is part of the John D Reinhart content family. Writer, illustrator, videographer, and accidental filmmaker — find the whole story at JohnDReinhart.com.

3014

©2026 John D Reinhartskippitywhistles.com/ — All rights reserved

How Standard Toilets Flush: The Chain Reaction Behind One Handle

One handle, one flush, no buttons to choose from — here’s the full mechanical chain that happens the second you push it down.

Ron’s toilet only has one flush option, which he considers a feature, not a limitation. “Nothing to overthink,” he says, pushing the handle the exact same way every time regardless of what’s being flushed. He’s not wrong that it’s simple. He’s just never once wondered what happens in the two seconds between pushing the handle and the water actually moving — which is a longer chain of parts than the one button suggests.

A standard, single-flush toilet looks like the simplest fixture in the house because it only asks you to do one thing. Underneath, it’s a small, deliberate sequence of parts triggering each other in order — and knowing that sequence is what turns a mysterious running toilet into an obvious two-minute fix.

🎯 It Starts With the Trip Lever

Pushing the handle down rotates a trip lever (the arm inside the tank connected to the handle) upward. A chain or a rigid lift arm connects that trip lever to the flapper below it. This is the entire mechanical purpose of the handle — it doesn’t touch the water at all. It just lifts one part.

🔓 The Flapper Opens the Flush Valve

The flapper (the rubber or plastic seal that sits over the flush valve opening at the bottom of the tank) is lifted away from the flush valve seat the moment the trip lever raises it. This opens a direct path for the entire tank of water to drop into the bowl at once — unlike a dual-flush valve, a standard flapper doesn’t have a partial-open position. It’s either sealed or it’s open, which is why standard toilets only have the one flush volume to offer.

🌊 The Rush of Water Creates the Siphon

As water drops from the tank into the bowl, it fills the bowl fast enough to trigger siphon action (the suction effect created by a rush of water that pulls waste, water, and air through the trap and into the drain line). This siphon is the actual cleaning mechanism — it’s not gravity alone pushing waste out, it’s the rapid water flow creating enough suction through the trap to pull everything through. Once the tank empties enough that the flow slows down, the siphon breaks, air enters the trap, and the bowl refills to its normal resting water level.

⚖️ The Flapper Reseats Itself

As the tank drains, the flapper — buoyant on its own, or attached to a float that rises and falls with the water — settles back down and reseals the flush valve opening once the tank is nearly empty. If a flapper is warped, cracked, or simply the wrong size for the flush valve seat, it won’t reseat cleanly, and water leaks slowly past it into the bowl. That slow leak is the single most common reason a toilet refills every so often on its own, and it’s usually a five-dollar part.

🔄 The Fill Valve Refills the Tank

Once the flapper reseals, a fill valve (the mechanism that refills the tank with water after a flush) opens and starts refilling the tank. A float on the fill valve rises with the water level and shuts the valve off once the tank reaches the height set by the fill valve’s adjustment. Some of the incoming water is also routed through a small refill tube into the overflow tube (the open tube inside the tank that prevents overfilling by draining excess water into the bowl), which restores the bowl’s resting water level at the same time the tank refills.

🔧 Reading the Failure Points

  • Handle feels loose or doesn’t lift anything: the chain connecting the trip lever to the flapper has slipped off or has too much slack.
  • Toilet runs constantly: check the flapper seal first, the fill valve shutoff second.
  • Weak flush that doesn’t fully clear the bowl: often a flapper that closes too early, cutting the siphon off before it finishes its job — sometimes fixable by adjusting the chain length so the flapper stays open a beat longer.

🛒 Gear Worth Having

Fluidmaster 5403 Universal Toilet Flapper — Adjustable frame fits most standard flush valve seats without needing the exact original brand, which matters since most toilets outlive their box and instructions by a decade.

Korky 528 Universal Toilet Fill Valve — A direct swap when the tank refills too slowly, too loudly, or won’t shut off — adjustable height covers most standard tank sizes without measuring first.

OXO Good Grips Toilet Plunger with Holder — Comes with a stand that actually contains the drips, which matters more than the plunger itself once you know what’s involved in the alternative.

As an Amazon affiliate, I earn from qualifying purchases. Thank you for supporting SkippityWhistles.

📖 Related Reads


SkippityWhistles is part of the John D Reinhart content family. Writer, illustrator, videographer, and accidental filmmaker — find the whole story at JohnDReinhart.com.

3013

©2026 John D Reinhartskippitywhistles.com/ — All rights reserved

How to Repair Broken Porcelain and Pottery (Without Losing Your Mind)

A broken mug or chipped porcelain doesn’t have to be a loss. With the right glue and a little patience, you can make the repair nearly invisible. Here’s exactly how.

Tink. Crash.

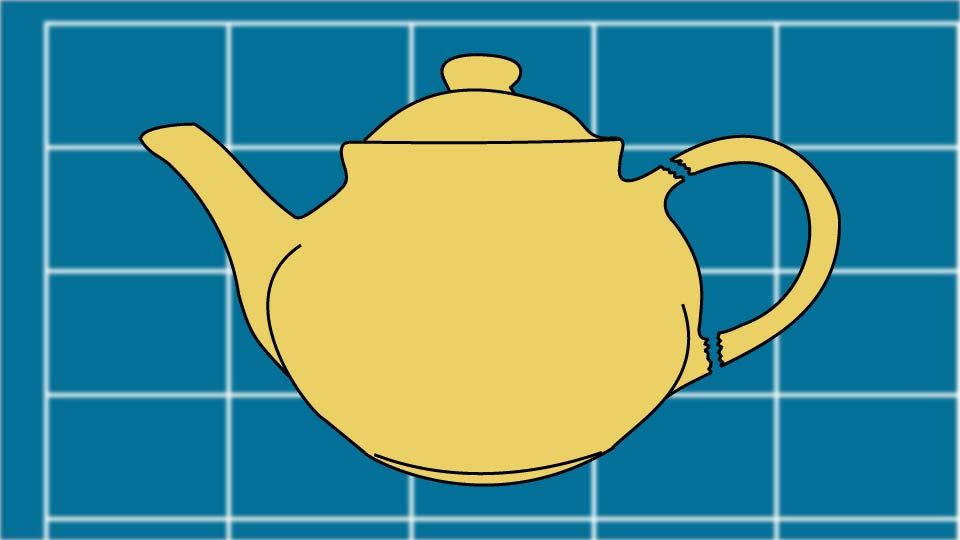
“Run, Luke, run! That was Grandma’s teapot!”

Porcelain and pottery are deceptive. They look solid and permanent sitting on the shelf, and then one nudge — one moment of physics doing what physics does — and you’re standing over a pile of shards wondering if this is the kind of thing that can be fixed or the kind of thing you don’t tell anyone about.

Good news: it’s usually the kind of thing that can be fixed. The right adhesive, a little patience, and the willingness to follow a few simple steps can make a break nearly invisible. Ron Screwstrip has done this more times than he’d like to admit — the workshop has a shelf dedicated to “things that were fine before I got to them.”

Here’s how to handle it properly.

🔍 Step One: Assess the Damage Honestly

Before you reach for any glue, look at what you’re actually working with. Not all breaks are equal, and the type of break determines the type of fix.

A clean break — where the piece snapped into two or three large sections with smooth, matching edges — is the best possible outcome. Clean breaks are what super glue and epoxy were designed for. The pieces fit back together precisely, and when done right the repair is nearly invisible.

Multiple small fragments are trickier but still manageable. The key is patience and working in sequence — more on that in a moment.

Missing shards, where a piece has crumbled or gone completely missing, require a gap-filling approach. You can still make a solid structural repair, but cosmetically you’re working with what you have.

A break at a high-stress point — like the handle of a mug or teapot that will regularly bear the weight of a full pot of hot liquid — is worth thinking carefully about. Glue can create a strong bond, but “strong” is relative when the alternative is a pot of boiling tea launching itself off the handle at an inconvenient moment. For purely decorative pieces, repair away. For load-bearing connections on items you actually use, consider whether the repair is genuinely safe before proceeding.

🧴 Choosing the Right Adhesive — This Is the Important Part

There are two adhesives worth knowing about for porcelain and pottery repair, and they are not interchangeable. The break tells you which one you need.

Super glue — technically called cyanoacrylate, or CA glue — is for clean, tight-fitting breaks where the edges match closely and there are no gaps to fill. It sets in seconds, dries completely clear, and when applied correctly leaves an almost invisible bond line. The gel formula is the one you want for this job: it’s thicker than liquid super glue, which means it doesn’t run into places you don’t want it, and it gives you slightly more time to align the pieces before the bond sets. Apply one small drop per square inch of surface area — not more. More glue does not mean a stronger bond. It means a hazy, messy joint that’s harder to close cleanly.

Two-part epoxy is for larger breaks, missing pieces, or any repair where there’s a gap between the surfaces. Epoxy comes in two parts — a resin and a hardener — that you mix together in equal amounts immediately before use. Once mixed, you have a working window of five to thirty minutes depending on the formula, after which it begins to set. Epoxy is stronger than super glue for gap-filling applications and bonds the surfaces with a rigid, durable connection. It also dries clear in most formulas, which matters for porcelain repair. Mix only as much as you need — mixed epoxy cannot be stored — and apply it sparingly. Excess epoxy that squeezes out of the joint when you press the pieces together will harden into a raised ridge that’s extremely difficult to remove cleanly.

A quick rule of thumb: tight-fitting clean break with no gaps? Super glue gel. Larger break, missing material, or any gap between surfaces? Two-part epoxy.

One thing both adhesives have in common: neither belongs on your skin. Super glue bonds to the moisture on skin instantly — it uses that moisture as part of its chemical bonding process — and getting your fingers stuck together is both uncomfortable and embarrassing to explain. Epoxy is caustic and difficult to remove once cured. Wear nitrile gloves for either job. This is not optional advice.

🧹 Before You Glue Anything: Clean and Dry Fit

The surfaces being glued need to be completely clean and completely dry. Dust, oil, old dried glue, or any residue on the break surface will prevent a proper bond. Wipe each broken edge gently with a cotton ball or pad dampened with rubbing alcohol, then let everything dry completely before touching it again. Alcohol evaporates quickly, so this only takes a few minutes.

Once the surfaces are clean, do a dry fit: lay all the pieces out and practice fitting them together without any glue. This step is not optional for multi-piece repairs, and it pays off even for simple two-piece breaks. You need to know how the pieces align before the glue goes on — because once super glue touches both surfaces, you have seconds before the bond sets. There is no “let me just adjust that slightly.” The dry fit is your rehearsal.

For a piece that broke into multiple fragments, think about the order of assembly before you start. Work from the inside of the break outward — the pieces that were deepest inside the break go first, and each successive piece builds toward the outer surface. Imagine the point of impact and work backwards from there. The last piece to go in is usually the one at the surface of the original impact point.

🔧 Applying the Adhesive

For super glue gel: apply one small drop per square inch of surface area to one side of the break only — not both sides. Press the pieces firmly together and hold them in place by hand for a full minute. You’ll feel the bond develop — a slight resistance when you try to shift the pieces. Don’t let go early. The glue feels set before it actually is. Wipe away any squeeze-out immediately with a dry cloth; once super glue cures, it’s there permanently.

For two-part epoxy: squeeze equal amounts of the resin and hardener onto a disposable surface — a piece of cardboard or a paper plate works fine — and mix them together thoroughly with a disposable stick. Scrape from the sides and bottom of the mixing area to ensure the two components are fully combined; unmixed epoxy won’t cure properly. Apply a thin, even coat to one surface, press the pieces together, and hold or clamp the joint until the epoxy sets. For a five-minute epoxy, that’s about five minutes of held pressure. Don’t skip this — pressure during the set phase is what produces a tight, clean bond.

🗜️ Clamping and Curing

For super glue repairs: hand pressure for one minute is usually sufficient. Light handling is possible after five to ten minutes, but the full bond strength develops over twenty-four hours. Don’t stress-test the repair before then.

For epoxy repairs: the joint needs to be held without movement until the epoxy sets. Small clamps work well. Rubber bands looped around the repair work for round pieces like mugs. Painter’s tape wrapped snugly around the joint works for odd shapes. The goal is to hold the pieces together without shifting while the epoxy develops its initial grip. Check the manufacturer’s instructions — five-minute epoxy sets in five minutes but cures to full strength in an hour. Give it the full hour before handling.

One important note about clamping with epoxy: whatever you use to hold the pieces together should not be something that can’t have epoxy on it. Epoxy will bond to painter’s tape, rubber bands, and clamp faces if it squeezes out. Use disposable materials or surfaces you don’t care about for clamping.

✨ Cosmetic Touch-Ups

For small remaining gaps after the repair sets, gap-filling super glue — a thicker, slower-setting formula specifically designed to fill small voids — can be applied with a toothpick and smoothed level with the surrounding surface. It dries clear, so on light-colored porcelain it may disappear entirely.

If the repaired area needs color matching — for a decorative piece where the break line is visible — ceramic touch-up paint or glaze is available at craft stores and some hardware stores. This is a cosmetic step, not a structural one, and it requires the adhesive to be fully cured first. Sand any raised glue ridges lightly with fine-grit sandpaper before painting. Go gently — porcelain is not forgiving of aggressive sanding.

🚫 When Not to Glue

Some repairs aren’t worth attempting, and it’s better to know this before you’ve committed the adhesive.

Extremely thin, fragile shards that can’t be handled without breaking further aren’t good candidates for gluing. If you can’t align the pieces without them disintegrating, the repair isn’t practical.

Pieces that will go in the dishwasher or be exposed to extreme heat regularly are poor candidates for adhesive repair. Both super glue and epoxy can be affected by repeated high-heat and moisture cycling, and a repair that holds perfectly on the shelf may fail in the dishwasher. Hand-wash repaired pieces, and accept that the repair has limits.

And Grandma’s teapot handle — the one that will bear the weight of a full pot of boiling water every morning — deserves an honest assessment. The repair might hold. But “might” is doing a lot of work in that sentence when boiling water is involved. A decorative display piece: absolutely repair it. The working handle on a heavily-used pot: proceed carefully and test the repair with cold water first.

🛒 Gear Worth Having

Gorilla Super Glue Gel XL — 25g, Clear, Anti-Clog Cap — The gel formula is the right choice for porcelain repair: thicker than liquid super glue so it doesn’t run, dries completely clear, and the anti-clog cap means the bottle is still usable three months from now when you need it again. Sets in 10-45 seconds, full cure in 24 hours.

J-B Weld ClearWeld 5-Minute Epoxy Syringe — 25ml, Clear — The two-part epoxy for gap-filling repairs and larger breaks. The syringe dispenses equal amounts of resin and hardener automatically, so there’s no measuring required. Sets in five minutes, cures to full strength in one hour, dries clear. Mixing tray and stick included. 3,900 PSI tensile strength — stronger than the porcelain around the repair once cured.

Gorilla Super Glue with Brush & Nozzle Applicator — 12g, Clear — For repairs where precision application matters. The fine-bristle brush gets into tight cracks and detailed areas; the precision nozzle handles direct application. Particularly useful for decorative pieces with complex surfaces where a standard tip would apply too much glue at once.

Nitrile Disposable Gloves — 100-Count Box, Powder-Free — Wear these for any adhesive work. Super glue bonds to skin using the moisture it finds there, and getting fingers stuck together is genuinely unpleasant. Epoxy is caustic. A box of nitrile gloves costs a few dollars and solves both problems permanently.

As an Amazon affiliate, I earn from qualifying purchases. Thank you for supporting SkippityWhistles.

📖 Related Reads

How to Use Epoxy: The Complete Beginner’s Guide

How to Use Super Glue Without Gluing Your Fingers Together

The DIYer’s Toolbox

Ron Screwstrip repaired the workshop mug — the one his daughter painted for him in second grade — with super glue gel on a Sunday afternoon. The repair took twelve minutes including cleanup. The mug is back on the shelf. He hasn’t mentioned it to anyone, but he looks at it differently now. That’s the quiet satisfaction of a repair done right.


SkippityWhistles is part of the John D Reinhart content family. Writer, illustrator, videographer, and accidental filmmaker — find the whole story at JohnDReinhart.com.

2018

©2026 John D Reinhartskippitywhistles.com/ – all rights reserved
What to Look for in a Multi-Tool (Or: The Tool That Doesn’t Belong in the Toolbox)

A good multi-tool isn’t supposed to live in the toolbox — it’s supposed to live in a pocket, and get used almost every single day.

Ron used to roll his eyes at multi-tools, fairly confident that anything advertising “100 tools in one” was mostly just advertising a toothpick nobody asked for. Then a coworker loaned him one to snip a zip tie, and somehow that tool has been in Ron’s pocket every single day since — opening boxes, tightening a loose screw, doing a dozen tiny jobs a real toolbox was never getting hauled out for. The gimmick skepticism was fair. The daily use snuck up on him anyway.

A multi-tool is a strange category, because it’s not really meant to live in the toolbox at all — it’s meant to live on you, for the small stuff that shows up when the actual tools are nowhere nearby.

🎯 Decide the Core Use First

Mostly home repairs? Outdoor and camping use? Something for genuine emergencies, or just light everyday tasks? Answering that question honestly narrows the field faster than reading a stack of comparison reviews ever will.

🧰 What’s Actually Inside It

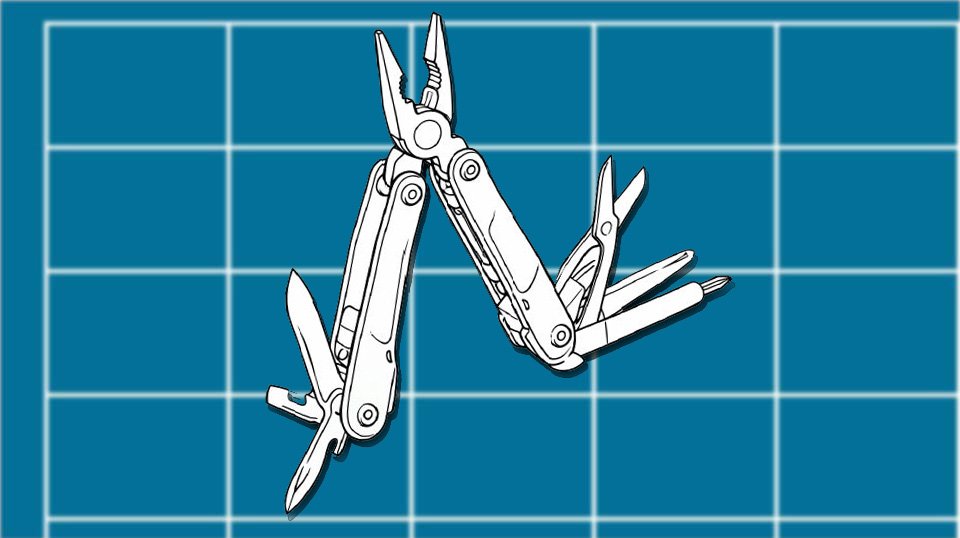
Most multi-tools include pliers (needle-nose and standard), wire cutters, flathead and Phillips screwdrivers, a knife blade, scissors, and often a small saw or file. Some add specialty extras — a bottle opener, an awl, a wire stripper. The rule worth remembering: more tools crammed in doesn’t automatically mean better. A handful of genuinely well-made tools you’ll actually reach for beats a kitchen-drawer’s worth of gimmicks folded into one handle.

🔩 Build Quality: Where Cheap Ones Actually Fail

  • Stainless steel holds up for decades; cheaper alloys wear and dull fast, and a broken multi-tool defeats the entire point of carrying one.
  • Solid pivot points mean less wobble under real pressure.
  • A dependable locking mechanism is non-negotiable — a poorly made one can fold shut mid-use, which is a genuinely bad time for the hand holding it.
  • Just as important as the lock itself is an easy, deliberate release; a lock that’s a fight to open gets skipped, and a skipped lock is a safety feature nobody’s actually using.

🖐️ Comfort and Grip

Handle shape matters more than it seems like it should — does it sit comfortably in hand with any given tool extended, or does one specific tool always feel awkward? Textured grip genuinely helps once hands are wet or greasy, which is exactly when a multi-tool tends to get used. Heavier builds feel sturdy but ride less comfortably in a pocket; lighter builds go anywhere easily but trade off some robustness. Hold it, flip a few tools open, and the right feel usually becomes obvious fast.

⚖️ Portability vs. Function

A heavier tool with more capability is a tool that’s more likely to get left behind on days it would’ve actually helped. A lighter one goes everywhere, at the cost of some of that heavier capability. Worth deciding upfront how it’ll actually get carried — pocket, belt sheath, glovebox — since a multi-tool that’s genuinely present when needed beats a more capable one sitting in a drawer at home. And worth remembering for travel: it is not making it through airport security in a carry-on, full stop.

💰 Price: Buy Once, Buy Right

Quality multi-tools generally run $50 to $150. Mid-tier brands often deliver real durability without the top-shelf price tag. Ultra-cheap models tend to frustrate fast and fail early — this is squarely a buy-once-correctly category, not a buy-the-cheapest-one-and-see category. Most people who go cheap first end up buying a better one within the year anyway, meaning the cheap one never actually saved anything.

🚫 The Gimmick Trap

Skip anything selling itself purely on tool count — nobody is actually using the included toothpick, and a tool nobody uses is just dead weight riding along with the ones that matter. Look specifically for tools that lock, test the pliers’ spring tension before buying if possible, and confirm both a standard Phillips and a flathead are included, since those two alone cover a surprising share of daily use.

🛒 Gear Worth Having

Gerber Gear Suspension Multi-Plier — A well-rounded tool selection in a sturdy frame, at a price that doesn’t require a second thought before buying it once.

Leatherman Wave Plus Multi-Tool — A step up in build quality and tool selection for anyone reaching for a multi-tool daily rather than occasionally.

Nylon Multi-Tool Belt Sheath — Keeps the tool somewhere it’s actually going to be worn, instead of sitting forgotten in a junk drawer at home.

As an Amazon affiliate, I earn from qualifying purchases. Thank you for supporting SkippityWhistles.

📖 Related Reads


SkippityWhistles is part of the John D Reinhart content family. Writer, illustrator, videographer, and accidental filmmaker — find the whole story at JohnDReinhart.com.

7050

©2026 John D Reinhartskippitywhistles.com/ — All rights reserved

How to Shut Off the Water to Your House (Or: Water Always Waits Until You’re Out of Towels)

Water always waits until you’re out of towels. Finding the shutoff valve five minutes before the emergency beats finding it during one.

Ron discovered his home’s main water shutoff valve for the first time at the exact moment a burst supply line turned his bathroom into a decorative fountain worthy of a Roman courtyard. He found it eventually, soaked to the elbows, mid-panic, in a basement he’d never fully explored. It worked fine. It would have worked just as fine five uneventful minutes earlier, if Ron had known where to look before the emergency instead of during it.

There are two kinds of homeowners: the ones who already know where their main shutoff valve is, and the ones who are about to find out the hard way. This is how to become the first kind on purpose.

🔍 Finding the Main Shutoff

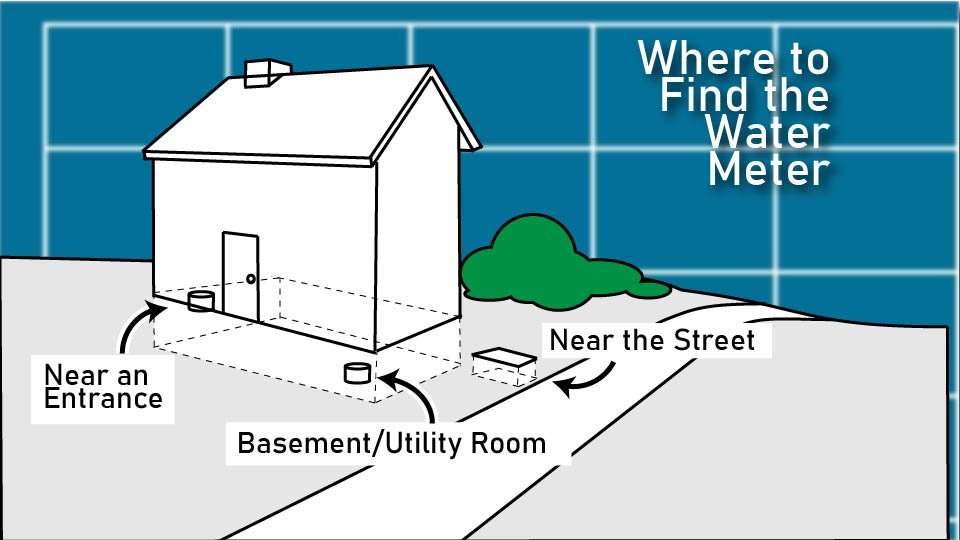
Inside the house, check the basement near the front wall, a crawlspace, a utility room, or near the water heater — following the incoming pipe from the street usually leads straight to it, since that pipe typically enters low on an exterior wall.

In warmer climates, the shutoff often lives outside instead: near the foundation, in a ground box labeled “Water,” or close to the street or sidewalk. A round or rectangular concrete or metal lid in the yard is a strong candidate worth lifting.

🔧 Identifying the Valve Type

A gate valve (a round wheel handle, like an old-fashioned spigot) closes by turning clockwise until it stops — go firm but gentle, since a valve that hasn’t moved in years can resist like a teenager asked to clean a room.

A ball valve (a straight lever handle) closes with a single quarter turn clockwise, until the handle sits perpendicular to the pipe instead of parallel to it. Parallel means open, perpendicular means closed — clear, decisive, no drama, which is exactly what an emergency actually wants from a valve.

✅ Confirming It Worked

Turn on a sink faucet. If the water runs briefly and slows to a stop, the shutoff worked. If it keeps flowing confidently like nothing happened, the wrong valve got turned, only a branch line got shut off, or what got found was a decorative relic from 1978 rather than a functioning valve. Try again.

❓ If the Valve Can’t Be Found

Look for a water meter box near the street, usually under a metal or plastic lid marked “Water” — there’s typically a shutoff valve on the street side of the meter, sometimes requiring a meter key or a wrench to operate.

If it looks municipal, intimidating, or genuinely unclear, calling the water company directly beats guessing; they’d much rather walk through a controlled shutoff than deal with a flooded basement later.

🐌 Turning It Back On Slowly

Once the emergency’s resolved, open a faucet inside the house first — nothing will happen yet, since the water’s still off.

Turn the main valve back on slowly rather than all at once, and let the open faucet hiss and spit as trapped air purges out of the lines.

This slow reopening prevents pressure shock, which is plumbing’s version of slamming every door in the house at once.

📅 Do This Today, Not During the Emergency

Locate the shutoff valve now, confirm it actually turns, clear any clutter blocking access to it, and show everyone else in the house exactly where it is.

None of this is advanced plumbing — it’s just preparedness, and preparedness is the entire difference between standing in a flooding bathroom shouting for help and calmly saying “hold on, I’ve got this” while walking to the basement.

🛒 Gear Worth Having

Water Meter Shutoff Key — The specific tool for a street-side meter valve, which a regular wrench often can’t grip properly on its own.

Adjustable Valve Wrench — Extra leverage for a gate valve that hasn’t been touched in years and is putting up exactly the resistance you’d expect.

Water Leak Detector Alarm — Catches a slow leak long before it becomes the kind of emergency this whole post is about, placed near water heaters, washing machines, or under sinks.

As an Amazon affiliate, I earn from qualifying purchases. Thank you for supporting SkippityWhistles.

📖 Related Reads


SkippityWhistles is part of the John D Reinhart content family. Writer, illustrator, videographer, and accidental filmmaker — find the whole story at JohnDReinhart.com.

3018

©2026 John D Reinhartskippitywhistles.com/ — All rights reserved

How to Use Teflon Tape (Or: The Direction Is the Whole Trick)

Teflon tape only has one real trick — wrap it the wrong direction and it unravels itself before the fitting even goes on.

Ron’s first piece of Teflon tape vanished somewhere between the roll and the fitting, the way the first piece always does. His second attempt wrapped on backwards, and by the time he’d threaded the fitting halfway on, the tape had unraveled itself into a single sad strand, twisted up like a tiny shoelace. His third attempt finally held — not because Ron had gotten better at wrapping tape, but because he’d finally wrapped it the direction it actually needed to go the whole time.

Teflon tape has exactly one detail that determines whether it works or unravels into a shoelace, and once that detail clicks, the tape stops fighting you.

🎯 What It’s Actually Doing

Teflon tape doesn’t glue anything together. It fills the tiny gaps between threaded surfaces, reduces friction so the fitting tightens down fully, and creates a watertight, airtight seal purely through that snug fit. It’s built specifically for threaded pipe connections — nothing else.

✅ Where It Belongs, ❌ Where It Doesn’t

Use it on threaded metal or plastic pipe, shower arms, threaded supply line fittings, and gas-line fittings (but only with gas-rated tape).

Skip it entirely on compression fittings, flared fittings, push-to-connect fittings, and anything that already seals with a rubber gasket.

If the seal comes from squeezing or flaring rather than threading, tape isn’t part of that equation at all, and wrapping it on anyway just adds bulk without adding any actual seal.

🔄 The Direction That Changes Everything

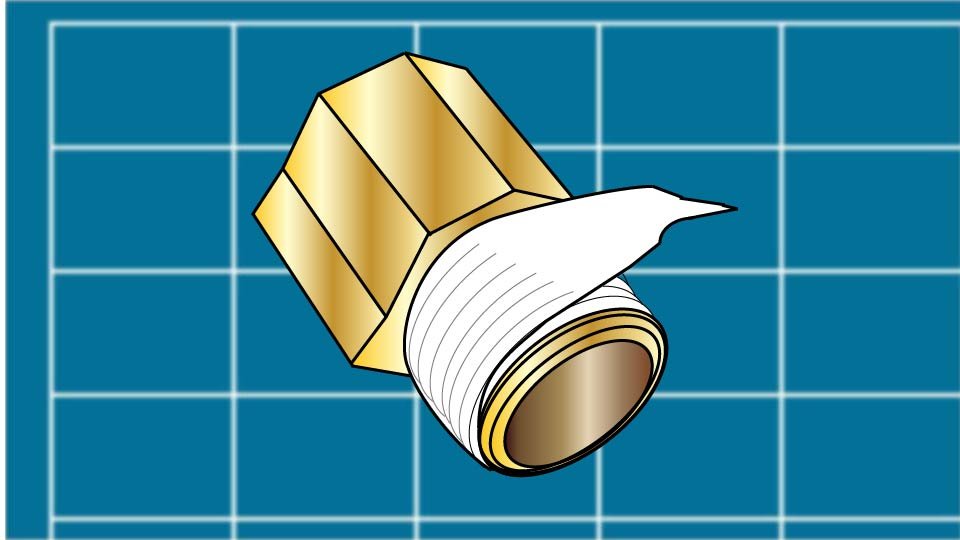
Hold the fitting facing you, threaded end out, and wrap the tape clockwise — the same direction the fitting turns when you tighten it.

Wrapped that way, threading the fitting on actually presses the tape tighter into the threads with every turn.

Wrapped the other way, threading the fitting on unwinds the tape instead, which is exactly the shoelace incident Ron’s second attempt turned into.

This one detail is responsible for more “why won’t this seal” frustration than everything else on this list combined.

📏 How Much Tape Actually Helps

Two to three wraps covers most household fittings; three to five suits larger ones.

More tape doesn’t mean a better seal — it can actually prevent the fitting from tightening fully, crack a plastic fitting under the extra bulk, or push loose material into the pipe’s interior.

This is a case where doing more genuinely makes the result worse, not just wasteful.

🚫 Keep It Off the Opening

Start wrapping about one thread back from the very end of the pipe, rather than right at the opening. Tape applied flush with the opening can shred loose material into the pipe itself, which travels downstream and eventually clogs a valve or aerator that had nothing to do with the original job.

🎨 Does Color Matter?

  • White tape is the standard for household water plumbing and covers most DIY jobs by default.
  • Yellow tape is rated specifically for gas lines and isn’t interchangeable with white for that purpose.
  • Pink tape suits heavier-duty water applications.

When genuinely unsure, white handles the overwhelming majority of household water fittings correctly.

🆚 Tape vs. Pipe Dope

Pipe joint compound, or pipe dope, is the other common sealing option, and some plumbers prefer it on metal fittings specifically.

For most household DIY work, Teflon tape is cleaner, simpler, and plenty sufficient on its own — pipe dope earns its place on tougher, more demanding jobs, and the two occasionally get used together rather than as strict alternatives.

🛒 Gear Worth Having

White PTFE Thread Seal Tape, Multi-Pack — Covers the overwhelming majority of household water fittings, and a multi-pack means the roll never runs out mid-project.

Yellow Gas-Rated PTFE Tape — The only tape actually rated for gas-line fittings — white tape isn’t a substitute here, full stop.

Pipe Joint Compound (Pipe Dope) — The companion sealant for tougher metal fittings, worth having on hand for the jobs tape alone doesn’t quite cover.

As an Amazon affiliate, I earn from qualifying purchases. Thank you for supporting SkippityWhistles.

📖 Related Reads


SkippityWhistles is part of the John D Reinhart content family. Writer, illustrator, videographer, and accidental filmmaker — find the whole story at JohnDReinhart.com.

3016

©2026 John D Reinhartskippitywhistles.com/ — All rights reserved

Understanding Faucets: What’s Actually Happening Under the Handle

Every faucet is one of four basic types under the handle — and knowing which one you have tells you exactly why it’s dripping.

Ron’s kitchen faucet developed a drip a few years back, and his solution was to crank the handle a little harder every time he shut it off — reasoning, more or less, that if a little pressure stopped ninety percent of the drip, a lot of pressure should stop all of it. It didn’t. It just wore out the handle faster and left him twisting it like Godzilla twice a day.

A faucet looks like one lever controlling water, but underneath the handle is a specific valve mechanism doing the actual work — and which mechanism you’ve got determines both why it eventually drips and what fixing it actually involves.

🔀 Four Valve Types, One Job

Nearly every residential faucet uses one of four internal valve types.

  • A compression valve (the oldest style, using a rubber washer that compresses against a valve seat to stop flow) is common in older two-handle faucets and is the type most prone to dripping, since the washer wears with every use.
  • A cartridge valve uses a replaceable cartridge (a self-contained unit that controls both flow and temperature) that slides or turns to open and close — common in modern single-handle faucets.
  • A ball valve uses a slotted metal or plastic ball that rotates to align with inlet ports, common in older single-handle kitchen faucets.
  • A ceramic disc valve uses two closely fitted ceramic discs that slide across each other to control flow, found in many higher-end modern faucets, and tends to be the most drip-resistant of the four because ceramic doesn’t wear the way rubber does.

💧 Why Faucets Actually Drip

  • A compression faucet drips because the washer has worn down and no longer seals fully against the valve seat (the fixed surface inside the faucet body that the washer presses against to stop water flow) — the fix is a new washer, and sometimes a resurfaced or replaced seat if it’s become pitted.
  • A cartridge faucet drips when the O-rings (small rubber rings that seal around the cartridge to prevent leaks) inside or around the cartridge harden and lose their seal, or when the cartridge itself wears out internally — the fix is usually a full cartridge swap rather than an individual seal, since cartridges are sold and serviced as one unit.
  • Ball and ceramic disc valves drip less often, but when they do, it’s typically worn internal seals or springs, and again the repair path is usually a manufacturer-specific replacement part rather than something generic.

🌬️ The Aerator: A Different Kind of Problem

An aerator (the small mesh screen screwed onto the tip of a faucet spout that mixes air into the water stream) doesn’t cause drips, but it’s the most common reason for reduced water pressure or a sputtering stream. Mineral deposits build up in the screen over time, especially in hard-water areas, and clog the small openings. Unscrewing and rinsing or replacing the aerator solves a shockingly large share of “my faucet feels weak” complaints that have nothing to do with the valve at all.

🔧 One Handle vs. Two: Why It Changes the Repair

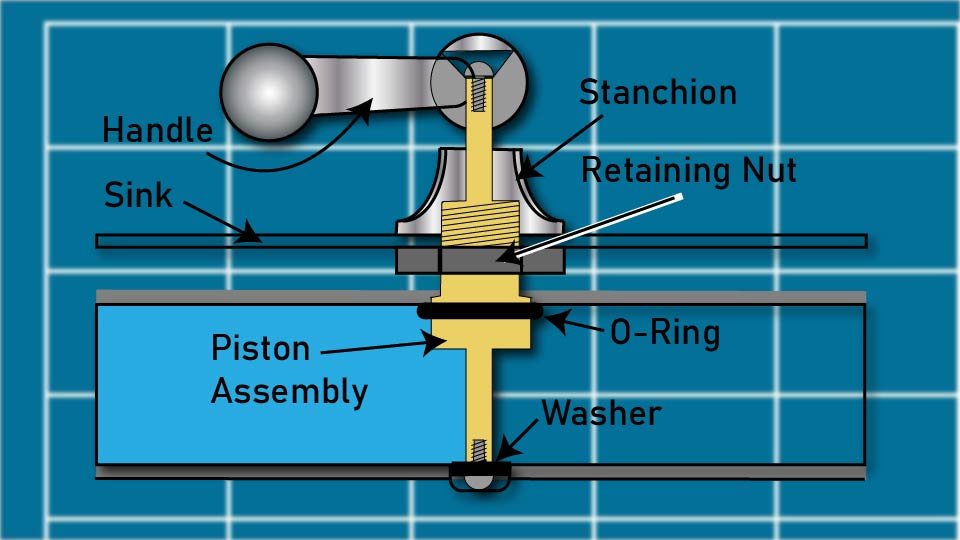
A two-handle faucet almost always uses compression valves — one per handle, one controlling hot, one controlling cold — which means each side can fail independently and each has its own washer and seat. A single-handle faucet uses one of the other three valve types, controlling both temperature and flow through a single mechanism, which means there’s exactly one part doing all the work, and exactly one part to replace when it fails.

🤔 Repair or Replace: Reading the Signs

A dripping faucet with a sound body and finish is almost always worth repairing — replacement parts for all four valve types are inexpensive and widely available, and the labor is usually shorter than a trip to the hardware store to buy the part. Replacement becomes the better call when the faucet body itself is corroded, when the specific cartridge or valve for an older or discontinued model is no longer available, or when a persistent leak has already caused damage to the surrounding fixture. As with most fixture repairs, matching the specific cartridge or valve model to your exact faucet brand is the detail that makes or breaks the fix — and it’s a detail worth confirming visually against your own faucet before buying anything, since even faucets from the same manufacturer often use several different cartridge designs across their product lines.

You can find a ton of YouTube videos showing you how to make the repairs we’ve discussed here, and how to make the replacement when things get drastic.

🛒 Gear Worth Having

Moen 1225 Cartridge Replacement — One of the most common single-handle cartridges in circulation, worth checking against your own faucet before assuming you need something more exotic.

Danco Faucet Repair O-Ring Assortment — Covers the range of O-ring sizes across most compression and cartridge faucets, so one kit answers most “which size do I even need” moments.

American Standard Water-Saving Aerator — A five-minute swap for a spout that’s been sputtering or running weak, and cheaper than assuming the whole faucet needs replacing over a clogged screen.

As an Amazon affiliate, I earn from qualifying purchases. Thank you for supporting SkippityWhistles.

📖 Related Reads

SkippityWhistles is part of the John D Reinhart content family. Writer, illustrator, videographer, and accidental filmmaker — find the whole story at JohnDReinhart.com.

3015

©2026 John D Reinhartskippitywhistles.com/ — All rights reserved

How to Choose the Right Staple Gun (Or: The Gunfight Nobody Needs to Have)

There are more kinds of staple guns than kinds of soup at the store, and picking the wrong one turns a quiet Saturday into a duel.

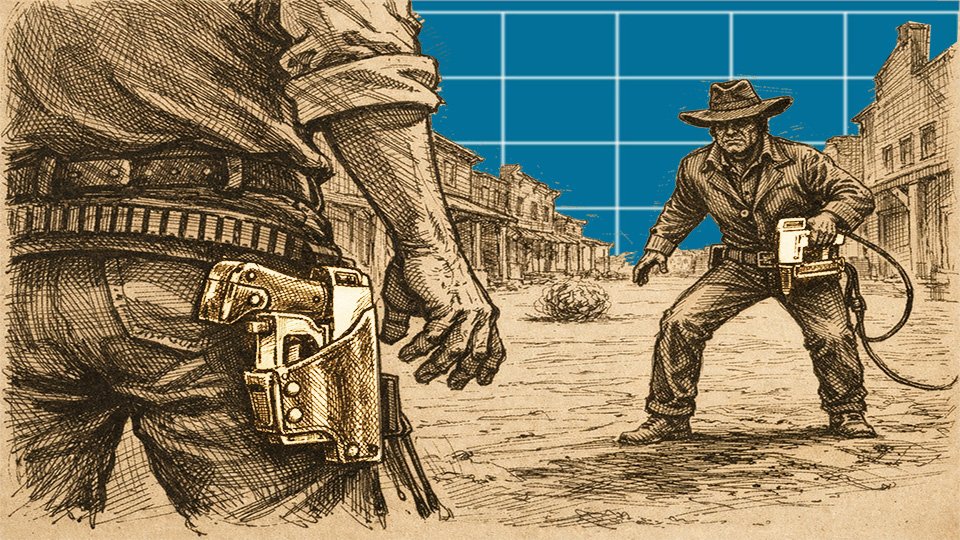
Ron picked up a light-duty craft stapler for what turned out to be a full chair reupholstering job, on the theory that a staple gun is a staple gun. The staples bounced off the plywood backing more often than they sank into it, and by the halfway point his hand had filed an official grievance. The tool wasn’t broken. It just wasn’t built for the fight Ron brought it to.

There are more kinds of staple guns than there are kinds of soup at the grocery store, and picking the wrong one turns a quiet Saturday project into something closer to a standoff. Let’s avoid that.

🎯 Match the Gun to the Material First

Light-duty manual staple guns handle crafting, light upholstery, screen repair, and attaching fabric to foam — inexpensive, easy to squeeze, and shooting short staples in the 1/4 to 5/16 inch range. They’re the right friend for a corkboard project and the wrong one for anything structural.

Heavy-duty manual staple guns step up to longer staples, up to 1/2 or 9/16 inch, and noticeably more driving force — the classic all-metal stapler most people picture, suited to fabric-on-plywood, insulation, house wrap, and light woodworking. If squeezing it feels like operating medieval equipment, that’s the correct category.

Electric and pneumatic staplers exist for genuine repetition — reupholstering furniture, large fabric runs, anything involving hundreds of staples in one sitting. Electric is convenient and plug-and-play. Pneumatic, air-powered and requiring a compressor, is lighter and stronger, and is the standard for serious workshop use.

🔢 Staple Series: The Detail That Ends Return Policies

Staple guns are built around a specific staple series — T50, JT21, Arrow-compatible, 18-gauge narrow crown — and a gun built for one series will not happily accept another. This is the single most common reason people think a brand-new staple gun is broken, when really it’s just been fed the wrong staples. Before buying, confirm the compatible staple series, the length range, and the gauge, all listed right on the packaging or product page.

🖐️ Comfort and Reliability Features

  • An ergonomic grip matters more on a manual gun than it sounds like it should — every squeeze triggers a spring mechanism, and a lever that doesn’t fit your hand well turns into real fatigue fast.
  • A jam-clear mechanism saves you from digging bent staples out with needle-nose pliers, which is not a hobby anyone signs up for on purpose.
  • An easy-load magazine prevents most jams before they start, since a fussy reload is exactly when jams tend to happen.
  • And a visible staple window means you find out you’re empty before the trigger pull that reveals it the hard way.

🛡️ Safety Basics

  • Even a manual staple gun can drive a staple into hardwood — or a thumb — with real force.
  • Always disconnect power or air before clearing a jam, never while it’s still live.
  • Wear eye protection, since a stray staple can genuinely ricochet.
  • And keep the tool pointed only at the material you actually intend to fasten — a staple gun is built for driving staples into material, not for anything resembling target practice.

🎯 Before You Click Add to Cart

  • What material are you actually fastening?
  • How often will this gun get used — once a year, or constantly?
  • What staple length does the job call for?
  • Is a compressor already sitting in the garage, or is that a separate purchase?

Answering those four questions honestly is most of the decision already made.

🛒 Gear Worth Having

Arrow T50 Heavy-Duty Manual Staple Gun — The classic all-metal workhorse for fabric-on-plywood, insulation, and general household stapling — the right default for most projects.

Corded Electric Staple Gun for Upholstery — Plug-and-play power for the moment a project involves hundreds of staples and a manual trigger starts sounding like a bad idea.

18-Gauge Pneumatic Narrow Crown Stapler — Lighter and stronger than either manual option, for anyone with a compressor and genuinely frequent workshop use.

As an Amazon affiliate, I earn from qualifying purchases. Thank you for supporting SkippityWhistles.

📖 Related Reads


SkippityWhistles is part of the John D Reinhart content family. Writer, illustrator, videographer, and accidental filmmaker — find the whole story at JohnDReinhart.com.

7045

©2026 John D Reinhartskippitywhistles.com/ — All rights reserved

How to Work with Wood: Understanding the Material Before You Cut

Wood isn’t complicated, but it has opinions about how you treat it. Here’s what you need to know: grain, knots, movement, and the shortcuts that fail later.

Ron built a set of floating shelves one spring, glued rigid to their wall brackets because rigid seemed sturdier. By August, the boards had swelled with summer humidity, had nowhere to go, and split clean along the glue line. Ron’s shelves weren’t a bad build. They were a build that never got told wood was going to move, and got surprised when it did anyway.

Wood is the most forgiving material in home DIY, right up until it isn’t. Most of what goes wrong with a wood project traces back to a handful of things the material is always doing quietly in the background — and once you know what those are, wood stops being unpredictable and starts being honest.

🌳 Solid Wood vs. Engineered Wood

Solid wood (lumber cut directly from a tree — pine, oak, maple, cedar) is strong along its grain, weaker across it, and moves seasonally with humidity. It’s the material behind shelves, doors, framing, and trim, and it’s genuinely beautiful, but it has a personality.

Engineered wood exists specifically to iron that personality out:

  • Plywood (thin wood layers glued together in alternating grain directions) resists warping and handles large panels well
  • MDF, or medium-density fiberboard (wood fibers pressed and glued into a dense, uniform sheet), takes paint beautifully but has weak edges and hates water
  • OSB, or oriented strand board (wood strands bonded with resin into a rough, strong panel), is affordable and sturdy but utilitarian in appearance

For most DIY furniture and shelving, engineered wood’s predictability is often the better trade against solid wood’s character.

↔️ Grain Direction: The Quiet Rule

Wood fibers run in one direction — the grain — and that direction determines how the board behaves under stress. A screw driven with the grain holds well; a screw driven across the grain, especially near a board’s end, splits it far more easily. This is also why the same fastening approach that worked fine in the middle of a board can fail entirely two inches from its edge. Checking grain direction before driving a fastener costs about a second and heads off a surprising share of split boards.

🕳️ Pilot Holes: The Step That Prevents the Split

A pilot hole is a small hole drilled before driving a screw, sized slightly smaller than the screw itself. It gives a screw somewhere to go besides straight into solid fiber, which is what actually causes splitting in the first place. It matters most near a board’s edge or end, with thick or long screws, and in hardwood or dense engineered material — situations where solid wood has the least room to give.

The honest rule: if you’re ever unsure whether a pilot hole is needed, drill one. It costs thirty seconds. A split board costs the whole piece.

🌦️ Wood Movement: Not a Flaw, a Feature to Plan Around

Solid wood swells and shrinks with humidity — wider in summer, tighter in winter — which is exactly what happened to Ron’s shelves. This isn’t poor craftsmanship showing up later; it’s the material behaving exactly as wood always behaves. Building around it means leaving a small gap instead of a forced-tight fit, skipping glue on joints that might need to shift, and snugging fasteners rather than cranking them down hard. A rigid, over-tightened joint on solid wood isn’t a stronger joint — it’s a joint with nowhere to go when the wood inevitably does.

🪢 Knots: The Hidden Problem in the Board

A knot is where a branch grew out of the tree, and the grain inside it runs at a different angle than the surrounding wood — which makes it harder, denser, and more likely to resist a screw or split unpredictably than the wood around it. A board with knots isn’t ruined; it just deserves a little judgment about where the fasteners actually go. Picking a section of straighter, more consistent grain for anything load-bearing or fastener-heavy avoids the problem before it starts.

🛒 Gear Worth Having

Snappy Self-Centering Countersink Drill Bit Set — Drills a properly sized pilot hole and countersink in one pass, centered automatically — the tool that makes “just drill a pilot hole” a fifteen-second habit instead of an extra step people skip.

Titebond III Ultimate Wood Glue — Water-resistant and strong enough for real joinery, for the joints that are meant to be permanent rather than the ones that need room to move.

IRWIN Quick-Grip One-Handed Bar Clamps (4-Pack) — Holds boards square and steady while glue sets or a pilot hole gets drilled, which solves the very real problem of not having a third hand.

As an Amazon affiliate, I earn from qualifying purchases. Thank you for supporting SkippityWhistles.

📖 Related Reads


SkippityWhistles is part of the John D Reinhart content family. Writer, illustrator, videographer, and accidental filmmaker — find the whole story at JohnDReinhart.com.

2005

©2026 John D Reinhartskippitywhistles.com/ All rights reserved

Working with Window Screens (Or: What’s Actually Between You and the Bugs)

A screen looks like one thing, but it’s three parts working together — and knowing which one failed tells you whether to fix it or replace it.

Ron’s fix for a torn window screen, for about three summers running, was a strip of packing tape pressed over the hole from the inside. It held, technically, in the sense that a bug now had to work slightly harder to get through. What Ron never quite figured out was that the screen wasn’t one thing that had failed — it was one of three specific parts, and knowing which one would have told him whether tape was even in the right neighborhood of a fix.

A window screen looks simple because it does one simple job. Understanding the three parts that do that job explains why screens fail the way they do, and which failures are worth your time to address.

🧩 Three Parts, One Job

Every window screen breaks down into a frame (the rigid border, usually aluminum, that holds everything else in shape), mesh (the woven material that blocks insects while letting air and light through), and a spline (a flexible rubber cord pressed into a groove around the inside of the frame, clamping the mesh in place). Nearly every screen problem traces back to a failure in exactly one of these three, which makes diagnosing the issue mostly a process of figuring out which one.

🖼️ The Frame: What Holds Everything

The frame’s only real feature that matters is the groove (a narrow channel running around the inside perimeter of the frame, where the spline sits) — without it, there’d be nothing to clamp the mesh against. Frames fail by bending (which throws the groove out of alignment so the spline can’t seat properly), corroding (aluminum weakens over years, especially near coastlines or in humid climates), or cracking (usually final — a cracked frame isn’t something to patch, it’s something to replace).

🕸️ The Mesh: What Actually Stops the Bugs

Fiberglass mesh is flexible and forgiving, which makes it the friendlier material to work with, though it sags a little more over time. Aluminum mesh holds its shape longer but is stiffer to install. Mesh fails through physical tears, UV-driven brittleness after years in the sun, or simple sagging when the spline behind it has lost its grip. The hole size in any mesh is a deliberate tradeoff — finer mesh blocks smaller insects but cuts down airflow slightly, which is why most residential screens land on a middle-ground size rather than the finest mesh available.

🧵 The Spline: The Part Nobody Notices Until It Fails

The spline is doing all the actual clamping — without it, mesh has nothing holding it against the frame at all. It fails the way most rubber does: UV exposure and years of temperature swings make it brittle and eventually crack, at which point it stops gripping and the mesh works itself loose. It’s also the part most commonly skipped during a repair, since reusing old spline looks like it saves a step. It rarely holds — spline that’s already brittle enough to fail once tends to fail again within months of being reinstalled.

🤔 Repair or Replace: Reading the Signs

A screen is generally worth repairing when the frame itself is straight and undamaged and the failure is limited to the mesh or spline — that’s a genuine fix, not a stopgap, provided both the mesh and spline get replaced together rather than just patched. A screen is generally worth replacing outright when the frame is bent, cracked, or corroded badly enough that the groove itself is compromised, since no amount of new mesh or spline fixes a frame that can’t hold either one properly. Given that a full replacement screen often costs less than an afternoon’s frustration, a compromised frame is rarely worth fighting for.

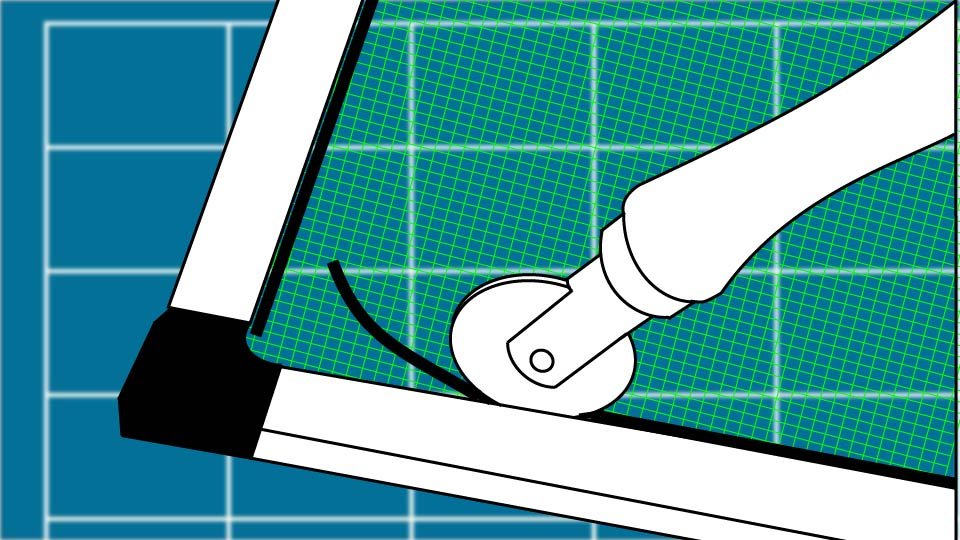
The actual mesh-and-spline installation — pressing new mesh into the groove and rolling the spline in tight and even all the way around — is a hands-on process that’s genuinely easier to follow by watching than reading. It’s worth a quick YouTube search once you’ve decided repair is the right call; watching someone’s hands roll a spline for thirty seconds will teach the technique faster than any amount of description here.

🛒 Gear Worth Having

Fiberglass Window Screen Repair Kit — Bundles fresh mesh with matching spline and a roller tool in one kit, so you’re not stuck reusing brittle old spline just because it was already in the drawer.

Prime-Line Screen Spline Roller Tool — The dual-wheel design seats spline evenly on the first pass instead of leaving loose spots that work themselves free within a season.

Metro Screenworks Custom-Cut Aluminum Window Screen — Built to your exact window dimensions when the frame itself is the problem — the right call the moment the groove is bent instead of the mesh.

As an Amazon affiliate, I earn from qualifying purchases. Thank you for supporting SkippityWhistles.

📖 Related Reads

SkippityWhistles is part of the John D Reinhart content family. Writer, illustrator, videographer, and accidental filmmaker — find the whole story at JohnDReinhart.com.

2020

©2026 John D Reinhartskippitywhistles.com/ — All rights reserved