How to Choose the Right Adhesive (Or: They’re Not All the Same)

Super glue, wood glue, epoxy — they all say “strong bond” on the label, but they’re not the same product. Here’s how to match the right adhesive to the right job every time.

Every adhesive on the shelf says something about strength. “Industrial strength.” “Maximum bond.” “Bonds everything.” And they’re not lying, exactly — they do bond things strongly. The problem is that “strongly” is relative, and the wrong adhesive for the wrong job produces a joint that fails in ways the right adhesive never would.

Super glue on a structural wood joint. Wood glue on a PVC pipe. Construction adhesive on a ceramic figurine. All of these create a bond. None of them hold.

The right adhesive isn’t the strongest one on the shelf — it’s the one whose chemistry matches the materials being joined, whose working time matches the complexity of the job, and whose cured properties match what the joint needs to do. Once those three things align, the adhesive does its job and disappears. Here’s how to get there.

❓ The Four Questions That Choose Your Adhesive

Before reaching for any glue, answer these four questions. The right product becomes obvious.

What materials are being bonded? Wood to wood, metal to metal, plastic to plastic, ceramic to ceramic — different surfaces require different chemistry. Adhesives work through chemical compatibility, and some won’t bond certain surfaces at all. This is the first filter.

Is this a structural joint or a cosmetic one? A joint carrying weight, resisting stress, or doing mechanical work needs structural adhesive — epoxy or construction adhesive. A joint that just needs to hold something together for appearance needs much less. The right answer for a decorative ceramic repair is completely wrong for a furniture joint under load.

What environment will the joint live in? Outdoors, in a wet area, exposed to heat, or subject to vibration — all of these affect which adhesive holds long-term. Standard wood glue fails outdoors. PVC cement is useless on wood. Regular super glue fails in wet conditions. Environment is not an afterthought.

How much working time is needed? Some adhesives set in seconds. Others allow hours of adjustment. That’s not a quality difference — it’s a design difference. A complex assembly with many pieces needs working time. A simple chip repair needs to set fast before the piece shifts. Match the working time to the job.

🔵 Cyanoacrylate (Super Glue) — Fast, Precise, and Not What You Think

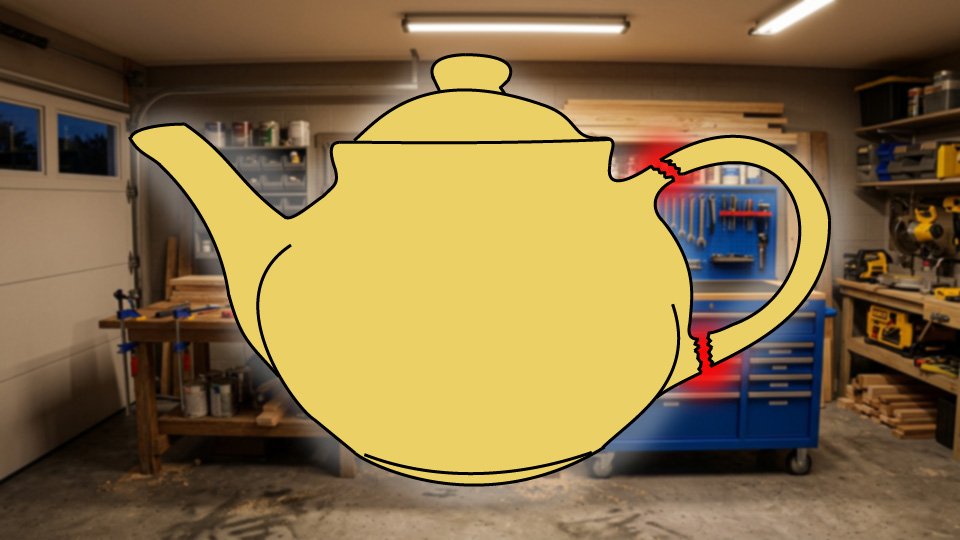
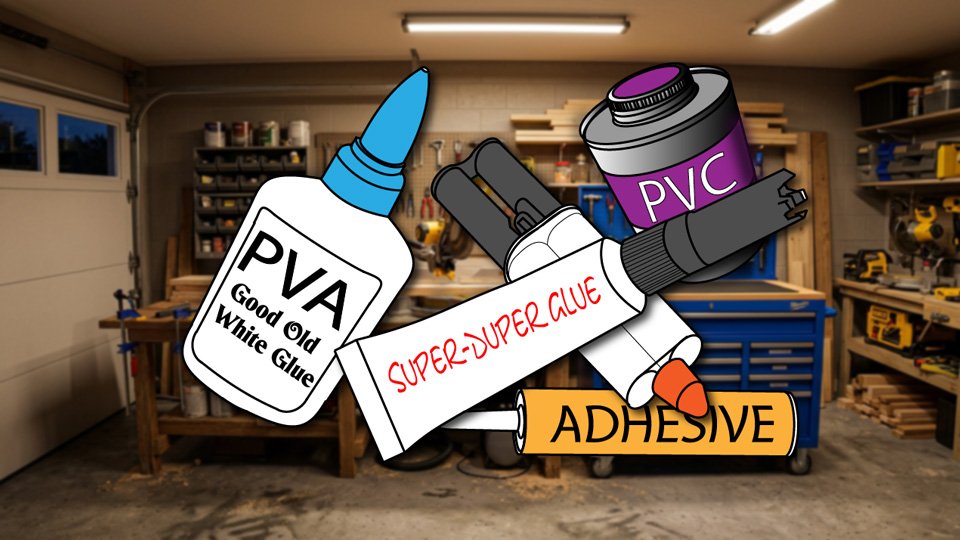
Super glue — technically cyanoacrylate (CA glue) — sets in seconds by reacting with trace moisture on the surfaces being bonded. The result is a hard, rigid bond that’s surprisingly strong on small, tight-fitting surfaces. It’s the right tool for quick repairs on non-porous materials: ceramic chips, small plastic breaks, metal-to-metal repairs where the fit is tight and the load is light.

What super glue is not: a gap-filler. It requires close-fitting surfaces to work properly. A gap between the pieces means no bond. It’s also brittle — it resists pulling forces well but fails under impact or stress. And it bonds skin instantly using the same moisture-reaction that bonds everything else, which is why gloves are worth keeping nearby.

The gel formula is better for most repair work than the liquid: thicker, less likely to run onto surfaces where it doesn’t belong, slightly more working time before the bond sets. For anything requiring precision — fitting a ceramic handle, reattaching a small decorative piece — gel is the right choice.

🟡 Two-Part Epoxy — The Structural Answer

Two-part epoxy comes in two containers — a resin and a hardener — that are mixed together immediately before use. The chemical reaction between them produces a rigid, extremely strong bond that fills gaps, works on almost any surface, and often ends up stronger than the materials being bonded.

Epoxy is the answer for structural repairs: metal brackets, furniture joints under load, ceramic or porcelain repairs where the piece will actually be used, bonding dissimilar materials that nothing else will stick to. It’s also the right choice when there’s a gap between surfaces — unlike super glue, epoxy fills the gap as it cures.

The working time varies by formula. Five-minute epoxy (the most common) gives roughly five minutes of working time before it begins to set, which is enough for straightforward assembly. Thirty-minute epoxy allows more complex positioning. The tradeoff: faster-setting epoxy is slightly less strong at full cure than slower-setting formulas. For most home repairs, five-minute is entirely adequate.

Mix only as much as the job requires. Epoxy can’t be stored once the two parts are combined — whatever is mixed needs to be used before it sets. Small syringe dispensers that meter equal amounts of resin and hardener automatically are the most convenient format for home use.

🟤 Wood Glue (PVA) — The Right Tool for Wood

PVA wood glue — polyvinyl acetate (PVA) — is specifically designed for wood-to-wood joints, and it performs them better than anything else. It penetrates wood grain, cures hard, and creates a joint that is often stronger than the wood itself. When a wood joint fails under load, the wood typically breaks before the glue does.

The critical requirement is clamping. Wood glue needs pressure applied during the curing process to draw the joint tight and ensure full contact between the surfaces. The clamp time is usually 20 to 30 minutes. Full cure takes 24 hours — the joint feels solid after a few hours, but full strength doesn’t develop until the next day. Don’t stress-test a glued wood joint before it’s fully cured.

Wood glue cleans up with water before it cures and can be sanded and painted after curing. It’s the right choice for furniture repair, cabinet assembly, shelf construction, and any wood-to-wood joint that will be finished. It is not the right choice for outdoor projects exposed to standing water or repeated wetting — use a waterproof-rated wood glue (look for Type I water resistance rating on the label) for those applications.

🔴 PVC Cement — Not Actually a Glue

PVC cement doesn’t bond two pieces of PVC pipe the way an adhesive bonds two surfaces. It dissolves the plastic surface of both pieces slightly, then fuses them together at a molecular level as the solvent evaporates. The result isn’t two pieces stuck together — it’s one piece of plastic where a joint used to be.

This is why PVC connections are permanent and essentially impossible to undo, and why using the wrong cement on the wrong plastic is a serious problem. PVC cement works on PVC. ABS cement works on ABS (the black drain pipe used in older homes). CPVC cement works on CPVC (the hot water supply pipe). These are not interchangeable — using PVC cement on CPVC can actually damage the pipe rather than bonding it. The label specifies which plastic the cement is rated for. Read it before applying.

Most residential PVC plumbing work also requires primer before cement — a purple chemical that prepares the plastic surface for bonding. Some cements include primer in the formula; most don’t. The primer step is not optional for pressure-rated plumbing work.

⚫ Construction Adhesive — For Heavy Materials Under Stress

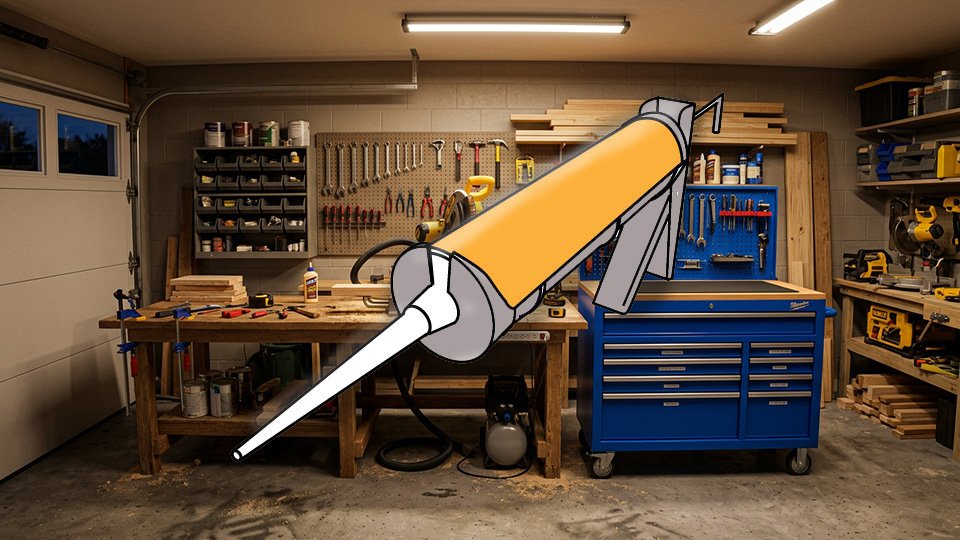
Construction adhesive is for bonding large building materials: subfloor panels to joists, drywall to framing, underlayment to subfloor. It comes in cartridges that fit a caulk gun (the same tool used for caulking, applied in a similar bead pattern).

What makes it different from other adhesives is flexibility. Where super glue and epoxy cure rigid, construction adhesive cures with some flexibility, which allows it to absorb vibration and movement. This is why it’s ideal for subfloors — applied under the panels before screwing them down, it fills the minor gaps between the panel and the joist, eliminating the movement that causes floor squeaks. A subfloor fastened with screws alone squeaks when the wood moves slightly. Add construction adhesive and the movement disappears.

It’s overkill for small repairs and awkward for precise work. It’s the right tool when large surfaces need to be bonded under building conditions.

🛒 Gear Worth Having

Gorilla Wood Glue — 8 oz., Water Resistant PVA, Natural Color, Paintable & Sandable — The benchmark PVA wood glue. Cross-linking formula creates a bond stronger than the wood around it. Twenty to thirty minutes of clamp time, fully cured in 24 hours. Dries a natural translucent tan with no foaming, paintable and sandable for a clean finish. Water resistant (ANSI/HPVA Type II rated) for indoor or outdoor projects. The reliable answer for any wood-to-wood joint from furniture repair to cabinet assembly.

Gorilla Super Glue Gel XL — 25g, Clear, Anti-Clog Cap — The gel formula for precision repair work. Thicker than liquid super glue so it doesn’t run onto adjacent surfaces, dries completely clear, sets in 10 to 45 seconds, full cure in 24 hours. The anti-clog cap keeps the bottle usable months after opening. The right tool for ceramic chips, small plastic repairs, and any close-fitting surface that needs a fast, invisible bond.

J-B Weld ClearWeld 5-Minute Epoxy Syringe — 25ml, Clear — Two-part epoxy in a syringe that dispenses equal amounts of resin and hardener automatically — no measuring, no guessing the ratio. Sets in five minutes, cures to full strength in one hour, dries completely clear. 3,900 PSI tensile strength — stronger than most of the materials it bonds. The structural repair answer for metal, ceramic, glass, and bonding dissimilar materials that nothing else will hold.

As an Amazon affiliate, I earn from qualifying purchases. Thank you for supporting SkippityWhistles.

📖 Related Reads

How to Repair Broken Porcelain and Pottery

How to Choose the Right Caulk for Your Home

Seals, Gaskets, and Plumber’s Tape

The right adhesive is patient. It does its job and disappears into the joint. The wrong adhesive announces itself eventually — usually at the worst possible moment, usually in the most inconvenient location. Ask the four questions, match the chemistry to the materials, and the joint holds. That’s the whole deal.


SkippityWhistles is part of the John D Reinhart content family. Writer, illustrator, videographer, and accidental filmmaker — find the whole story at JohnDReinhart.com.

2010

©2026 John D Reinhartskippitywhistles.com/ – all rights reserved

How Your Home’s Plumbing System Actually Works: From Street to Sink to Sewer

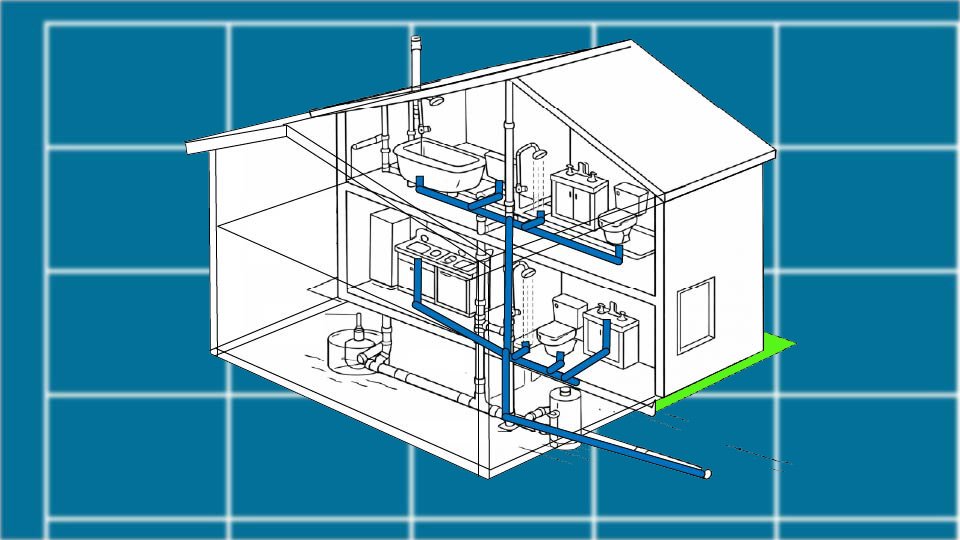
Your plumbing isn’t magic—it’s three systems working together: pressure brings water in, gravity takes it out, vents keep it balanced. Here’s how it actually works.

Ron’s bathroom sink has gurgled softly for as long as he’s lived in the house, and for just as long, he’s filed it under “personality quirks of an old house,” somewhere between the creaky third stair and the light switch that does nothing. It’s not a personality quirk. It’s a blocked or undersized vent, quietly failing to do a job Ron never knew existed — because nobody ever explained that plumbing has a third system, and it’s the one making all the noise.

Turn on a faucet, water flows. Flush a toilet, water disappears. It looks simple because the actual system is hidden entirely inside your walls — but it’s really three separate systems working together, and once you know what each one does, a gurgle, a smell, or a slow drain all stop being mysteries.

💧 Three Systems, One Job

The water supply system uses pressure to push water in. The drain-waste system uses gravity to pull water back out. The vent system, the quiet one nobody thinks about, keeps air balanced so the other two can actually do their jobs without fighting each other. Understand those three, and the whole house makes sense.

⬆️ Supply: Pressure Brings It In

Water enters through a main supply line, usually buried underground, arriving under real pressure — typically around 50 PSI from the city main.

Inside the house, a main shutoff valve controls all of it, and the line splits into cold (straight to the fixtures) and hot (routed through the water heater first).

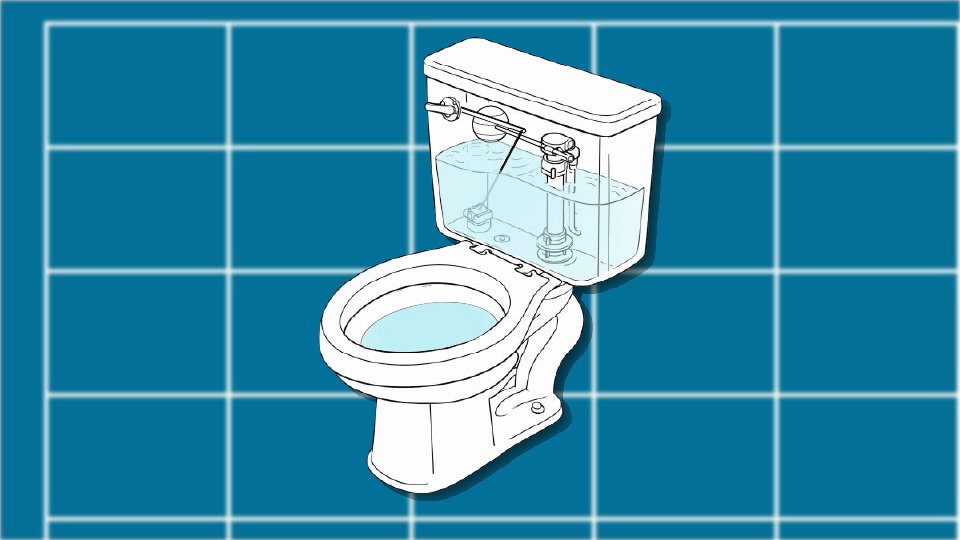
That pressure is doing more work than it gets credit for: it’s what makes a shower feel strong, what fills a washing machine, what refills a toilet tank after a flush.

A sudden drop in pressure anywhere in the house is the supply system’s way of reporting a leak, a partially closed valve, or a real supply problem.

⬇️ Drain-Waste: Gravity Takes It Out

Once water leaves a faucet and enters a drain, pressure stops mattering entirely and gravity takes over completely.

Drain pipes slope downward at a deliberate, specific angle — about 1/4 inch per foot — carrying water from fixture drains into branch drains, into the main drain line, and finally out to the sewer or septic system.

Too steep a slope and water rushes past solids, leaving them behind to clog later. Too shallow and water crawls, letting solids settle where they sit. That narrow correct range is exactly why a plumber’s first move on a slow drain is often checking slope, not reaching for a snake.

Under every sink sits a P-trap (a curved section of pipe shaped like a P or U), holding a small standing pool of water that seals the drain against sewer gases rising back up into the house. If a drain smells like sewage, the trap is either dry — pour water down it — or it’s failed outright, which is a call to a plumber.

🌬️ Vent: The Silent System Nobody Thinks About

Vent pipes connect the drain system to open air, usually exiting through the roof.

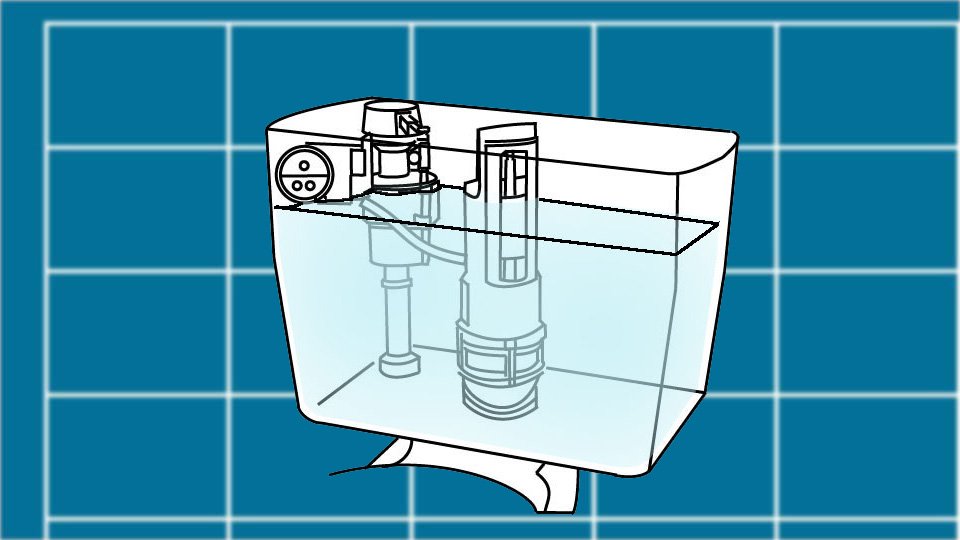
As water rushes down a drain, it creates pressure changes inside the pipe — without somewhere for air to enter and equalize that change, drains gurgle, traps can get siphoned dry, and the whole system starts misbehaving in small, confusing ways.

A blocked vent — ice, leaves, even a bird’s nest — is exactly what turns into Ron’s “quirky” gurgling sink, a slow toilet, or an unexplained sewer smell. It’s invisible right up until it fails, and then it explains almost everything at once.

🔄 The Whole Sequence, In Order

Washing your hands runs through all three systems in seconds: pressurized water travels through the supply line and reaches the faucet. You use it, then release it down the drain, where gravity takes over. It passes through the P-trap, which stays filled and sealed behind it. It flows along the sloped drain line toward the main.

Air enters through the vent system the entire time, equalizing pressure so nothing gurgles or siphons. And the wastewater finally reaches the sewer or septic system, job complete, without you ever thinking about any of it.

🔍 Common Symptoms, Decoded

  • A slow drain usually means improper slope, a partial clog, or a blocked vent — gravity can’t do its job if the path is obstructed.
  • Gurgling sounds mean a blocked vent, air escaping the only way it can, through water.
  • A sewer smell means a dry or failed P-trap, the seal no longer sealing.
  • A weak faucet or shower points to the supply side — a partially closed valve, a leak, or a genuine pressure problem somewhere upstream.
  • A sudden backup across multiple fixtures at once points to the main line itself, and that one’s a call to a plumber, not a DIY afternoon.

🛒 Gear Worth Having

Plunger Set, Cup and Flange — A flat cup plunger for sinks and tubs, a flanged one for toilets — the two shapes solve two genuinely different sealing problems.

P-Trap Replacement Kit — A quick, inexpensive fix the moment a trap fails — cheaper than a plumber call for a problem this straightforward.

Rechargeable Headlamp Flashlight — Frees both hands for the actual work, which matters most in the dark cramped cabinet under a sink where most of this happens.

As an Amazon affiliate, I earn from qualifying purchases. Thank you for supporting SkippityWhistles.

📖 Related Reads


SkippityWhistles is part of the John D Reinhart content family. Writer, illustrator, videographer, and accidental filmmaker — find the whole story at JohnDReinhart.com.

3019

©2026 John D Reinhartskippitywhistles.com/ — All rights reserved

Nuts, Bolts, and Washers: What They Are and Which One You Actually Need

The hardware aisle doesn’t have to be overwhelming. Here’s what hex bolts, carriage bolts, lock nuts, and washers actually do — and the one assortment kit that ends the hardware store trips.

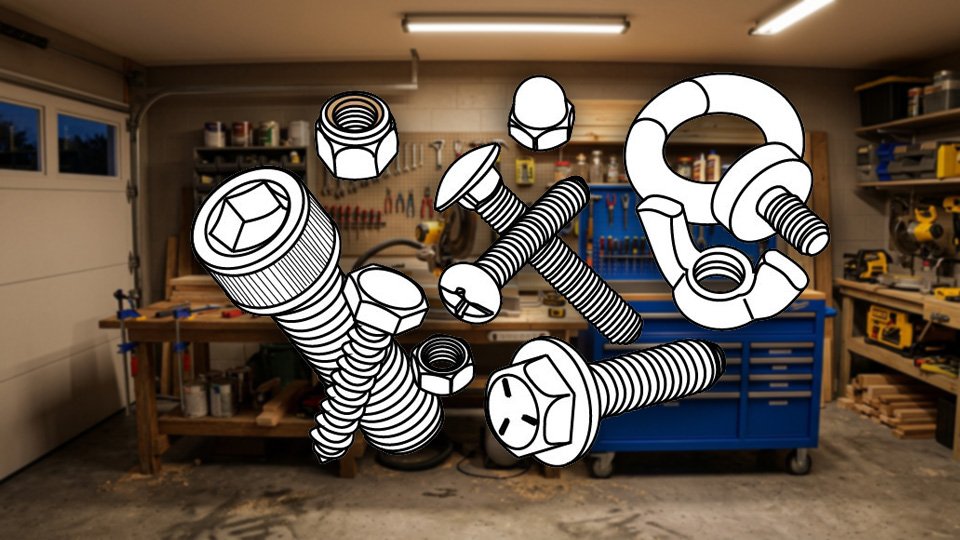
Walk into the hardware aisle and stare at the fastener section. Hex bolts, carriage bolts, lag bolts, cap nuts, lock nuts, fender washers, Grade 5, Grade 8, coarse thread, fine thread. The whole aisle feels like a mechanical dictionary fell off a shelf.

Here’s the thing: you don’t need to understand every variation on the shelf. You need to understand how bolted connections work. Once you understand the principle — how a bolt and nut create clamping force — choosing the right hardware becomes obvious. Everything else is details.

Here’s how it works.

⚡ How a Bolt Actually Works

A bolt is not a screw.

A screw threads directly into the material it’s fastening — wood, drywall, metal. The strength of a screw lies in the grip the screw’s threads (the sharp spiral around the outside) have on the material.

A bolt passes all the way through the material and is secured on the other side with a nut. That distinction matters because it changes what the connection can do.

When you tighten a bolt and nut together, the bolt stretches slightly under tension. The nut resists that tension from the other side. The materials sandwiched between the bolt head and the nut get squeezed together — clamped. That clamping force is what makes a bolted connection strong. The whole joint shares the load across the contact area between the surfaces, not just at the threads.

This is why bolts are the right choice for structural connections, joints that will experience vibration or stress, and anything that might need to come apart later. Screws are convenient. Bolts are dependable. For connections that matter, bolts usually win.

🔵 Hex Bolts — The One You’ll Reach For Most

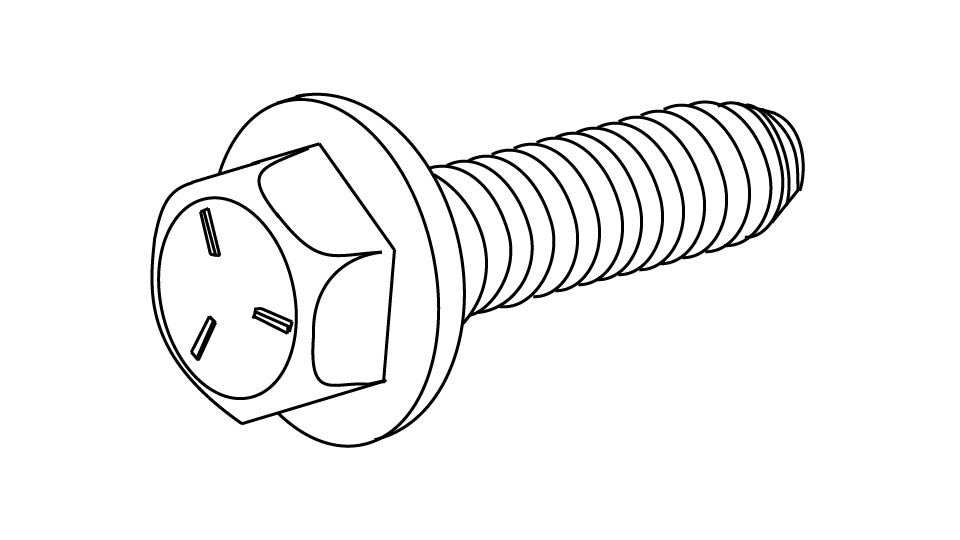
A line drawing of a hex bolt by John D Reinhart

A hex bolt has a six-sided head that tightens with a wrench or socket. It’s the workhorse of the fastener world — the bolt that handles structural framing, deck ledgers, outdoor projects, and anything that needs serious, reliable strength.

The hex head distributes tightening force evenly and gives a wrench or socket a solid grip from six different angles. It’s not elegant, but it holds. When there’s no specific reason to use something else, hex bolts are the default.

You’ll see “hex bolt” and “hex cap screw” used interchangeably at most hardware stores, and for most DIY purposes they perform the same job. The technical difference — tighter manufacturing tolerances and a washer face built into the cap screw head — matters in precision mechanical applications, not in lumber and deck construction. If it has a six-sided head and the size and grade match the project, it works.

🟤 Carriage Bolts — The Wood-Friendly Option

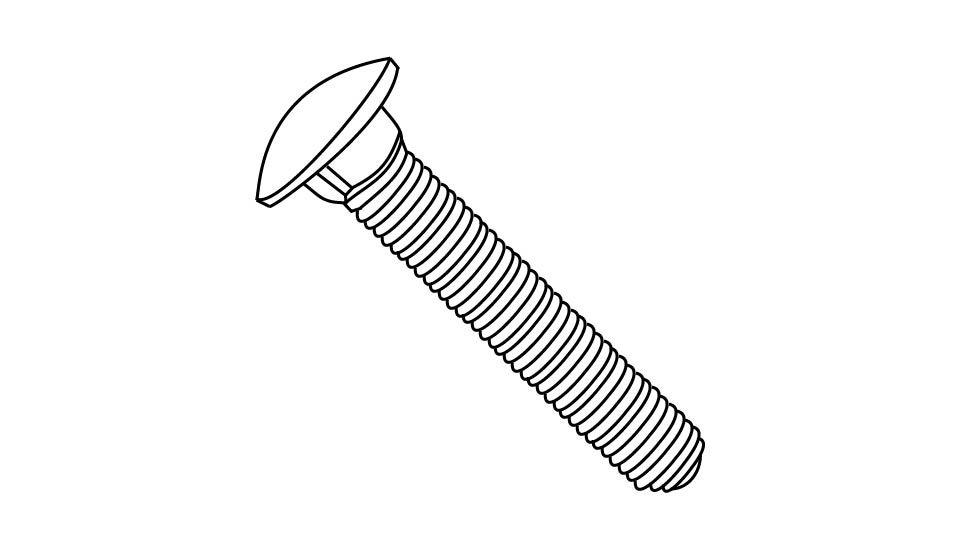
A line drawing of a carriage bolt by John D Reinhart

A carriage bolt has a smooth, rounded dome head with a square section just below it. That square shoulder is the functional feature: when you push a carriage bolt through a drilled hole in wood, the square shoulder bites into the wood and prevents the bolt from spinning while you tighten the nut from the other side. No second wrench needed on the bolt head.

This makes carriage bolts ideal for wood-to-wood connections — decks, fences, gates, outdoor furniture — where holding a wrench on both sides would be awkward or impossible. The rounded dome head also looks cleaner than a hex head on visible surfaces, which is why carriage bolts show up wherever appearance matters alongside strength.

🪵 Lag Bolts (Lag Screws) — The Structural Wood Fastener

A line drawing of a lag bolt by John D Reinhart

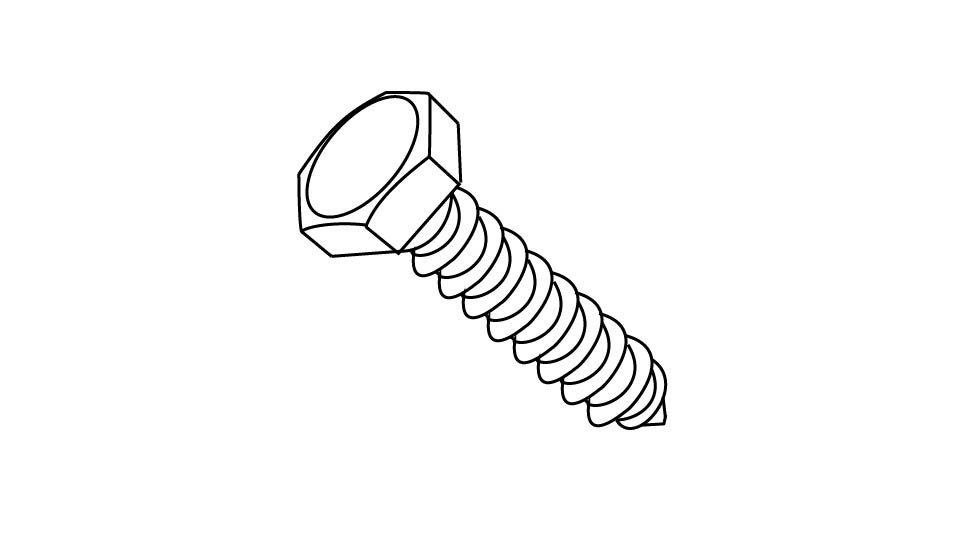
Lag bolts look like very large hex-headed bolts but work like screws — they thread directly into wood without a nut. The distinction matters enough that they’re technically called lag screws, but the name “lag bolt” has stuck because they look like bolts and are sized like bolts.

They’re for heavy structural connections into wood: ledger boards fastened to house framing, mounting heavy items into studs, and any application where you need serious pulling strength into solid wood. The large threads and substantial diameter create a hold that smaller screws can’t match.

Lag screws require a pilot hole — a pre-drilled hole slightly smaller than the bolt diameter — before installation. Skip the pilot hole and the wood can split, or the lag screw strips the threads it’s trying to create. The pilot hole is not optional.

🔒 Lock Nuts — The Ones That Stay Put

A line drawing of a lock nut by John D Reinhart

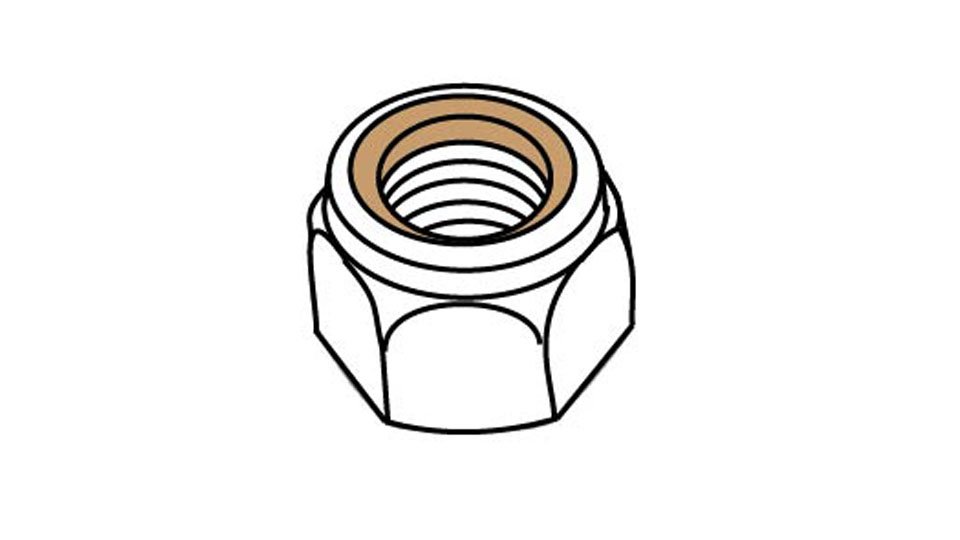
A standard hex nut tightens against the bolt and stays put under normal conditions. Under vibration — from machinery, from engines, from the general shaking that happens in the real world — it can back off slowly until the connection loosens. A lock nut solves this.

The most common type is the nylon insert lock nut (also called a nyloc nut — a plastic nylon ring inside the nut that grips the bolt threads when tightened). The nylon deforms slightly around the threads, creating friction that resists loosening. Once a nyloc nut is seated, it doesn’t back off under vibration.

Use them on anything that moves, shakes, or vibrates: lawn equipment, appliances, furniture with mechanical parts, outdoor installations exposed to wind loading. They cost slightly more than standard nuts and are worth it every time.

🪣 Washers — The Part Everyone Skips and Shouldn’t

A washer is a flat ring of metal — or a split ring in the case of a lock washer — that sits between the bolt head and the surface, and between the nut and the surface on the other side.

Flat washers distribute the clamping load across a larger area. Without a washer, the bolt head or nut bears against a small contact area, which can compress or damage softer materials — wood, drywall, plastic — and allows the bolt to sink in over time as the material compresses. A washer spreads that load. It also protects the surface from being marred by the rotating bolt head during tightening.

Lock washers add vibration resistance. A split lock washer has a small gap that creates a spring effect, maintaining pressure against the nut even as the joint vibrates slightly. They’re used under nuts on connections that will experience movement.

The practical rule: use a flat washer under every bolt head and every nut, on every project. A washer costs a few cents. The repair it prevents costs considerably more.

📊 Bolt Grades — Strength Ratings Made Simple

Bolts are graded by strength, and the grade is marked on the bolt head with radial lines — the lines that look like clock positions stamped into the top of the bolt.

No markings means Grade 2 — basic strength, light-duty applications. Three radial lines means Grade 5 — medium-high strength, suitable for the vast majority of home and construction projects. Six radial lines means Grade 8 — very high strength, for heavy structural and mechanical applications where the specifications call for it.

Grade 5 handles nearly everything a homeowner encounters. Deck construction, outdoor furniture, shelving hardware, general structural connections — Grade 5 is the right choice and doesn’t require the premium cost of Grade 8. When a specification, building code, or manufacturer instruction calls for Grade 8, use it. Otherwise, Grade 5 is correct.

🛒 Gear Worth Having

1035-Piece Grade 5 Nut, Bolt & Washer Assortment — Hex Bolts, Hex Nuts, Lock & Flat Washers, 30 Bins — The assortment that ends the hardware store trips. 1,035 Grade 5 hex bolts, hex nuts, lock washers, and flat washers in 1/4″, 5/16″, 3/8″, and 7/16″ sizes, organized in 30 labeled bins. Every size you’ll use regularly in home DIY, all in one organized unit that sits on a shelf and stays there. The bins are labeled so finding the right piece takes seconds rather than sorting through a coffee can. This is the investment that pays for itself on the first project it saves a trip for.

Carriage Bolt Assortment — 1/4″-20 & 5/16″-18, with Nuts and Washers, 100 Pieces — The wood-connection companion to the hex bolt assortment. Carriage bolts in the two most common residential sizes, with matching nuts and washers included. Covers deck railings, fence construction, outdoor furniture, and any wood-to-wood connection where the rounded head and self-locking square shoulder make the job easier. Hot-dip galvanized for outdoor use.

Nylon Insert Lock Nut Assortment — 1/4″-20, 5/16″-18, 3/8″-16, 140 Pieces — Nyloc lock nuts in the three most common residential bolt sizes. The nylon ring inside each nut grips the bolt threads and resists loosening under vibration. Use them anywhere a standard nut might back off over time: outdoor connections, equipment mounting, anything that shakes or moves seasonally. Stainless steel for corrosion resistance. Keep these alongside the main assortment — cheap insurance against connections that gradually loosen themselves.

As an Amazon affiliate, I earn from qualifying purchases. Thank you for supporting SkippityWhistles.

📖 Related Reads

How to Use a Torque Wrench

How to Use a Socket Wrench

The DIYer’s Toolbox

The hardware aisle stops being overwhelming the moment the underlying principle is clear: a bolt and nut create clamping force, the grade determines how much load the connection handles, and a washer under every head and nut protects the surface and distributes the load. Everything else — the specific bolt type, the nut style, the washer size — follows from what the joint needs to do. Know the principle and the hardware aisle becomes a resource rather than a riddle.


SkippityWhistles is part of the John D Reinhart content family. Writer, illustrator, videographer, and accidental filmmaker — find the whole story at JohnDReinhart.com.

2017

©2026 John D Reinhartskippitywhistles.com/ – all rights reserved

How to Choose the Right Caulk for Your Home (Or: They’re Not All the Same)

Not all caulk is the same — and grabbing the wrong one means peeling, cracking, or paint that won’t stick. Here’s how to match the right caulk to the right job, every time.

The house you moved into — especially if it was built a few decades ago — is not a static object. It breathes. New floors settle. Old framing shifts. Seasons expand and shrink everything twice a year, and suddenly there are seams where there weren’t seams before. The gap between the baseboard and the new floor. The crack where the crown molding meets the wall. The opening at the corner of the shower that wasn’t there last winter.

None of this is failure. It’s physics. Houses move, and caulk is how you make peace with the movement.

The problem is that most people walk into the hardware store, grab the tube that says “All Purpose,” and head home. Sometimes that works. Sometimes it doesn’t — and “doesn’t” means caulk that cracks, peels, won’t hold paint, or grows mold in the shower. The difference is knowing which caulk goes with which job. It’s a short list, and once you have it, the caulk aisle stops being confusing.

🧪 The Four Types You’ll Actually Use

Acrylic latex caulk — sometimes called painter’s caulk — is the one that handles interior trim, baseboards, door and window frames, and any seam that’s going to be painted over. It cleans up with water, accepts paint within thirty minutes to an hour, is easy to apply, and easy to tool smooth with a wet finger. This is the caulk that belongs in every home toolbox.

The key word on the tube to look for is “paintable.” If the tube doesn’t say paintable, the caulk may not accept paint — or it may accept paint but leave a shiny, visible bead underneath it. For interior trim work where the finished result is a painted surface, paintable acrylic latex is the correct choice.

Siliconized acrylic caulk – acrylic caulk with silicone blended in. It’s more flexible than plain acrylic, which matters in older homes where seasonal movement is significant. It’s still paintable. It still cleans up with water. It just holds up longer in joints that move. For an older house with settling floors and shifting framing, siliconized acrylic is often the better answer than plain acrylic — it handles the movement without cracking as quickly.

100% silicone caulk – for wet areas: showers, tubs, sinks, exterior window frames, anywhere that sees consistent water exposure. Silicone is waterproof, extremely flexible, and lasts fifteen to twenty years in wet conditions. It is also not paintable — paint won’t bond to cured silicone — and it’s harder to apply cleanly than acrylic. If silicone gets on a surface where it doesn’t belong, it’s genuinely difficult to remove. Use it where water is the primary concern, and keep it away from anything that’s going to be painted.

Polyurethane caulk – for exterior gaps, concrete cracks, and high-movement joints outside the house. It bonds aggressively to almost any surface, handles significant structural movement, and holds up in conditions that would destroy acrylic. It’s harder to work with than acrylic and overkill for interior trim. For the exterior foundation crack, the gap around the dryer vent, or the joint between the concrete steps and the house — polyurethane is the right material.

📋 The Quick Decision

Sealing interior trim, baseboards, or crown molding before painting? Paintable acrylic latex or siliconized acrylic. These are the same answer — siliconized acrylic if the house moves seasonally, plain acrylic if it doesn’t.

Sealing a shower, tub surround, or sink? 100% silicone, specifically labeled for kitchen and bath use. Do not use acrylic here — it won’t hold up to constant moisture and will develop mold.

Sealing an exterior gap, concrete crack, or high-movement exterior joint? Polyurethane caulk.

The one thing to avoid: using 100% silicone anywhere that needs to be painted, and using acrylic latex anywhere that sees constant water. These are the two mistakes that send people back to redo the job.

📏 How Big a Gap Is Too Big for Caulk?

Caulk is a sealant, not a gap filler. It’s designed to bridge small joints and seal them against air, water, and dust — not to fill structural voids.

A gap under about a quarter inch wide is fine for caulk alone. A gap larger than a quarter inch needs backer rod first. Backer rod is a foam rope (available at any hardware store in various diameters) that you press into the gap before caulking. It gives the caulk something to bond to on both sides, limits how deep the caulk needs to go, and produces a much better result than trying to fill a large gap with caulk alone. Without backer rod, deep gaps consume expensive caulk and often crack as the caulk skins over before the interior fully cures.

🖐️ Applying It — The Technique That Makes the Difference

Cut the nozzle smaller than you think you need. The most common caulking mistake is cutting the tip too wide, which produces a bead that’s too large to tool cleanly and leaves excess everywhere. For most interior trim work, the opening at the tip should be about the diameter of a pencil lead. You can always make a second pass if the bead is too thin. You cannot un-apply a bead that’s too thick.

Run the bead continuously along the joint in one smooth motion. Start at one end and move steadily to the other without stopping. Stopping and restarting creates overlap marks that are visible after painting.

Shape the bead immediately after applying it, before it begins to skin over — usually within two to five minutes. Dampen a finger with water and draw it along the bead with steady, even pressure in a single pass. One pass, not multiple. Overworking caulk tears it up and makes it look worse than if you’d left it alone. The damp finger gives a smooth, slightly concave profile that paints cleanly and looks professional.

Wipe excess onto a rag immediately. Caulk that dries on adjacent surfaces is harder to remove than caulk that’s wiped away wet.

Painter’s tape along both sides of the joint before caulking gives a perfectly clean edge every time and is worth the extra two minutes on visible joints — around a window frame, along a baseboard in a finished room — where a ragged edge would be noticed. Remove the tape immediately after tooling the bead, before the caulk skins over.

⏱️ How Long Does It Last?

Interior acrylic and siliconized acrylic caulk: five to ten years, depending on how much the joint moves. When it starts to crack, shrink visibly, or separate from the surface, replace it. Recaulking over old failed caulk doesn’t work well — remove the old caulk with a utility knife or caulk remover tool first, clean the surface, and start fresh.

100% silicone in wet areas: ten to twenty years. Silicone fails when it starts to peel away from the tile or show dark spots underneath — which is mold growing behind a failing seal. At that point, remove it completely and replace it.

🛒 Gear Worth Having

DAP Alex Plus Acrylic Latex Caulk with Silicone — 10.1 oz, White, Paintable in 30 Minutes — The benchmark paintable interior caulk. Silicone additives give it more flexibility than plain acrylic, it accepts paint in thirty minutes, and it cleans up with water. Bonds to wood, drywall, plaster, masonry, aluminum, and vinyl. This is the tube that handles baseboards, trim, crown molding, and door frames — the everyday interior caulking job. DAP backs it with a 40-year durability guarantee.

GE Advanced Silicone Caulk for Kitchen & Bathroom — 10 fl oz, 100% Waterproof, White — 100% silicone for showers, tubs, sinks, and anywhere that sees constant water. Ready for water exposure in thirty minutes. Won’t shrink, crack, or support mold growth. Forty percent more flexible than standard silicone sealants, which matters in tub surrounds and shower corners where movement is ongoing. Backed by a lifetime guarantee from the number one silicone brand. Not paintable — use this where waterproofing is the priority.

Dripless ETS2000 Composite Caulk Gun — 12:1 Thrust Ratio, Ergonomic Grip — The caulk gun that actually stops when you stop squeezing. Standard ratchet-style caulk guns continue dispensing after the trigger is released, which means a blob of caulk wherever the job ends. The Dripless mechanism retracts after each trigger pull, stopping the flow immediately. Lightweight composite body, ergonomic grip, 12:1 thrust ratio handles both acrylic and silicone cartridges. The tool that makes the whole job cleaner and less frustrating.

As an Amazon affiliate, I earn from qualifying purchases. Thank you for supporting SkippityWhistles.

📖 Related Reads

How to Use Wire Nuts

How to Repair Broken Porcelain and Pottery

The DIYer’s Toolbox

The right caulk in the right place takes twenty minutes and lasts a decade. The wrong caulk in the wrong place takes twenty minutes and fails in two years, at which point the whole job has to be done again. The house is going to keep moving regardless — the only question is whether the seams move with it or crack across it.


SkippityWhistles is part of the John D Reinhart content family. Writer, illustrator, videographer, and accidental filmmaker — find the whole story at JohnDReinhart.com.

2013

©2026 John D Reinhartskippitywhistles.com/ – all rights reserved

How to Use a Voltage Tester (Or: How to Test a Wire Without Scaring Yourself to Death)

Before you touch a wire, one question matters: is this actually off? A non-contact voltage tester answers it in two seconds. Here’s how to use one correctly — including the step most people skip.

Before touching any wire, any outlet, any switch, or anything connected to your electrical system, one question needs an honest answer:

Is this actually off?

Not “I think I turned it off.” Not “I’m pretty sure that’s the right breaker.” Actually off, confirmed, zero voltage present. The only way to answer that question honestly is with a voltage tester — a tool that detects the presence of electricity before any hand goes anywhere near a wire.

The tool is simple, inexpensive, and one of the most important things in a home toolbox. Here’s how it works and how to use it correctly — including the one step most people skip but professional electricians never do.

🔌 What a Voltage Tester Does

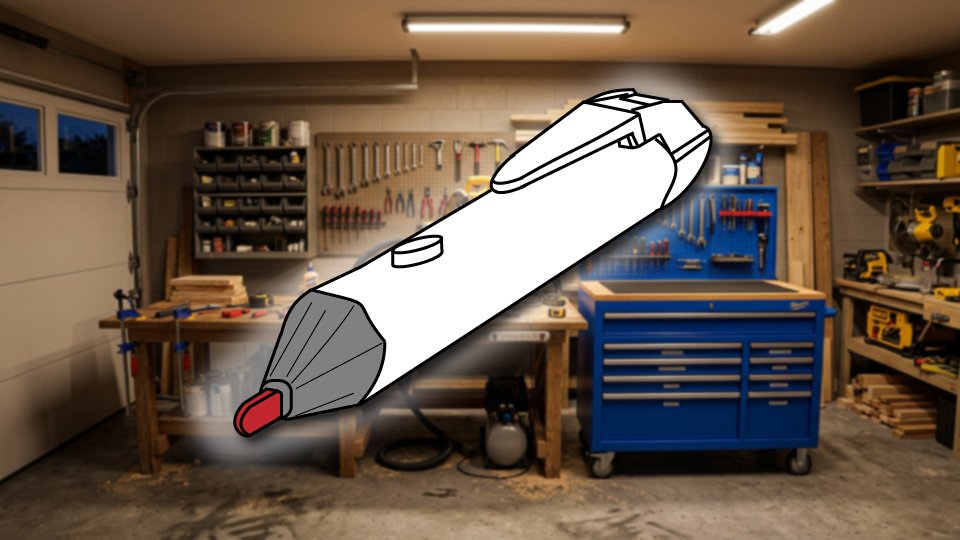
A non-contact voltage tester — also called an NCVT, a voltage pen, or a voltage detector — is a small, pen-shaped tool that detects the presence of electrical voltage without touching bare wires. You hold the tip near a wire, outlet slot, or electrical connection. If voltage is present, the tool beeps and the tip lights up red. If there’s no voltage, it stays silent and shows a steady green light.

That’s the entire function. It doesn’t measure how much voltage. It doesn’t diagnose wiring problems. It answers one question: is electricity present right here, right now? That single answer is what stands between safe electrical work and an extremely unpleasant experience.

The non-contact design is what makes it safe and practical for homeowners. Because the tip detects voltage through the wire’s insulation — the plastic coating around the wire — there’s no need to touch bare metal at all. Hold it near the wire, read the indicator, proceed accordingly.

🟢 Understanding the Lights

Every non-contact voltage tester has two indicator states, and knowing what each one means is the whole operating manual.

A steady green light means the tester is powered on and working. This is the standby state. Green means the tool is ready and has not detected voltage at the current location.

A flashing red light with an audible beep means voltage is detected. The circuit is live. Do not touch the wire. The beep and the red flash happen simultaneously, which means the tester communicates the warning even in a noisy environment where you might not hear the beep, or in a bright space where you might not notice the light change.

If the tester shows nothing at all — no green light, no response when you press the button — the batteries are dead or the tester has failed. This matters enormously, which is why the next section exists.

🔄 Live-Dead-Live Testing — The Step That Keeps Electricians Safe

Here is the procedure that professional electricians follow every time, and that most homeowners skip: Live-Dead-Live testing.

The concern is simple: what if the tester stopped working between when you last used it and right now? A tester with dead batteries shows no response on a live wire — which looks exactly like a dead wire. If you trust a silent tester without verifying it’s working, you’re trusting nothing.

Live-Dead-Live testing eliminates this risk in three steps.

First — Live: Before touching anything, test the tester on a known live circuit. A working outlet that you haven’t turned off is perfect. Hold the tip near the smaller slot (the “hot” slot — the one connected to the live side of the circuit) and confirm the tester beeps and flashes red. The tester is working.

Second — Dead: Go to the circuit you’re working on. Turn off the breaker at the electrical panel (the metal box with rows of switches, usually in a utility room, garage, or hallway — the breaker is the switch that controls the specific circuit). Now go back and hold the tester near the wire or outlet. No beep, steady green. The circuit appears to be off. Now go back to the circuit breaker and turn it on.

Third — Live again: Return to the known live outlet and test the tester once more. It beeps and flashes red. The tester is still working — which means the silent result in step two was accurate, not a dead battery.

This takes sixty additional seconds. It converts “I think the power is off” into “I have confirmed the power is off with a functioning tester.” That is not a small difference.

📋 Using It Step by Step

Turn on the tester and confirm the green light is showing. If there’s no light, replace the batteries before proceeding.

Take the steps above to verify that the tester is working correctly.

Go to the electrical panel and turn off the breaker controlling the circuit you’re working on. If the panel isn’t labeled — and many aren’t, fully or accurately — flip the switch for the room or fixture and confirm the light or device loses power before proceeding.

Hold the tester tip near the wire, outlet slot, or switch terminal you’ll be working on. Keep it close — within about half an inch of the surface. If it beeps and flashes red, the circuit is still live. The wrong breaker is off, or there are multiple circuits in the box. Find the right breaker before proceeding.

If the tester stays green and silent, go back and test on the known live outlet again. Confirmed still working. The circuit is off and the confirmation is real.

Proceed with the work.

⚠️ What a Voltage Tester Cannot Do

A non-contact voltage tester answers one question: is voltage present here? It cannot tell you how much voltage, whether the wiring is correct, whether the outlet is properly grounded, or whether the circuit has any other problems. Those questions require a multimeter — a more sophisticated tool that measures exact voltage values and tests continuity (whether a circuit is complete). Read about that here.

For basic homeowner electrical safety — confirming a circuit is off before working on it — the non-contact tester is the right and sufficient tool. For diagnosing electrical problems, understanding why an outlet isn’t working, or verifying proper wiring, a multimeter is the next step.

One additional note: never trust wire color alone. White wires are supposed to be neutral (not carrying current under normal conditions) and black wires are supposed to be hot (carrying current). “Supposed to be” does the heavy lifting in that sentence. Older homes, previous DIY work, and wiring errors mean wire color is not a reliable indicator of what’s live and what isn’t. Test every wire before touching it. Every time.

🛒 Gear Worth Having

Klein Tools NCVT-1P Non-Contact Voltage Tester — 50V to 1000V AC, Green/Red LED, Audible Alert — The tool that professional electricians and serious homeowners reach for. Green LED confirms it’s powered and working; red flash and audible beep when voltage is detected. Covers 50 to 1000V AC — the full range of residential wiring. CAT IV 1000V safety rating (the highest rating for general electrical work). Pocket clip, auto power-off to save batteries, compact enough to keep in any toolbox. Klein has been making professional electrical tools since 1857. This is the one.

Klein Tools NCVT1PKIT — Non-Contact Voltage Tester + GFCI Receptacle Tester, 2-Piece Kit — The NCVT-1P paired with Klein’s RT205 GFCI receptacle tester (the tool you plug directly into an outlet to check for wiring problems — open ground, reversed polarity, open hot, open neutral). The voltage tester tells you if power is present; the receptacle tester tells you if the outlet is wired correctly. Together they cover the two most common electrical safety checks a homeowner needs. The kit costs only slightly more than the tester alone.

Klein Tools NCVT-3P Dual Range Non-Contact Voltage Tester — 12-1000V AC, Built-in Flashlight — The upgraded option. Dual voltage range (12-1000V) means it also detects low-voltage wiring — doorbell systems, thermostat wiring, and landscape lighting that the NCVT-1P’s 50V minimum misses. The built-in flashlight illuminates junction boxes and outlet interiors where the work is happening. For anyone doing more than occasional electrical work, the dual range and flashlight are worth the modest additional cost.

As an Amazon affiliate, I earn from qualifying purchases. Thank you for supporting SkippityWhistles.

📖 Related Reads

How to Use Wire Nuts

How to Use a Voltmeter or Multimeter Safely

The DIYer’s Toolbox

Nervous people double-check things. That’s not a character flaw — it’s the right response to working near electricity. The voltage tester is what makes double-checking possible. Green light, silent tester, confirmed on a known live circuit immediately after: that’s not overcaution. That’s procedure. And procedure is what keeps the lights on — in the right sense of the phrase.


SkippityWhistles is part of the John D Reinhart content family. Writer, illustrator, videographer, and accidental filmmaker — find the whole story at JohnDReinhart.com.

9009

©2026 John D Reinhartskippitywhistles.com/ – all rights reserved

How to Use a Multimeter (Or: How to Actually See What Electricity Is Doing)

A multimeter tells you what electricity is doing — voltage, continuity, resistance — and removes the guesswork from DIY electrical work. Here’s how to use one without frying yourself or the meter.

Electricity is invisible. That’s both its charm and its fundamental problem — like dating someone who thinks they’re always in a movie scene. You can’t see it, you can’t smell it in normal quantities, and you can’t know what it’s doing without a tool that translates it into numbers you can read.

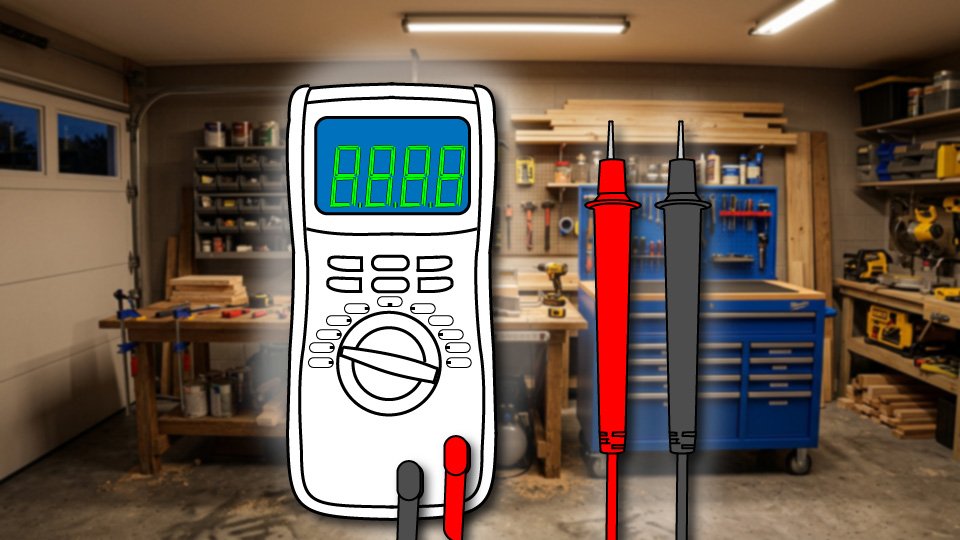
That tool is a multimeter — also called a digital multimeter, or DMM. If you’ve ever heard the word “voltmeter,” that’s the same thing, or close enough: a voltmeter measures voltage specifically, while a multimeter measures voltage and several other things besides. When you go to buy one, you’ll find multimeters on the shelf, not voltmeters. They do more and cost about the same.

Here’s what a multimeter measures, how to use it safely, and which one to buy first.

📊 What a Multimeter Actually Measures

The three measurements you’ll use most as a homeowner are voltage, continuity, and resistance.

Voltage is electrical pressure — the force that pushes current through a circuit. When you want to know whether an outlet is live, whether a wire is carrying current, or whether a battery still has charge, you’re measuring voltage. It’s measured in volts (V), and the reading tells you how much electrical pressure is present at that point in the circuit.

Continuity is whether a circuit is complete — whether electrical current can flow from one point to another without interruption. A continuity test tells you if a wire is broken, if a fuse has failed, or if a switch is making proper contact. Most multimeters signal a complete circuit with an audible beep, which means you can run the test without looking at the display. The beep means connected. Silence means broken.

Resistance is the opposition a material presents to the flow of electricity. Measured in ohms (Ω), resistance readings help diagnose component problems and verify that wiring is intact. For most homeowner electrical work, voltage and continuity cover the situations you’ll encounter. Resistance becomes relevant in more involved diagnostic work.

⚡ AC vs. DC — The Setting That Has to Match

Before taking any measurement, the multimeter dial needs to be set to the correct type of voltage. Getting this wrong produces either a meaningless reading or zero when there should be a number — which can be dangerous if it leads to the conclusion that power is off when it isn’t.

AC (Alternating Current) is what comes out of your wall outlets — the standard household current in the United States runs at approximately 120 volts AC. The dial marking is V~ (the tilde symbol indicates alternating). Use this setting for outlets, switches, light fixtures, and anything connected to household wiring.

DC (Direct Current) is what batteries produce, and also what solar panels, car electrical systems, and low-voltage electronics run on. The dial marking is V⎓ (the straight line indicates direct). Use this setting for batteries, car systems, and low-voltage DC applications.

Mixing up the settings — testing an AC outlet on the DC setting, or testing a battery on the AC setting — produces a reading of zero or a nonsensical number. If the reading doesn’t match expectations, the first thing to check is whether the dial is on the correct type of voltage.

🔌 How to Test an Outlet — Step by Step

Set the dial to AC Voltage (V~). We know that the voltage in most home AC circuits should be 120V. Click the dial on the multimeter until it points at 200V. Some meters feature auto-ranging, which chooses the range for you.

Connect the probes: black probe into the COM port (the port labeled COM, usually in the center or bottom), red probe into the VΩ port (the port for voltage and resistance measurements, usually labeled V or VΩ). Never put the red probe into the port labeled A — that port measures current (amperes), and connecting it across a voltage source will blow the meter’s internal fuse immediately. The A port is only used when measuring current, which requires a completely different connection method. Avoid the A port!

With the probes in the correct ports, insert the black probe tip into the wider outlet slot (the neutral slot) and the red probe tip into the narrower slot (the hot slot — the one connected to the live side of the circuit). Yes, into the slots.

A note on the finger-in-the-socket concern: this is a reasonable instinct that turns out not to apply to properly used test probes. The probe tips are insulated except at the very tip. Your fingers stay well behind the insulated guards. The meter has very high internal resistance that limits the current that flows through it to a level far below what’s dangerous. Electricians do this dozens of times a day. A properly used multimeter does not meaningfully increase shock risk compared to handling a normal lamp cord. Be brave – you can do this.

A live, properly wired outlet reads approximately 110 to 125 volts. Zero means the breaker is off or the outlet isn’t receiving power. A reading significantly different from the expected range suggests a wiring issue worth investigating.

🔋 How to Test a Battery

Set the dial to DC Voltage (V⎓). Choose a range slightly above the expected voltage of the battery being tested, or use auto-range.

Touch the red probe to the positive terminal of the battery (marked + on the battery) and the black probe to the negative terminal (marked −). The reading tells you the battery’s current voltage.

A good-condition AA battery reads approximately 1.5 volts. Below 1.2 volts and the battery is getting weak. A 9-volt battery reads 9 volts when fresh. A car battery reads approximately 12.6 volts when fully charged — below 12.4 suggests it’s getting tired, and below 12 volts means it’s significantly discharged and may struggle to start the car in cold weather.

Battery testing is one of the most immediately useful things a multimeter does. The difference between a dead battery and a weak battery is the difference between throwing away something that still has useful life and diagnosing a device problem correctly.

⚠️ The Rules That Protect the Meter and the Person Using It

Never change the dial setting while the probes are in contact with a live circuit. Set the dial first, then connect the probes.

Never use the continuity or resistance settings on a live circuit. Power off first, then test.

Never put the red probe in the A (current) port except when specifically measuring current — and measuring current requires breaking the circuit and connecting the meter in series, which is a different procedure entirely. The A port connected across a voltage source blows the fuse immediately.

Verify the meter is working before trusting a zero reading. A dead battery in the meter, or a blown internal fuse, shows zero on a live circuit. If a circuit that should be live reads zero, confirm the meter is functioning on a known live source before concluding the circuit is off. This is the same Live-Dead-Live principle covered in the voltage tester post — applied here to the multimeter.

🛒 Gear Worth Having

AstroAI Digital Multimeter 2000 Counts — AC/DC Voltage, Resistance, Continuity, Diode, Blue — The entry-level multimeter that handles everything a homeowner needs: AC and DC voltage, resistance, continuity with audible buzzer, and diode testing. Manual ranging with clearly labeled positions. Backlit LCD for working in dim spaces. Double-fused for overload protection. Over 73,000 Amazon reviews at 4.5 stars. This is the meter that earns its place in the toolbox on the first use and stays there for years.

AstroAI TRMS 4000-Count Auto-Ranging Multimeter — AC/DC Voltage, NCV, Battery Test, Flashlight — The step-up option. Auto-ranging means the meter selects the correct measurement range automatically — no dial sub-setting required beyond choosing the measurement type. TRMS (True RMS) measurement provides accurate readings on modern electronics and appliances that use non-standard waveforms. Built-in NCV (non-contact voltage detection) function, flashlight, and specific battery test modes for 1.5V, 9V, and 12V batteries. The right choice for anyone who wants the meter to do a little more thinking.

Klein Tools MM325 Digital Multimeter — 600V AC/DC, Manual Ranging, Backlit Display — Klein’s entry into the homeowner multimeter category, built to the same standards as their professional electrical tools. 600V AC/DC range, resistance to 2MΩ, continuity with buzzer, diode test, and battery test. Tough rubber housing that survives the toolbox. The brand that professional electricians trust in a meter priced for the homeowner who wants professional-grade reliability without the professional price tag.

As an Amazon affiliate, I earn from qualifying purchases. Thank you for supporting SkippityWhistles.

📖 Related Reads

How to Use a Voltage Tester

How to Use Wire Nuts

The DIYer’s Toolbox

A multimeter doesn’t fix anything. It tells the truth — whether power is present, whether a circuit is complete, whether a battery has enough charge left to be useful. In DIY electrical work, truth is the tool. Everything else follows from knowing what’s actually there.


SkippityWhistles is part of the John D Reinhart content family. Writer, illustrator, videographer, and accidental filmmaker — find the whole story at JohnDReinhart.com.

9012

©2026 John D Reinhartskippitywhistles.com/ – all rights reserved

How to Use a Stud Finder (And Finally Stop Drilling Into Nothing)

There’s a piece of wood hiding behind your drywall right now that can hold a TV, a shelf, or a cast-iron skillet rack — if you know how to find it. Here’s how to stop guessing and start drilling with total confidence.

Ron once found a stud by knocking on the wall and listening for a change in pitch. This is a legitimate technique — if you are a woodpecker. Ron is not a woodpecker. The shelf he hung that day is now a shelf-shaped dent in the carpet.

Nobody starts out knowing where the studs are. The wall gives away nothing on purpose. But there’s a fifteen-dollar tool that ends the guessing forever, and once it’s part of the routine, drilling into drywall stops being a gamble and starts being a plan.

🧠 What’s Actually Behind Your Wall

Drywall is a covering, not a structure. Behind it, vertical framing boards called studs (the wood or metal supports that give a wall its strength) run floor to ceiling, usually spaced 16 inches apart. Anything with real weight — a TV, a floating shelf, a cabinet — needs to grab one of those studs, not just the drywall skin covering it.

A stud finder reads the wall for density. Hollow cavity feels different to the sensor than solid wood. Cross that boundary and the tool lights up, beeps, or both — translation: right here.

🧲 Magnetic or Electronic: Pick a Fighter

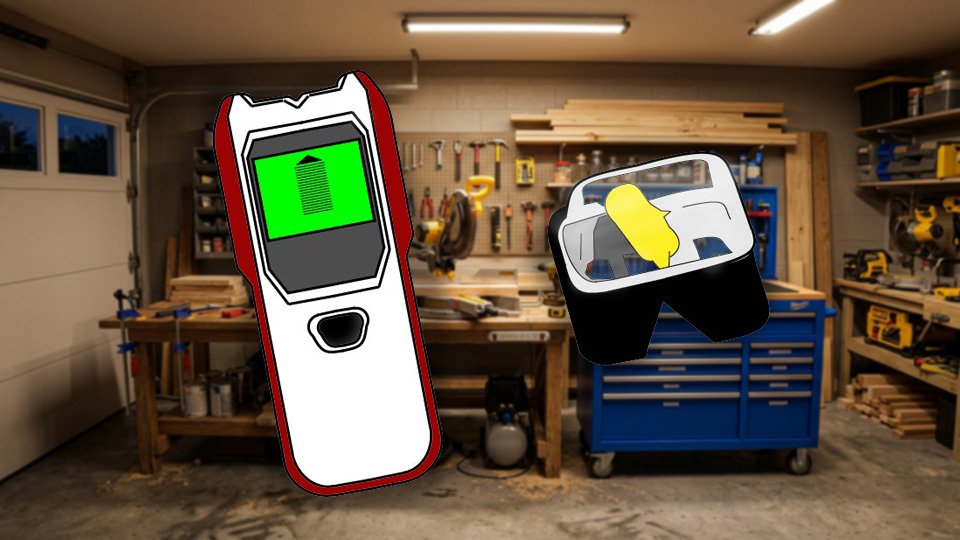
Magnetic stud finders don’t find studs directly — they find the metal fasteners holding the drywall to the stud. No batteries, nothing to calibrate, nearly impossible to break. Slower to use, and less exact about where the stud’s actual edges are.

Electronic stud finders sense the density change directly and usually mark both edges of the stud, not just a fastener. Faster, more precise, and worth the extra cost the moment anything heavier than a picture frame is going up.

📏 Finding the Stud, Step by Step

Magnetic Finders:

Place the finder flat against the wall. Slowly slide it horizontally across the wall. You’ll know when you’ve found fastener, and therefore a stud, when the finder latches onto it magnetically. Test your finding by moving the finder vertically up and down the wall, looking for other fasteners. They should all be pretty well lined up. There’s you stud.

Electronic Finders:

Step 1 — Start clean. Stud finders are calibrated for standard drywall. Plaster, tile, and concrete all confuse the reading, so expect a rougher result on older construction.

Step 2 — Calibrate the finder away from the target. Hold it flat against the wall in a spot that’s probably not over a stud, turn it on, and let it settle before moving. If you calibrate directly over a stud and the tool loses its baseline, and everything reads as a stud after that.

Step 3 — Glide the calibrated tool along the wall, don’t rush. Move the tool slowly and horizontally. The first signal marks one edge of the stud — pencil it in. Keep sliding until the signal drops off, and mark that edge too.

Step 4 — Split the difference. The center of the stud sits halfway between the two edge marks. That’s the spot to drill.

📐 The 16-Inch Rule

Studs in most homes are spaced 16 inches on center, occasionally 24. Find one, measure 16 inches over, and there’s a strong chance the next one is waiting right there. That shortcut turns a two-bracket shelf into a five-minute job instead of a twenty-minute one.

⚠️ Mistakes That Cost You a Wall Patch

  • Skipping calibration of the electric finder and trusting the first beep anyway
  • Sliding the tool too fast for it to get a clean read
  • Calling it done after one pass instead of confirming with a second
  • Drilling near an outlet without checking what’s running behind it

That last one matters more than it sounds like it should — wiring tends to run vertically up from outlets and switches, so anything drilled directly above one deserves extra caution.

⚡ Don’t Drill Into a Wire

Before any drill touches the wall: confirm the stud spacing looks normal, cut power to anything nearby, and sweep the area with a voltage tester (a small handheld tool that detects live electrical current without needing to touch a wire directly). Thirty seconds of caution beats an afternoon spent explaining what happened to the breaker panel.

🖼️ When a Stud Isn’t the Point

Light loads — picture frames, small mirrors, floating shelves under a few pounds — can usually ride on a drywall anchor (a small fastener that grips the drywall itself instead of the framing behind it) instead of a stud. Anything heavier gets a stud. No exceptions, no matter how confident the nail looks going in.

✅ Final Verdict

A stud finder doesn’t turn anyone into a carpenter. It turns guessing into knowing, and that’s the whole difference between a shelf that holds and a shelf-shaped dent in the carpet.

🛒 Gear Worth Having

CH Hanson Magnetic Stud Finder — a straightforward magnetic finder for anyone who just needs a yes-or-no answer without spending real money on the question.

Zircon StudSensor Electronic Stud Finder —an electronic finder that marks both edges of the stud and handles the calibration cleanly — the sweet spot for most household projects, from shelving to TV mounts.

Franklin Sensors ProSensor Multi-Sensor Stud Finder — a multi-sensor unit that scans a wider strip of wall at once and reads through thicker material, including some plaster walls that give cheaper units trouble. Overkill for a single picture frame, exactly right for anyone doing this often enough that speed and accuracy start to matter.

As an Amazon affiliate, I earn from qualifying purchases. Thank you for supporting SkippityWhistles.

📖 Related Reads

Working with Electricity: The Basics

How to Use a Voltage Tester

Drill Bit Sets: What You Actually Need

SkippityWhistles is part of the John D Reinhart content family. Writer, illustrator, videographer, and accidental filmmaker — find the whole story at JohnDReinhart.com.

2014

©2026 John D Reinhartskippitywhistles.com/ – all rights reserved

How to Work with Electricity (Or: Respect the Breaker Panel)

You don’t need to be an electrician to work safely around your home’s wiring — just the habits that keep you that way.

Ron once explained to his neighbor that you can tell if a wire is live by tapping it quickly with the back of your hand — something about how a quick tap won’t let your muscles clench around the wire the way a full grip would. His neighbor, wisely, did not try this. Ron didn’t either, for the record. He just liked saying it with authority.

That’s the thing about electricity: everybody’s got a method, a trick, a thing their uncle swore by. None of it replaces the two habits that actually keep you safe. This post is about those two habits — and about understanding what’s actually happening behind your outlets and switches so “be careful” turns into something you can act on.

🔌 What’s Actually Behind the Wall

Every outlet and switch in your house connects back to a junction box (the plastic or metal box inside your wall where wires are joined together and protected) and, eventually, to your breaker panel (the metal box — usually in a basement, garage, or utility closet — where your home’s electrical circuits split off from the main power line, each protected by its own breaker).

Each circuit runs on wire rated by gauge (a number describing wire thickness — the lower the number, the thicker the wire, and the more current it can safely carry). A 14-gauge wire is standard for a 15-amp lighting circuit; a 12-gauge wire steps up to a 20-amp circuit, like the one your kitchen outlets are probably on.

Using a wire rated for less current than the circuit calls for is how outlets get warm and, eventually, how houses catch fire. This is the one place in home DIY where “close enough” isn’t a category.

🧪 Live-Dead-Live: The Rule That Never Changes

Before you touch any wire, you test it. Every time. Even the fifth time. Even when you’re sure. Here’s the sequence, and it doesn’t change no matter how many times you’ve done this:

First, test your voltage tester (a tool that detects electrical current, either by touching a wire directly or, with a non-contact voltage tester, by sensing current from nearby) on a wire or outlet you know is live — a lamp that’s plugged in and on works fine. This confirms the tester itself is working. That’s the first “live.”

Second, flip off the breaker for the circuit you’re working on, then test the wire you actually intend to work on. It should read dead. That’s the “dead” — the reading that matters.

Third, go back and test the same known-live source from step one again. If it still reads live, your tester didn’t die mid-test and give you a false “dead” reading. That’s the second “live,” and it’s the step almost everyone skips — right before they needed it.

Live-dead-live. Three tests, in that order, every single time. It takes forty-five seconds and it is the entire difference between a DIY project and an emergency room visit.

🎨 Reading Wire Colors (Without Guessing)

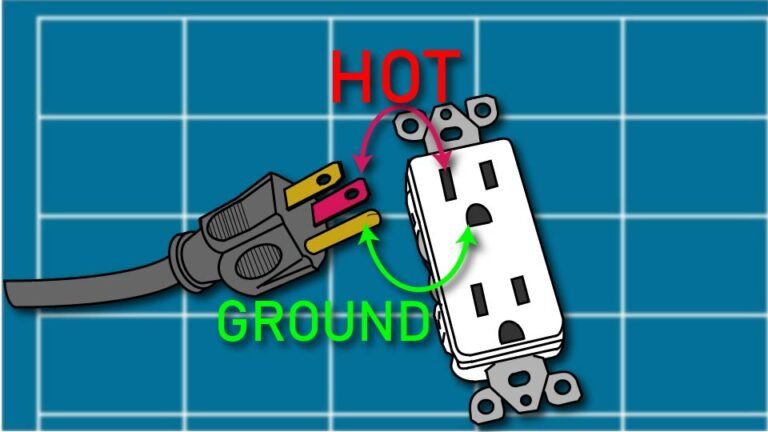
Technical line drawing of an electrical outlet and grounded-plug with the hot and ground pins identified against a blueprint-style background by John D. Reinhart, created using the Three Point Line illustration method

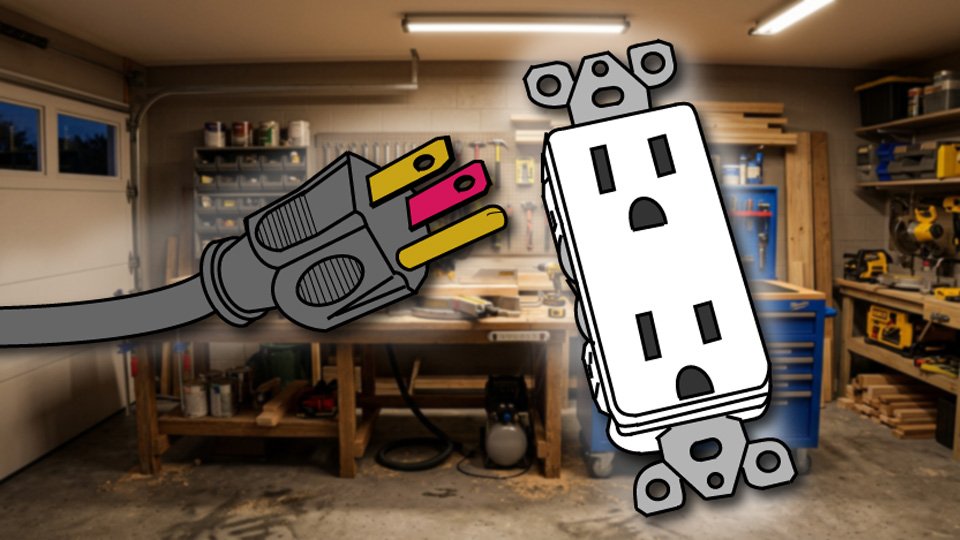
In standard US residential wiring, black or red wires are typically hot (the wire carrying current from the breaker panel toward whatever you’re powering), white wires are typically neutral (the wire that carries current back to the panel to complete the circuit), and bare copper or green wires are ground (the wire that gives electricity a safe path to the earth if something goes wrong, instead of through you).

“Typically” is doing real work in that sentence. Wire color is a strong convention, not a law of physics, and older homes or previous owners’ DIY work can break the pattern. Color tells you what to expect. Live-dead-live testing tells you what’s true. Trust the second one.

🔧 Wire Nuts and Connections Done Right

A wire nut (the small plastic cap that twists onto bare wire ends to join them and cap off the exposed metal) needs bare wire twisted together tightly enough that the nut grips and covers every strand — no copper visible once it’s on. If you can wiggle a wire nut off with light pressure, it’s not seated. Give it another twist.

Match wire nut size to the wire gauge and count you’re joining — too small and it won’t seat; too large and the connection can work loose over time. The color-coded sizing on the packaging isn’t decoration; it’s the manufacturer telling you which nut goes with which combination of wires.

🚫 When to Call an Electrician

Swapping an outlet, replacing a switch, adding a light fixture on an existing circuit — all reasonable weekend projects once you’ve got the live-dead-live habit. Anything involving your breaker panel itself, aluminum wiring, knob-and-tube wiring (an old wiring method, mostly phased out by the 1950s, that used ceramic knobs and tubes instead of modern insulation), or a circuit that keeps tripping for no obvious reason — that’s a phone call, not a project. There’s no shame in it. Ron’s dad called an electrician exactly once in thirty years, and it was for the panel. Everything else, Ron figured out with the right tools and enough patience.

🛒 Gear Worth Having

Klein Tools NCVT-3 Non-Contact Voltage Tester — Detects live current through the wire’s insulation without touching bare metal, and the two-point detection at the tip means you’re less likely to get a false reading. This is the tool that makes step one of live-dead-live actually reliable.

IDEAL 30-076 Wing-Nut Wire Connector Assortment — A mixed box covering the wire gauge and count combinations you’ll actually run into in a house this age, so you’re not mid-project realizing you have the wrong size nut for a three-wire joint.

Klein Tools 32717MAG Multi-Bit Insulated Screwdriver — Insulated to 1,000 volts, which matters less for the amperage in a home circuit and more because it’s one less thing to think about while your hands are near a junction box.

As an Amazon affiliate, I earn from qualifying purchases. Thank you for supporting SkippityWhistles.

📖 Related Reads


SkippityWhistles is part of the John D Reinhart content family. Writer, illustrator, videographer, and accidental filmmaker — find the whole story at JohnDReinhart.com.

9010

©2026 John D Reinhartskippitywhistles.com/ — All rights reserved
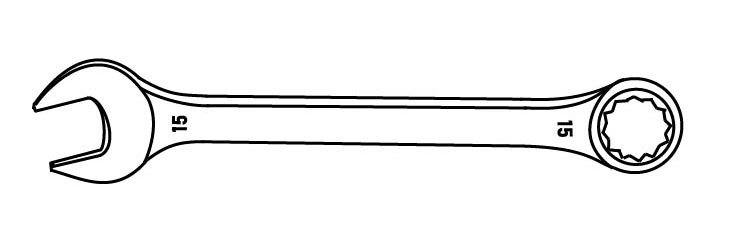
How to Choose the Right File (Or: Not Every Ridged Metal Bar Is the Same Tool)

The wrong file turns a five-minute fix into a ruined edge. Here’s how to grab the right one on the first try.

Ron kept exactly one file in his workbench drawer for about a decade — a beat-up flat one he grabbed for everything from a rough bolt thread to the burr on a cut pipe to, once, memorably, trying to round off a key that no longer fit its lock. Two out of three of those jobs went badly. The file wasn’t broken. It was just the wrong shape for the job, every time, because Ron didn’t know there was a right one.

A file (a hand tool with a hardened, ridged surface used to shape, smooth, or remove small amounts of material from metal, wood, or plastic through abrasion) isn’t one tool. It’s a family of tools, each shaped and cut for a different job, and picking the right one is the difference between a clean edge and twenty extra minutes of frustration.

📐 Shape Is the First Decision

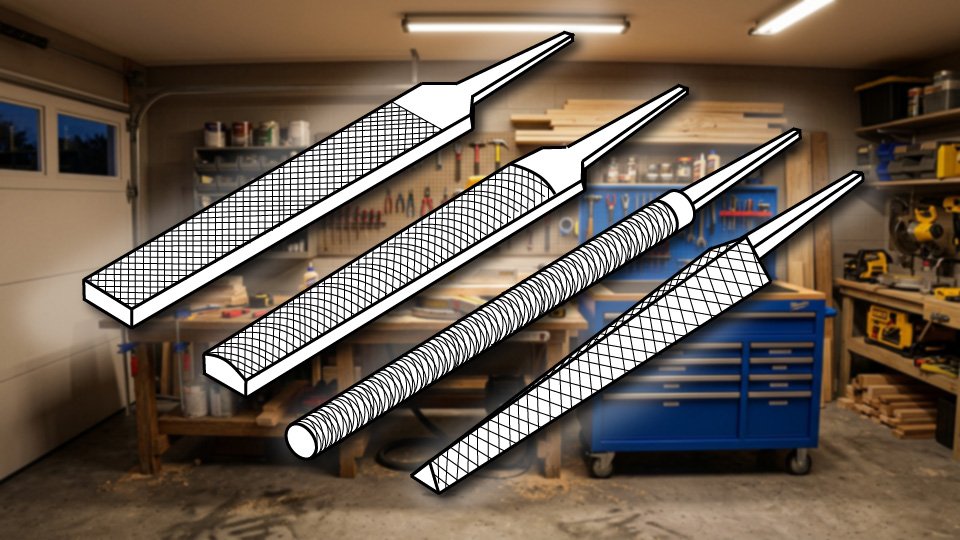
A flat file has two flat faces and is the generalist of the group — good for straight edges, wide surfaces, and squaring off material.

A round file, sometimes called a rat-tail file, is cylindrical and made for enlarging holes or smoothing curved, concave surfaces.

A half-round file has one flat face and one curved face, which makes it useful for both flat work and gentle curves without switching tools.

A triangular file has three flat faces meeting at sharp points and is built for cleaning out corners, notches, and saw teeth that a flat or round file can’t reach.

A mill file (a flat, single-cut file traditionally used for sharpening mower blades, axes, and other tool edges) is the specific tool for keeping cutting edges sharp — worth owning on its own if you sharpen your own blades.

If you only own one file, a flat one covers the most ground. If you’re buying a set, shape variety matters more than owning five of the same profile.

🔢 Single-Cut vs. Double-Cut: Reading the Teeth

Every file has teeth cut into its surface, and the pattern changes what it’s good at. A single-cut file has one set of parallel ridges running in one direction, producing a smoother finish and more control — the choice for sharpening tools or finishing an edge. A double-cut file has two sets of ridges crossing each other, removing material faster but leaving a rougher surface — the choice for shaping and stock removal where speed matters more than finish.

📏 Coarseness: Bastard, Second-Cut, and Smooth

Beyond shape and cut direction, files come in coarseness grades — bastard (coarse, for fast material removal), second-cut (medium, for general shaping), and smooth (fine, for finishing touches). A bastard-cut file chews through material quickly but leaves a rough surface behind it. A smooth file barely removes material but leaves a clean, near-polished result. Most home workshops get the most use out of a second-cut file, with a smooth one held in reserve for finish work.

🧹 Keeping a File Working: The File Card

Files clog. Metal filings, called swarf (the fine shavings and dust produced by filing or machining), pack into the teeth and reduce a file’s cutting ability fast — often after just a few strokes on soft metal like aluminum or brass. A file card (a brush with short, stiff wire bristles, used specifically to clear packed metal filings out of a file’s teeth) restores a clogged file in seconds and should live right next to wherever the files are stored. Running a clogged file across metal doesn’t just work poorly — it can scratch the workpiece with the trapped debris.

✋ The Part Nobody Mentions: The Tang Needs a Handle

Most files come with a tang (the narrow, unsharpened point at the base of the file, meant to be inserted into a handle) and no handle attached. Filing with a bare tang is how people put a file straight through their palm when it catches on a workpiece — the tang has no guard, and a slip sends it forward into your hand. A file without a proper handle isn’t a finished tool yet.

🛒 Gear Worth Having

Nicholson 5-Piece File Set with Handles — Covers flat, half-round, and round profiles in second-cut coarseness, with handles already fitted to every tang. The set that answers “which file do I even own” before it becomes a problem.

Nicholson File Card and Brush Combo — Wire bristles on one side for clogged teeth, softer bristles on the other for a final cleanout. Keeps every file in the set above actually cutting instead of just sliding.

General Tools 707 Needle File Set — Miniature versions of the standard shapes, sized for small hardware, jewelry repair, and the fine deburring work a full-size file is too clumsy to do.

As an Amazon affiliate, I earn from qualifying purchases. Thank you for supporting SkippityWhistles.

📖 Related Reads


SkippityWhistles is part of the John D Reinhart content family. Writer, illustrator, videographer, and accidental filmmaker — find the whole story at JohnDReinhart.com.

7046

©2026 John D Reinhartskippitywhistles.com/ — All rights reserved
How to Use Toggle Bolts and Anchors (Or: What to Grab When the Screw Just Spins)

A screw spinning uselessly in drywall isn’t broken — it’s just missing something to actually grip. Here’s what to give it.

Ron drove a screw into what he was fairly confident was a stud, hung a shelf, and loaded it with exactly the kind of hardcover books that make a point about it later. The shelf held for four days. On the fifth, at roughly 3 AM, it introduced itself to the floor. Ron hadn’t found a stud. He’d found drywall that was very good at pretending, right up until it wasn’t.

A screw spinning uselessly in drywall isn’t a broken screw — it’s a screw with nothing to grip, because drywall’s powdery gypsum core has no fiber for threads to bite into the way solid wood does. That’s the entire reason anchors and toggle bolts exist: they give a fastener something real to hold onto, spreading the load out instead of asking one small point of drywall to carry all of it.

🧩 Four Anchors, Four Strength Levels

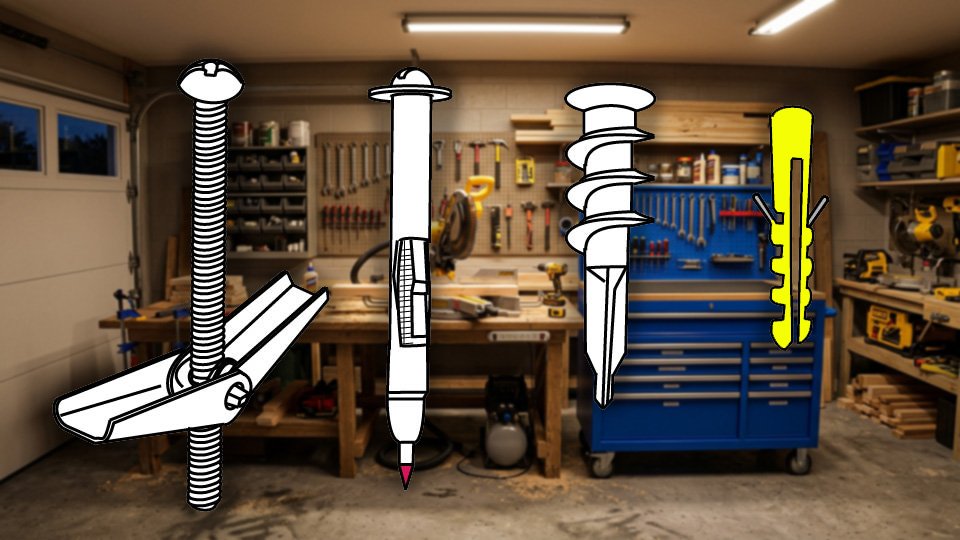
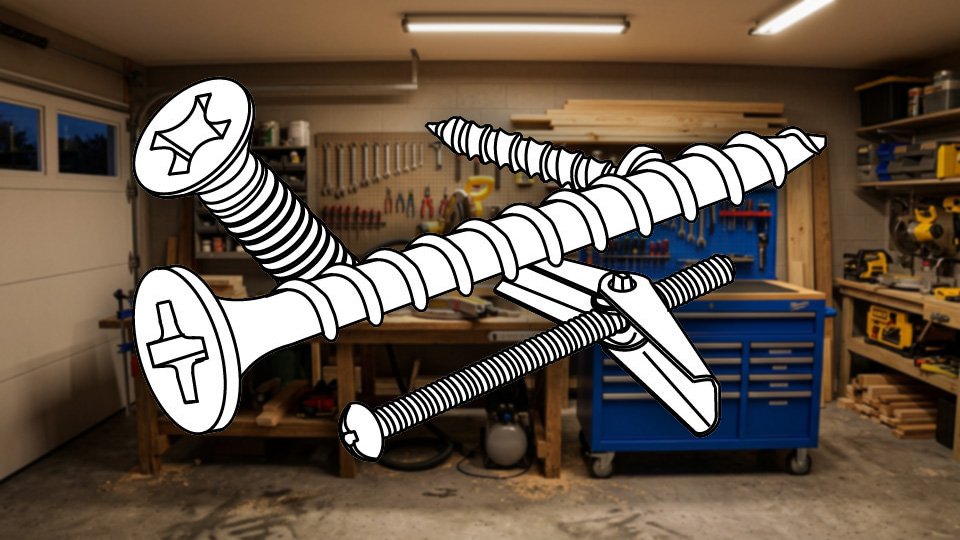
  • A plastic expansion anchor (a ridged plastic sleeve that expands against the hole as a screw is driven into it) is the lightest option, good for roughly 5 to 10 pounds — pictures, small hooks, nothing you’d mourn if it failed.
  • A self-drilling anchor (a sharp-tipped screw-style anchor that drills its own hole without a pilot) steps up to around 10 to 25 pounds and skips a step in installation, at the cost of leaving a bigger hole behind if it’s ever removed.
  • A molly bolt (a metal sleeve that expands and locks behind the drywall as its screw is tightened) handles roughly 25 to 50 pounds and stays permanently anchored behind the wall even after the screw comes out.
  • A toggle bolt (a machine screw paired with spring-loaded metal wings that fold flat for insertion and snap open behind the drywall) is the heavyweight option, often rated 50 to 100-plus pounds, because its wings lock flat against the back of the drywall and spread the load across the widest area of any anchor type.

The general rule: light and forgettable gets a plastic anchor, everyday household weight gets a self-drilling anchor or molly bolt, and anything you genuinely cannot afford to have fall — a heavy mirror, a loaded shelf, a TV mount — gets a toggle bolt, or better yet, an actual stud.

🛠️ Installing a Toggle Bolt, Step by Step

Mark the spot and commit — toggle bolts leave a dime-sized hole behind if the anchor’s ever removed, so measure with intention. Drill the hole to the exact size the package specifies; too small and the wings can’t open, too large and the whole anchor spins uselessly in the hole, which defeats the entire point. Thread the screw through whatever you’re hanging first, then thread it through the folded wings until the screw tip just peeks through — don’t tighten yet, just assemble. Fold the wings flat and push the assembly through the hole until you feel a distinct snap as the wings spring open on the other side of the drywall. Finally, tighten while gently pulling the screw back toward you, which keeps the wings flush against the back of the wall for maximum grip — stop at snug, not at Hulk-strength, since overtightening can crush the drywall from the inside and quietly weaken the very hold you’re trying to create.

🤔 The Three-Question Test

Before buying anything, answer three questions honestly.

  • How heavy, really — not just the fixture’s weight, but the fixture plus whatever it’ll eventually hold, since a shelf that weighs two pounds empty might carry thirty pounds of books.
  • What’s the wall made of — standard drywall works with any anchor type here, but solid masonry or concrete needs a completely different masonry anchor, a different category of hardware entirely.
  • And how permanent — plastic anchors come out cleanly for something you’ll rearrange next year, while toggle bolts commit you to that exact spot on the wall for good.

🚫 The One Mistake That Beats Them All

Before reaching for any anchor, check for a stud (the wood or metal framing member inside the wall that a screw can bite into directly). A stud is stronger than every anchor on this list combined, and if one happens to be right where you need it, skip the anchor entirely and drive a wood screw straight into it. Anchors exist specifically for the in-between spots where no stud is available — they’re a very good solution to a problem you’d rather not have in the first place.

🛒 Gear Worth Having

TOGGLER SnapToggle Heavy-Duty Toggle Bolt Kit — Rated well past 100 pounds per anchor and reusable if the screw ever needs to come out — the toggle bolt that makes a heavy mirror a non-issue.

Self-Drilling Drywall Anchor Assortment — No pilot hole, no separate drill bit — for the everyday medium-weight jobs that don’t need the full toggle-bolt commitment.

Zircon MultiScanner Stud Finder — The tool that makes the whole anchor conversation unnecessary in the first place, whenever there’s a stud close enough to use instead.

As an Amazon affiliate, I earn from qualifying purchases. Thank you for supporting SkippityWhistles.

📖 Related Reads


SkippityWhistles is part of the John D Reinhart content family. Writer, illustrator, videographer, and accidental filmmaker — find the whole story at JohnDReinhart.com.

2008

©2026 John D Reinhartskippitywhistles.com/ — All rights reserved