How to Use a Spirit Level: Straight Is Not A Suggestion

Your eye is genuinely bad at spotting a tilt, especially on something you built yourself. A spirit level doesn’t have that problem.

Rhonda hung a shelf by eye, stepped back, and it looked perfectly level — right up until a coffee mug started a slow, deliberate migration toward the edge over the following week. Her eye hadn’t been careless. It had just done what eyes reliably do with anything you built yourself: rounded the tilt down to zero because you wanted it to be level.

A spirit level exists specifically to overrule that instinct. It’s a genuinely simple tool, and using it right is less about technique and more about trusting it over your own eye, every time, without negotiating.

🫧 How the Bubble Actually Works

Inside a spirit level sits a sealed, curved tube filled with liquid (traditionally alcohol — the “spirit”) and one air bubble.

Gravity pulls the liquid to the lowest point, which pushes the bubble to the highest point in the tube.

When the tube is perfectly level, the bubble centers itself exactly between two marked lines. Tilt the tube even slightly, and the bubble drifts toward the higher end.

That’s the entire mechanism — everything else about using a level is just reading that one honest signal correctly.

📏 Picking the Right Level for the Job

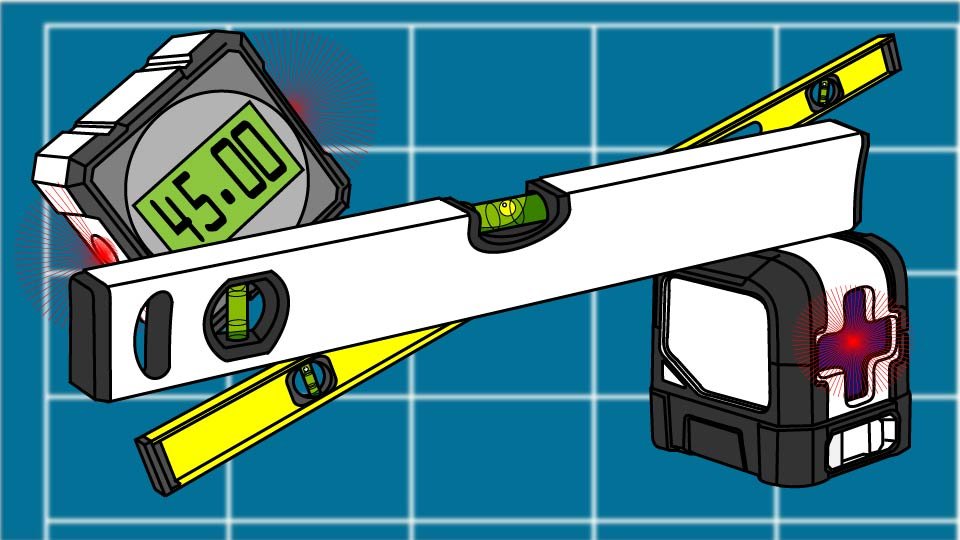
  • A torpedo level (short, usually 9 to 24 inches, showing level, plumb, and often 45 degrees) covers the overwhelming majority of household jobs — shelves, picture frames, cabinets, fence posts — and is the level most people should own first.
  • A box level (longer, 24 to 48 inches) gives a more accurate reading across longer spans, which matters for deck framing, drywall, or flooring where a short level’s reading in one spot can miss a slow sag across the whole surface.
  • A laser level projects a level line across a whole wall or room, genuinely useful for big projects but unnecessary for a single shelf. The general rule: the longer the surface, the more a longer tool’s reading actually means something.

👀 Reading the Bubble Correctly

Centered – like dead center between the lines, means level. “Pretty-much centered” and “basically centered” are not things. The bubble must be between the lines. Off toward one end means the surface tilts in that direction, and the further off-center, the more pronounced the tilt.

  • Horizontal (floors, tables, shelves, etc): Lay the level flat on the surface. Make sure there’s nothing under it that might throw it off. Rotate the level 90 degrees to make sure the item is flat in the other direction, too.
  • Vertical (the sides of bookcases, door frames, etc): There’s a smaller “plumb” level to measure the up-and-down straightness of these things. Like measuring the horizontal, press the level against the item being measured, making sure there’s nothing under the level to throw it off.

Checking one direction only is the most common way a project ends up subtly wrong — a shelf can read perfectly level side-to-side and still slope front-to-back. Rotate the level ninety degrees and check the second direction before calling anything finished.

🚫 The Habits That Undo a Good Level

  • Trusting your eye over the tool once the level has already told you otherwise defeats the entire purpose of owning one.
  • Using a short level on a long surface can miss a gentle sag that only shows up across real distance.
  • Skipping the second-direction check leaves half the problem invisible.
  • And treating “pretty close” as good enough quietly reintroduces the exact tilt the level was there to catch — if it matters enough to check, it matters enough to actually center the bubble.

🧰 Keeping a Level Honest

Store it flat or standing upright, never propped at an angle, since angled storage stresses the tube’s seal over time.

A level that’s been dropped deserves a quick trust check: set it on a surface you’re confident is truly flat, like a countertop, and confirm the bubble still centers.

If it doesn’t, the level itself has gone out of true — and a level you can’t trust is worse than no level at all, since it hands you false confidence instead of an honest answer.

🛒 Gear Worth Having

Johnson Level 24-Inch Aluminum Torpedo Level — Accurate, compact, and the right first level for nearly every household project before anything longer is ever needed.

Empire 48-Inch Box Level — Spans real distance for framing, flooring, or anything a short torpedo level would only read a fraction of.

Huepar Self-Leveling Laser Level — Projects a full line across a wall instead of a single point, which earns its keep the moment a project gets bigger than one shelf.

As an Amazon affiliate, I earn from qualifying purchases. Thank you for supporting SkippityWhistles.

📖 Related Reads


SkippityWhistles is part of the John D Reinhart content family. Writer, illustrator, videographer, and accidental filmmaker — find the whole story at JohnDReinhart.com.

2022

©2026 John D Reinhartskippitywhistles.com/ — All rights reserved

How to Use a Reciprocating Saw (Or: It Wants to Get Away From You)

Reciprocating saws cut aggressively through almost anything. Here’s how to grip it safely so it doesn’t escape, and when it’s the right tool for the job.

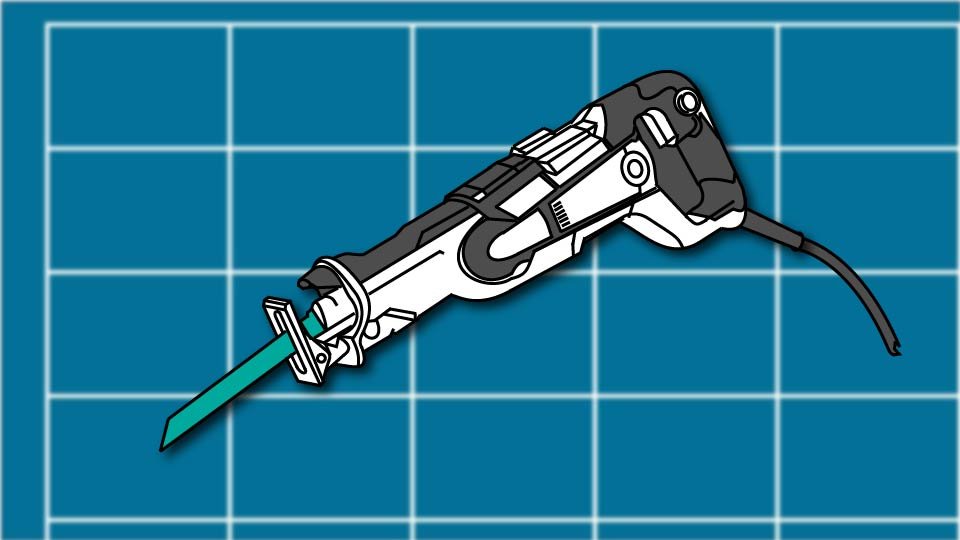
Ron gripped his reciprocating saw with just his his hand wrapped around the trigger, figuring the front of the tool was just there to point the blade. The blade caught on a hidden nail mid-cut, and the whole tool twisted hard and fast, nearly wrenching out of his grip entirely. Nothing was wrong with the saw. Ron just hadn’t put his other hand where it actually needed to be — on the front handle, holding on like the tool meant it, because it did. What did you think that grip on the front was for, eh Ronnie?

A reciprocating saw isn’t a precision tool. It’s controlled aggression — a blade moving back and forth hundreds of times a second, built for rough cuts and demolition. Respected properly, it tears through wood, metal, and even nails with real speed. Held wrong, it’s a tool that genuinely tries to twist itself loose the moment it meets real resistance.

⚠️ The Core Principle

The back-and-forth blade motion creates real torque, especially the instant the blade catches on something solid. That torque tries to twist the saw out of your hands or twist your wrist along with it. Your job isn’t to fight the tool’s cutting power — let it cut aggressively, that’s what it’s for. Your job is to make sure it can’t do to your hands what it wants to do the moment it catches.

🔩 The Parts You’re Holding

The blade moves back and forth thousands of strokes per minute, and different blades suit different materials —

  • wood blades with larger teeth cut fast through lumber
  • metal blades with finer teeth handle pipe and studs
  • demolition blades are built for rough, aggressive cutting through mixed material including embedded nails.

Stroke length — how far the blade travels on each cycle, typically 3/4 to 1 1/4 inch depending on the saw — is a fixed spec of the tool itself, not something you adjust; a longer-stroke saw cuts more aggressively and demands more experience to control.

Variable speed, where available, adjusts how fast the blade cycles, but speed is never a substitute for proper grip.

🖐️ The Grip: Two Hands, Straight Wrist, Non-Negotiable

  • Your dominant hand, on the trigger handle, is the main control point — grip firmly, all fingers and thumb locked underneath, without crushing the handle.
  • Your other hand belongs on the front handle, and this is the grip that actually matters most: it’s what prevents the saw from twisting out of your hands the instant the blade catches on something.
  • Grip it like it’s trying to get away, because it genuinely is.
  • Keep your wrist straight rather than bent — a bent wrist acts like a lever, rotating your hand instead of resisting the twist, while a straight wrist actually holds firm against it.
  • Stand with feet shoulder-width apart, leaning slightly into the tool, positioned so that if it does slip, it slides away from your body rather than toward it.

🛠️ Using It: Secure, Position, Cut

  • Secure whatever you’re cutting first — clamps, bracing, or gravity, but it needs to be stable. Material that shifts mid-cut is one of the most common causes of the tool binding and twisting unexpectedly.
  • Position the blade against the material before starting; plunge cuts, starting mid-material with the saw already running, are an advanced technique worth learning after edge cuts feel comfortable.
  • Let the blade reach full speed before pushing into the cut — starting already embedded in material invites binding immediately.
  • Push forward and slightly downward, guiding rather than forcing; pressing hard doesn’t cut faster, it just works the tool harder and makes a twist more likely.
  • Follow your cut line steadily, and don’t expect precision — the blade wanders a little, and that’s normal for a demolition tool.
  • Once through, pull the saw away from the material rather than leaving a running blade sitting in the cut.

🚫 The Mistakes Worth Never Making

  • Gripping with only one hand removes the exact control that stops the tool from twisting loose.
  • A bent wrist turns into a lever instead of resistance. Pressing too hard works the saw harder without cutting any faster.
  • Unsecured material shifts mid-cut and causes binding.
  • A dull blade demands more force and binds more easily than a sharp one.
  • Starting before the blade reaches full speed causes it to bind on first contact.
  • Leaving a running blade in the material creates unnecessary wear and risk.
  • And reaching any part of your body near a running blade is exactly as dangerous as it sounds — just never do it.

🎯 When to Reach for It (and When Not To)

Reach for it for demolition, cutting through nails or metal, rough and fast cuts, salvaging material from something being torn out, or cutting in spots a circular saw can’t reach.

Reach for something else — a circular saw or miter saw — when the job needs precision, a genuinely clean final cut, or speed on a long straight run, since a reciprocating saw simply isn’t built to deliver any of those three.

🛒 Gear Worth Having

Cordless Reciprocating Saw — Genuine freedom of movement for demolition work, without a cord getting caught in exactly the debris you’re trying to cut through.

Demolition Blade Assortment (Wood, Metal, Nail-Embedded) — Covers the mixed, unpredictable material demolition work actually throws at a blade, including the nails a wood blade alone won’t survive.

Bessey Bar Clamp Set — Keeps material from shifting mid-cut, which is one of the most common ways this saw ends up binding and twisting unexpectedly.

As an Amazon affiliate, I earn from qualifying purchases. Thank you for supporting SkippityWhistles.

📖 Related Reads


SkippityWhistles is part of the John D Reinhart content family. Writer, illustrator, videographer, and accidental filmmaker — find the whole story at JohnDReinhart.com.

7054

©2026 John D Reinhartskippitywhistles.com/ — All rights reserved

How to Use an Oscillating Multi-Tool (Or: Why It Feels Weirder Than It Is)

This tool doesn’t spin, doesn’t stroke back and forth like a saw, and doesn’t move the way anything else in the garage does — and that’s exactly the point.

Ron grips his oscillating tool like it might buck loose from his hand at any second, and presses it into the work harder than he means to every single time, bracing for something to go wrong. Nothing ever does. What actually happens is the harder grip and the extra pressure slow the blade’s own motion down, which makes the cut worse, not safer — the tool was never fighting him. It just moves in a way nothing else in the garage moves, and that unfamiliar feeling reads as danger even when it isn’t.

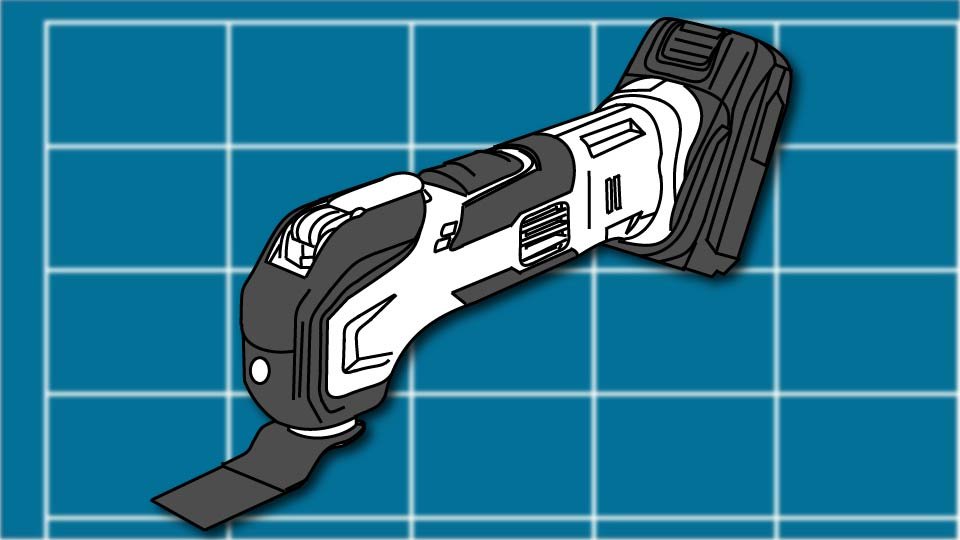
An oscillating tool doesn’t spin like a drill and doesn’t stroke back and forth in one long motion like a saw. It vibrates rapidly side to side, hundreds of times a second, and once that specific motion clicks, the whole tool stops feeling unpredictable.

🎯 The Core Idea: Precision, Not Power

This tool isn’t trying to compete with a circular saw or a reciprocating saw on speed or raw material removal. It’s built for one specific advantage: precision in tight spaces nothing else can reach. Trim in a corner, a plunge cut through drywall, sanding right up against an edge — that’s its actual job, not big cuts or heavy demolition.

🔩 The Parts You’re Holding

The body is the handle — small enough for one hand, though two hands give steadier control. The head holds whatever attachment is doing the work, and most modern tools use a quick-change system that swaps attachments without extra tools, which matters, since a fiddly swap process means those extra attachments just never get used. Many models include speed control, letting you dial back for delicate work and up for more aggressive cutting or sanding.

🛠️ Choosing the Right Attachment

  • A saw blade cuts wood, metal, or drywall, in various shapes for different cut types.
  • A sanding pad handles finish work and tight corners a bigger sander can’t reach.
  • A scraper blade removes paint, caulk, or adhesive. A grout blade is built specifically for the narrow lines between tile.
  • A basic starter kit with a saw blade and a sanding pad covers the large majority of what most people ever actually use one for.

✋ Using It: Guide, Don’t Fight

  • Secure whatever’s being worked on — clamp small pieces, and for installed trim or fixtures, a steady hand or gravity is often enough.
  • Turn the tool on and let it reach full speed before the blade ever touches the material.
  • Bring the blade to the work and let the oscillation itself do the cutting or sanding — this is the exact instinct Ron gets backwards every time. Pressing harder doesn’t speed anything up; it slows the blade’s actual motion and wears out the attachment faster.
  • Move in slow, smooth passes rather than jabbing or rushing, and let the tool’s own speed do the work it’s already built to do.

🚫 Common Mistakes

  • Pressing too hard is the one nearly everyone makes first, and it’s counterproductive every time.
  • Using the wrong attachment for the job — sanding with a saw blade, cutting with a sanding pad — just wastes both.
  • Letting the work shift mid-cut produces uneven, damaged results.
  • Jerky, aggressive movement causes rough cuts where smooth passes would have been cleaner and faster.
  • And trying to use it for heavy material removal, the job a reciprocating saw actually exists for, is asking a precision tool to do a demolition tool’s work.

🎯 When to Reach for It (and When Not To)

Reach for it when cutting trim in a tight corner, removing paint or caulk from a small area, sanding inside a corner, cutting a clean hole for an outlet, or doing any detail work where precision matters more than speed.

Reach for something else when the job involves large pieces, heavy material removal, long straight cuts, or genuine time pressure — a circular saw, jigsaw, or reciprocating saw covers that ground far better.

🛒 Gear Worth Having

Variable Speed Oscillating Multi-Tool — Speed control adds real precision for delicate work without giving up power for the more aggressive jobs.

Oscillating Blade and Sanding Pad Assortment Kit — Covers the saw blades and sanding pads that handle the overwhelming majority of what this tool actually gets used for.

AXEMIS Half-Face Respirator Mask Combo Kit with Anti-Fog Safety Glasses — Covers eyes and lungs against the dust this tool kicks up during cutting, sanding, or scraping.

As an Amazon affiliate, I earn from qualifying purchases. Thank you for supporting SkippityWhistles.

📖 Related Reads


SkippityWhistles is part of the John D Reinhart content family. Writer, illustrator, videographer, and accidental filmmaker — find the whole story at JohnDReinhart.com.

7052

©2026 John D Reinhartskippitywhistles.com/ — All rights reserved

How to Use a Miter Saw (Or: The Angle Is Not What You Think)

A miter saw cuts trim at exact angles. Here’s how to square it up, set your angle (it’s not what you think), and get perfect fits every time.

Ron needed to trim a 90-degree corner, so he set his miter saw to 90 degrees, because that is what a reasonable person would assume a 90-degree corner requires. The two pieces came out looking less like a corner and more like a flat, confused line. He tried it again. Same flat, confused line. Ron had discovered, the hard way, that a miter saw’s angle setting has almost nothing to do with the number on the corner it’s supposed to create.

Here’s the part that trips up almost everyone the first time: the angle you set on the saw is half the corner angle, not the corner angle itself. A 90-degree corner needs each piece cut at 45 degrees. Once that clicks, the whole tool suddenly makes sense.

🎯 The Core Idea: Precision, Not Speed

A miter saw’s actual superpower isn’t cutting fast — it’s cutting the exact same angle, over and over, with total consistency. Cut ten pieces of trim at 45 degrees, and all ten come out at genuinely, reliably 45 degrees. That repeatability, not raw speed, is the entire reason this tool exists.

🔩 The Parts You’re Working With

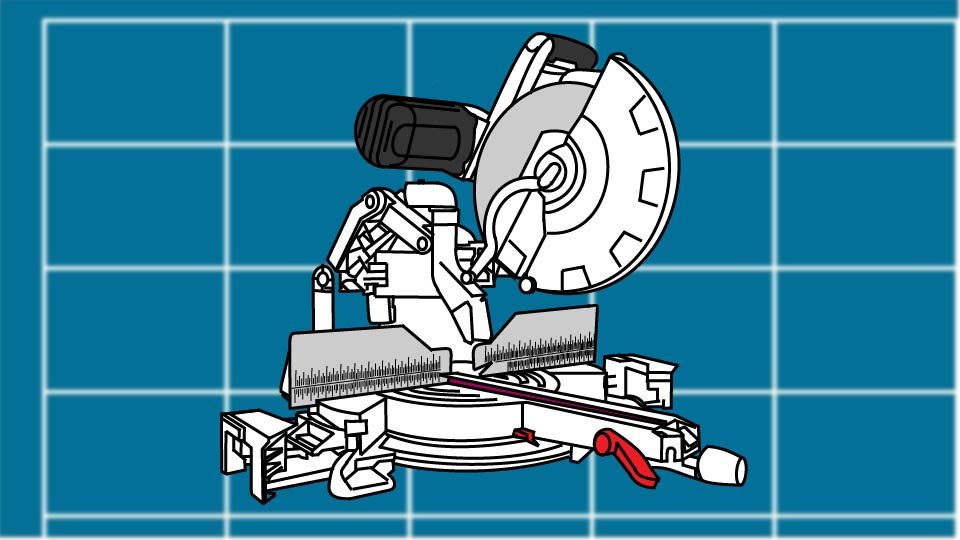
  • The blade rotates down into the material in one clean motion — not a back-and-forth or continuous spin, just one decisive cut.
  • The table stays stationary and holds your material flat.
  • The fence is the backstop your material presses against. The fence needs to sit truly perpendicular to the blade. If it’s off by a tiny amout, every cut inherits that same small error.
  • The angle adjustment is what lets the blade swing to a specific degree and lock there.
  • Some saws add a bevel adjustment, which tilts the blade itself for compound cuts — genuinely not something most trim work ever needs.

🛠️ Setting Up Before You Cut

  • Check that the blade is sharp and matched to your material — a dull or wrong blade tears instead of cutting cleanly.
  • Square the fence by holding a square against it and the blade; if there’s a gap anywhere, adjust the fence screw until there isn’t.
  • Set your angle, using the saw’s detents at common angles like 45 and 30 degrees, which snap firmly into place.
  • Then measure and mark your material clearly before it ever touches the blade.

✂️ Making the Cut

  • Position the material against the fence with your mark lined up to the blade, and clamp it — one clamp on each side of the blade, never directly in the blade’s path.
  • Stand to the side of the saw, not in front of it; that’s where most miter saw accidents actually happen.
  • Squeeze the trigger and let the blade reach full speed before it touches anything — you’ll hear the saw’s motor settle into a consistent pitch.
  • Pull the handle down smoothly, no jerking, and let the blade do the cutting rather than forcing it.
  • Once through, release the trigger and let the blade come to a complete stop before lifting it back up or reaching for your material.

📐 The Angle Math Nobody Explains Up Front

A miter joint is where two pieces meet at an angle, and the number you set on the saw is always half of the corner you’re trying to create. A 90-degree corner needs each piece cut at 45 degrees. A 60-degree corner needs each piece cut at 30 degrees. This single detail is exactly where Ron went wrong, and it’s exactly where most first-time miter saw users go wrong too — the saw’s angle and the corner’s angle are related, but they are never the same number.

🚫 The Mistakes Worth Avoiding

  • An unsquared fence throws off every single cut that follows it. Cutting before the blade hits full speed causes binding and rough edges.
  • Jerking the handle down tears the material instead of slicing it.
  • Unsecured material shifts mid-cut and ruins the angle you were aiming for.
  • Reaching near a blade that’s still slowing down is how most injuries happen.
  • And setting the saw to the corner angle instead of half of it is the mistake that started this whole story.

🎯 When to Reach for This Saw (and When Not To)

A miter saw earns its keep on trim, molding, door casings, and anything needing precise, repeatable angled cuts. It’s the wrong tool for ripping boards lengthwise, cutting material wider than its capacity, or making curved cuts — a circular saw or jigsaw covers that ground instead.

🛒 Gear Worth Having

DEWALT 10-Inch Single Bevel Miter Saw — Solid accuracy and reliable power in the size most homeowners actually need — a genuine sweet spot for trim work.

Miter Saw Stand — Holds the saw at a comfortable working height and catches most of the mess before it spreads across the whole garage floor.

Carbide-Tipped Fine-Cut Blade, 80-Tooth — A genuinely cleaner cut on trim than the stock blade most saws ship with, and it holds an edge noticeably longer.

As an Amazon affiliate, I earn from qualifying purchases. Thank you for supporting SkippityWhistles.

📖 Related Reads


SkippityWhistles is part of the John D Reinhart content family. Writer, illustrator, videographer, and accidental filmmaker — find the whole story at JohnDReinhart.com.

7043

©2026 John D Reinhartskippitywhistles.com/ — All rights reserved

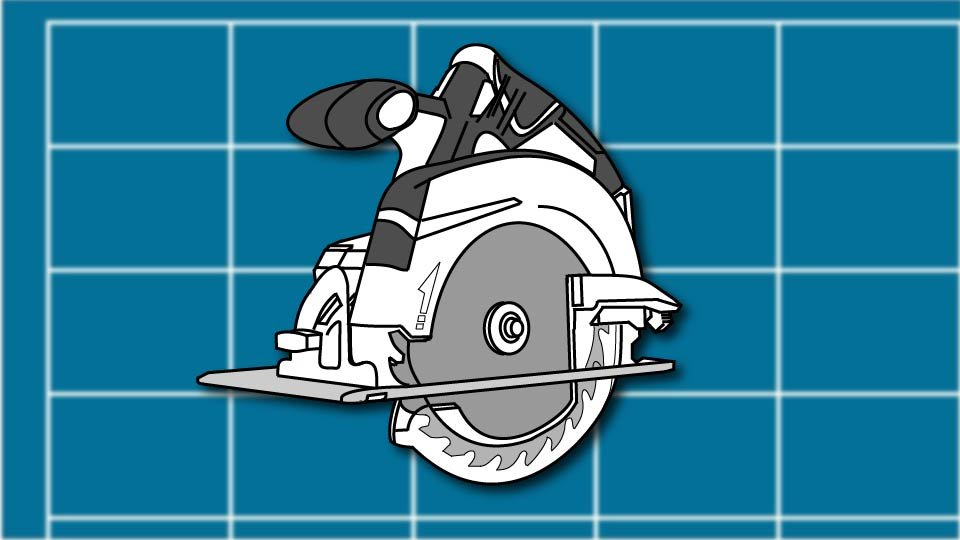
How to Use a Circular Saw (Or: Your Eye Is Not as Straight as You Think)

A circular saw doesn’t do straight lines on its own — it does whatever your eye tells it to, and your eye is a much worse judge of straight than it thinks.

Ron had a sheet of plywood, a pencil line, and total confidence in his own hand-eye coordination, so he skipped the clamped guide and just eyeballed the cut freehand. The line wandered. Not dramatically — just enough that the two halves of that plywood sheet now have a very different opinion about where their edge actually is. Ron’s eye wasn’t the problem in some deep, personal sense. It’s just that everyone’s eye is bad at this, and a circular saw has zero interest in correcting for it on your behalf.

A circular saw is the workhorse of home DIY — handheld, aggressive, and genuinely one of the most useful tools in any garage. It’s also a spinning blade with real opinions about physics, and understanding those opinions is what separates a clean cut from a crooked one, or worse.

⚠️ The Core Principle

As the blade cuts, it generates real forces: it pulls itself forward into the cut, it pulls upward toward you, and if it binds on something, it can twist hard and fast in your hands. None of this is the saw malfunctioning — it’s just what a spinning blade under load does. Your job is two hands, a flat base, and steady guidance, directing those forces instead of fighting them.

🔩 The Parts You’re Holding

The blade determines the quality of the cut more than anything else —

  • a crosscut blade with many teeth cuts cleanly across the grain
  • a rip blade with fewer teeth cuts fast along the grain
  • a combination blade splits the difference
  • and a fine-tooth plywood blade minimizes tear-out on finished sheets.

The base is the flat plate riding on the material; keep it flat, since a tilted base means a tilted cut every time.

The depth adjustment should be set so the blade barely clears the material’s underside — deeper isn’t safer, it’s just more exposed blade with nothing gained.

The guards, one fixed above the blade and one spring-loaded below, exist specifically to keep your hand away from a spinning edge — they don’t get removed, tied back, or “worked around.” Ever. Got that?

🛠️ Using It Safely, Step by Step

  • Mark your cut line clearly and double-check it against a square or tape measure before committing — a wrong cut ruins material either way, guide or no guide.
  • Clamp the material so it can’t shift, and make sure whatever the blade extends below isn’t something you meant to keep.
  • Stand to the side of the saw, never directly behind it, so a bind sends the saw away from your body rather than toward it.
  • Grip with both hands — one on the main handle, one supporting the front — firmly but without white-knuckling it.
  • Let the blade reach full speed before it touches the material; starting already engaged is one of the fastest ways to bind and tear the cut.
  • Guide the saw forward smoothly once it’s cutting, letting the blade do the work rather than pressing hard.
  • Keep the base flat the entire way through, follow all the way to the end of the material without stopping partway, and let the blade coast to a stop naturally once you’re clear.

📐 Straight Cuts: The Secret Ron Skipped

Circular saws are not naturally good at straight lines — they’re only as straight as whatever’s guiding them. A clamped straight edge (a 2×4 or a dedicated guide clamped along the cut line) is the reliable, repeatable way to get a genuinely straight cut, and it’s what separates a clean edge from Ron’s now-two-different-opinions plywood sheet.

A rip fence attachment works reasonably for simple parallel cuts.

Freehanding it, trusting your eye alone, works fine for people with genuinely exceptional depth perception and steady hands — and produces a wandering line for basically everyone else.

✂️ Ripping vs. Crosscutting

Crosscutting means cutting across the grain, and it calls for a crosscut blade and a straight path across the board.

Ripping means cutting along the grain, lengthwise down a board’s full length, and a guide here isn’t optional — without one, the cut wanders over distance in a way that’s hard to correct once it starts.

For long rip cuts specifically, a table saw handles the job more reliably; a circular saw can do it, but only with real guide discipline.

🚫 The Mistakes Worth Avoiding

  • Skipping the clamp lets material shift mid-cut and ruins the line.
  • Starting the blade already inside the material invites an immediate bind.
  • Pressing hard doesn’t cut faster, it just increases the odds of binding.
  • Letting the base tilt turns a square cut into a bevel nobody asked for.
  • Stopping partway through a cut is exactly how a blade binds in the kerf — the narrow slot the blade cuts as it passes through, which can pinch shut on the blade the moment the cut stops.
  • Reaching anywhere near the blade, guard or no guard, is never worth whatever convenience it seems to offer.
  • And removing or defeating the guards trades a genuine safety feature for nothing at all.

🛒 Gear Worth Having

Cordless Circular Saw — Reliable, mobile power for plywood, lumber, and trim — the actual workhorse most home shops reach for first.

Straight Edge Guide Clamp — The tool that would have saved Ron’s plywood — clamps to the material and keeps the blade honest along a real straight line.

Circular Saw Blade Assortment (Crosscut, Rip, Combination) — Matches the blade to the cut instead of asking one blade to do every job adequately and none of them well.

As an Amazon affiliate, I earn from qualifying purchases. Thank you for supporting SkippityWhistles.

📖 Related Reads


SkippityWhistles is part of the John D Reinhart content family. Writer, illustrator, videographer, and accidental filmmaker — find the whole story at JohnDReinhart.com.

7055

©2026 John D Reinhartskippitywhistles.com/ — All rights reserved

How to Work with Wood Glue (Or: Why More Glue Isn’t the Answer)

Wood glue isn’t just for wood—it’s PVA, the strongest adhesive for porous materials. Here’s why tight fit matters more than glue amount, and how to clamp for maximum strength.

Ron had a joint with a visible gap on one side, and his solution was more glue — reasoning that if a little glue holds two tight pieces together, a lot of glue should hold two not-quite-tight pieces together even better. It looked great until it fell apart – wood glue is great for gluing stuff, but not for filing gaps.

Wood glue doesn’t bond the way epoxy or super glue does. Understanding the difference is the entire reason some glued joints outlast the wood itself, and others quietly come apart.

🧬 Mechanical Lock, Not Chemistry

Wood glue is polyvinyl acetate (PVA) — a water-based adhesive that hardens as its water evaporates. It bonds through mechanical interlocking rather than a chemical reaction.

As the glue dries, it wedges into the wood’s own fibers and hardens there, physically gripping the grain rather than dissolving or fusing it the way super glue or epoxy would.

That’s why a well-fitted PVA joint can be stronger than the wood around it — you’ll break the board before that joint gives way.

It’s also why a loose joint fails no matter how much glue goes into it: there’s nothing for the glue to mechanically lock into across an actual gap.

🧴 Four Types Worth Knowing

  • Standard yellow wood glue is the everyday default — fast setting, full strength at 24 hours, and the right choice for most interior furniture and general woodworking.
  • White glue (the same PVA family, sometimes called school glue) is slightly weaker but better suited to paper, cardboard, and other porous craft materials rather than structural wood joints.
  • Waterproof wood glue swaps in additives that make it genuinely waterproof once cured, not just water-resistant — worth the extra cost for anything going outdoors, since standard glue will fail on exterior furniture eventually.
  • Cross-linked, polyurethane-modified glue is the heavy-duty option for high-stress or load-bearing joints and oily woods that resist standard PVA — overkill for most projects, but the right call when a joint’s failure would be a real problem.

📏 Fit Beats Quantity, Every Time

Dry-fit the joint before any glue touches it — pieces should come together smoothly with no forcing.

Any gap wider than about 1/32 inch is a real weakness that glue alone can’t bridge, no matter how much you stuff in it.

The actual goal is a thin, even coat on one surface only, applied so that clamping produces a small, visible bead squeezed out along the seam — that bead is proof the joint is filled and seated, not evidence of excess.

A gluey mess oozing everywhere means too much was used on a joint that probably needed re-cutting instead. Cut once, measure twice is not a thing.

🛠️ Clamp Properly, Then Leave It Alone

Assemble and clamp promptly once glue is applied — it starts setting within minutes.

Firm, even pressure is enough; wood glue doesn’t need bone-crushing force, and over-tightening can bow a panel or squeeze out more glue than the joint actually needs.

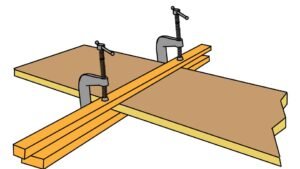
Wipe excess while it’s still wet, since dried glue has to be sanded off instead. For large panels, cauls (straight scrap boards clamped across the top and bottom of a panel) prevent the panel from bowing under clamp pressure.

A line drawing of clamp cauls by John D Reinhart

⏳ Patience Is the Last Ingredient

Wood glue reaches roughly 50 percent strength at 30 minutes — enough to unclamp for light handling — but full strength doesn’t arrive until close to 24 hours.

Testing a joint’s strength right after unclamping is one of the more common ways a genuinely good glue-up gets blamed for a failure that was really just impatience.

Cold workshops slow the whole process down further, so give a joint extra time in a chilly garage.

🧻 Where PVA Works Beyond Wood

Because it bonds through mechanical interlocking rather than chemistry, wood glue works on any porous material — paper, cardboard, cork, natural-fiber fabric, and MDF all take PVA well.

It won’t bond to non-porous surfaces like plastic, metal, or glass at all; those need an adhesive that works through actual chemistry, which is exactly the ground epoxy and super glue cover instead.

🛒 Gear Worth Having

Titebond Original Wood Glue — The industry-standard yellow glue that covers the overwhelming majority of interior woodworking without needing anything fancier.

Titebond III Waterproof Wood Glue — Genuinely waterproof once cured, not just water-resistant — the one to reach for on anything headed outdoors.

IRWIN Quick-Grip Bar Clamp Set — Even, adjustable pressure across the whole joint, which matters more to the final bond than the glue itself does.

As an Amazon affiliate, I earn from qualifying purchases. Thank you for supporting SkippityWhistles.

📖 Related Reads


SkippityWhistles is part of the John D Reinhart content family. Writer, illustrator, videographer, and accidental filmmaker — find the whole story at JohnDReinhart.com.

2024

©2026 John D Reinhartskippitywhistles.com/ — All rights reserved

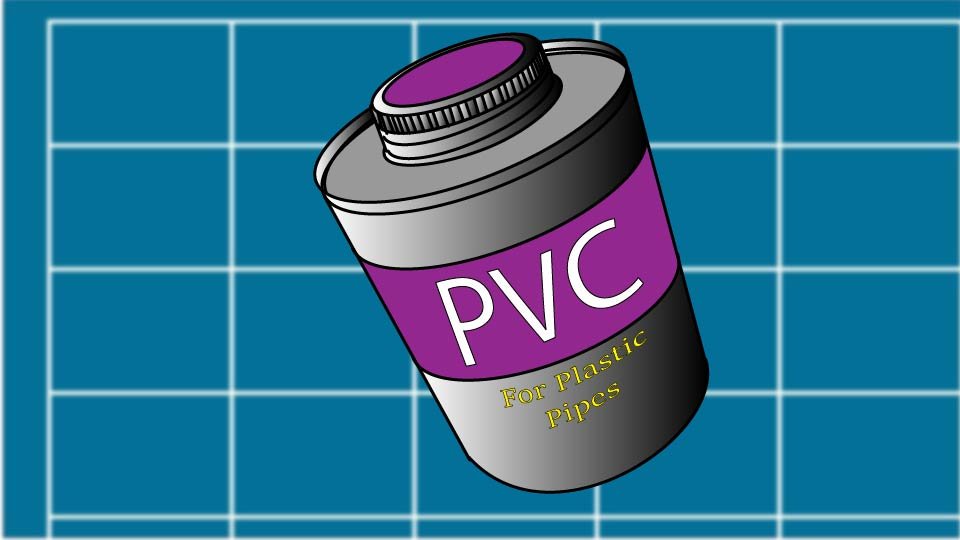
How to Work with PVC Adhesives (Or: The Purple Liquid That Doesn’t Do Second Chances)

PVC cement doesn’t glue—it dissolves plastic and fuses joints permanently. Here’s how to work with it so your plumbing doesn’t leak and your mistakes don’t become disasters.

Ron pressed a PVC fitting into place, decided mid-press that it needed a slight twist to “seat it better,” and gave it one. The pipe accepted the twist permanently, at an angle nobody wanted, because PVC cement isn’t glue holding two pieces together — it’s a solvent that dissolves the plastic and fuses both pieces into one continuous piece. There’s no repositioning a joint that’s already become a single object. Ron’s friends look at it and ask “did you fix that yourself?”

That one distinction — dissolve-and-fuse, not stick-and-hold — explains almost everything about how to work with it correctly.

🧪 Not Glue — A Solvent

PVC cement chemically softens the outer layer of both the pipe and the fitting. When pressed together, the two surfaces merge as the solvent evaporates.

Regular glue bonds two separate things; PVC cement makes them stop being two things. That’s why it’s irreversible — once fused, only a saw separates the joint again, not a wrench or a pull.

🎨 Matching Cement to Plastic

  • Standard PVC cement (usually purple or clear) is right for the Schedule 40 PVC used in most residential plumbing.
  • CPVC cement is required for CPVC (chlorinated PVC, often used for hot water lines). The two aren’t interchangeable, and using the wrong one simply won’t bond.
  • ABS cement is required for ABS, a plastic from an entirely different chemical family, common in older drain lines.
  • A combination cement rated for both PVC and CPVC exists and is worth the small extra cost on any project where you’re not entirely sure which plastic you’re holding.

🔵 Primer Isn’t Optional (Usually)

Most plumbing codes require a primer (typically a blue-tinted liquid) applied before cement, and for good reason — it strips away surface oxidation and oils, softens the plastic slightly, and gives the cement a cleaner surface to fuse against. Skipping it on anything pressurized, underground, or carrying hot water is both a code violation and a genuine risk to joint strength. When unsure, use it — a dollar of primer beats redoing a joint an inspector rejects.

🛠️ The Process: One Shot, Make It Count

  • Cut the pipe cleanly and deburr the edge – use a deburring tool, a file, or sandpaper to smooth the cut edge of the pipe. Rough edges prevent a proper fit and could weaken the fused joint.
  • Confirm everything is dry, clean, and correctly aligned before touching any cement, since this is the step where mistakes are still fixable.
  • Apply primer if required – it usually is.
  • Apply the cement, coating the outer pipe edge and the inner fitting surface evenly — not a soaking coat, just full coverage.
  • Press the pipe into the fitting with firm, straight, deliberate pressure — no twisting, which misaligns the joint rather than seating it.
  • Hold the parts together for the time the label specifies, usually 10 to 30 seconds.
  • Leave it completely alone. Light cure is often reached within 2 hours, but full cure for pressure testing can take a full 24, and rushing that step is one of the more common ways a fine-looking joint fails later. Leave. It. Alone.

❄️ Cold Weather Changes the Math

PVC cement cures noticeably slower below about 50°F, and will result in a genuinely weaker joint. If the project can wait for warmer conditions, do that. Or warming the the materials before cementing will be an effort worth doing rather than trusting a joint that cured too slowly in the cold to be fully sound.

🛒 Gear Worth Having

Oatey All-In-One PVC Cement with Primer — Combines primer and cement for smaller residential jobs, so there’s one less product to keep track of mid-project.

PVC Ratcheting Pipe Cutter — A clean, square cut with no burrs to file down afterward, which matters more than it seems once you’re trying to get a snug fit.

Nitrile Gloves, Solvent-Resistant, 100-Pack — PVC cement stains skin for days and isn’t something you want soaking in through bare hands over a whole project.

As an Amazon affiliate, I earn from qualifying purchases. Thank you for supporting SkippityWhistles.

📖 Related Reads


SkippityWhistles is part of the John D Reinhart content family. Writer, illustrator, videographer, and accidental filmmaker — find the whole story at JohnDReinhart.com.

2011

©2026 John D Reinhartskippitywhistles.com/ — All rights reserved

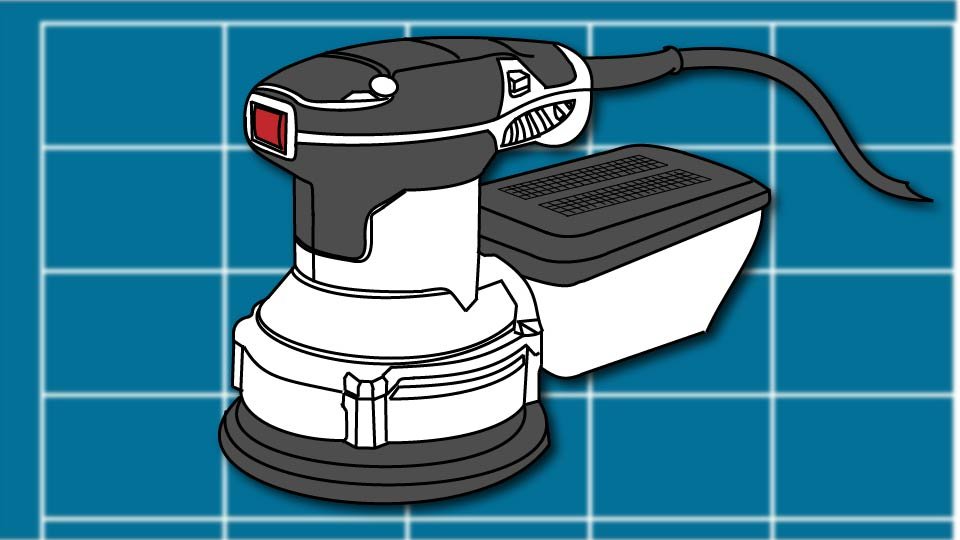
How to Use a Power Sander (Or: The Tool Does the Work, Not Your Elbow)

A power sander does the work through motion, not muscle — press down and you’re not sanding faster, you’re just sanding wrong.

Rhonda leaned into her belt sander like it owed her rent, figuring more pressure meant a faster finish on the tabletop she was smoothing. Thirty seconds later, the tabletop had a dip in it deep enough to serve soup out of. The sander hadn’t malfunctioned. It had done exactly what Rhonda told it to do, which was the actual problem.

A power sander removes material through motion and friction, not through how hard you lean on it. Understanding that one idea prevents almost every disaster a power sander is capable of causing.

🌀 Three Sanders, Three Jobs

  • A random orbital sander (a round pad that spins while also moving in small random circles) is the forgiving, do-almost-everything option — the randomness in its motion is specifically what prevents the circular swirl marks other sanders can leave behind.
  • An orbital sander (a smaller square pad that moves in tight, consistent circles) produces an extremely smooth finish but works slower and is best saved for fine detail work.
  • A belt sander (a continuous loop of sandpaper running fast around two rollers) removes material aggressively — genuinely fast — which makes it the right tool for stripping paint or flattening rough lumber and the wrong tool for anything needing a delicate touch.

For most household projects, a random orbital sander covers the job; the belt sander is a specialist brought in for rough, heavy removal only.

🔢 Grit: Start Rough, Work Up

Sandpaper grit is a number rating system defining how coarse or fine a sandpaper’s abrasive particles are.

Lower numbers are coarser and remove material fast, higher numbers are finer and smooth or polish without removing much at all. An 80-grit sheet cuts through old paint aggressively. A 320-grit sheet barely leaves a mark, which is exactly the point once you’re past removing anything and into finishing.

The rule that covers almost every situation: start coarse when you’re removing material, start fine when you’re finishing a surface that’s already close to done.

⚡ Starting, Floating, and Stopping

Turn the sander on before it touches the wood — starting it already pressed against the surface can dig a small gouge in the first instant of spin-up.

Once it’s running, let the tool’s own weight do the work; guide it with two hands rather than pressing down; a sander barely needs to touch the surface to be effective.

Keep it moving in slow, overlapping passes rather than lingering in one spot, the same way you’d mow a lawn — stopping in place for even a few extra seconds creates a shallow dip that’s far more work to sand back out than it would have been to avoid.

Lift the sander off the surface before switching it off, letting it wind down in the air rather than against your work.

🧹 Dust Isn’t Optional

Sanding dust does two things at once: it clogs the sandpaper, which makes it cut poorly and can actually scorch the surface, and it fills the air you’re breathing.

If the sander has a dust port, connect it to a shop vacuum or use the attached collection bag every time, not just when somebody’s looking.

A dust mask or respirator isn’t a suggestion for extended sanding sessions — fine wood dust is a genuine respiratory irritant, and the tool that makes a project faster shouldn’t make your lungs pay for it.

🛑 Knowing When to Stop

A surface is done when it feels smooth under bare fingertips (a better test than eyesight alone), looks even under raking light from the side, and shows a consistent scratch pattern with no remaining gouges or high spots.

More sanding past that point doesn’t improve anything — it just thins the material, softens edges that should stay crisp, and burns time you didn’t need to spend. Smooth is a finish line, not a direction to keep walking past.

🛒 Gear Worth Having

DEWALT 5-Inch Random Orbital Sander (DWE6423K) — The forgiving all-purpose sander that covers nearly every household job without the learning curve or the risk a belt sander carries.

Bosch Universal Vacuum Hose Adapter Kit — Connects most sanders to a standard shop vacuum, which keeps sandpaper cutting cleanly instead of clogging and scorching halfway through the job.

3M N95 Sanding and Dust Respirator, 5-Pack — Genuinely necessary for any extended sanding session — the dust is a real irritant, and this is the cheapest insurance in the whole project.

As an Amazon affiliate, I earn from qualifying purchases. Thank you for supporting SkippityWhistles.

📖 Related Reads


SkippityWhistles is part of the John D Reinhart content family. Writer, illustrator, videographer, and accidental filmmaker — find the whole story at JohnDReinhart.com.

2016

©2026 John D Reinhartskippitywhistles.com/ — All rights reserved

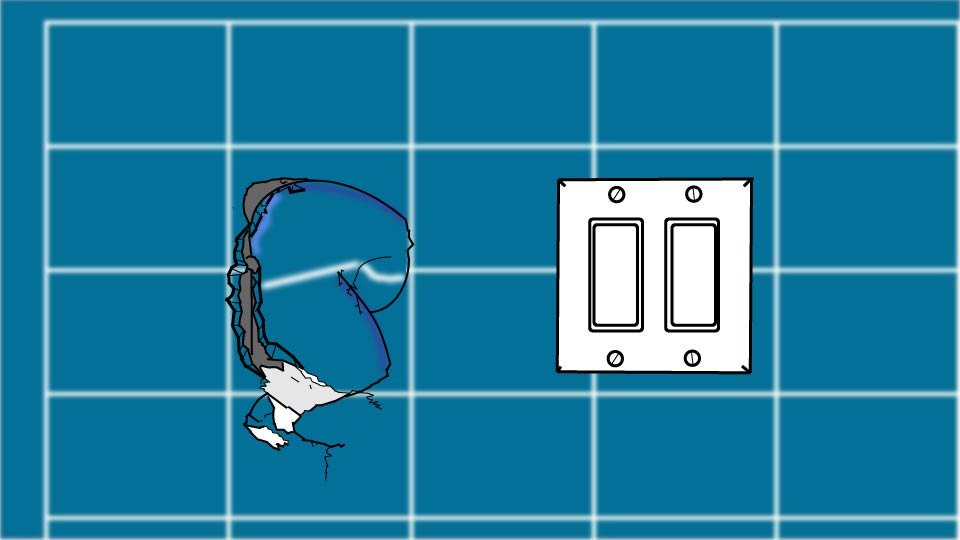
How to Patch a Hole in Drywall (Or: Evicting the Tenant You Never Agreed to House)

That hole has been staring back at you for months. It’s fixable, it’s not a big deal, and it definitely doesn’t deserve its own zip code.

Ron’s hole has been in the hallway wall so long it’s basically achieved squatter’s rights. He’s rearranged a bookshelf to hide it. He’s told two separate guests it’s “a vent, actually.” At this point the hole has more tenure in that house than Ron’s own couch. It is, statistically, one of the least threatening things Ron has ever avoided, and it is entirely fixable in an afternoon.

Whatever put the hole there — a doorknob, a wrestling match with a dresser, a moment nobody’s proud of — the fix depends almost entirely on one thing: how big it is. Get that part right and the rest is just patience wearing a putty knife.

🔍 Know Your Enemy: Sizing Up the Hole

A small hole (up to about a quarter inch — nail holes, old picture hangers, the pushpin incident) isn’t really a patch at all, it’s a filling job. A medium hole (roughly half an inch to four inches — doorknob dents, a failed wall anchor, a chair that got a little too enthusiastic) needs an actual patch, but nothing dramatic. A large hole (bigger than a fist) needs backing — something solid behind the new drywall to screw into — but it still doesn’t need a professional, just more patience and a longer afternoon.

🩹 Small Holes: The Five-Minute Redemption Arc

Scrape any loose bits from the hole so you’re working with clean edges. Press in spackle with a putty knife until it’s level with the wall — not mounded, level. Wipe the excess flat, let it dry (usually thirty minutes to an hour), then sand lightly and touch up with paint. Two thin coats beat one thick one; thick spackle shrinks as it dries and leaves a small crater that stares back at you exactly like the original hole did, just smugger.

🕳️ Medium Holes: Mesh Patch, Meet Compound

Lightly sand around the hole so the patch has a clean surface to grip. Peel the backing off a self-adhesive mesh patch (a fiberglass mesh square with adhesive on one side, sized to stick directly over a hole and give joint compound something to bond to) and press it on firmly — no wrinkles, no air pockets sneaking underneath like it’s hiding from you. Apply joint compound (a plaster-like paste used to fill and smooth drywall repairs) over the patch with a putty knife, feathering the edges wider than the layer before it. Let it dry fully — a genuine 24 hours, not “it feels dry-ish” — sand smooth, add a second thin coat if the patch outline is still visible, then prime and paint.

🧱 Large Holes: When the Wall Needs a Backbone

Cut the damaged area into a clean rectangle with a utility knife — straight edges make everything downstream easier. Cut two wood backing strips (short pieces of scrap lumber, 1x2s work fine) and screw them horizontally inside the wall, spanning the opening, so there’s something solid behind the hole to anchor to. Cut a new drywall patch to fit snugly against the backing, screw it in place every 6 to 8 inches, then tape all four seams with drywall tape (a reinforcing strip embedded in compound to keep a seam from cracking later). From there it’s the same compound-feather-sand cycle as a medium hole, just wider and usually needing three coats instead of two. This is the exact method contractors use — it’s not a shortcut, it’s just the real thing, done at your own pace and price.

🪶 Feathering: The Trick That Makes It Disappear

Feathering means spreading each coat of joint compound progressively wider and thinner than the last, so the edge blends into the surrounding wall instead of stopping abruptly. It is the single detail that separates “I see exactly where you patched this” from “wait, there was a hole here?” Thick, sharp-edged compound reads as a patch from across the room. Thin, wide, gradually-fading compound reads as nothing at all. When in doubt, go thinner and wider on the next coat — you can always add another pass, but scraping off an overly thick coat will make a sight far worse than the hole ever was.

🎨 Sand, Prime, Paint: Sticking the Landing

Sand with light pressure in small circles, not long aggressive strokes — you’re smoothing, not sanding your feelings out on the wall. A work light held sideways against the wall reveals bumps and dips that regular overhead lighting hides completely. Prime before painting, especially on anything bigger than a small hole — skip it and the patch can show through as a slightly different sheen or shade, sometimes called a ghost patch, which is a spookier name than the problem deserves. To avoid a haunted hallway, prime first.

🛒 Gear Worth Having

FibaTape Self-Adhesive Wall Repair Patch — The mesh patch that turns a medium hole into a formality — press, smooth, and the compound does the rest.

USG Sheetrock Pre-Mixed All-Purpose Joint Compound — Ready straight out of the bucket, so mixing powder isn’t one more way for a first patch to go sideways.

3M N95 Sanding and Dust Respirator, 5-Pack — Joint compound dust is genuinely unpleasant to breathe for an afternoon — cheap insurance for lungs you’ll want later.

As an Amazon affiliate, I earn from qualifying purchases. Thank you for supporting SkippityWhistles.

📖 Related Reads


SkippityWhistles is part of the John D Reinhart content family. Writer, illustrator, videographer, and accidental filmmaker — find the whole story at JohnDReinhart.com.

2019

©2026 John D Reinhartskippitywhistles.com/ — All rights reserved

How to Use a Torque Wrench (Or: How Tight Is Tight Enough?)

A torque wrench isn’t complicated. It’s just a tool that tells you when to stop tightening. Here’s what it does, when you actually need one, and which one to buy first.

You’re tightening a bolt. It feels snug. You give it one more turn because snug feels like not quite enough. Then another, because the second turn felt like the first one — still not tight enough. Then something either strips, cracks, or gives way, and now a simple job has become a more complicated one.

This is the problem that torque wrenches solve. Not every bolt needs one — most household fasteners are fine with a regular wrench and reasonable judgment. But for bolts that hold structural things together, bolts that go into softer materials like aluminum, or bolts where the manufacturer has specified an exact tightening value — a torque wrench takes “how tight is tight enough” out of the equation entirely.

It’s also a significantly simpler tool than most people assume. Here’s what it does and how to use it.

⚙️ What a Torque Wrench Actually Does

A torque wrench measures rotational force — called torque — as you tighten a fastener. Torque is measured in foot-pounds (ft-lbs), inch-pounds (in-lbs), or Newton-meters (Nm), depending on the application and which measurement system the spec was written in.

The tool lets you set a target value before you start tightening. When you reach that value — when you’ve applied exactly the amount of rotational force the fastener requires — the wrench signals you to stop. On the most common type (the click-type torque wrench), that signal is a distinct click you can both hear and feel. On a beam-type wrench, it’s a pointer reaching a mark on a visible scale. Either way, the message is the same: you’re done. Stop tightening.

The reason this matters is that different fasteners in different materials have very specific tightening requirements. A deck ledger bolt connecting your deck to the house framing needs a precise amount of torque — too loose and the connection fails structurally, too tight and you can damage the threads or the wood. A bolt going into aluminum needs less torque than the same bolt going into steel, because aluminum strips more easily. The torque specification exists to get the fastener to exactly the right tightness for its application, and the torque wrench is the tool that gets you there.

🔧 The Click-Type Wrench — This Is the One to Buy

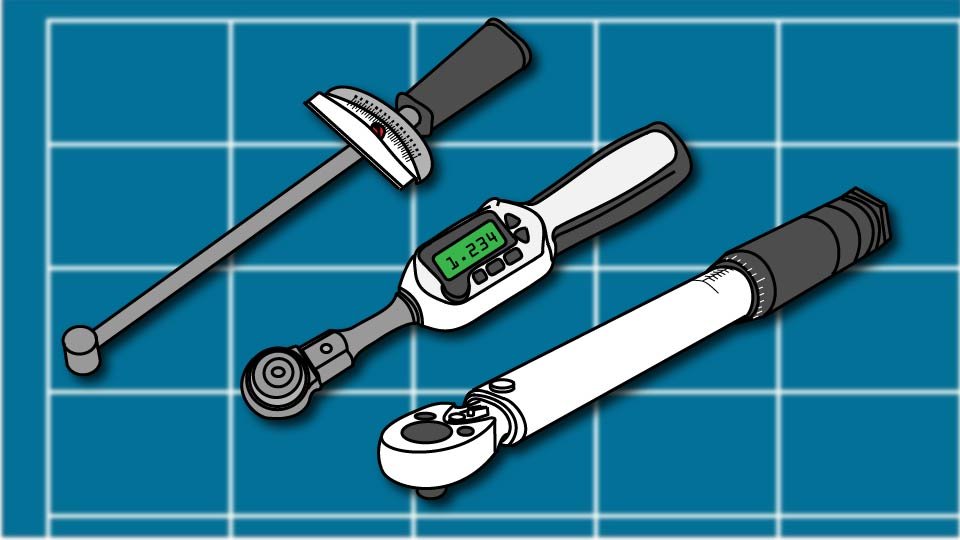
There are three types of torque wrenches: click-type, beam-type, and digital. For home DIY use, the click-type is the right choice. It’s reliable, affordable, requires no batteries, and is easy to use without a learning curve.

A click-type torque wrench looks like a long-handled ratchet wrench. The handle is hollow, and inside it is a calibrated spring mechanism. You set your target torque value by gripping the handle and rotating the adjustment knob at the bottom — this compresses the spring to a specific tension. When you tighten a fastener and the applied force reaches the preset value, the spring releases with a distinctive click. The click is unmistakable. You stop, the bolt is torqued correctly, and you move on.

The beam-type wrench uses a visible pointer on a scale — you watch it while you tighten and stop when the pointer reaches your target. It’s accurate and requires no calibration, but it requires you to watch the scale while tightening, which can be awkward in tight spaces. The digital type has an electronic display and beeps at the target value — accurate and convenient, but more expensive and battery-dependent.

For most people buying their first torque wrench: click-type, 3/8-inch drive (the square post size that connects to sockets — the same standard 3/8-inch drive used by most socket sets), range of 10 to 80 foot-pounds. That covers the majority of home DIY applications: automotive work, deck construction, furniture assembly with specified torque, and general structural fasteners.

📋 Finding the Torque Specification

Before using a torque wrench, you need to know what value you’re tightening to. This is not a number you guess — it comes from the manufacturer or from a standard reference.

For furniture and equipment assembly, the manual specifies torque values for critical fasteners. For automotive work — lug nuts, spark plugs, oil drain plugs — the vehicle’s service manual specifies the values, and they’re also widely available online by searching the vehicle year, make, model, and the specific component. For structural fasteners like deck ledger bolts, the building code or the fastener manufacturer’s documentation specifies the values.

As a general reference for hardware that doesn’t come with specifications: small bolts (1/4 inch diameter) typically land in the 5 to 15 foot-pound range; medium bolts (3/8 inch) in the 20 to 40 foot-pound range; larger bolts (1/2 inch) at 50 foot-pounds and up. But these are starting points, not substitutes for the actual spec. When a spec exists, use it.

📐 How to Set and Use the Wrench

Look up the torque specification for your fastener and write it down. Misremembering a number mid-job is more common than it should be.

Select a socket that fits the bolt head precisely — no wobble, no play. A socket that’s even slightly loose on the fastener will give an inaccurate reading and can round off the fastener head. On click-type wrenches, the drive size needs to match your socket set — 3/8-inch drive wrench with 3/8-inch drive sockets.

Set the torque value on the wrench. On most click-type wrenches, hold the handle firmly with one hand and rotate the knurled adjustment knob at the bottom of the handle with the other. The scale on the handle shows your current setting. Turn until the indicator line aligns with your target value. Check it again before you start — a misread of even five foot-pounds can matter on critical fasteners.

Thread the bolt in by hand until it’s snug against the surface. Hand-tightening first ensures the threads are properly engaged before any torque is applied, and prevents cross-threading — the frustrating situation where the bolt goes in at a slight angle and damages both the bolt threads and the receiving threads.

Attach the torque wrench and begin tightening with slow, steady pressure. Don’t jerk or apply sudden force. The click mechanism needs consistent pressure to trigger accurately — rapid or jerky tightening can cause the wrench to click early or late. When you hear and feel the click, stop immediately. The bolt is torqued to specification. Tightening further past the click does not improve the connection — it just adds force beyond the rated value, which can strip threads or damage the fastener.

🔄 One Important Storage Rule

When you’re done using a click-type torque wrench, turn the adjustment knob back to its lowest setting before putting it away. The spring inside the wrench that creates the click mechanism can take a permanent set — weaken slightly — if stored under compression at a high torque setting. Over time, a wrench stored at maximum torque loses calibration accuracy. Back it off to the minimum after every use. It takes ten seconds and it keeps the wrench accurate for years.

Store the wrench in its case rather than loose in a toolbox. Torque wrenches are precision tools — the calibration can be affected by a sharp impact. A drop onto a concrete floor is worth getting the wrench recalibrated before trusting it on critical fasteners again. Professional calibration runs about twenty to fifty dollars and is worth it for anything structural.

🛒 Gear Worth Having

TEKTON 3/8 Inch Drive Micrometer Torque Wrench (10-100 ft.-lb.) | 24330 — The 3/8-inch drive click-type wrench that handles the majority of home DIY torque work: automotive fasteners, deck construction, structural hardware, furniture with specified torque values. Calibrated to ±4% accuracy out of the box. All-steel construction with no plastic parts. Dual-range scale in both foot-pounds and Newton-meters. Ships in a storage case. TEKTON is the respected mid-range brand that professional mechanics and serious DIYers reach for when they want accuracy without a professional price point.

TEKTON 1/4 Inch Drive Click Torque Wrench (20-200 in.-lb.) | 24320 — The smaller companion to the 3/8-inch wrench, for lighter fasteners measured in inch-pounds (in-lbs) rather than foot-pounds. Spark plugs, small engine components, bicycle fasteners, and precision assembly work all typically call for inch-pound torque values. Same TEKTON build quality, same ±4% calibration accuracy, same all-steel construction. If the 3/8-inch wrench is for the deck and the car, the 1/4-inch is for everything smaller.

SUERCUP Torque Wrench Set — 1/4″, 3/8″ & 1/2″ Drive, 3-Piece with Case — For the toolbox that wants all three drive sizes in one purchase. The 1/4-inch handles small precision work, the 3/8-inch covers most DIY applications, and the 1/2-inch handles heavy-duty automotive and structural work. Chrome vanadium steel throughout, calibrated to ±4%, organized storage case keeps all three accessible. The complete answer if you want to buy torque wrenches once and have what you need for any job.

As an Amazon affiliate, I earn from qualifying purchases. Thank you for supporting SkippityWhistles.

📖 Related Reads

How to Use a Socket Wrench

How to Use an Adjustable Wrench

How to Choose the Right Fastener

The torque wrench isn’t the tool for every bolt — most household fasteners are perfectly fine tightened by feel with a regular wrench. But for the ones that matter, for the structural connections and the precision assemblies and the fasteners where the manufacturer took the time to specify an exact value, the torque wrench is the tool that gets it right the first time. The click is the sound of a fastener done correctly. It’s a satisfying sound.


SkippityWhistles is part of the John D Reinhart content family. Writer, illustrator, videographer, and accidental filmmaker — find the whole story at JohnDReinhart.com.

7053

©2026 John D Reinhartskippitywhistles.com/ – all rights reserved