How to Use a Power Sander (Or: The Tool Does the Work, Not Your Elbow)

A power sander does the work through motion, not muscle — press down and you’re not sanding faster, you’re just sanding wrong.

Rhonda leaned into her belt sander like it owed her rent, figuring more pressure meant a faster finish on the tabletop she was smoothing. Thirty seconds later, the tabletop had a dip in it deep enough to serve soup out of. The sander hadn’t malfunctioned. It had done exactly what Rhonda told it to do, which was the actual problem.

A power sander removes material through motion and friction, not through how hard you lean on it. Understanding that one idea prevents almost every disaster a power sander is capable of causing.

🌀 Three Sanders, Three Jobs

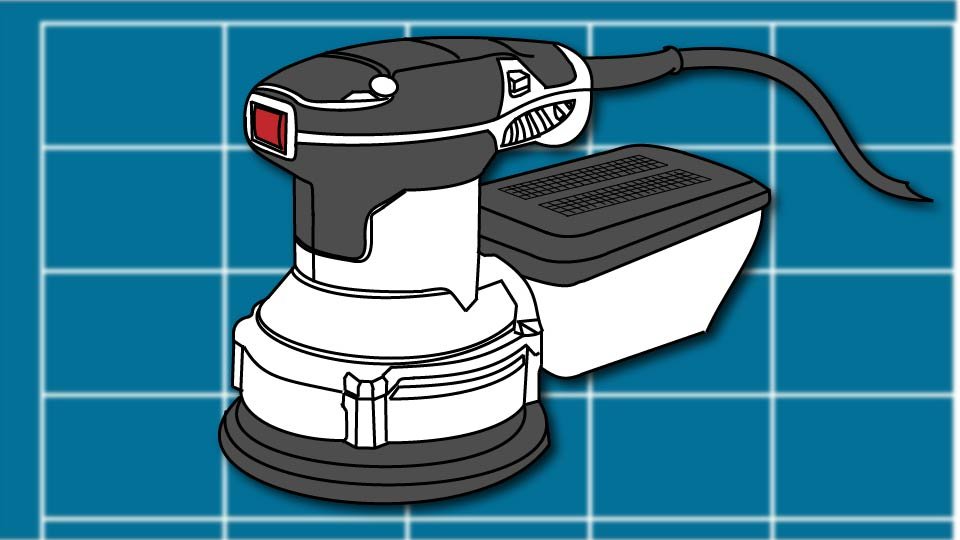
  • A random orbital sander (a round pad that spins while also moving in small random circles) is the forgiving, do-almost-everything option — the randomness in its motion is specifically what prevents the circular swirl marks other sanders can leave behind.
  • An orbital sander (a smaller square pad that moves in tight, consistent circles) produces an extremely smooth finish but works slower and is best saved for fine detail work.
  • A belt sander (a continuous loop of sandpaper running fast around two rollers) removes material aggressively — genuinely fast — which makes it the right tool for stripping paint or flattening rough lumber and the wrong tool for anything needing a delicate touch.

For most household projects, a random orbital sander covers the job; the belt sander is a specialist brought in for rough, heavy removal only.

🔢 Grit: Start Rough, Work Up

Sandpaper grit is a number rating system defining how coarse or fine a sandpaper’s abrasive particles are.

Lower numbers are coarser and remove material fast, higher numbers are finer and smooth or polish without removing much at all. An 80-grit sheet cuts through old paint aggressively. A 320-grit sheet barely leaves a mark, which is exactly the point once you’re past removing anything and into finishing.

The rule that covers almost every situation: start coarse when you’re removing material, start fine when you’re finishing a surface that’s already close to done.

⚡ Starting, Floating, and Stopping

Turn the sander on before it touches the wood — starting it already pressed against the surface can dig a small gouge in the first instant of spin-up.

Once it’s running, let the tool’s own weight do the work; guide it with two hands rather than pressing down; a sander barely needs to touch the surface to be effective.

Keep it moving in slow, overlapping passes rather than lingering in one spot, the same way you’d mow a lawn — stopping in place for even a few extra seconds creates a shallow dip that’s far more work to sand back out than it would have been to avoid.

Lift the sander off the surface before switching it off, letting it wind down in the air rather than against your work.

🧹 Dust Isn’t Optional

Sanding dust does two things at once: it clogs the sandpaper, which makes it cut poorly and can actually scorch the surface, and it fills the air you’re breathing.

If the sander has a dust port, connect it to a shop vacuum or use the attached collection bag every time, not just when somebody’s looking.

A dust mask or respirator isn’t a suggestion for extended sanding sessions — fine wood dust is a genuine respiratory irritant, and the tool that makes a project faster shouldn’t make your lungs pay for it.

🛑 Knowing When to Stop

A surface is done when it feels smooth under bare fingertips (a better test than eyesight alone), looks even under raking light from the side, and shows a consistent scratch pattern with no remaining gouges or high spots.

More sanding past that point doesn’t improve anything — it just thins the material, softens edges that should stay crisp, and burns time you didn’t need to spend. Smooth is a finish line, not a direction to keep walking past.

🛒 Gear Worth Having

DEWALT 5-Inch Random Orbital Sander (DWE6423K) — The forgiving all-purpose sander that covers nearly every household job without the learning curve or the risk a belt sander carries.

Bosch Universal Vacuum Hose Adapter Kit — Connects most sanders to a standard shop vacuum, which keeps sandpaper cutting cleanly instead of clogging and scorching halfway through the job.

3M N95 Sanding and Dust Respirator, 5-Pack — Genuinely necessary for any extended sanding session — the dust is a real irritant, and this is the cheapest insurance in the whole project.

As an Amazon affiliate, I earn from qualifying purchases. Thank you for supporting SkippityWhistles.

📖 Related Reads


SkippityWhistles is part of the John D Reinhart content family. Writer, illustrator, videographer, and accidental filmmaker — find the whole story at JohnDReinhart.com.

2016

©2026 John D Reinhartskippitywhistles.com/ — All rights reserved

How to Patch a Hole in Drywall (Or: Evicting the Tenant You Never Agreed to House)

That hole has been staring back at you for months. It’s fixable, it’s not a big deal, and it definitely doesn’t deserve its own zip code.

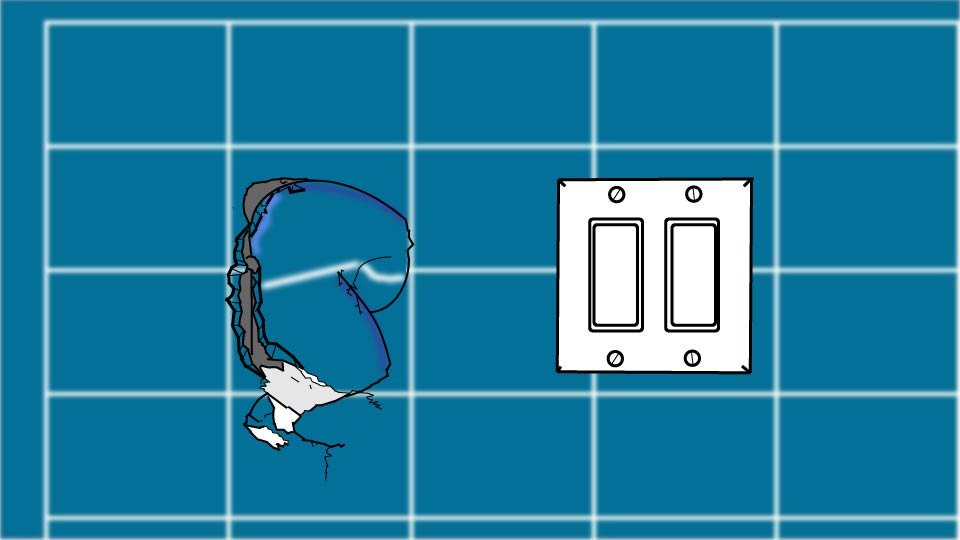
Ron’s hole has been in the hallway wall so long it’s basically achieved squatter’s rights. He’s rearranged a bookshelf to hide it. He’s told two separate guests it’s “a vent, actually.” At this point the hole has more tenure in that house than Ron’s own couch. It is, statistically, one of the least threatening things Ron has ever avoided, and it is entirely fixable in an afternoon.

Whatever put the hole there — a doorknob, a wrestling match with a dresser, a moment nobody’s proud of — the fix depends almost entirely on one thing: how big it is. Get that part right and the rest is just patience wearing a putty knife.

🔍 Know Your Enemy: Sizing Up the Hole

A small hole (up to about a quarter inch — nail holes, old picture hangers, the pushpin incident) isn’t really a patch at all, it’s a filling job. A medium hole (roughly half an inch to four inches — doorknob dents, a failed wall anchor, a chair that got a little too enthusiastic) needs an actual patch, but nothing dramatic. A large hole (bigger than a fist) needs backing — something solid behind the new drywall to screw into — but it still doesn’t need a professional, just more patience and a longer afternoon.

🩹 Small Holes: The Five-Minute Redemption Arc

Scrape any loose bits from the hole so you’re working with clean edges. Press in spackle with a putty knife until it’s level with the wall — not mounded, level. Wipe the excess flat, let it dry (usually thirty minutes to an hour), then sand lightly and touch up with paint. Two thin coats beat one thick one; thick spackle shrinks as it dries and leaves a small crater that stares back at you exactly like the original hole did, just smugger.

🕳️ Medium Holes: Mesh Patch, Meet Compound

Lightly sand around the hole so the patch has a clean surface to grip. Peel the backing off a self-adhesive mesh patch (a fiberglass mesh square with adhesive on one side, sized to stick directly over a hole and give joint compound something to bond to) and press it on firmly — no wrinkles, no air pockets sneaking underneath like it’s hiding from you. Apply joint compound (a plaster-like paste used to fill and smooth drywall repairs) over the patch with a putty knife, feathering the edges wider than the layer before it. Let it dry fully — a genuine 24 hours, not “it feels dry-ish” — sand smooth, add a second thin coat if the patch outline is still visible, then prime and paint.

🧱 Large Holes: When the Wall Needs a Backbone

Cut the damaged area into a clean rectangle with a utility knife — straight edges make everything downstream easier. Cut two wood backing strips (short pieces of scrap lumber, 1x2s work fine) and screw them horizontally inside the wall, spanning the opening, so there’s something solid behind the hole to anchor to. Cut a new drywall patch to fit snugly against the backing, screw it in place every 6 to 8 inches, then tape all four seams with drywall tape (a reinforcing strip embedded in compound to keep a seam from cracking later). From there it’s the same compound-feather-sand cycle as a medium hole, just wider and usually needing three coats instead of two. This is the exact method contractors use — it’s not a shortcut, it’s just the real thing, done at your own pace and price.

🪶 Feathering: The Trick That Makes It Disappear

Feathering means spreading each coat of joint compound progressively wider and thinner than the last, so the edge blends into the surrounding wall instead of stopping abruptly. It is the single detail that separates “I see exactly where you patched this” from “wait, there was a hole here?” Thick, sharp-edged compound reads as a patch from across the room. Thin, wide, gradually-fading compound reads as nothing at all. When in doubt, go thinner and wider on the next coat — you can always add another pass, but scraping off an overly thick coat will make a sight far worse than the hole ever was.

🎨 Sand, Prime, Paint: Sticking the Landing

Sand with light pressure in small circles, not long aggressive strokes — you’re smoothing, not sanding your feelings out on the wall. A work light held sideways against the wall reveals bumps and dips that regular overhead lighting hides completely. Prime before painting, especially on anything bigger than a small hole — skip it and the patch can show through as a slightly different sheen or shade, sometimes called a ghost patch, which is a spookier name than the problem deserves. To avoid a haunted hallway, prime first.

🛒 Gear Worth Having

FibaTape Self-Adhesive Wall Repair Patch — The mesh patch that turns a medium hole into a formality — press, smooth, and the compound does the rest.

USG Sheetrock Pre-Mixed All-Purpose Joint Compound — Ready straight out of the bucket, so mixing powder isn’t one more way for a first patch to go sideways.

3M N95 Sanding and Dust Respirator, 5-Pack — Joint compound dust is genuinely unpleasant to breathe for an afternoon — cheap insurance for lungs you’ll want later.

As an Amazon affiliate, I earn from qualifying purchases. Thank you for supporting SkippityWhistles.

📖 Related Reads


SkippityWhistles is part of the John D Reinhart content family. Writer, illustrator, videographer, and accidental filmmaker — find the whole story at JohnDReinhart.com.

2019

©2026 John D Reinhartskippitywhistles.com/ — All rights reserved

How to Use a Torque Wrench (Or: How Tight Is Tight Enough?)

A torque wrench isn’t complicated. It’s just a tool that tells you when to stop tightening. Here’s what it does, when you actually need one, and which one to buy first.

You’re tightening a bolt. It feels snug. You give it one more turn because snug feels like not quite enough. Then another, because the second turn felt like the first one — still not tight enough. Then something either strips, cracks, or gives way, and now a simple job has become a more complicated one.

This is the problem that torque wrenches solve. Not every bolt needs one — most household fasteners are fine with a regular wrench and reasonable judgment. But for bolts that hold structural things together, bolts that go into softer materials like aluminum, or bolts where the manufacturer has specified an exact tightening value — a torque wrench takes “how tight is tight enough” out of the equation entirely.

It’s also a significantly simpler tool than most people assume. Here’s what it does and how to use it.

⚙️ What a Torque Wrench Actually Does

A torque wrench measures rotational force — called torque — as you tighten a fastener. Torque is measured in foot-pounds (ft-lbs), inch-pounds (in-lbs), or Newton-meters (Nm), depending on the application and which measurement system the spec was written in.

The tool lets you set a target value before you start tightening. When you reach that value — when you’ve applied exactly the amount of rotational force the fastener requires — the wrench signals you to stop. On the most common type (the click-type torque wrench), that signal is a distinct click you can both hear and feel. On a beam-type wrench, it’s a pointer reaching a mark on a visible scale. Either way, the message is the same: you’re done. Stop tightening.

The reason this matters is that different fasteners in different materials have very specific tightening requirements. A deck ledger bolt connecting your deck to the house framing needs a precise amount of torque — too loose and the connection fails structurally, too tight and you can damage the threads or the wood. A bolt going into aluminum needs less torque than the same bolt going into steel, because aluminum strips more easily. The torque specification exists to get the fastener to exactly the right tightness for its application, and the torque wrench is the tool that gets you there.

🔧 The Click-Type Wrench — This Is the One to Buy

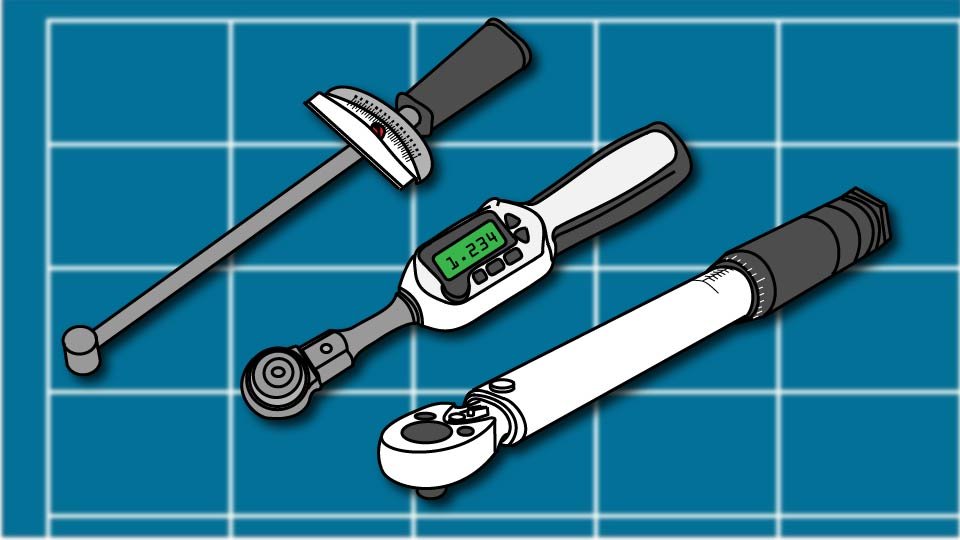
There are three types of torque wrenches: click-type, beam-type, and digital. For home DIY use, the click-type is the right choice. It’s reliable, affordable, requires no batteries, and is easy to use without a learning curve.

A click-type torque wrench looks like a long-handled ratchet wrench. The handle is hollow, and inside it is a calibrated spring mechanism. You set your target torque value by gripping the handle and rotating the adjustment knob at the bottom — this compresses the spring to a specific tension. When you tighten a fastener and the applied force reaches the preset value, the spring releases with a distinctive click. The click is unmistakable. You stop, the bolt is torqued correctly, and you move on.

The beam-type wrench uses a visible pointer on a scale — you watch it while you tighten and stop when the pointer reaches your target. It’s accurate and requires no calibration, but it requires you to watch the scale while tightening, which can be awkward in tight spaces. The digital type has an electronic display and beeps at the target value — accurate and convenient, but more expensive and battery-dependent.

For most people buying their first torque wrench: click-type, 3/8-inch drive (the square post size that connects to sockets — the same standard 3/8-inch drive used by most socket sets), range of 10 to 80 foot-pounds. That covers the majority of home DIY applications: automotive work, deck construction, furniture assembly with specified torque, and general structural fasteners.

📋 Finding the Torque Specification

Before using a torque wrench, you need to know what value you’re tightening to. This is not a number you guess — it comes from the manufacturer or from a standard reference.

For furniture and equipment assembly, the manual specifies torque values for critical fasteners. For automotive work — lug nuts, spark plugs, oil drain plugs — the vehicle’s service manual specifies the values, and they’re also widely available online by searching the vehicle year, make, model, and the specific component. For structural fasteners like deck ledger bolts, the building code or the fastener manufacturer’s documentation specifies the values.

As a general reference for hardware that doesn’t come with specifications: small bolts (1/4 inch diameter) typically land in the 5 to 15 foot-pound range; medium bolts (3/8 inch) in the 20 to 40 foot-pound range; larger bolts (1/2 inch) at 50 foot-pounds and up. But these are starting points, not substitutes for the actual spec. When a spec exists, use it.

📐 How to Set and Use the Wrench

Look up the torque specification for your fastener and write it down. Misremembering a number mid-job is more common than it should be.

Select a socket that fits the bolt head precisely — no wobble, no play. A socket that’s even slightly loose on the fastener will give an inaccurate reading and can round off the fastener head. On click-type wrenches, the drive size needs to match your socket set — 3/8-inch drive wrench with 3/8-inch drive sockets.

Set the torque value on the wrench. On most click-type wrenches, hold the handle firmly with one hand and rotate the knurled adjustment knob at the bottom of the handle with the other. The scale on the handle shows your current setting. Turn until the indicator line aligns with your target value. Check it again before you start — a misread of even five foot-pounds can matter on critical fasteners.

Thread the bolt in by hand until it’s snug against the surface. Hand-tightening first ensures the threads are properly engaged before any torque is applied, and prevents cross-threading — the frustrating situation where the bolt goes in at a slight angle and damages both the bolt threads and the receiving threads.

Attach the torque wrench and begin tightening with slow, steady pressure. Don’t jerk or apply sudden force. The click mechanism needs consistent pressure to trigger accurately — rapid or jerky tightening can cause the wrench to click early or late. When you hear and feel the click, stop immediately. The bolt is torqued to specification. Tightening further past the click does not improve the connection — it just adds force beyond the rated value, which can strip threads or damage the fastener.

🔄 One Important Storage Rule

When you’re done using a click-type torque wrench, turn the adjustment knob back to its lowest setting before putting it away. The spring inside the wrench that creates the click mechanism can take a permanent set — weaken slightly — if stored under compression at a high torque setting. Over time, a wrench stored at maximum torque loses calibration accuracy. Back it off to the minimum after every use. It takes ten seconds and it keeps the wrench accurate for years.

Store the wrench in its case rather than loose in a toolbox. Torque wrenches are precision tools — the calibration can be affected by a sharp impact. A drop onto a concrete floor is worth getting the wrench recalibrated before trusting it on critical fasteners again. Professional calibration runs about twenty to fifty dollars and is worth it for anything structural.

🛒 Gear Worth Having

TEKTON 3/8 Inch Drive Micrometer Torque Wrench (10-100 ft.-lb.) | 24330 — The 3/8-inch drive click-type wrench that handles the majority of home DIY torque work: automotive fasteners, deck construction, structural hardware, furniture with specified torque values. Calibrated to ±4% accuracy out of the box. All-steel construction with no plastic parts. Dual-range scale in both foot-pounds and Newton-meters. Ships in a storage case. TEKTON is the respected mid-range brand that professional mechanics and serious DIYers reach for when they want accuracy without a professional price point.

TEKTON 1/4 Inch Drive Click Torque Wrench (20-200 in.-lb.) | 24320 — The smaller companion to the 3/8-inch wrench, for lighter fasteners measured in inch-pounds (in-lbs) rather than foot-pounds. Spark plugs, small engine components, bicycle fasteners, and precision assembly work all typically call for inch-pound torque values. Same TEKTON build quality, same ±4% calibration accuracy, same all-steel construction. If the 3/8-inch wrench is for the deck and the car, the 1/4-inch is for everything smaller.

SUERCUP Torque Wrench Set — 1/4″, 3/8″ & 1/2″ Drive, 3-Piece with Case — For the toolbox that wants all three drive sizes in one purchase. The 1/4-inch handles small precision work, the 3/8-inch covers most DIY applications, and the 1/2-inch handles heavy-duty automotive and structural work. Chrome vanadium steel throughout, calibrated to ±4%, organized storage case keeps all three accessible. The complete answer if you want to buy torque wrenches once and have what you need for any job.

As an Amazon affiliate, I earn from qualifying purchases. Thank you for supporting SkippityWhistles.

📖 Related Reads

How to Use a Socket Wrench

How to Use an Adjustable Wrench

How to Choose the Right Fastener

The torque wrench isn’t the tool for every bolt — most household fasteners are perfectly fine tightened by feel with a regular wrench. But for the ones that matter, for the structural connections and the precision assemblies and the fasteners where the manufacturer took the time to specify an exact value, the torque wrench is the tool that gets it right the first time. The click is the sound of a fastener done correctly. It’s a satisfying sound.


SkippityWhistles is part of the John D Reinhart content family. Writer, illustrator, videographer, and accidental filmmaker — find the whole story at JohnDReinhart.com.

7053

©2026 John D Reinhartskippitywhistles.com/ – all rights reserved

Seals, Gaskets, and Plumber’s Tape (Or: Why Most Leaks Cost $2 to Fix)

Most plumbing leaks come down to one thing: a seal that’s worn out or missing. Here’s what washers, O-rings, and plumber’s tape actually do — and how a $2 part fixes most drips.

Turn on the tap. Water flows smoothly out of the faucet and nowhere else. The supply line doesn’t spray. The connection under the sink doesn’t drip. The pipe fitting doesn’t seep.

This seems like the bare minimum — water going where it’s supposed to go. But there are dozens of connection points between the water main and your faucet, and every single one of them wants to leak. The only reason they don’t is a collection of rubber washers, O-rings, and a few wraps of white tape that most people don’t know exist until the dripping starts.

Here’s the thing about most plumbing leaks: they’re not complicated. The connection didn’t fail structurally. A pipe didn’t crack. A tiny rubber part — one that costs almost nothing — wore out, lost its flexibility, or went missing from a reassembled connection. Understanding what these parts are and what they do turns a mystery drip into a five-minute fix.

💧 What Seals, Gaskets, and Tape Actually Do

Every place two plumbing components connect is a potential leak point. A pipe screwing into a fitting. A supply line connecting to a faucet. A valve stem turning inside a faucet body. Water pressure is constantly pushing against every one of these joints, looking for any gap it can find.

Seals, gaskets, and tape are what close those gaps. They work by filling the microscopic spaces between two mating surfaces — spaces that look solid to the eye but are large enough for water under pressure to exploit. Compress a rubber washer between two surfaces and it fills the irregularities. Wrap tape around pipe threads and it fills the gaps between the ridges. The water has nowhere to go except where it’s directed.

The terms “seal,” “gasket,” and “washer” overlap considerably in everyday use, and most people use them interchangeably without any practical problem. What matters is recognizing which type does which job — because when a leak develops, the type of seal involved tells you what to replace.

🔴 Rubber Washers — The Most Common Fix in Plumbing

A rubber washer is a flat, circular piece of rubber — or rubber-like material — usually about the size of a dime or a nickel. It sits at connection points and creates a watertight seal when two surfaces are tightened together. As the connection tightens, the washer compresses and fills any gap between the surfaces.

Washers are everywhere in residential plumbing: inside faucet connections, at the ends of supply lines (the flexible lines connecting shut-off valves to faucets — the braided metal or plastic hoses under the sink), inside valve stems, and at virtually every hose connection. They’re so common and so inexpensive that a worn-out washer is the single most frequent cause of slow drips and minor leaks in a home.

The failure mode is straightforward: rubber degrades over time. It gets hard, loses its flexibility, and stops conforming to the mating surface. A washer that’s been in a connection for ten or fifteen years may look fine but has lost the elasticity that made it seal. Tightening the connection doesn’t fix it — the washer needs to be replaced.

How to tell a washer has failed: a slow drip from a connection that gets worse after you tighten it, or a connection that leaks even when snugged firmly. How to fix it: turn off the water at the shut-off valve (the small oval handle under the sink, turned clockwise to close — closing it shuts off water to that fixture without affecting the rest of the house), unscrew the connection, pull out the old washer, press in a new one, reassemble. The whole job usually takes under ten minutes. The washer costs less than a dollar.

The practical move: keep a mixed washer assortment in the plumbing kit. The next time a connection drips, the fix is already in the drawer.

⭕ O-Rings — The Seal Inside Moving Parts

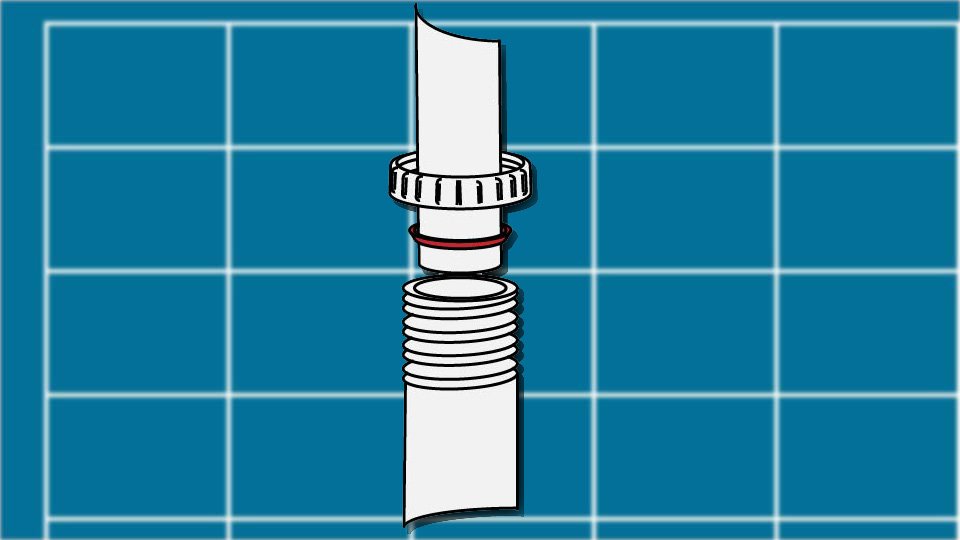
An O-ring is a circular rubber seal — a donut shape rather than a flat disc — designed to create a watertight barrier inside mechanisms that move. Where a flat washer seals a static joint between two surfaces that don’t move relative to each other, an O-ring seals moving parts: the valve stem that rotates when you turn a faucet handle, the cartridge inside a single-handle faucet that controls both flow and temperature, and the internal mechanisms of shut-off valves.

O-rings fail the same way washers do — the rubber hardens and loses its ability to maintain a seal. The symptom is usually a drip from inside the faucet itself, or water seeping from around the base of a faucet handle, or a shut-off valve that drips from the stem even when closed.

Replacing an O-ring requires taking apart the faucet or valve — removing the handle, extracting the cartridge or valve stem, and pressing the new O-ring into the correct groove. It’s a more involved repair than replacing a connection washer, but still well within DIY territory. The critical thing is getting the right size: O-rings come in dozens of diameters and cross-sectional thicknesses, and the wrong size won’t seal. Either bring the old O-ring to the hardware store to match it, or look up the faucet model and order the correct replacement kit.

The money-saving argument: a faucet that drips because of a failed O-ring doesn’t need to be replaced. A $5 O-ring kit fixes the problem and the faucet keeps working. The only reason to replace the whole faucet is if the cartridge itself is damaged, the faucet body is cracked, or the faucet is simply old enough that replacement makes more sense than repair.

🏷️ Plumber’s Tape — The Three-Dollar Fix for Threaded Connections

Plumber’s tape — also called Teflon tape or PTFE tape (polytetrafluoroethylene, the same material used in non-stick cookware) — is a thin, white, slightly stretchy tape that wraps around the threaded ends of pipes and fittings before they’re screwed together.

The reason threaded connections need it: pipe threads look solid but aren’t perfectly smooth. The ridges of the thread leave microscopic gaps between the male and female parts (the “male” part is the one that screws in; the “female” part receives it). Water under pressure finds those gaps. Plumber’s tape fills them, conforming to the thread profile and creating a watertight seal that the threads alone can’t provide.

How to apply it: wrap three to four layers around the male threads — the part that screws into the fitting — starting at the first thread and working toward the end of the pipe. Wrap clockwise, in the same direction the fitting will turn when screwed in. This way, tightening the connection pulls the tape tighter against the threads rather than unwrapping it. Tighten the connection normally after wrapping. Done.

A roll of plumber’s tape costs two or three dollars and lasts for years of occasional use. It belongs in every home toolbox, and the rule of thumb is simple: when in doubt, use it. Wrapping threads that didn’t need tape does no harm. Failing to wrap threads that did need tape produces a connection that drips from day one.

One important note: plumber’s tape is for threaded connections only. It is not a repair for a cracked pipe, a split fitting, or any structural failure. It seals threads — nothing else.

🔍 Reading the Leak — What the Location Tells You

A drip coming from a supply line connection or a threaded fitting under the sink is almost always a washer or missing plumber’s tape. Tighten the connection first. If it still drips after tightening, turn off the water, disconnect the fitting, check for a washer (replace it if worn or missing), and reapply plumber’s tape to the threads before reconnecting.

A drip from the faucet itself — from the spout even when the handle is fully closed — is typically a worn O-ring or a failed cartridge inside the faucet. The handle controls flow through an internal valve; when that valve’s seal degrades, it can’t fully close. An O-ring kit or a replacement cartridge (specific to the faucet model) is the fix.

A spray from a threaded connection that was recently assembled or disassembled is almost always missing or incorrectly applied plumber’s tape. Disassemble, wrap the threads properly, reassemble.

Water seeping from around the base of a faucet handle suggests the O-ring on the valve stem has failed. The stem seal is what prevents water from traveling up the stem and out around the handle. A valve stem O-ring replacement kit handles this.

A slow leak that seems to come from nowhere specific and appears intermittently is worth investigating carefully before concluding it’s a seal failure — intermittent leaks around pipes can also be condensation forming on cold surfaces in humid conditions. Touch the pipe or fitting at the wet spot: if it’s noticeably cold, condensation may be the culprit rather than an actual leak.

🛒 Gear Worth Having

NBRINGO 114-Piece Faucet Washer Assortment Kit — Flat & Beveled, 12 Sizes, with Brass Screws — Flat and beveled rubber washers in twelve sizes, plus the brass bibb screws used to hold washers in place inside valve stems and outdoor spigots. Covers the full range of residential faucet and hose connection repair. Keep this in the plumbing kit and the next dripping connection is a ten-minute fix with parts already on hand. The entire kit costs less than a single plumber’s service call trip charge.

DOPKUSS PTFE Plumber’s Tape — 10 Rolls, 1/2″ x 520″, 5.5 mil Thick — Ten rolls of standard-density PTFE thread seal tape at the thickness professional plumbers use. The 5.5 mil thickness (thicker than budget tape) conforms more completely to thread profiles and stays in place during assembly rather than tearing or sliding. One roll wraps hundreds of connections. Ten rolls is a lifetime supply for most homeowners. Use it on every threaded plumbing connection, every time.

KEZE 32-Size O-Ring Assortment Kit — 1,540 Pieces, with Hook and Pick Set — 1,540 O-rings in 32 sizes covering the full range used in residential faucets, valves, and plumbing connections. When a faucet drips and the cartridge is fine, it’s the O-ring — and having the right size on hand means the repair happens today rather than after a hardware store trip. The included hook and pick set is for removing old O-rings from their grooves without damaging the valve body. An essential addition to any plumbing kit.

As an Amazon affiliate, I earn from qualifying purchases. Thank you for supporting SkippityWhistles.

📖 Related Reads

How to Use Wire Nuts

How to Choose the Right Caulk for Your Home

The DIYer’s Toolbox

A washer assortment, a roll of plumber’s tape, and an O-ring kit together cost about thirty dollars and handle the majority of household plumbing leaks. The drip under the sink, the faucet that won’t fully close, the threaded fitting that seeps — all of it comes down to a small rubber part or a few wraps of tape. The water goes where it’s supposed to go. The rest of the house stays dry.


SkippityWhistles is part of the John D Reinhart content family. Writer, illustrator, videographer, and accidental filmmaker — find the whole story at JohnDReinhart.com.

3028

©2026 John D Reinhartskippitywhistles.com/ – all rights reserved
How Your Dishwasher Works: Understanding the Plumbing (And Why It Matters)

Your dishwasher is a mini plumbing system. Here’s how it fills, sprays, and drains—plus how to fix the most common problems yourself in 30 minutes.

Ron’s dishwasher kept leaving a puddle of standing water in the bottom of the tub after every cycle, along with a faint smell he genuinely blamed on the machine getting old. He almost called for service before a friend crouched down, looked at the drain hose running along the cabinet floor, and pointed out that it never rose above the level of the sink drain it connected to — which meant water had nowhere to go but sit there. Ron’s dishwasher wasn’t old or broken. Its hose was just installed wrong from day one. Oops. Did you install that yourself, Ron?

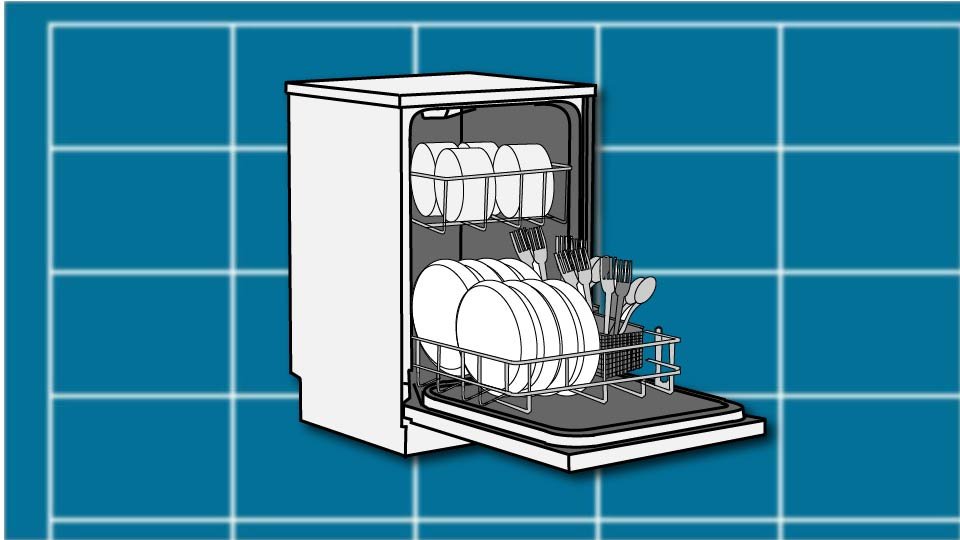
A dishwasher is really a small, self-contained plumbing system tucked into a cabinet — it fills, sprays, drains, and repeats, and most of what goes wrong with it traces back to one of those four steps rather than the machine itself.

💧 The Basic Concept

Water enters through an inlet, gets pushed through spray arms by a pump, and eventually drains back out through a separate pump and hose — fill, spray, drain, repeat, on a timed cycle.

Understanding those four stages is most of what’s needed to diagnose almost anything that goes wrong.

🔥 Hot Water In

A dishwasher connects specifically to the hot water line, not cold — hot water dissolves detergent more effectively and cleans better across the board.

A flexible supply line runs to an inlet valve that opens and closes to control flow, releasing water into the bottom of the tub.

  • If the dishwasher won’t fill, the inlet valve is usually stuck or the supply line is kinked
  • a slow fill often means sediment clogging the valve’s screen
  • lukewarm results usually trace back to the water heater itself not running hot enough, or a supply line long enough that water cools before arriving.

💦 Getting Water to the Dishes

A lower spray arm rotates near the bottom of the tub, and an upper arm covers the top rack — both powered purely by water pressure forcing them to spin as it sprays through their holes.

Clogged holes from food particles or mineral deposits, a cracked arm, or debris jamming the rotation are the most common reasons dishes come out less than clean.

Checking the spray arms first, before anything else, catches the majority of “my dishes aren’t getting clean” complaints.

Soaking a removed arm in hot water with vinegar dissolves mineral buildup, and a toothpick clears individual clogged holes — a genuinely free fix in most cases.

🌡️ Temperature and Detergent

Many dishwashers heat water internally during the cycle to reach an optimal cleaning temperature, typically 140 to 150°F. This means the water heater itself doesn’t need to run scalding hot — the dishwasher does additional heating on its own.

Detergent releases at specific points in the cycle through a spring-loaded dispenser cup.

If it’s not dissolving properly, low water temperature is the more likely culprit than the detergent itself.

⬆️ The Drain System, and the Rule That Trips Everyone Up

A drain pump creates suction at the end of the cycle, pulling dirty water out through a flexible hose running to the kitchen drain. Sometimes the water will be run through an air gap – a small cylinder, usually on the countertop, that prevents dirty sink water from siphoning back into the dishwasher.

The detail almost nobody knows going in: a dishwasher drain hose cannot drain uphill. If the hose runs up and then back down to reach the kitchen drain, that high point has to actually be the highest point in the run — a proper loop, well above the water level, before descending to the drain.

Without that loop, or if there’s a low spot anywhere along the hose where water can pull, the result is exactly what happened to Ron: standing water in the tub, a slow drain, and a smell that has nothing to do with the machine’s age.

🧽 The Filter: Catching What Shouldn’t Go Down

Most modern dishwashers have a filter at the tub’s bottom, catching food particles before they can clog the drain pump or get stuck in the spray arms.

A dirty filter is genuinely the single most common cause of dishwasher performance complaints.

Rinsing it under hot water and scrubbing lightly with an old toothbrush every one to two weeks (more often with heavy use) is a thirty-second habit that prevents a real share of service calls.

💧 Diagnosing a Leak by Where It Shows Up

  • Water leaking during the cycle itself usually points to the door seal or, less commonly, a crack in the tub.
  • Water under the dishwasher points to a supply or drain hose connection worth tightening by hand first.
  • Water around the door specifically points to a worn or dirty door seal. Most door seals pull free by hand along the track they’re seated in, without tools. Run a finger along the gasket to find the edge, then peel it out gently before. Soaking it in hot water with vinegar sometimes restores a seal that’s just built up detergent residue rather than genuinely failed.

🧹 Keeping It Running

  • Clean the filter monthly at minimum.
  • Run it with genuinely hot water rather than lukewarm, since cold water hurts both cleaning and drainage.
  • Use the correct amount of detergent — too much causes oversudsing, too little leaves residue.
  • Confirm the drain hose is properly looped, not flat or kinked.
  • And don’t let a small leak sit — a slow drip today is water damage under the cabinet tomorrow.

📞 When to Call a Professional

These items are all well past the DIY line:

  • grinding motor noises
  • any sign of electrical trouble like sparking or a burning smell
  • a cracked tub
  • or genuine uncertainty about a repair .

Electrical components, the heating element, and internal sensors or timers are worth leaving to someone qualified — knowing where that line sits is good judgment, not a failure to fix it yourself.

🛒 Gear Worth Having

Dishwasher Filter Replacement — Cheap insurance against the single most common cause of dishwasher performance complaints — worth keeping a spare on hand.

Dishwasher Drain Hose Kit — For routing a proper high loop the way Ron’s never had — straightforward to install and solves standing water at the source.

Dishwasher Door Seal/Gasket Replacement — The most common leak source on any dishwasher — confirm the model number before ordering, since seals are model-specific.

As an Amazon affiliate, I earn from qualifying purchases. Thank you for supporting SkippityWhistles.

📖 Related Reads


SkippityWhistles is part of the John D Reinhart content family. Writer, illustrator, videographer, and accidental filmmaker — find the whole story at JohnDReinhart.com.

3030

©2026 John D Reinhartskippitywhistles.com/ — All rights reserved

Drainage 101: Where Does It All Go? (Or: Gravity Doesn’t Need a Pep Talk)

Your drain system runs on gravity, slope, and a small curved pipe that blocks sewer gas. Once you understand those three things, slow drains and bad smells stop being mysterious.

Ron noticed his shower draining a little slower than usual the same week his toilet started gurgling whenever the washing machine emptied out. He treated them as two separate problems — bought a drain cleaner for the shower, shrugged at the toilet — because a slow shower and a gurgling toilet don’t look like they have anything to do with each other. They did. Both were symptoms of the exact same downstream problem, and treating them separately meant Ron fixed neither.

You flush a toilet, water disappears. You pull a drain plug, water vanishes. This feels like the bare minimum a house should do — until one day it doesn’t disappear quite as fast, then slower still, then not at all. Most people call a plumber at that point with no idea what they’ll find. Drain problems almost always come down to the same handful of causes, and once the system makes sense, those causes stop being mysterious.

⬇️ The Fundamental Principle: Gravity Does Everything

The water supply system works because of pressure, pushing water to your fixtures. The drainage system works on the opposite principle entirely: gravity.

There are no pumps in a residential drain system — water flows downhill through pipes deliberately angled to keep it moving. Too steep, and water rushes through faster than it can carry solid waste, leaving debris behind. Too shallow, and water crawls, letting solids settle out before they reach the main line.

The correct slope is about 1/4 inch of drop per foot — barely visible to the eye, but exactly enough to keep everything moving. A slow drain with no obvious clog often traces back to incorrect slope.

🔄 The Journey from Fixture to Sewer

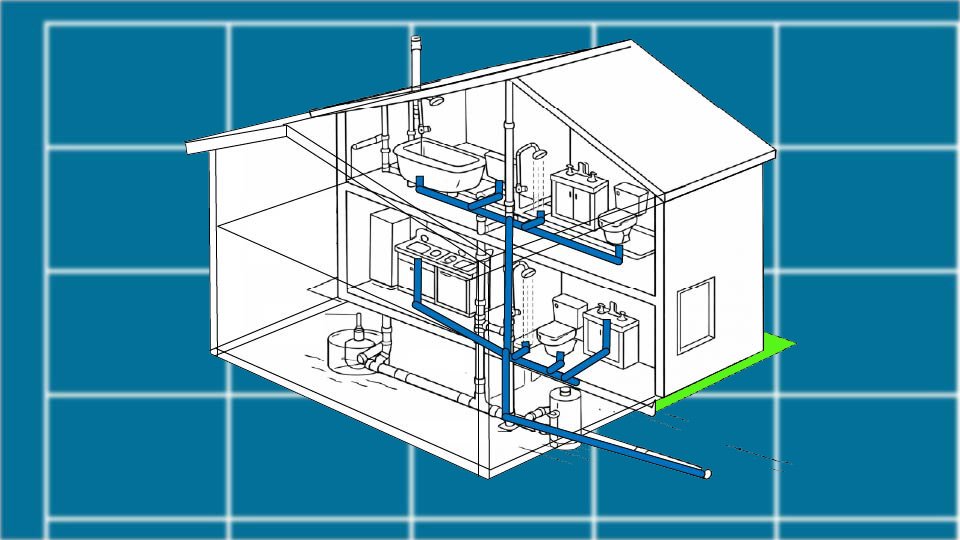
Water leaving a sink, shower, or toilet enters a small drain pipe, typically 1.5 to 2 inches wide, and reaches the first key component: the P-trap (also called a U-bend — the curved section of pipe under every sink that dips down and back up before continuing to the wall).

That water sitting in the trap holds a seal that keeps sewer gases from traveling back up into the house — the entire reason plumbing doesn’t smell like what it’s actually connected to.

From there, water flows into a branch drain, joins other branch drains into the main drain line, and exits through the foundation to the sewer or septic system.

Fixture drain to P-trap to branch drain to main line to sewer — gravity-powered the whole way.

💨 The Vent System: The Invisible Part That Makes Everything Work

A network of vent pipes runs from the drain lines up through the house and out through the roof — the pipes visible poking through the shingles.

As water flows down a drain, it pushes air ahead of it, and without somewhere for that air to escape, pressure changes build up inside the pipe. Those changes make drains gurgle, can siphon water straight out of P-traps, and slow the whole system down.

Vent pipes connect the drain system to outside air, equalizing that pressure so water can flow smoothly and sewer gases can escape outward instead of into the house.

When a vent gets blocked — ice, leaves, a bird’s nest — the symptoms are distinctive: gurgling drains, multiple fixtures slowing down at once, and P-traps siphoned dry enough to let sewer smells through.

Clearing a blocked vent usually means getting on the roof, which is worth handing to a professional.

🔍 Reading the Symptoms

  • A slow drain at just one fixture is almost always a partial clog right there — hair, soap scum, debris — and it’s the most common, most fixable drain problem in any home.
  • Multiple drains slowing down at the same time, the way Ron’s shower and toilet did together, points downstream of any single fixture: a main line blockage or a blocked vent, not something a single drain cleaner will touch.
  • Gurgling is the sound of air fighting its way through water in a trap because the vent can’t supply air fast enough — usually a partially blocked vent.
  • A sewer smell means a P-trap has lost its seal, either from drying out in a rarely-used drain (pour water down it — problem solved) or from being siphoned dry by a vent issue (if the smell returns within days, that’s the more likely cause).
  • Water backing up out of a drain means a main line blockage, and that’s a call to a plumber immediately — not a DIY project, since a backup can introduce sewage into living space.

🛡️ What Actually Keeps Drains Running

  • Hair and soap buildup cause the vast majority of slow drains — a simple drain screen at every shower and tub catches hair before it combines with soap residue into a growing blockage; emptying it takes ten seconds, snaking a clogged drain takes considerably longer.
  • Keep grease out of kitchen drains entirely, since it solidifies as it cools and accumulates into a real blockage over time — wipe greasy pans before washing rather than rinsing grease straight down.
  • Running hot water down a drain occasionally helps keep soap residue moving instead of building up on the pipe walls — maintenance, not a cure for an existing clog.
  • And know where the cleanout -a capped pipe – is located, today. It’s usually in the basement, crawlspace, or near the foundation outside, giving direct access to the main drain line before an emergency makes finding it urgent.

🛒 Gear Worth Having

TubShroom Revolutionary Tub Drain Hair Catcher — Sits inside the drain and catches hair around the stem while water flows freely past — pull it out, wipe it off, done. The best few dollars spent on preventing a clog before it starts.

25-Foot Drum Drain Snake Auger — For the clog the hair catcher didn’t prevent and the plunger didn’t clear — twenty-five feet of cable that handles most household drain clogs without a service call.

Neiko 4-Piece Plunger Set (Cup and Flange) — A flat cup plunger for sinks and tubs, a flanged one that seats into a toilet bowl properly — the right shape for each job clears most partial clogs in thirty seconds.

As an Amazon affiliate, I earn from qualifying purchases. Thank you for supporting SkippityWhistles.

📖 Related Reads


SkippityWhistles is part of the John D Reinhart content family. Writer, illustrator, videographer, and accidental filmmaker — find the whole story at JohnDReinhart.com.

3021

©2026 John D Reinhartskippitywhistles.com/ — All rights reserved

Water Supply 101: Pipes, Valves, and Pressure

Water pressure, pipes, valves—here’s how your water supply system actually works. Know these components, find your shut-offs, and handle simple problems yourself.

Ron watched his water bill creep upward for three straight months and quietly blamed the utility company for raising rates again. It wasn’t the rates. A toilet fill valve had been running low and steady the entire time, quietly wasting water around the clock, and the answer had been sitting right there on his water meter the whole time — he’d just never learned that the meter could tell him anything beyond how much to pay.

The water supply system looks like it’s just pipes and pressure, but a few specific components are doing real, active work — and knowing what they are turns a mysterious bill or a weak shower into something you can actually diagnose.

🚰 The Service Line: Where Your Responsibility Begins

The city taps its main water line with a smaller pipe, called a service line, usually buried 3 to 4 feet deep to stay below the frost line to your property.

Once that service line crosses your property line, it becomes your responsibility, not the utility’s — if it leaks or freezes, that’s a homeowner repair, not a city one.

That’s a detail worth knowing.

Another detail: if your home is older, your service line might be made of lead, as they sometimes were until the 1970’s. A lead service line is a genuine health hazard. If you think that could be a possibility in your house, it might be worth having a plumber confirm it.

🎛️ The Pressure-Reducing Valve: The Quiet Protector

City water pressure genuinely varies, sometimes swinging between 50 and 100-plus PSI depending on the day. A pressure-reducing valve (PRV — a small, brass, bulb-shaped device usually found near the main shutoff or water meter) steps that down to a safe, consistent 50 to 60 PSI before it reaches your fixtures.

Without it, pipes, seals, and appliances take on more pressure than they’re rated for, which shows up eventually as leaking connections, shortened fixture life, or water hammer (a banging sound from pressure surges in the pipes). Most homes have one. Most homeowners never notice it’s there, quietly doing its job.

📊 The Water Meter: A Leak Detector You Already Own

The water meter tracks exactly how much water enters the house, and it’s usually sitting right where the service line comes in — a pit near the street, or inside a basement.

Checking it is simple: write down the reading, make sure nothing’s using water for a few hours, and check it again.

Any movement at all means something’s using water somewhere, even if nothing’s visibly running — which is exactly the kind of slow, invisible leak that quietly inflated Ron’s bill for three months before he ever thought to look.

🔀 Cold and Hot Lines: Why They Stay Separate

Cold water travels straight from the main line to fixtures with no detour. Hot water takes a longer route — into the water heater, warmed, then out through its own dedicated pipes.

They stay separate because hot water expands as it heats, and running both through shared piping would create mixing and pressure problems neither system was built to handle.

That delay before hot water reaches the tap is simply the time it takes to warm the water already sitting in that pipe — the longer the run from heater to fixture, the longer the wait.

🔧 Shut-Off Valve Types

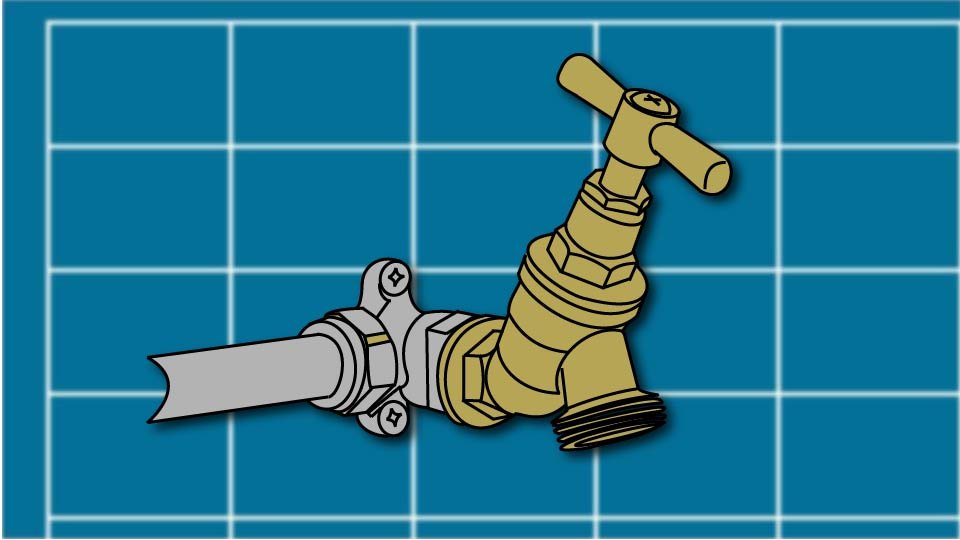
  • A ball valve (lever handle, quarter-turn on or off) is the modern standard and the most reliable of the three.
  • A gate valve (wheel handle, several full turns to open or close) is older and prone to sticking or failing after years of little use.
  • A compression valve (a screw-down handle) is oldest of all and the most prone to leaking over time.

If any fixture in the house lacks its own shut-off valve, adding one is a small cost that prevents a much bigger problem the day that fixture needs a repair.

📈 Reading Your Own Pressure

  • Below 30 PSI shows up as a weak shower, a slow-filling toilet, or an appliance that seems to take forever — usually pointing to a leak, a blocked line, or a failing PRV.
  • Above 80 PSI shows up as banging pipes, leaking connections, or fixtures wearing out faster than they should — usually a faulty PRV or naturally high local pressure.
  • 50 to 60 PSI is the healthy range, and a simple gauge that screws onto an outdoor spigot confirms exactly where a home actually sits, rather than guessing from symptoms alone.

🔍 Common Problems, Decoded

  • No water at all points first to the main shutoff — check whether it’s accidentally closed before assuming a bigger issue.
  • Low pressure everywhere suggests a leak, a blocked line, or a failing PRV.
  • Low pressure at just one fixture is almost always a clogged aerator, the small screen at the faucet tip — remove and rinse it.
  • Banging pipes point to pressure surges or a failing PRV. A leak at a connection is usually a worn washer or seal, fixable by shutting off that fixture’s valve and tightening or replacing the part.
  • Discolored water that clears after running for a few minutes was just sediment; water that stays discolored is worth a plumber’s look.

🛒 Gear Worth Having

Water Pressure Gauge (Spigot-Mount) — A cheap, direct reading instead of guessing from symptoms — screws onto any outdoor faucet in seconds.

Ball Valve Shut-Off Kit — Individual, reliable shutoffs for any fixture that’s missing one — a small fix that prevents a much bigger emergency later.

Pipe Insulation Wrap — Prevents freezing on exposed lines in cold weather and cuts heat loss on hot water runs the rest of the year.

As an Amazon affiliate, I earn from qualifying purchases. Thank you for supporting SkippityWhistles.

📖 Related Reads


SkippityWhistles is part of the John D Reinhart content family. Writer, illustrator, videographer, and accidental filmmaker — find the whole story at JohnDReinhart.com.

3020

©2026 John D Reinhartskippitywhistles.com/ — All rights reserved

How to Read an Electrical Panel: Your House’s Electrical Nervous System Explained

Intimidated by your breaker box? Here’s what every homeowner should know: what those switches do, why your house has them, and when to call an electrician—explained in plain English.

Ron’s breaker labels were mostly guesswork — half of them read “???” from a previous owner who clearly gave up at the same point Ron eventually would. His method for finding the right breaker during any given problem was flipping switches one at a time and waiting to hear which room went quiet. It worked, eventually, the way hitting every button in an elevator eventually gets you to your floor. It’s just not what anyone would call reading the panel.

An electrical panel looks like a wall of identical switches guarding a mystery, but it’s really just a traffic cop — deciding how much power goes where, and giving you a way to shut any of it off. Once you know what you’re actually looking at, the guessing stops.

🚦 The Main Disconnect: The Big Switch

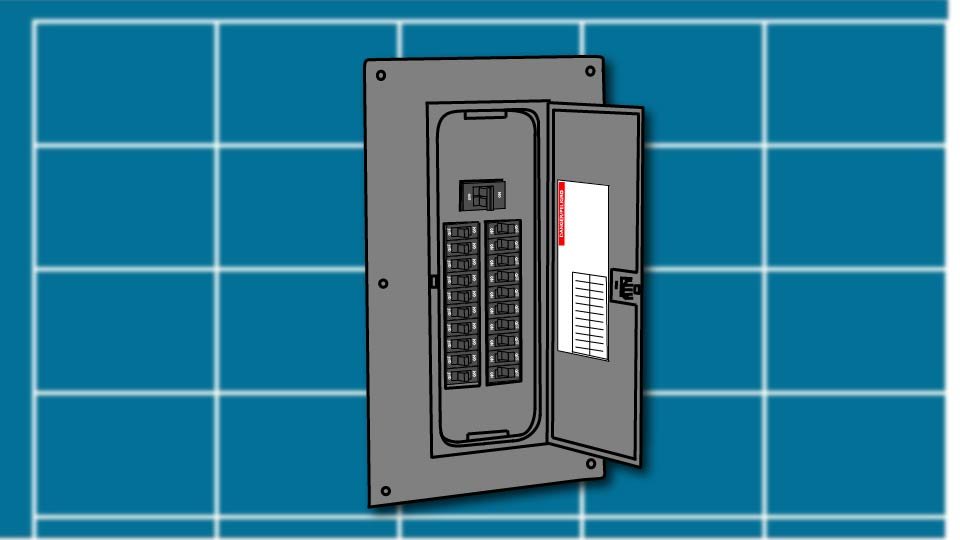
Near the top of most panels sits one larger breaker, usually labeled MAIN, with its own amperage rating printed on it — 100, 150, or 200 amps in most homes. This is the main disconnect, and it cuts power to the entire house at once. In some homes, especially older or larger ones, the main disconnect sits outside the panel entirely — worth knowing where yours actually is before an emergency makes that knowledge urgent.

🔌 Breakers: Single-Pole and Double-Pole

Below the main sit columns of smaller breakers, each protecting one circuit — a single circuit might feed several outlets or lights, but they all answer to the same breaker. A single-pole breaker (narrow, one switch) handles standard 120-volt circuits — most of the outlets and lights in a house. A double-pole breaker (wider, looks like two switches joined together) handles 240-volt circuits — the water heater, central air, an electric range, a dryer, anything genuinely power-hungry enough to need double the voltage.

🔗 The Neutral and Ground Buses

Along the sides of the panel sit two metal bars with wires clustered onto them. The neutral bus (usually silver or gray, with white wires attached) completes the circuit, carrying current back out. The ground bus (usually green or bare copper) provides a safety path for electricity if something goes wrong elsewhere in the circuit. Neither is a random cluster of wires — both are doing specific, structural work every time anything in the house draws power.

🏷️ Reading the Labels

A properly labeled panel tells you exactly what each breaker controls and how much current it allows — “Kitchen 20A,” “Bedrooms 15A,” “Water Heater 30A.” If the labels in a panel are faded, vague, or missing entirely, that’s genuinely worth fixing: flip one breaker at a time, note what goes dark, and write it down. Thirty minutes now saves a lot of Ron’s elevator-button guessing later.

🎨 What Breaker Colors Actually Mean

Color signals the type of protection, not how strong the breaker is — a red breaker isn’t more powerful than a black one, it’s just wired for a different voltage.

Black breakers are standard single-pole, 120-volt. Red breakers are standard double-pole, 240-volt. Yellow often indicates AFCI (arc fault) protection. Blue or green often indicates GFCI (ground fault) protection or a specialty breaker type.

Tandem or “twin” breakers — two thin breakers sharing one slot — show up in some panels and not others, since not every panel is rated to accept them. If a panel already has some, that’s useful to recognize when reading it — but whether more can safely be added is a question for whoever’s actually working inside that panel, not something to figure out by inspection alone.

⚡ Amperage: What the Numbers Actually Mean

The number stamped on each breaker — 15, 20, 30, 40 — is the maximum current that circuit is rated to carry before the breaker trips.

  • 15A handles light-duty circuits like bedroom outlets and lighting.
  • 20A is the general-purpose standard for kitchens and bathrooms.
  • 30A and up covers heavy-duty appliances like water heaters and dryers.

🏠 Service Size: How Much Power the House Has

The number on the main breaker is the house’s total service size — its overall electrical capacity.

  • 100A service is common in older homes and can feel tight running AC, a water heater, and an oven at once.
  • 150A covers a modest modern home reasonably, though it can get crowded with an EV charger or heat pump added later.
  • 200A is the standard for most homes built or renovated recently, and handles the typical mix of major appliances comfortably.

Anything beyond that is generally reserved for larger homes or all-electric construction.

🔄 What a Tripped Breaker Actually Means

A tripped breaker did its job — it caught an overload, a short, or a ground fault before that fault became something worse.

Unplug what’s on that circuit, flip the breaker fully off and back on, then reintroduce devices one at a time to find the culprit.

A breaker that trips immediately, every time, points to a real fault, not a coincidence — that’s an electrician’s call.

A breaker that won’t stay reset at all is a genuine red flag, not something to keep pressing and hoping.

🛡️ The Golden Rule: Look, Don’t Touch

Understanding a panel and working inside one are two completely different things.

Turning breakers on and off, testing GFCI and AFCI devices monthly, and keeping the panel clearly labeled and unobstructed are all reasonable homeowner territory.

Touching the main lugs or service entrance wires, sticking anything into the panel, or opening it up for repair work is not — those wires carry deadly voltage regardless of whether the main breaker is on or off, and that’s a licensed electrician’s job, every time, no exceptions.

🛒 Gear Worth Having

Klein Tools NCVT-3 Non-Contact Voltage Tester — Confirms what’s actually live near a panel before anything gets touched — a genuinely essential first step, not an optional one.

Label Maker for Breaker Panels — Turns a wall of guesswork into an actual reference, so the next person opening this panel doesn’t inherit Ron’s elevator-button method.

Circuit Breaker Finder and Outlet Mapper — Plugs into any outlet and identifies its breaker automatically, which turns labeling from an afternoon guessing game into a five-minute task.

As an Amazon affiliate, I earn from qualifying purchases. Thank you for supporting SkippityWhistles.

📖 Related Reads

SkippityWhistles is part of the John D Reinhart content family. Writer, illustrator, videographer, and accidental filmmaker — find the whole story at JohnDReinhart.com.

9015

©2026 John D Reinhartskippitywhistles.com/ — All rights reserved

How to Tame a Sawhorse (Or: Collapse Insurance Not Included)

Sawhorses wobble? Shift? Feel unsafe? Here’s how to choose, set up, and use them so they stay put and actually support your work—no more fighting your tools.

Ron found a pair of sawhorses at a suspiciously good price, made of the kind of plastic that looks confident in the store and reconsiders that confidence the moment real weight shows up. They held a sheet of plywood for about ninety seconds before folding sideways like a lawn chair meeting its true purpose in life. He set them back up, tried again, and watched it happen a second time — because apparently once wasn’t a clear enough message.

A sawhorse looks like the simplest object in the entire garage. Four legs, a beam, nothing to think about. Right up until it’s under real weight and it turns out “simple” and “correctly rated for the job” are two very different things.

🐴 What a Sawhorse Actually Does

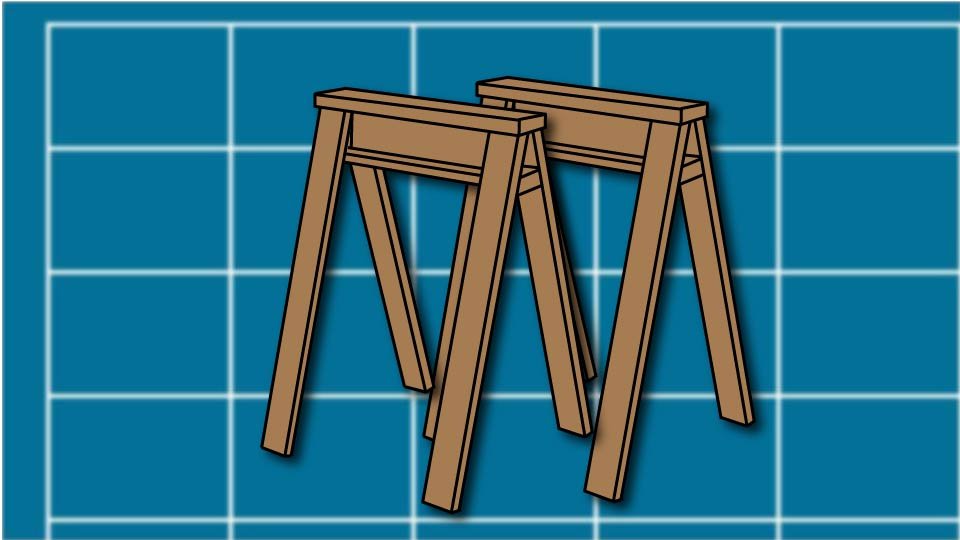
A sawhorse elevates and stabilizes a workpiece — no bending over, no material shifting mid-cut, and a pair of them with a sheet of plywood on top instantly becomes a workbench. It sounds unglamorous because it is. Unglamorous and reliable is exactly the goal here.

⚖️ Weight Capacity: Don’t Be Ron

Light-duty sawhorses, rated around 500 pounds per pair, are fine for small projects and light assembly — but a standard sheet of plywood already weighs around 55 pounds before you add a person leaning on it, which eats into that rating faster than it looks like it should. Medium-duty, in the 1,000 to 2,000 pound range, is the actual sweet spot for most home DIY work — stable, reasonably priced, and unlikely to stage a dramatic collapse mid-project. Heavy-duty, 2,500 pounds and up, is genuinely overkill unless renovation work is a regular occurrence rather than an occasional weekend.

🧱 Material: Plastic, Metal, or Homemade

  • Plastic folds up small and travels light, which is exactly why it tempts people into a suspiciously good price — but it flexes under real load and the tops get slippery fast.
  • Metal costs more and weighs more to move, but it’s the durable, stable upgrade that doesn’t fold sideways under a sheet of plywood the way Ron’s did.
  • Building your own from wood takes an afternoon and gives you exact control over height and grip, at the cost of portability and storage space. None of these is wrong.

Matching the material to the actual load is the part that matters.

🐎 Taming the Wobble

Always use them in pairs — a single sawhorse offers nothing but a false sense of accomplishment. Check the ground before loading anything on top; uneven concrete or a sloped driveway puts all the weight on one leg and turns a stable stand into a seesaw. A scrap of wood shimmed under a short leg fixes this in about ten seconds.

Spacing matters too — roughly 4 to 6 feet apart for lumber, closer at 3 to 4 feet for sheet goods, since anything wider needs the extra support to keep from sagging in the middle.

🎿 Stopping the Slide

A slick plastic top lets material slide the instant you press down with a saw, which turns a straight cut crooked fast. Non-slip grip tape on the top solves this in minutes for a few dollars. A sacrificial scrap board clamped across the top works just as well for free, and takes the cut damage instead of the sawhorse itself. For anything heavy or awkward, clamping the workpiece directly to the sawhorse removes the sliding problem entirely — worth the extra minute of setup on anything that actually matters.

🪑 Turning Two Sawhorses Into a Workbench

Two properly spaced sawhorses plus a sheet of plywood on top is an instant, adjustable, portable workbench — genuinely one of the better cheap upgrades in a home shop. When the plywood top gets chewed up from use, swap it for a fresh sheet instead of replacing the whole setup.

🚫 The Mistakes Worth Avoiding

  • Standing on a sawhorse treats it like a ladder, which it was never built to be.
  • Exceeding the weight rating is exactly how Ron’s plastic pair met their end, twice.
  • Cutting directly into an unprotected top chews up the surface and leaves splinters behind.
  • Using just one sawhorse for anything real is asking for trouble.
  • And ignoring uneven ground is the fastest way to lose control of a workpiece mid-cut.

🛒 Gear Worth Having

WORX Medium-Duty Adjustable Sawhorses — The sweet-spot rating and adjustable height that covers the overwhelming majority of home DIY work without folding sideways under a sheet of plywood.

Non-Slip Grip Tape for Sawhorse Tops — A few dollars and a couple minutes to stop material from sliding mid-cut — one of the cheapest upgrades on this whole list.

Steel Heavy-Duty Folding Sawhorses — For anyone who’s already had the suspiciously-cheap-plastic experience and is ready to never have it again.

As an Amazon affiliate, I earn from qualifying purchases. Thank you for supporting SkippityWhistles.

📖 Related Reads


SkippityWhistles is part of the John D Reinhart content family. Writer, illustrator, videographer, and accidental filmmaker — find the whole story at JohnDReinhart.com.

7035

©2026 John D Reinhartskippitywhistles.com/ — All rights reserved

GFCI & AFCI Outlets Explained

Those push-button outlets? GFCI and AFCI protect you from shock and fires. Here’s what they do, where you need them, and why they matter.

(Or: Those Buttons Are Not a Design Choice)

Ron plugged his phone charger into the bathroom outlet one morning and got nothing — no light, no charge, dead as a doornail. He unplugged it, checked the charger, tried a different outlet entirely, and was fully prepared to declare the whole bathroom electrically cursed before he noticed the small button in the middle of the outlet marked RESET. He pressed it. The outlet came back to life instantly, like it had just been waiting for someone to ask nicely.

Those push-button outlets in kitchens, bathrooms, and garages aren’t a style choice or a manufacturing quirk. They’re doing real, active work every second they’re plugged into the wall, and understanding what that work actually is makes the button a lot less mysterious.

⚡ The Problem These Outlets Solve

A regular circuit breaker protects your home’s wiring from overload, but it’s slow by design — it’s waiting for a large amount of current before it trips. If you’re standing in a puddle and touch a live wire or a faulty appliance, only a small amount of current needs to pass through you to cause real harm, and that small amount is nowhere near what it takes to trip a standard breaker. The breaker just isn’t built to catch that specific, smaller, more personal kind of danger.

🛡️ GFCI: The Fast Safety Cop

GFCI stands for Ground Fault Circuit Interrupter, and it works by constantly comparing the electricity going out on the hot wire to the electricity coming back on the neutral wire. When everything matches, nothing happens. When some current goes missing — because it’s escaping through you to the ground instead of coming back through the wire — the GFCI notices the mismatch and cuts power immediately.

A GFCI can detect a leak as small as 4 to 6 milliamps and cut power in about 25 milliseconds. For comparison, it takes roughly 100 milliseconds just to blink, and even longer for pain signals from your finger to reach your brain — meaning a GFCI can genuinely cut the power before you’ve even had time to feel the pain from an electric shock.

🔘 What the Buttons Actually Do

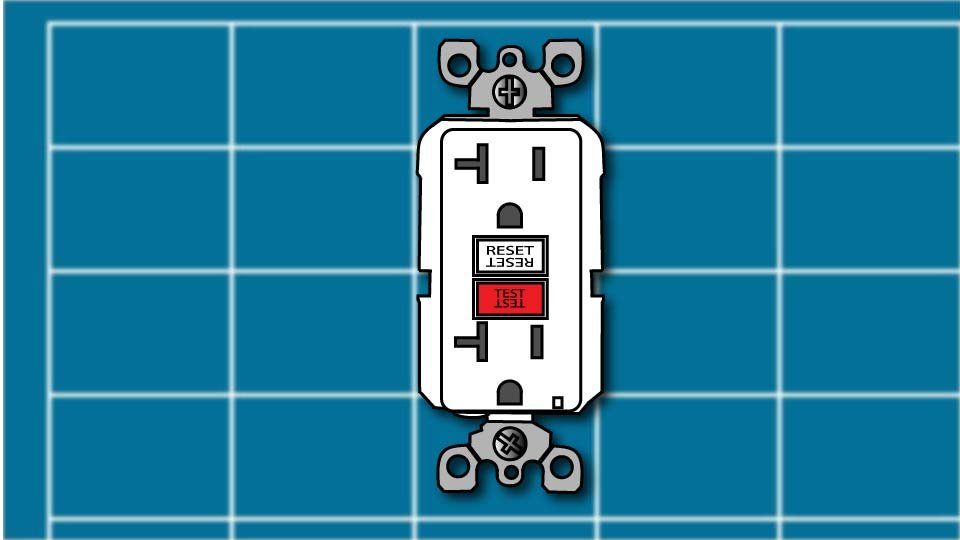
The TEST button intentionally creates a small fault to confirm the outlet’s safety mechanism is actually working — press it, and a functioning GFCI should trip immediately with an audible click. The RESET button restores power after a trip, whether that trip came from an actual fault or from testing. Test every GFCI outlet monthly; if pressing TEST doesn’t trip it, that outlet has failed and isn’t protecting anyone, and needs to be replaced.

📍 Where GFCI Protection Is Required

Building codes require GFCI protection specifically where water and electricity are most likely to meet at the same time you’re touching both — kitchen countertops, bathrooms, outdoor outlets, basements, garages, and laundry rooms. One GFCI outlet, installed first in line on a circuit, can protect every regular outlet downstream of it on that same circuit — which is why a kitchen might have just one or two GFCI outlets doing quiet duty for several ordinary-looking ones nearby.

🔥 AFCI: The Fire Prevention Cousin

AFCI stands for Arc Fault Circuit Interrupter, and it solves a different problem entirely. Where GFCI watches for current escaping to ground, AFCI watches for arcing — electricity jumping across a gap it shouldn’t be jumping across, caused by damaged insulation, a loose connection, or a worn cord. That spark runs hot enough to ignite nearby material inside a wall or an appliance, and AFCI protection is increasingly required in bedrooms, living areas, and throughout much of a modern home specifically to catch it before it starts a fire.

🤝 One Outlet, Both Protections

Combination GFCI/AFCI outlets exist and cover both hazards in a single device — pricier than either alone, but a genuine option for anyone updating outlets and wanting maximum coverage in one spot without installing two separate devices.

🔄 When One Trips

A tripped GFCI or AFCI outlet did exactly what it’s designed to do — it’s not broken, it caught something. Unplug whatever was connected when it tripped, then press RESET. If it trips again immediately, the fault is likely still present; if it stays on, plug devices back in one at a time to find the culprit. If it won’t stay reset at all, that’s a real problem with the outlet or the circuit, and it’s an electrician’s call, not a DIY one.

🧪 Testing Monthly Is Worth the Thirty Seconds

Plug in a lamp, turn it on, press TEST — the lamp should cut off immediately. Press RESET, and it should come back on. If TEST doesn’t trip the outlet, or it trips but won’t reset, that GFCI has failed and needs replacing. Thirty seconds a month is a small price for confirming a genuinely life-protecting device is still doing its job.

🛒 Gear Worth Having

GFCI Outlet Replacement Kit, Multi-Pack — Worth having a few on hand — most homes have more locations needing GFCI protection than people initially realize.

Combination GFCI/AFCI Outlet — Covers shock and fire protection in one device, for anyone updating outlets and wanting both bases covered at once.

Outlet Tester with GFCI Indicator — A cheap plug-in tool that confirms an outlet is wired and grounded correctly in seconds, no guesswork required.

As an Amazon affiliate, I earn from qualifying purchases. Thank you for supporting SkippityWhistles.

📖 Related Reads


SkippityWhistles is part of the John D Reinhart content family. Writer, illustrator, videographer, and accidental filmmaker — find the whole story at JohnDReinhart.com.

9014

©2026 John D Reinhartskippitywhistles.com/ — All rights reserved