Staples vs. Nails: Two Different Jobs Wearing Similar Outfits

Your stapler isn’t a hammer and your hammer isn’t a stapler. Here’s how to pick the right fastener before your project falls apart and your significant other asks ‘why did you do that?’

Rhonda spent one entire hot Saturday reupholstering her grandmother’s recliner in the garage, and the specific smell of forty-year-old furniture dust never fully left her memory since. What she does remember clearly, dust and all, is that the staple gun made quick, clean work of the fabric — and that reaching for the same staple gun to reinforce the chair’s wobbly wooden frame underneath would have been a complete mistake.

Staples and nails look like they’re competing for the same job. They’re not. They hold material in two fundamentally different ways, and knowing which mechanism you actually need is the entire decision.

🔗 Two Mechanisms: Clamping vs. Gripping

A staple works by clamping (the two legs of a staple bend flat against the back of the material once fired, pinching it against the backing like a small mechanical vise). That clamping force is excellent at holding something thin and flat in place — fabric, paper, veneer — but it isn’t built to resist a strong pull or carry real weight.

A nail works by friction and grip: a single shaft drives through material and the surrounding fibers squeeze around it, resisting the nail’s removal along its entire length. That grip is what lets a nail carry load, resist being pulled loose, and hold a structural joint together under stress. Different mechanism, different job — and reaching for a staple gun when a project actually needs a nail’s grip is how a shelf, not just old upholstery, ends up on the floor.

🧷 Staple Sizes: Match the Leg Length to the Material

  • Light-duty staples, roughly a quarter to half an inch, suit paper, thin cardboard, and craft projects — minimal holding power by design.
  • Medium-duty staples, around 5/8 to 3/4 inch, are the everyday workhorse for upholstery, trim, and thin wood backing.
  • Heavy-duty staples, an inch or more, handle thick material and genuinely demanding jobs like roofing felt.

Going too light for the material means the staple simply won’t seat properly; going too heavy on something delicate risks tearing straight through it.

🔨 Nail Types: Different Shafts for Different Jobs

  • Common nails have a thick shaft and broad head, built for framing and structural work where raw holding strength matters more than appearance.
  • Finishing nails trade shaft thickness for a small, easily hidden head, making them the right call for trim and cabinetry where looks matter and the joint isn’t load-bearing.
  • Brad nails go even thinner still, for delicate trim and detail work with essentially no structural ambition.
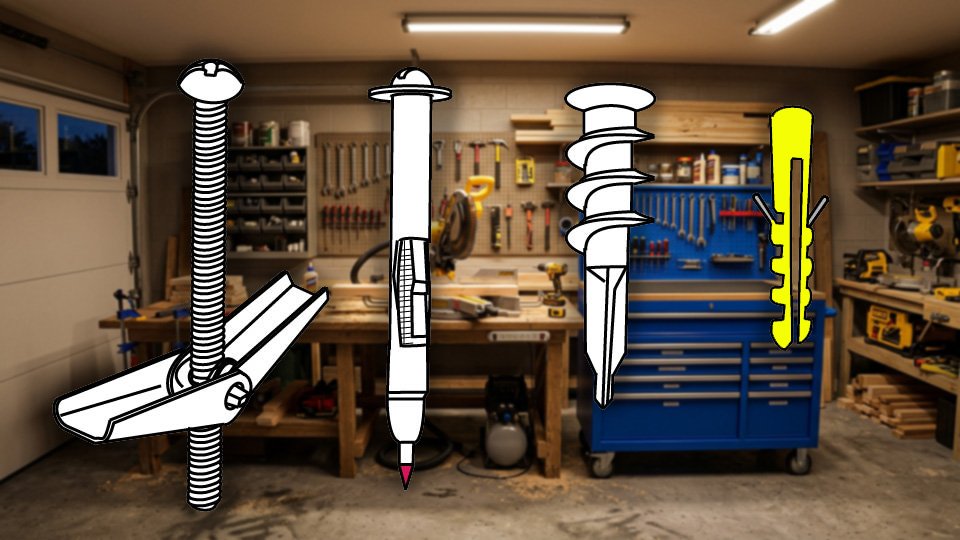
  • Specialty nails exist too — galvanized roofing nails resist weather and rust, and ring-shank drywall nails are cut specifically to grip drywall’s soft gypsum core better than a smooth shaft would.

⚖️ The Decision, Simplified

If the material is thin and flat and just needs to stay against a backing — fabric on a frame, veneer on plywood, paper on cardboard — reach for staples. If the joint needs to bear weight, resist being pulled apart, or hold up under real stress — framing, structural trim, anything load-bearing — reach for nails. When a project genuinely straddles both categories, the safer default is nails; a nail asked to do a staple’s job just looks a little rough, but a staple asked to do a nail’s job tends to fail outright.

🚫 The Mistake That Ends a Project Early

The single most common failure here is stapling something structural — a shelf bracket, a load-bearing joint — because the staple gun was already sitting right there and felt faster than digging out a hammer. Clamping force was never designed to carry ongoing weight, and it shows up as a slow, quiet failure rather than an immediate one: the project holds for a while, then doesn’t, usually at the least convenient moment. If there’s real weight or stress involved anywhere in the joint, that’s a nail’s job every time.

🛒 Gear Worth Having

Arrow T50 Heavy-Duty Staple Gun — The standard workhorse for upholstery and general fastening, with enough force to seat medium-duty staples cleanly without a fight.

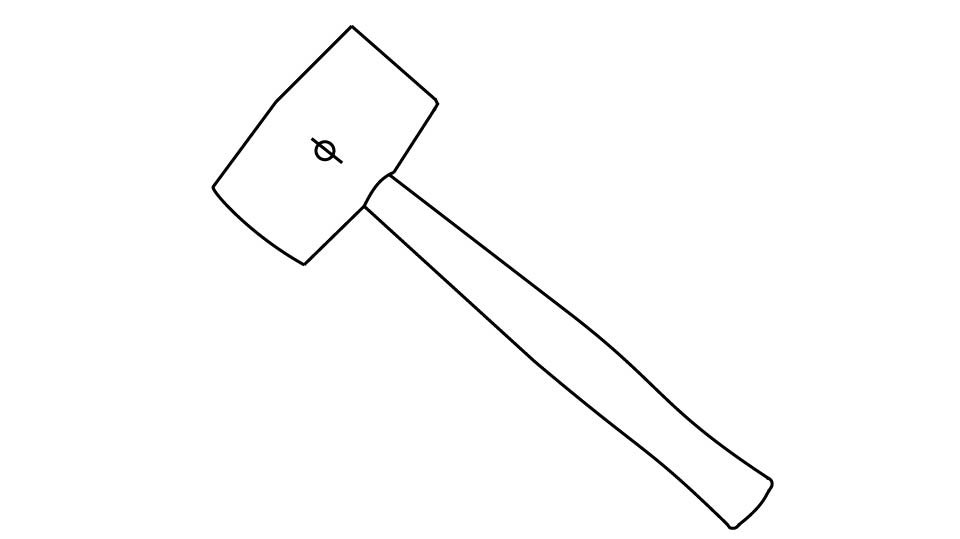
Estwing 16-Ounce Curved Claw Hammer — A one-piece steel forged hammer that won’t loosen at the head over time the way a wood-handled one eventually can — buy it once.

Finish and Brad Nail Assortment Kit — Covers the thin, low-visibility nail sizes trim work actually calls for, so the junk drawer doesn’t end up full of nails that are all secretly the same size.

As an Amazon affiliate, I earn from qualifying purchases. Thank you for supporting SkippityWhistles.

📖 Related Reads


SkippityWhistles is part of the John D Reinhart content family. Writer, illustrator, videographer, and accidental filmmaker — find the whole story at JohnDReinhart.com.

2007

©2026 John D Reinhartskippitywhistles.com/ — All rights reserved
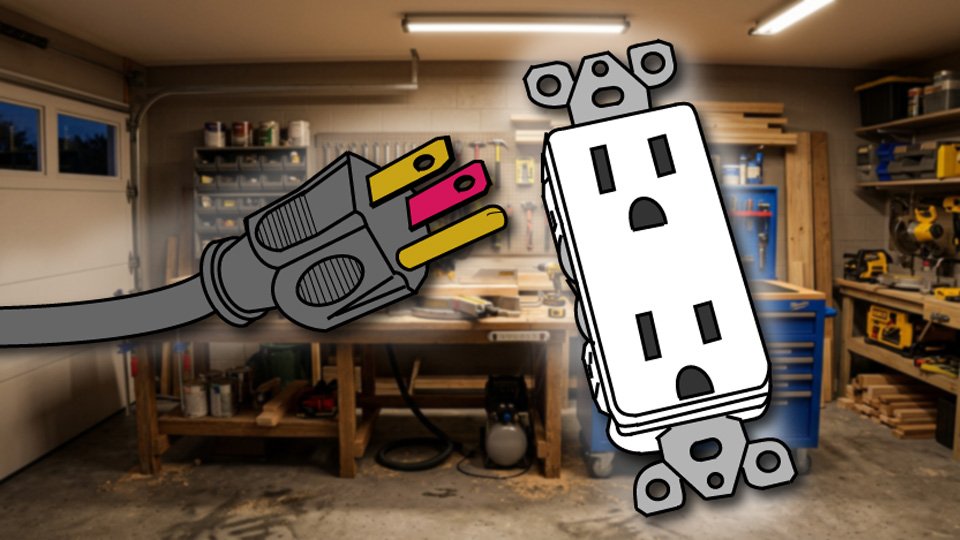
Why Your Circuit Breaker Keeps Tripping (Or: Stop Flipping It and Start Listening)

A breaker that keeps tripping isn’t broken — it’s shouting. Here’s what it’s actually trying to tell you, and when to stop flipping it back on.

Ron ran his toaster, his microwave, and his coffee maker at the same time every single morning, and every single morning the kitchen breaker tripped somewhere around minute two. His fix was consistent: walk to the panel, flip it back on, walk back to the kitchen, repeat tomorrow. He’d been doing this for months. The breaker had been trying to tell him something the entire time, and Ron had been answering by hitting snooze.

A breaker that trips repeatedly isn’t malfunctioning. It’s doing exactly the job it was built for — and ignoring that message by simply flipping it back on, over and over, is how a minor annoyance turns into a genuine hazard.

⚡ The Core Principle: It’s a Hero, Not a Villain

A circuit breaker watches the current flowing through its circuit, and if that current exceeds the breaker’s rating, it trips and cuts power immediately. Too much current generates heat; too much heat melts wire insulation; melted insulation is how house fires start. A tripping breaker isn’t the problem. It’s the thing standing between a problem and a much worse outcome.

🔥 The Five Reasons a Breaker Actually Trips

  • Overloading the circuit is the most common cause, and it’s exactly what caught Ron every morning. A 120-volt, 20-amp circuit tops out around 2,400 watts — Ron’s toaster (1,200W), microwave (1,000W), and coffee maker (1,000W) running together add up to 3,200 watts, well past what the circuit can carry. This is a spread-the-load problem, not a broken-breaker problem.
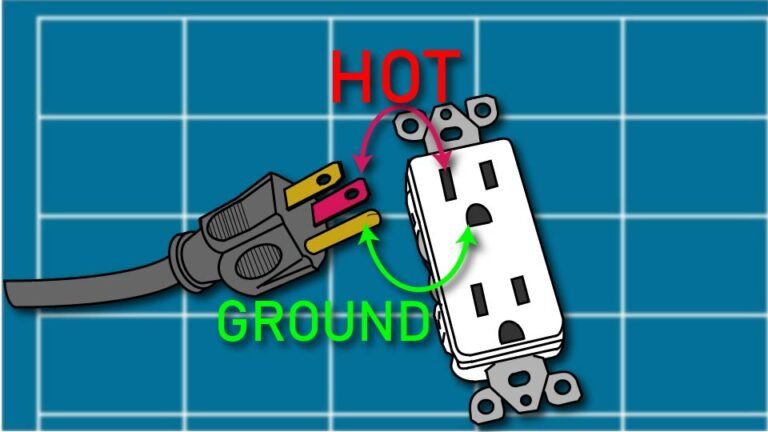
  • A short circuit happens when the hot and neutral wires touch directly instead of routing current through whatever’s plugged in — often from damaged internal wiring in an appliance — and trips the breaker instantly and forcefully.
  • A ground fault occurs when current escapes to ground through an unintended path, commonly water or moisture near an outlet.
  • Faulty wiring — old, damaged, or loosely connected — creates resistance, and resistance generates heat that eventually trips the breaker even without an obvious overload.
  • And, rarely, the breaker itself is simply wearing out and tripping without any real fault behind it at all.

🔍 Diagnosing It Yourself

Don’t just keep flipping it back on — that’s answering a warning by muting it, not solving it.

Note what was actually running the moment it tripped; that alone often points straight at the answer.

Unplug everything on that circuit, then reset the breaker:

  • If it holds with nothing plugged in, the problem is overload, not a wiring fault.
  • If it trips again with nothing plugged in at all, that’s a deeper problem — short circuit, ground fault, or faulty wiring — and not something to keep testing alone.

Once it holds, reintroduce devices one at a time until the culprit reveals itself.

🚫 What Never to Do

  • Never replace a breaker with a higher-amp one to make the tripping stop — the wiring behind it is only rated for the original amperage, and a bigger breaker just means the wiring overheats before anything trips to stop it.
  • Never wedge a coin or any object behind a breaker to hold it on — this has genuinely happened, more than once, and it completely defeats the one thing standing between an overload and a fire.
  • Never treat occasional trips as fine just because they’re infrequent; infrequent is still a warning.
  • And never route a high-draw appliance through an extension cord to another circuit as a workaround — that doesn’t solve the overload, it just relocates it somewhere with its own limits.

📞 When to Call an Electrician

  • A breaker that trips with absolutely nothing plugged in
  • A breaker that trips consistently at a specific outlet
  • A breaker that had been tied to a specific appliance and continues to trip even after the appliance is confirmed faulty
  • or any hint of a burning smell or scorch marks near the panel

All of these are past the point of DIY troubleshooting. That’s not a failure to solve it yourself. It’s recognizing exactly where the line sits.

🛒 Gear Worth Having

Klein Tools NCVT-3 Non-Contact Voltage Tester — Confirms what’s actually live before any hands-on diagnosis starts — the same first step worth taking every time.

Basic Digital Multimeter — Measures voltage and current directly, which turns a guessing game about an overloaded circuit into an actual number.

Heavy-Duty Surge Protector Power Strip — Rated for real appliance loads, not the flimsy strip that turns three high-draw devices into one overloaded outlet.

As an Amazon affiliate, I earn from qualifying purchases. Thank you for supporting SkippityWhistles.

📖 Related Reads

SkippityWhistles is part of the John D Reinhart content family. Writer, illustrator, videographer, and accidental filmmaker — find the whole story at JohnDReinhart.com.

9020

©2026 John D Reinhartskippitywhistles.com/ — All rights reserved
How to Choose a Paintbrush (And Why the Cheap One Always Costs More)

A cheap paintbrush sheds bristles. A good one doesn’t. Here’s how to tell the difference, match the brush to the paint type, and never fish a bristle off a wet wall again.

The wall is freshly painted. The color is perfect. The coverage is smooth. And then — there it is. A single stray bristle glistening on the surface like a small, quiet accusation.

It didn’t come from carelessness. It came from the brush. A cheap brush sheds bristles like a dog in July. A good brush holds its bristles like it has something to prove. The difference between a paint job you’re proud of and one you’re looking at with a tweezers often comes down to the twelve dollars you saved at the hardware store.

Here’s what to know before you buy a brush — what the bristles are made of, what the shapes are for, and the one test that tells you instantly whether a brush is worth taking home.

🐗 Natural Bristles vs. Synthetic Bristles — This Is the First Decision

Paintbrush bristles are either natural animal hair or man-made synthetic fibers, and the paint type determines which one you need. This is not a preference — it’s a compatibility issue, and using the wrong one produces noticeably worse results.

Natural bristles — made from hog or boar hair — are for oil-based paints, stains, and varnishes. The reason comes down to what bristles do in water: natural hair absorbs it. When a natural bristle brush goes into water-based latex paint, the bristles absorb moisture, go soft, and lose their ability to hold and release paint evenly. The brush gets mushy, the coverage gets streaky, and the bristles start coming out. For oil-based coatings, however, natural bristles perform beautifully — they’re stiff enough to push thick oil paint around without absorbing it.

Synthetic bristles — polyester, nylon, or a blend — are for water-based paints (latex, acrylic). Unlike natural hair, synthetic bristles don’t absorb water. They stay firm in wet conditions, hold their shape throughout the job, and release latex paint smoothly and evenly. For most interior painting today, synthetic bristles are the correct choice — latex paint is the standard for walls, trim, and ceilings, and synthetic brushes handle it best.

The quick rule: latex paint gets synthetic bristles. Oil-based paint gets natural bristles. If the paint can says “clean up with water,” use a synthetic brush. If it says “clean up with mineral spirits,” use natural bristles.

✂️ What “Flagged Bristles” Means — And Why It Matters

Look closely at the tips of any quality paintbrush and you’ll see that the individual bristles have tiny splits at the ends — like split ends in hair. These are called flagged bristles, and they’re a reliable indicator of brush quality.

Flagged tips hold more paint than blunt-cut tips, which means fewer trips back to the tray and more paint on the wall per stroke. They also release paint more smoothly, which means fewer brush marks in the finished surface. A cheap brush has blunt-cut bristles — every bristle trimmed to the same length with no splitting at the tip. It works, but it doesn’t work as well.

Before buying a brush, look at the tips. If the ends are split and feathery, that’s a quality brush. If the ends are cleanly cut across like a flat edge, it’s a budget brush. The flagged tips are worth paying for.

📐 Brush Shapes — Match the Shape to the Job

The angled sash brush — bristles cut at an angle so one edge is shorter than the other — is the most useful brush in a home painter’s collection. The angled edge gives precise control at the point of the cut, which is what you need when painting trim, cutting in at the ceiling line, or working around windows and door frames. If someone owns one good brush, it should be an angled sash brush in the 2 to 2.5 inch range.

A flat brush has bristles all cut to the same length in a rectangular shape. This is the brush for large flat surfaces — walls, doors, wide boards — where coverage speed matters more than edge precision. A 3 to 4 inch flat brush covers large areas quickly and efficiently.

A round brush — cylindrical, bristles coming to a point — is for detail work, corners, and tight spaces. Most homeowners don’t need one unless they’re doing detailed trim work or working in genuinely awkward spots.

For most painting projects, an angled sash brush for cutting in and edges plus a flat brush for the large surfaces covers everything. Two brushes, matched to the task, produce better results than one brush trying to do everything.

📏 Brush Width — Bigger Isn’t Always Better

A 1 to 1.5 inch brush is for narrow trim, spindles (on a stair rail, for example), and detail work where a wider brush can’t maneuver. A 2 to 2.5 inch brush handles most cutting-in work, door and window trim, and baseboard edges — this is the most versatile width for most homeowners. A 3 inch brush covers walls and large surfaces quickly. A 4 inch brush covers faster but is harder to control, especially near edges.

The mistake most people make is using a large brush for everything to save time. A 3 or 4 inch brush on a door frame produces a ragged edge and paint in places it wasn’t meant to be. Use the right width for the job — a 2 inch angled brush for trim takes a little longer but produces a result that doesn’t require touch-up.

👆 The Test That Tells You Everything

Before buying a brush, fan the bristles open with a finger and let them spring back. A quality brush snaps back immediately, bristles returning to their original position without straggling. A poor brush returns slowly, or some bristles stay bent.

Then run a finger against the bristles — against the direction they point. On a good brush, no bristles come out. On a poor brush, one or two will. That’s the wall test happening in the store instead of on a freshly painted surface. If bristles come out in the store, they’ll come out on the wall.

A good brush also feels dense and solid when you hold it — the bristles have substance. A poor brush feels sparse and light. Density in the bristle pack is what holds and releases paint evenly.

💧 Loading the Brush — The Technique That Prevents Drips

Dip only the bottom third of the bristle length into the paint. Dipping deeper loads more paint into the ferrule (the metal band that holds the bristles — higher gauge numbers mean thinner metal, and a thinner ferrule holds less), which then drips as you lift the brush. One-third of the bristle length holds plenty of paint for most strokes and doesn’t drip.

Tap the brush lightly against the inside of the can rather than wiping it across the rim. Wiping removes paint from the outside of the bristles but doesn’t address paint loaded in the center. Tapping shakes off excess from the whole bristle pack without removing too much.

🧹 Cleaning and Storing — How a $20 Brush Lasts for Years

Clean the brush immediately when the job is done — not after dinner, not tomorrow morning. Paint that begins to cure in the bristles is extremely difficult to remove, and a brush with dried paint in the ferrule is effectively ruined. For latex paint, warm water and a little dish soap work fine. Work the bristles against the palm of your hand under running water until the water runs clear, then reshape the bristles and hang the brush or lay it flat to dry.

For oil-based paint, mineral spirits or paint thinner in a jar first, working the bristles until the solvent runs clear, then a soap and water wash to remove the solvent. Dispose of used solvent properly — check local regulations.

If you’re taking a break during the job, wrap the brush tightly in a plastic bag and put it in the refrigerator. The cold slows the curing process and keeps the brush workable for the next day. This works for latex paint and buys twelve to twenty-four hours before the brush needs a proper cleaning.

Store clean, dry brushes hanging by the handle or lying flat. Never store a brush resting on its bristles — this bends and permanently deforms the bristle tips. A brush keeper — a cardboard or plastic sleeve that holds the bristles in their correct shape — is worth using between jobs on quality brushes.

🛒 Gear Worth Having

Purdy XL Dale 2-1/2″ Angled Sash Paint Brush — Synthetic, for Latex and Oil-Based Paint — The brush that professional painters reach for on trim and cutting-in work. Nylon/polyester blend synthetic bristles with Purdy’s proprietary flagging process — split tips that hold more paint and release it more smoothly than standard synthetic brushes. Handcrafted in the USA since 1925, signed by the person who made it. This brush holds its shape, doesn’t shed, and with proper care outlasts a decade of weekend painting projects. The angled edge gives the precision you need at a ceiling line or along a window frame.

Purdy XL Glide 3″ Angular Flat Paint Brush — Synthetic, for Walls and Large Surfaces — The large-surface companion to the angled sash brush. Three-inch width covers walls and doors efficiently without losing control. Same Purdy XL nylon/polyester flagged bristles, same build quality. Use this for the main painting area and the 2.5-inch for the edges. Two Purdy brushes, matched to the task, produce results that look professional without requiring professional experience.

Purdy Brush Comb and Cleaning Tool — Stainless Steel, Fits All Brush Sizes — Run this through the bristles before painting to remove any loose bristles before they end up on the wall, and after cleaning to realign bristles and remove residual paint from deep in the brush. Stainless steel tines work on both natural and synthetic bristles. Keeps the brushes in good condition between jobs and extends their useful life significantly. A four-dollar tool that protects a forty-dollar investment.

As an Amazon affiliate, I earn from qualifying purchases. Thank you for supporting SkippityWhistles.

📖 Related Reads

How to Choose the Right Caulk for Your Home

How to Use Masking Tape Like You Mean It

The DIYer’s Toolbox

The right brush loaded correctly, cleaned immediately, and stored properly will still be on the shelf in ten years — and the wall it painted won’t have a single bristle on it. That’s the whole deal.


SkippityWhistles is part of the John D Reinhart content family. Writer, illustrator, videographer, and accidental filmmaker — find the whole story at JohnDReinhart.com.

2006

©2026 John D Reinhartskippitywhistles.com/ – all rights reserved

How to Use a Soldering Iron (Or: Heat the Joint, Not the Solder)

Soldering looks scary but it’s just heating the joint until solder flows. Here’s how to do it right so your circuits actually work instead of exploding.

Ron’s first soldering attempt involved touching the iron directly to a blob of solder, watching it melt onto the wire, and calling it done. It seemed like to make sense – everything looked fine until the joint just popped apart two weeks later. It turns out you don’t just bulldoze your way through it, Ron. There’s a technique.

Ron’s one mix-up explains almost every bad solder joint ever made. Fix it, and soldering stops being intimidating and starts being genuinely straightforward.

🔥 The One Principle That Explains Everything

The iron’s job is to heat the joint — the actual metal being connected — not to melt the solder directly. Once the joint itself is hot enough, solder touched to it melts on contact and flows into the connection on its own, bonding to hot metal the way it’s supposed to.

Solder melted by the iron and then dropped onto cold metal never gets the chance to bond with anything. It just sits there, barely attached, waiting to come apart when something pulls on it. That’s called a “cold joint.”

🧰 What You’re Actually Holding

  • The iron itself runs around 315 to 425°C (600 to 800°F) — easily hot enough to burn skin instantly, so respect it accordingly.
  • Solder is a low-melting-point metal alloy that flows into a heated joint and hardens into the actual bond; 60/40 leaded solder flows more easily and forgives more mistakes.
  • Lead-free solder needs slightly more heat but avoids the lead exposure.Either is fine to learn on, though many hobbyists start with leaded for the easier flow and simply wash their hands after.
  • Flux is a chemical, that strips oxidation from the joint so solder can actually bond instead of beading up on top. Usually already built into the core of the solder wire, it solves more soldering problems than any other single factor — when a joint won’t cooperate, more flux is usually the fix before anything else.

🛠️ The Process, Start to Finish

  • Let the iron fully heat up before starting — a cold or half-warm iron transfers heat poorly and all but guarantees a cold joint.
  • Wipe the iron’s tip on a damp sponge to clean it, then touch it briefly to the solder to tin it (coat it with a thin layer), since a tinned tip transfers heat far better than a bare one.
  • Make sure the workpiece is secure and stable.
  • Take the iron into one hand, the spool of solder into the other.
  • Touch the iron to the actual joint, holding for 2 to 3 seconds until the metal itself changes color slightly — that’s the joint reaching temperature, not a fixed timer to count down.
  • Touch the solder to the heated joint, not to the iron; it should melt and flow into the connection almost immediately.
  • Pull the solder away first, then the iron.
  • Let the joint sit completely undisturbed for 10 to 20 seconds while it hardens — moving it during that window is how a good joint turns into a weak one.

🌋 Reading a Good Joint vs. a Bad One

A good joint is shiny, smooth, and shaped like a small, neat cone — that shine is the visual proof the solder actually bonded to hot metal. A dull, grainy, or lumpy joint is a cold joint, and no amount of it looking “close enough” changes that: It will fail under stress.

If a joint comes out dull, the fix isn’t more solder — it’s reheating the joint properly and trying again.

🧯 Safety Notes Worth Taking Seriously

  • Work in a ventilated space — flux fumes aren’t something to breathe in over an extended session.
  • Safety glasses guard against the occasional solder splash.
  • A stand to rest the iron on between joints keeps a 700-degree tool from becoming an accident waiting to happen.
  • Give a finished joint real time to cool before handling it; it holds heat longer than it looks like it does.

🛒 Gear Worth Having

Weller Digital Temperature-Controlled Soldering Station — Stable, adjustable heat instead of a fixed-temperature iron, which removes one entire variable from getting a joint right the first time.

Kester 60/40 Rosin Core Solder — Flows easily and forgives a shaky first attempt more than lead-free solder does — the right choice while you’re still building the feel for it.

Helping Hands Tool with Magnifier — Holds the work steady with alligator clips so both hands are free for the iron and the solder, instead of trying to grow a third one.

As an Amazon affiliate, I earn from qualifying purchases. Thank you for supporting SkippityWhistles.

📖 Related Reads


SkippityWhistles is part of the John D Reinhart content family. Writer, illustrator, videographer, and accidental filmmaker — find the whole story at JohnDReinhart.com.

2015

©2026 John D Reinhartskippitywhistles.com/ — All rights reserved
How to Choose the Right Paint: Why Your Cheap Choice Will Haunt You For Five Years

Cheap paint needs repainting in three years. Premium paint lasts ten. Here’s how to choose right so you don’t spend $200 fixing a $20 mistake.

Ron stood in the paint aisle for twenty minutes, staring down alabaster white, cloud white, and something called Swiss coffee that was very clearly beige with an alibi. He picked one, painted the room, and got home to discover his “clean white” looked distinctly blue under lamplight — nothing like the swatch under the store’s fluorescent bulbs. The paint wasn’t defective. White was just never as simple as it looked.

Paint isn’t one product with a color slapped on — it’s a quality tier, a type, a sheen, and a color, and getting any one of those four wrong is how a $20-a-gallon shortcut turns into a $200 repaint two years later.

💰 Why Cheap Paint Costs More in the Long Run

Budget paint uses more water, less pigment, and cheaper binders — it goes on fine the first day and starts fading, scuffing, and needing a repaint within 3 to 5 years. Premium paint costs more per gallon but carries more pigment and better binders, holding its look for a decade or more. Do the actual math on cost per year, not cost per gallon, and premium paint is usually the cheaper choice by the time year four rolls around.

🧴 Latex, Oil, and Enamel: Different Jobs

  • Latex paint (water-based, the modern standard) is what covers roughly 90 percent of interior jobs — low odor, easy soap-and-water cleanup, and plenty durable for most rooms.
  • Oil-based paint (solvent-based, requiring mineral spirits to clean up) costs more and takes longer to dry, but holds up noticeably better on trim, doors, and anywhere moisture is a constant, like a kitchen or bath.
  • Enamel (a hard, glossy finish, usually oil-based) is the toughest and shiniest option of the three, built specifically for surfaces that take a beating — cabinets, trim, doors — where durability matters more than easy application.

✨ Sheen: How Shiny Determines How It Behaves

  • Flat, or matte, hides dust and small wall imperfections beautifully but stains permanently and doesn’t wipe clean — a good match for a low-traffic bedroom, a poor one for anywhere hands touch the wall often.
  • Eggshell adds just enough sheen to wipe clean occasionally while still hiding most flaws, which makes it the safe default when you’re not sure what else to pick.
  • Satin cleans well and resists moisture, the right call for kitchens, bathrooms, and trim — but it also shows every bump and roller mark on a wall that wasn’t properly prepped.
  • Gloss and semi-gloss are the most durable and easiest to wipe down, standard for trim and cabinets, but merciless about exposing fingerprints and application mistakes anywhere else.

🌈 Why “White” Isn’t White

Every white paint carries an undertone

  • Warm whites lean slightly yellow or pink and read as cozy but can age into looking dingy
  • cool whites lean blue or gray and read as clean but can feel cold in a north-facing room with little natural light.

Store lighting is fluorescent and flattens undertones you’ll absolutely notice at home under lamplight or daylight. The fix is genuinely simple: buy a few sample pots, paint large swatches directly on the wall, and look at them across a full day — morning light, afternoon light, and lamp light all tell a different story about the same color.

📐 The Coverage Math Nobody Mentions

The “350 to 400 square feet per gallon” on the label assumes primed, smooth walls and good technique — real-world coverage on unprimed walls drops closer to 250 to 300 square feet, and textured walls eat even more.

Two coats, which almost every wall actually needs to look intentional rather than patchy, cuts your effective coverage in half again. Buying one gallon short and running out mid-wall, then trying to color-match a repeat trip to the store, is a genuinely bigger headache than just buying enough the first time.

🖌️ The Step Everyone’s Tempted to Skip

Primer isn’t a nice-to-have on new drywall, a dark existing color, or a stained surface — skipping it means the paint itself has to work harder for coverage, which usually means buying more paint to compensate anyway.

A $15 can of primer regularly saves a $40 second gallon of finish coat. When genuinely unsure whether a surface needs it, priming is the cheaper mistake to make.

🛒 Gear Worth Having

Zinsser Bulls Eye 1-2-3 Stain-Blocking Primer — Handles new drywall, dark colors, and stains in one product, so coverage problems get solved before the finish coat ever goes on.

Samplize Peel-and-Stick Paint Samples — Real, dried paint on a large stick-on card, so there’s no ambiguity about what’s in the box and no wait for a wet sample to dry before you can judge it under different light.

Purdy Paintbrush and Roller Set — A genuinely better brush and roller lay down a smoother coat with fewer visible strokes than the cheapest option on the shelf — this is not the place to economize.

As an Amazon affiliate, I earn from qualifying purchases. Thank you for supporting SkippityWhistles.

📖 Related Reads


SkippityWhistles is part of the John D Reinhart content family. Writer, illustrator, videographer, and accidental filmmaker — find the whole story at JohnDReinhart.com.

2025

©2026 John D Reinhartskippitywhistles.com/ — All rights reserved
How to Mask Like a Pro (Or: The Tape Was Never the Problem)

Paint bleeding under tape edges? Wrong tape, wrong technique, or wrong timing. Here’s how professionals use masking tape to get clean lines every time—no freehand needed.

Ron taped off the trim before painting a wall, pressed the strip down carefully, and still watched blue paint creep half an inch under the edge like it had never met the tape at all.

The problem? Old Ronnie-boy forgot to seal the tape against the wall, which meant his nicely sealed tape was facing exactly the wrong direction the whole time.

Masking tape isn’t a beginner’s crutch or a professional’s shortcut — it’s a tool with one genuinely non-obvious detail that determines whether it works at all. Get that detail right and tape stops being a coin flip.

🎨 Painter’s Tape, Not Whatever’s in the Drawer

  • Painter’s tape (usually blue, green, or tan, formulated with a lower-tack adhesive specifically for paint work) releases cleanly without pulling up existing paint or finish underneath it — this is the one to reach for almost every time.
  • Standard tan masking tape grips harder and costs less, which sounds like a win until it tears delicate surfaces or leaves adhesive residue behind on removal.
  • Duct tape, gaffer tape, and cloth tape aren’t masking tape at all — they’re built to hold things together, not to release cleanly, and using them for paint lines just trades one problem for a worse one.

🧹 Prep Decides More Than Technique Does

  • Wipe the surface clean with a damp cloth or tack cloth (a slightly sticky cloth built to lift dust) and let it dry fully before taping — dust and grime under the tape are what let paint sneak through in the first place.
  • Know exactly where the line needs to sit before you start, and mark it lightly in pencil if there’s any doubt.
  • Cut or tear tape into workable lengths, roughly one to two feet, rather than wrestling with one long unwieldy strip straight off the roll.

🖐️ Applying It: Position, Press, Smooth, Burnish

  • Hold the tape above the surface first and check the angle before it touches anything — a level helps for anything meant to run perfectly straight, since the eye is worse at judging straight lines than it feels like it should be.
  • Press down one end firmly, then work along the strip smoothing as you go, using steady pressure rather than pressing hard enough on the first pass to lock in a wrinkle. Wrinkles are not your friend as they let paint flow under the tape.
  • Finish by burnishing (running a finger, or better, a plastic scraper, firmly along the edge where tape meets surface) — this seals the edge shut and is the single step most responsible for the difference between a crisp line and a bled one.

🔀 The Underlap: The Detail Nobody Explains

The edge of the tape facing the area you’re about to paint is the edge that has to be sealed tight — not the far edge, the near one. Taping trim before painting a wall means the wall-facing edge of the tape is the one that needs the firm burnish; the trim-facing edge barely matters. Get this backwards, seal the wrong edge, and paint finds the gap no matter how carefully everything else was done. This single detail is responsible for more “why does my tape never work” frustration than every other mistake on this list combined.

⏳ Timing: Before You Paint, and Before You Remove

Wait at least 30 minutes after taping before painting — the adhesive needs that time to fully set, and painting too soon lets paint seep under an edge that hasn’t finished bonding. On the other end, remove tape once paint is dry to the touch but not fully cured, typically 1 to 2 hours for latex — too early and you smudge the line, too late and dried paint tears away with the tape instead of releasing from it. Pull at a shallow angle, close to parallel with the surface, rather than straight up and away, which is what actually tears wet paint.

🚫 The Short List of Real Mistakes

  • Cheap tape on a surface that mattered
  • a dirty surface underneath the tape
  • a skipped burnish
  • painting before the adhesive set
  • pulling tape too early or at too steep an angle

Nearly every bad taping outcome traces back to one of these five things. None of them are complicated to avoid. They’re just easy to skip when you’re in a hurry.

🛒 Gear Worth Having

ScotchBlue Painter’s Tape Multi-Pack — The reliable everyday standard — clean release, no residue, worth having several rolls on hand rather than rationing one.

3M Fine Line Automotive Masking Tape — Thin enough to follow a curve or detail edge that standard-width tape just can’t bend around cleanly.

Plastic Putty and Burnishing Scraper Set — More even pressure than a fingertip, and doesn’t leave a fingerprint-shaped gap in an otherwise perfect seal.

As an Amazon affiliate, I earn from qualifying purchases. Thank you for supporting SkippityWhistles.

📖 Related Reads


SkippityWhistles is part of the John D Reinhart content family. Writer, illustrator, videographer, and accidental filmmaker — find the whole story at JohnDReinhart.com.

2023

©2026 John D Reinhartskippitywhistles.com/ — All rights reserved
How Your Furnace Works: The Fire Machine That Keeps You From Freezing While Your Bills Get Hot

Your furnace burns fuel and blows heat around. Here’s how it works, why it needs maintenance, and why ignoring it will haunt you in February.

Ron’s furnace died at 2 AM in February, on the coldest night of the year, after roughly three straight years of unchanged filters and skipped annual service calls. The repair technician who showed up that morning wasn’t surprised at all — he’d seen the exact same failure a hundred times, always on the coldest possible night, always preventable with a fifteen-dollar filter and a service call Ron kept meaning to schedule. The furnace hadn’t failed without warning. It had been getting steadily louder and less efficient for years. Ron just hadn’t been listening.

A furnace looks mysterious sitting in a basement making noise and heat, but it’s actually doing something straightforward: burning fuel, or using electricity, to create heat, then blowing that heat through the same ductwork the air conditioner uses in summer. No refrigerant cycle, no heat moving in from outside — just controlled combustion and a fan.

🔥⚡🛢️ Three Types, One Job

  • A gas furnace (the most common type) burns natural gas or propane, running 80 to 95 percent efficient depending on age and maintenance — reliable and affordable, right up until neglect catches up with it.
  • An electric furnace heats metal coils with electricity, essentially a house-sized toaster, and runs 100 percent efficient since none of the energy goes to waste as exhaust — but electricity costs enough more than gas that the efficiency gain often gets eaten by the bill.
  • An oil furnace, more common in older homes and areas without gas service, atomizes and ignites heating oil, running 80 to 90 percent efficient and requiring a storage tank and regular delivery — that faint burnt smell when it starts is normal, not a warning sign.

🔩 The Parts Actually Doing the Work

  • The burner is where combustion or electric heating actually happens — gas ignites at a burner, oil gets atomized and sprayed before ignition, electric coils simply heat up when current flows through them.
  • The heat exchanger transfers that heat into the air moving through the house without letting the two mix directly.
  • The blower fan pushes heated air through the ducts.
  • The thermostat monitors room temperature and tells the furnace when to start and stop.
  • The igniter or pilot light creates the flame that starts combustion; modern electric igniters are more reliable than a pilot light that has to stay lit continuously.
  • And the exhaust vent carries combustion gases safely outside.

🔄 The Cycle, Start to Finish

  • The thermostat detects the room has dropped below the set temperature and signals the furnace to start.
  • The igniter creates a flame, and gas (or oil, or electric current) begins combustion or heating.
  • Hot combustion gases flow through the heat exchanger, where a blower pushes house air across those same passages, picking up heat without ever mixing with the combustion gases directly.
  • That heated air travels out through supply ducts into every room.
  • Once the thermostat senses the set temperature has been reached, it signals the furnace to shut down — the burner stops, fuel flow stops, and the blower runs briefly longer to push out the last of the heat before it stops too.

This whole cycle repeats ten to twenty times a day through a cold winter, which is a lot of wear for a machine that mostly gets ignored until it stops.

⚡ Why It Needs Electricity Even When It’s Gas

This trips people up constantly: if a furnace burns gas, why does a power outage kill it too?

Because gas provides the heat energy, but electricity runs everything else — the igniter, the blower, the thermostat, the control board.

No power means no functioning furnace, regardless of how much gas is available. Worth knowing before the first winter storm knocks the power out.

📉 Why Efficiency Drops Over Time

  • Age alone costs efficiency — a furnace pushing 20 years old might run around 80 percent where a new one hits 95.
  • A dirty filter forces the blower to work harder while reducing actual heat transfer, and it’s the single most avoidable cause on this entire list — a $15 filter, swapped monthly through heating season, prevents a real share of furnace complaints before they start.
  • An unmaintained heat exchanger collects dust that reduces transfer efficiency, which annual professional service catches.
  • Poor insulation and leaky ducts both force the furnace to generate more heat than actually reaches a room.
  • And a thermostat set higher than necessary costs real money for every extra degree — the furnace itself can’t fix that particular problem, only the thermostat setting can.

🔍 Reading the Symptoms

  • A furnace that won’t ignite usually points to a bad igniter, an out pilot light, or a gas supply issue — call a professional rather than troubleshooting gas ignition personally.
  • Constant on-off cycling often traces back to a dirty filter or a thermostat problem, worth checking before anything more involved.
  • Running but not heating well points to airflow — check the filter again — or a failing blower motor.
  • Loud banging or grinding, as opposed to normal expansion sounds, means something’s genuinely wrong and worth a professional look before it gets worse.
  • A persistent unusual smell, beyond the brief dust-burning smell of a furnace starting up after sitting idle, is worth the same call.
  • And a house that feels cold despite the thermostat reading warm often means the thermostat itself is poorly placed or failing, not the furnace.

🧯 Maintenance Worth Actually Doing

  • Change the filter monthly during heating season — genuinely the single highest-value, lowest-effort thing on this entire list.
  • Keep the area around the furnace clear of boxes and clutter blocking vents or intake air.
  • Schedule annual professional service before winter starts, not after something fails — a technician cleans the burner, checks the heat exchanger, and tests for carbon monoxide, and the $150 to $300 it costs is considerably less than an emergency call on the coldest night of the year.
  • Don’t block supply vents or return grilles with furniture.
  • And test carbon monoxide detectors monthly, replacing batteries yearly without fail.

🛒 Gear Worth Having

Furnace Air Filter Multi-Pack (Pleated, MERV 11) — Confirm the exact size for your system first — buying a multi-pack means the filter’s actually on hand the month it needs changing, not just planned for.

Carbon Monoxide Detector, Plug-In with Battery Backup — Essential in any home with a gas or oil furnace, and the battery backup keeps it working even through a power outage.

WiFi-Enabled Programmable Smart Thermostat — A thermostat that’s actually reporting the right temperature solves more “furnace problems” than people expect, and scheduling saves real money over a season.

As an Amazon affiliate, I earn from qualifying purchases. Thank you for supporting SkippityWhistles.

📖 Related Reads


SkippityWhistles is part of the John D Reinhart content family. Writer, illustrator, videographer, and accidental filmmaker — find the whole story at JohnDReinhart.com.

3029

©2026 John D Reinhartskippitywhistles.com/ — All rights reserved
How to Work with 2-Part Epoxy (Or: The Permanent Relationship You Didn’t Ask For)

2-part epoxy bonds with everything including you. Here’s how to use it without becoming a permanent part of your project.

Ron fixed a broken mug handle with 2-part epoxy on a Sunday afternoon and, by the end of it, had also permanently fused his own fingertip to the mixing tray, the mixing tray to the newspaper underneath it, and the newspaper to the table. The mug came out fine. Everything else in a three-inch radius did not.

2-part epoxy doesn’t distinguish between the thing you meant to fix and whatever else happens to be nearby when it’s curing. Understanding how it actually works is the difference between a clean repair and an afternoon spent googling how to unstick yourself from a table.

🧬 Two Chemicals, One Countdown

Epoxy comes in two parts: resin (Part A, a liquid plastic precursor that does nothing on its own) and hardener (Part B, the catalyst that triggers the reaction). Mixed together, they cross-link into a bond that’s often stronger than the materials it’s holding together — epoxied wood tends to break somewhere other than the glue line.

The catch: from the moment you mix it, a clock starts. Quick-set formulas give you 5 to 10 minutes of working time, medium-set 20 to 30, slow-set 1 to 2 hours — and the epoxy keeps hardening the entire time you’re using it, not just after you stop.

🛡️ Protect Everything, Including Yourself

Clean and dry both surfaces first — dirt and oil bond to the epoxy instead of letting the epoxy bond to your actual material. Lay down protection under the work area, not just beside it, since epoxy drips find gaps you didn’t know were there. Gloves aren’t optional; bare skin bonds just as readily as ceramic does. Keep a rag and some acetone within reach the entire time, not after you’ve already noticed a problem.

⏱️ Mix, Apply, Hold

  • Mix in the ratio the label specifies — usually 1:1 or 2:1 — using a disposable stick, and scrape the sides and bottom of the container, since unmixed resin likes to hide there.
  • Apply a thin, even layer to both surfaces if possible; more epoxy doesn’t mean a stronger bond, just a bigger mess and more trapped air.
  • Press the pieces together and hold — by hand or with a clamp — for however long the label specifies, and don’t let go early just because it feels solid; it isn’t yet.
  • Wipe away any squeeze-out immediately, while it’s still soft — once it hardens, you’re scraping instead of wiping.

⏳ Curing Takes Longer Than “It Looks Done

Most epoxy is handleable within 24 hours but doesn’t reach full strength for 48 to 72. A repair that looks solid the next morning can still fail under real stress if you push it too soon. Set the piece somewhere it can sit completely undisturbed for that whole window — moving it, adjusting it, or “just checking” partway through is the single most common way a good bond turns into a weak one.

🧴 When It Bonds to You Anyway

It happens to almost everyone eventually. Don’t pull — soak the bonded skin in warm water for several minutes, which softens the bond enough for gentle, gradual separation. Acetone dissolves fresh, uncured epoxy quickly if you catch it early; once fully cured, it’s staying until it wears off on its own. Prevention is genuinely just gloves, applied before you start, not after the first close call.

🛒 Gear Worth Having

J-B Weld Original Cold-Weld Epoxy — A reliable medium-set formula with enough working time to actually position a repair before it starts fighting back.

Disposable Mixing Sticks and Trays Bulk Pack — Cheap enough to throw away every single time, which is exactly the point — reused sticks are how cross-contamination and bad ratios happen.

Nitrile Gloves, Acetone-Resistant, 100-Pack — The one piece of gear standing between a clean repair and an afternoon epoxied to your own kitchen table.

As an Amazon affiliate, I earn from qualifying purchases. Thank you for supporting SkippityWhistles.

📖 Related Reads


SkippityWhistles is part of the John D Reinhart content family. Writer, illustrator, videographer, and accidental filmmaker — find the whole story at JohnDReinhart.com.

2028

©2026 John D Reinhartskippitywhistles.com/ — All rights reserved
How Your Central Air System Works

Your AC doesn’t make cold—it shoves heat outside using two buckets. Here’s how the engine works, why your house needs it, and why your thermostat is just an on/off switch.

Ron came inside on a 95-degree afternoon and cranked the thermostat down to 60, reasoning that a lower number would cool the house faster — more cold, sooner. It didn’t work that way. The compressor ran at exactly the same rate it would have at 72, and all Ron actually did was guarantee the AC kept running long after the house was already comfortable, chasing a number it was never going to need to hit.

Air conditioning doesn’t make cold air. It moves heat — takes it from inside the house and dumps it outside, leaving cooler air behind as the result. Once that clicks, the whole system, including exactly why Ron’s thermostat trick never works, makes sense.

🪣 Two Buckets, Not Magic

Bucket 1 is the refrigerant cycle, mostly happening in the outside unit — this is the actual engine doing the work.

Bucket 2 is your house air, the beneficiary riding along on whatever Bucket 1 accomplishes.

Bucket 1 runs the same way regardless of what’s happening in Bucket 2; it doesn’t work harder because the house feels warmer, it just runs until the thermostat tells it to stop.

🔧 Bucket 1: The Refrigerant Cycle

  • Compression happens first: the compressor squeezes refrigerant into a smaller space, and pressure and temperature both spike, often to 120 to 150°F depending on how hard the compressor has to work against the outside temperature.
  • Condensation follows: outside air blows across the condenser coil, the hot refrigerant releases that heat outward, and it cools back into a liquid, down around 40 to 50°F.
  • Expansion comes next: the liquid refrigerant passes through a tiny valve, pressure drops suddenly, and temperature plunges into the 30s — this sudden cold is what makes the next step possible.
  • Evaporation happens inside: that very cold refrigerant flows through the evaporator coil, house air blows across it, and heat transfers from your air into the refrigerant, cooling the air and warming the refrigerant slightly before it heads back to the compressor to start over.

The whole loop is closed — refrigerant doesn’t get “used up” the way gas does in a car. If a system needs a refill, that’s a leak, not depletion.

🏠 Bucket 2: Your House Air

  • The evaporator coil sits directly in your home’s airflow
  • A blower pushes house air across it, then out through the ducts into every room.

Your air never actually touches the refrigerant directly — the cold coil is the go-between, absorbing heat from the air on one side and handing it to the refrigerant on the other. Bucket 2 doesn’t control any of this. It just gets cooled as a byproduct of Bucket 1 doing its job.

🌡️ The Thermostat: A Switch, Not a Dial

This is exactly where Ron went wrong.

A thermostat doesn’t tell the compressor to work harder or cool more aggressively — it simply monitors house temperature and switches the whole system on or off.

Hit the set point, and it shuts the compressor down. The house naturally warms a degree or two, and the thermostat switches it back on.

Setting a lower number doesn’t make the compressor run harder or the air any colder — it just keeps the system running longer, chasing a temperature that was never actually necessary to reach in the first place.

The only real control a thermostat gives you is when the system runs, never how intensely.

📦 Why Both Units Matter Equally

The outside unit houses the compressor and condenser coil — genuinely the heavy lifting, and where most of the electricity gets spent.

The inside unit is quieter specifically because it isn’t compressing anything or dumping heat anywhere; it’s just delivering the result.

Neither one does anything useful without the other — an outside unit running with no inside unit just wastes energy dumping heat nobody benefits from, and an inside unit with no working outside unit has nothing cold to work with at all.

🚫 Common Misconceptions Worth Retiring

  • Air conditioning doesn’t create cold air — it moves heat, and the cold you feel is really the absence of heat that just got relocated outside.
  • The thermostat doesn’t control cooling intensity, only whether the system runs.
  • Refrigerant doesn’t deplete on a schedule the way fuel does; needing a refill always means a leak, which is a real problem worth a professional’s attention, not routine maintenance.
  • And a system running continuously, all day without cycling off, usually points to an undersized system or a thermostat set unrealistically low — not to a healthy AC working exactly as intended.

💰 Why It Genuinely Costs Money to Run

Moving heat against its natural direction — from cool space to hot outside air — takes real energy, and the compressor alone can account for 30 to 50 percent of a summer electric bill.

The bigger the gap between inside and outside temperature, the harder the whole system works: 72°F inside against a 95°F day costs meaningfully more to maintain than 78°F inside on the same day.

A few degrees of thermostat difference in summer can genuinely mean $20 to $30 a month, without changing comfort nearly as much as it changes the bill.

🔍 Reading the Symptoms

  • Running but not cooling well usually means a dirty filter, a refrigerant leak, or a blocked outside unit — something interfering with heat transfer rather than the system itself failing outright.
  • Constant cycling without ever shutting off points to a thermostat set too low or a system undersized for the house.
  • A frozen-over inside unit usually means restricted airflow, often a dirty filter, or refrigerant pressure running low.
  • No air from the vents despite the system running suggests a blower motor failure or blocked ducts.
  • And most AC complaints, genuinely, trace back to a dirty filter or debris blocking the outside unit — a $15 filter solves a real share of these before they ever need a service call.

🛒 Gear Worth Having

HVAC Air Filter Multi-Pack — Confirm your system’s exact size, then replace monthly through cooling season — the single highest-value habit on this whole list.

Condenser Fin Comb — Straightens the thin aluminum fins on the outside unit that debris and time tend to bend flat, restoring the airflow the whole system depends on.

WiFi-Enabled Smart Thermostat — Scheduling and remote access save real money over a season, even though it still only controls when the system runs, not how hard.

As an Amazon affiliate, I earn from qualifying purchases. Thank you for supporting SkippityWhistles.

📖 Related Reads


SkippityWhistles is part of the John D Reinhart content family. Writer, illustrator, videographer, and accidental filmmaker — find the whole story at JohnDReinhart.com.

3031

©2026 John D Reinhartskippitywhistles.com/ — All rights reserved
How to Work with Super Glues (Or: Fast, Precise, and Not Forgiving)

Super Glue works fast and bonds tight—but only on small surfaces with perfect fit and fingers. Here’s how to use it correctly, when to use it, and what to do when you mess up.

Rhonda glued a chipped teacup handle back on in what she assumed would be a ten-second job, and it was — except two of those seconds happened while her thumb and forefinger were still touching the piece. She spent the next several minutes with her hand attached to a teacup, which is a genuinely strange way to reconsider your relationship with speed.
Super glue, or cyanoacrylate, isn’t magic — it’s a chemical reaction with moisture that happens fast enough to feel like magic. Once you understand that one mechanism, using it well is mostly about respecting how little time it gives you.

⚡ Why It Bonds So Fast

Cyanoacrylate hardens the instant it contacts moisture — from the air, the material, or your own skin, which is exactly why it bonds fingers so readily. That same speed is both the whole appeal and the whole risk: it’s ready to work almost immediately, and it stops giving you options almost as fast. It bonds tight, hard, and rigid, which also makes it brittle under stress or flex — a joint that needs to bend or absorb impact isn’t the right job for it.

🎯 What It’s Actually Good For

Small, tight-fitting repairs — a ceramic chip, a plastic model piece, a rubber tip — are exactly its sweet spot, since it needs surfaces already touching to bond well and can’t bridge any real gap the way epoxy can. It has no place in anything load-bearing, anything that flexes, or anything exposed to constant water or sun, all of which will outlast the bond long before the bond outlasts them.

🧽 Prep Matters More Than the Glue Does

Clean both surfaces with rubbing alcohol or a similar solvent, then let them dry fully — oil and dust get between the cyanoacrylate and the material, weakening the bond before it even forms.

A single pinhead-sized drop on one surface is enough; more just oozes out, makes a mess, and can leave a white, crystalline “frosting” on some plastics.

🤏 Align Once, Press, and Walk Away

Position the pieces exactly right before pressing — there’s no adjusting afterward, since the bond starts forming the instant contact is made.

Hold firmly for 10 to 30 seconds, longer for anything delicate, then leave it alone.

Light handling is usually safe within about 5 minutes, but full strength takes closer to 24 hours — testing the repair too soon is one of the most common ways a good bond fails.

🧴 Unsticking Yourself

Stop moving the bonded skin immediately — pulling tears skin faster than it separates the glue.

Soak in warm, soapy water for 5 to 10 minutes, then gently work the pieces apart; a little twisting motion often helps more than straight pulling.

Acetone dissolves fresh cyanoacrylate on non-porous surfaces quickly, but it’s not something to use on skin casually — soap and water first, acetone as the backup plan.

🛒 Gear Worth Having

Loctite Super Glue Gel Control — The gel formula stays put instead of running, which matters most on vertical surfaces or anything you’re gluing overhead.

Cyanoacrylate Accelerator Spray — Speeds up the cure on porous materials that don’t have enough natural moisture to bond quickly on their own.

100% Pure Acetone Solvent — The actual undo button for a fresh mistake — on the material or, carefully, on skin.

As an Amazon affiliate, I earn from qualifying purchases. Thank you for supporting SkippityWhistles.

📖 Related Reads


SkippityWhistles is part of the John D Reinhart content family. Writer, illustrator, videographer, and accidental filmmaker — find the whole story at JohnDReinhart.com.

2012

©2026 John D Reinhartskippitywhistles.com/ — All rights reserved